
The last shell was gone before I even realized I’d been fighting my husband for it. We were standing over the stove, two forks in hand, both pretending we weren’t racing to scrape the last bits of creamy, smoky cheese sauce from the bottom of the pot. He looked at me, fork halfway to his mouth, and said, “Okay, you have to make this again next week.” That was the moment I knew I’d stumbled onto something special with this Creamy Hatch Chili Mac and Cheese.
It started on a random Tuesday. I had a bag of frozen Hatch green chiles in the freezer from a summer trip to New Mexico—honestly, I buy them every year and then forget about them until winter. That night, I wanted mac and cheese, but I wanted it to have a little personality. Not just the same old cheddar situation. I wanted something that felt like a warm blanket with a tiny kick. So I tossed those roasted chiles into my usual cheese sauce, crossed my fingers, and hoped for the best.
The first bite surprised me. The chiles didn’t overpower the cheese—they sort of melted into it, adding this gentle heat and a subtle, smoky sweetness that made the whole thing taste like something you’d get at a cozy diner in Santa Fe. It was comfort food, but smarter. Bolder. And somehow, it came together in under thirty minutes. That’s the kind of recipe you hold onto. The kind that makes you look forward to a Tuesday night.
Why You’ll Love This Recipe
This Creamy Hatch Chili Mac and Cheese isn’t just another pasta dish. It’s the kind of meal that solves the “what’s for dinner” problem with style and speed. I’ve tested this recipe more times than I can count—adjusting the cheese ratios, playing with the heat level, figuring out the perfect pasta-to-sauce ratio—and I can confidently say this version is the one.
- Quick & Easy: From start to finish, this meal is on your table in about 30 minutes. No complicated steps, no weird techniques. Just straightforward cooking that works.
- Simple Ingredients: You don’t need a specialty grocery store for this. The Hatch chiles are the star, but everything else is probably already in your pantry or fridge.
- Perfect for Weeknights: Whether it’s a busy Tuesday or a lazy Sunday, this recipe fits. It’s cozy enough for chilly evenings but light enough for any season.
- Crowd-Pleaser: Kids love the cheesy goodness, and adults appreciate the subtle heat. I’ve brought this to potlucks and watched it disappear before the salad even got touched.
- Unbelievably Creamy: The secret is in the technique—melting the cheese slowly and using the right dairy combination. No grittiness, no separation, just silky, dreamy sauce.
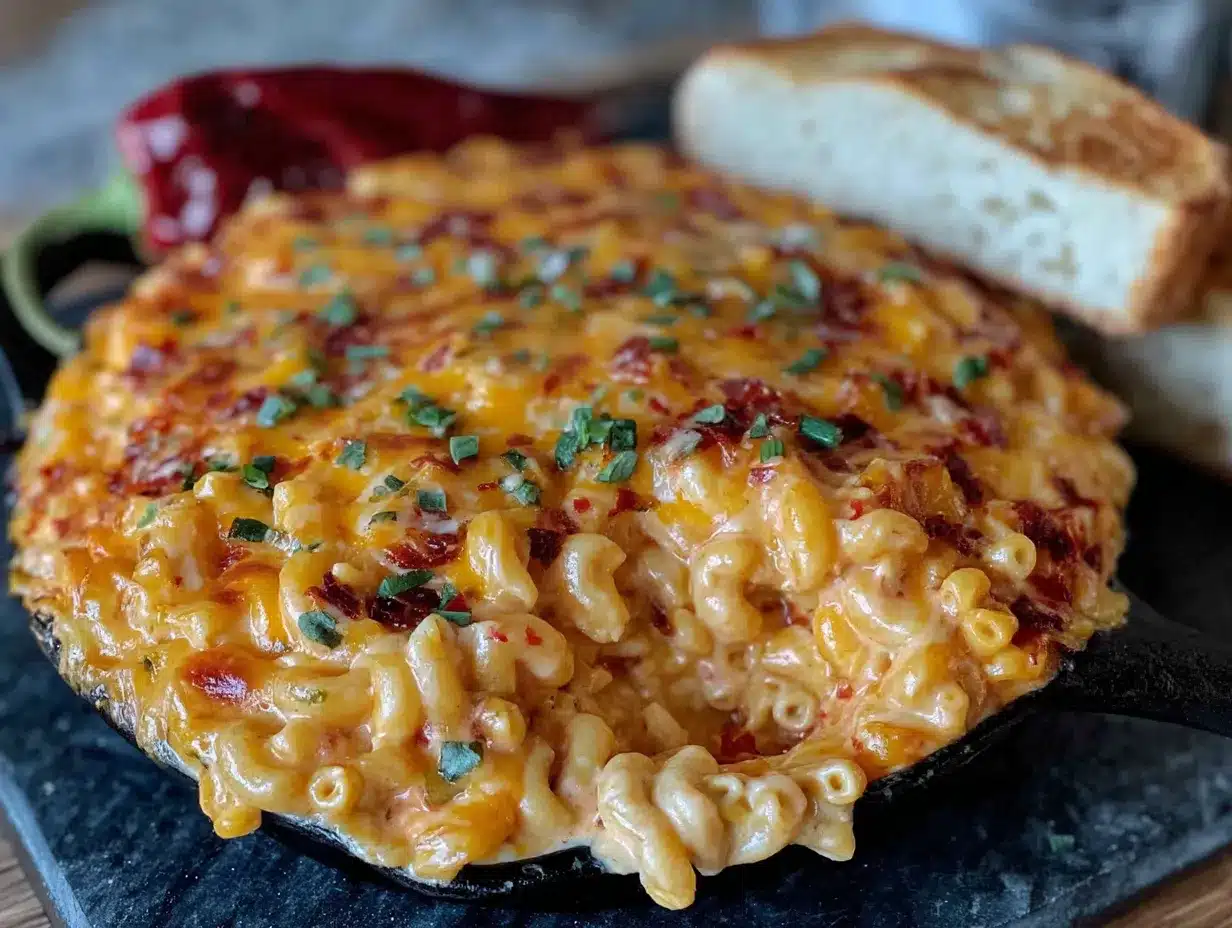
What makes this different from every other mac and cheese recipe out there? It’s the Hatch chiles. They’re not just a garnish or an afterthought. They’re woven into the sauce, infusing every bite with that distinctive roasted flavor. This isn’t “mac and cheese with a little green stuff on top.” It’s a fully integrated, harmonious dish where the chiles and cheese become something better together.
I’ll be honest—the first time I made this, I wasn’t sure it would work. I was worried the chiles would make the sauce watery or that the flavor would get lost in all that cheese. But the opposite happened. The chiles actually helped balance the richness, cutting through the fat with their bright, smoky notes. It’s one of those happy accidents that became a permanent part of my dinner rotation.
What Ingredients You Will Need
This recipe uses simple, wholesome ingredients to deliver bold flavor and satisfying texture without the fuss. Most of these are pantry staples, but the Hatch chiles are worth seeking out—they’re the heart of this dish.
For the Pasta
- 12 ounces (340g) elbow macaroni or cavatappi – I prefer cavatappi because the ridges hold onto the sauce beautifully, but any short pasta works. Shells, rotini, or even penne are great substitutes.
- Salt for the pasta water – Don’t skip this. Season the water generously—it’s your only chance to flavor the pasta from the inside out.
For the Cheese Sauce
- 4 tablespoons (56g) unsalted butter – I use unsalted so I can control the salt level. If you only have salted butter, reduce the added salt later.
- 1/4 cup (31g) all-purpose flour – This thickens the sauce. For a gluten-free version, use a 1:1 gluten-free flour blend.
- 2 cups (480ml) whole milk – Whole milk gives the creamiest result. I’ve tested this with 2% and it works, but the sauce is noticeably thinner. Avoid skim milk—it’s too watery.
- 1 cup (240ml) heavy cream – This is non-negotiable for that ultra-luxurious texture. Half-and-half can work in a pinch, but the sauce won’t be as rich.
- 8 ounces (226g) sharp cheddar cheese, freshly shredded – Pre-shredded cheese has anti-caking agents that prevent smooth melting. Grate your own—it makes a real difference. I recommend Tillamook or Cabot for consistent quality.
- 4 ounces (113g) Monterey Jack cheese, freshly shredded – This adds creaminess and a mild, buttery flavor that complements the cheddar perfectly.
- 2 ounces (57g) cream cheese, softened and cut into small cubes – This is my secret weapon. It stabilizes the sauce and adds a subtle tang that makes everything more interesting.
- 1/2 teaspoon smoked paprika – This reinforces the smoky notes from the Hatch chiles. Regular paprika works too, but smoked is better.
- 1/4 teaspoon garlic powder – Not fresh garlic here—it can make the sauce grainy. Powdered garlic dissolves smoothly.
- 1/4 teaspoon onion powder – Adds depth without overpowering the chiles.
- Salt and black pepper to taste – Start with 1/2 teaspoon salt and 1/4 teaspoon pepper, then adjust at the end.
For the Hatch Chili Element
- 1 cup (about 8 ounces) frozen or canned Hatch green chiles, chopped – I prefer the 505 Southwestern brand for consistent heat and flavor. If using frozen, thaw and drain them well. If using canned, look for “whole” or “chopped” and drain off the liquid. Mild or medium heat both work—medium gives a gentle warmth without being spicy.
Optional Toppings
- 1/2 cup panko breadcrumbs – For a crunchy topping if you’re baking this (more on that in the variations section).
- 2 tablespoons melted butter – To mix with the panko for golden, crispy results.
- Fresh cilantro or green onions, chopped – Adds color and freshness right before serving.
Ingredient Selection Tip: When choosing Hatch chiles, look for ones that are roasted and peeled—this step is already done for you in most frozen or canned products. The roasting process brings out their natural sweetness and gives them that signature smoky flavor. If you can’t find Hatch chiles, you can substitute with roasted Anaheim or poblano peppers, but the flavor won’t be quite the same.
Substitution Guidance: For a dairy-free version, use unsweetened oat milk and vegan butter, plus a high-quality vegan cheddar shred. The texture won’t be identical, but it’s still delicious. For extra protein, stir in some shredded rotisserie chicken or crispy bacon at the end.
Equipment Needed
You don’t need a fancy kitchen to make this recipe work. Here’s what you’ll need:
- Large pot (5-6 quart) – For boiling the pasta. I use my trusty enameled cast iron Dutch oven, but any large pot works.
- Medium saucepan or the same pot after draining pasta – For making the cheese sauce. If you’re efficient (like me), you can cook the pasta first, drain it, and use the same pot for the sauce. One less dish to wash!
- Wooden spoon or silicone spatula – For stirring the sauce. Avoid metal utensils if you’re using a non-stick pot.
- Box grater or food processor with shredding disc – For grating your own cheese. I’ve ruined too many sauces with pre-shredded cheese—don’t make my mistake.
- Measuring cups and spoons – Accuracy matters with the flour and liquid ratios.
- Colander – For draining the pasta.
- Whisk – For smoothing out the roux and preventing lumps. A balloon whisk works best.
Budget-Friendly Tip: If you don’t have a whisk, a fork works in a pinch—just stir vigorously. And if you don’t have a box grater, you can buy block cheese and ask the deli counter to shred it for you (though freshly grated is always better).
Preparation Method
Let’s get cooking. This recipe moves fast, so I recommend having all your ingredients measured and ready before you start. Trust me on this one—the sauce doesn’t wait for anyone.
- Bring a large pot of salted water to a boil. Use about 1 tablespoon of salt per 4 quarts of water. The water should taste like the sea—this seasons the pasta from the inside. Add the pasta and cook according to package directions until al dente, usually 8-10 minutes. Stir occasionally to prevent sticking.
- While the pasta cooks, prepare your cheese. Grate the cheddar and Monterey Jack if you haven’t already. Cut the cream cheese into small cubes so it softens faster. Having everything ready makes the sauce-making process smooth and stress-free.
- Drain the pasta, but don’t rinse it. Reserving about 1/2 cup of pasta water is a good idea—you might need it to thin the sauce later. Set the pasta aside in the colander. If you’re using the same pot for the sauce, wipe it clean with a paper towel.
- In the same pot (or a medium saucepan), melt the butter over medium heat. Once it’s fully melted and starting to bubble, add the flour. Whisk constantly for about 2 minutes. You’re making a roux here, and it should smell nutty and look like wet sand. Don’t let it brown—you want a pale, golden roux.
- Slowly pour in the milk while whisking continuously. This is where lumps can form if you’re not careful. Add the milk in a thin stream, whisking the whole time. Once all the milk is incorporated, add the heavy cream in the same way. Keep whisking until the mixture is smooth and starts to thicken, about 3-4 minutes. It should coat the back of a spoon.
- Reduce the heat to low. Add the cream cheese cubes and whisk until they’re fully melted and incorporated. This takes about 1 minute. The sauce will look slightly thinner at this point—that’s okay.
- Add the shredded cheddar and Monterey Jack cheese, one handful at a time. Stir gently with a wooden spoon or spatula after each addition. Don’t dump all the cheese in at once—it can clump and become grainy. Keep stirring until each addition is fully melted before adding the next. This takes patience, but it’s worth it for that silky texture.
- Stir in the chopped Hatch green chiles, smoked paprika, garlic powder, and onion powder. Mix until everything is evenly distributed. The sauce will look beautifully creamy with little flecks of green chile throughout. Taste it and add salt and pepper as needed. Remember that the cheese adds saltiness, so go easy at first.
- Add the drained pasta to the sauce. Fold gently until every piece of pasta is coated. If the sauce seems too thick, add a splash of the reserved pasta water and stir. The pasta will continue to absorb liquid as it sits, so don’t worry if it looks a little loose at first.
- Let it rest for 2-3 minutes off the heat. This allows the sauce to settle and cling to the pasta. Give it one final stir before serving. The smell at this point is absolutely intoxicating—smoky, cheesy, and just a little bit spicy.
Sensory Cue: When you lift your spoon, the sauce should slowly drip off in a thick ribbon. If it runs off like water, cook it a minute longer. If it’s too thick, add more pasta water a tablespoon at a time.
Personal Tip: I always taste a piece of pasta before serving. It should be tender but still have a little bite—the perfect canvas for that creamy sauce. If it’s mushy, you’ve overcooked it. Next time, set a timer.
Cooking Tips & Techniques
I’ve made this recipe more times than I can count, and I’ve learned a few things the hard way. Let me save you some trouble.
Don’t rush the roux. That two minutes of whisking the butter and flour together might feel like forever, but it’s crucial. Cooking the flour eliminates that raw, pasty taste and ensures your sauce thickens properly. I once tried to speed through this step while my toddler was crying, and the sauce never thickened right. Learn from my mistakes.
Low and slow for the cheese. Cheese sauce is temperamental. High heat can cause the proteins to seize up, leaving you with a grainy, separated mess. Keep the heat on low when you add the cheese, and stir gently. If you see the sauce starting to break (little oily spots forming), remove it from the heat immediately and whisk in a tablespoon of cold milk.
Grate your own cheese. I know, I know—it’s an extra step. But pre-shredded cheese is coated in cellulose and other anti-caking agents that prevent smooth melting. I’ve tested this side by side, and the difference is night and day. Freshly grated cheese melts like a dream. Plus, it’s cheaper to buy blocks and grate them yourself.
Timing is everything. This whole recipe comes together in about 30 minutes, but the sauce-making part is the most active. I like to get the pasta water boiling first, then start the roux while the pasta cooks. That way, everything finishes around the same time, and the sauce goes straight onto hot pasta.
If your sauce is too thick: Don’t panic. Just add a splash of the reserved pasta water or some extra milk. The starch in the pasta water actually helps stabilize the sauce, so I always save a little before draining.
If your sauce is too thin: Let it simmer on low heat for another 2-3 minutes, stirring constantly. The flour will continue to thicken as it cooks. You can also mash a few pieces of cooked pasta into the sauce to help thicken it naturally.
Variations & Adaptations
One of the best things about this recipe is how flexible it is. Here are some ways to make it your own:
Spicy Version
Use hot Hatch chiles instead of mild, and add a pinch of cayenne pepper or a diced jalapeño (seeds removed unless you want extra heat). I made this for a game day party once, and it was a hit with the spice lovers. Just be warned—it sneaks up on you.
Baked Mac and Cheese
After combining the pasta and sauce, transfer everything to a greased 9×13 baking dish. Mix 1/2 cup panko breadcrumbs with 2 tablespoons melted butter and sprinkle over the top. Bake at 375°F for 15-20 minutes until bubbly and golden. The crunchy topping adds a whole new texture dimension. This version is perfect for when you want something a little more special.
Loaded Hatch Chili Mac
Stir in 1 cup of shredded rotisserie chicken, 1/2 cup of cooked crumbled bacon, and a handful of diced tomatoes (drained) before serving. Top with fresh cilantro and a dollop of sour cream. This turns it into a full meal that’s hearty enough for dinner. I’ve done this version for potlucks and it disappears fast.
Vegetarian Protein Boost
Add a can of drained black beans or pinto beans along with the chiles. The beans soak up the sauce beautifully and add fiber and protein without changing the flavor much. This is my go-to when I want something a little more filling but don’t feel like adding meat.
Dairy-Free Adaptation
Use unsweetened oat milk (it’s the creamiest non-dairy milk), vegan butter, and a high-quality vegan cheddar shred. The texture won’t be identical—vegan cheese doesn’t melt the same way—but it’s still delicious. I’ve tested this with Miyoko’s brand and it worked well.
Personal Variation: My favorite twist is adding a handful of roasted corn kernels along with the chiles. The sweetness of the corn plays beautifully against the smoky heat. I use frozen roasted corn from Trader Joe’s, but any corn works. It adds little pops of sweetness that make every bite interesting.
Serving & Storage Suggestions
This mac and cheese is best served immediately, while it’s still hot and creamy. The sauce will continue to thicken as it cools, so don’t wait too long to dig in.
Serving Temperature: Serve piping hot, straight from the pot. If you’ve baked it, let it rest for 5 minutes before serving so the topping sets slightly.
Presentation: Spoon into shallow bowls and top with a sprinkle of fresh cilantro or chopped green onions. A pinch of extra smoked paprika on top adds a beautiful color contrast. If you’re feeling fancy, serve it in individual cast iron skillets for a rustic look.
Complementary Dishes: This mac and cheese pairs beautifully with a simple green salad dressed with a tangy vinaigrette—the acidity cuts through the richness. It also works great alongside grilled chicken, steak, or even a simple roasted vegetable like broccoli or asparagus. For a complete comfort meal, serve it with a side of slow-roasted tomato soup for dipping.
Beverage Pairing: A cold beer (something light like a pilsner or a Mexican lager) is perfect. For wine drinkers, a crisp Sauvignon Blanc or a light Pinot Noir works well. Non-alcoholic options include sparkling water with lime or a tangy lemonade.
Storage Instructions: Store leftovers in an airtight container in the refrigerator for up to 4 days. The pasta will absorb some of the sauce as it sits, so don’t be alarmed if it looks drier the next day.
Reheating Methods: The best way to reheat is on the stovetop over low heat. Add a splash of milk or cream and stir gently until warmed through. You can also microwave individual portions in 30-second bursts, stirring between each. If you’re reheating the baked version, pop it in a 350°F oven for 10-15 minutes covered with foil.
Freezer Instructions: This recipe freezes surprisingly well. Let it cool completely, then transfer to a freezer-safe container. It will keep for up to 3 months. Thaw in the refrigerator overnight, then reheat on the stovetop with a little extra milk. Note that the texture won’t be quite as creamy after freezing, but it’s still delicious.
Flavor Development: Honestly, this mac and cheese tastes even better the next day. The flavors meld together overnight, and the heat from the chiles becomes more integrated. If you can resist eating it all the first night, you’re in for a treat.
Nutritional Information & Benefits
Let’s be real—this is comfort food, not health food. But that doesn’t mean it can’t have some redeeming qualities.
Estimated Nutritional Values (per serving, based on 6 servings):
| Nutrient | Amount |
|---|---|
| Calories | 520 |
| Total Fat | 32g |
| Saturated Fat | 19g |
| Cholesterol | 95mg |
| Sodium | 680mg |
| Total Carbohydrates | 38g |
| Dietary Fiber | 2g |
| Sugars | 6g |
| Protein | 20g |
| Calcium | 420mg |
| Vitamin C | 15mg |
Health Benefits of Key Ingredients: Hatch green chiles are surprisingly nutritious. They’re rich in vitamin C (even more than oranges by weight) and contain capsaicin, which has anti-inflammatory properties. The dairy provides calcium and protein, which are essential for bone health and muscle repair. The smoked paprika adds a dose of antioxidants from the capsicum peppers.
Dietary Considerations: This recipe is not gluten-free (due to the flour), but can be adapted with a gluten-free flour blend. It’s also not suitable for vegans or those with dairy allergies, though the dairy-free adaptation mentioned earlier works well. If you’re watching your sodium, use low-sodium cheese and skip the added salt until the end.
Potential Allergens: This recipe contains dairy (milk, cream, cheese) and gluten (flour, pasta). It does not contain nuts, eggs, or soy in its standard form.
Personal Wellness Perspective: I believe in balance. This isn’t a daily meal, but it’s a wonderful occasional indulgence. I pair it with a big green salad and try to keep the rest of my meals that day lighter. Food should be joyful, and this mac and cheese brings a lot of joy.
Conclusion
This Creamy Hatch Chili Mac and Cheese has earned a permanent spot in my dinner rotation. It’s the kind of recipe that feels special enough for company but simple enough for a random Tuesday. The combination of sharp cheddar, creamy Monterey Jack, and those smoky, slightly spicy Hatch chiles creates something that’s greater than the sum of its parts.
I love that this recipe doesn’t pretend to be something it’s not. It’s not a health food makeover or a complicated chef’s project. It’s honest, straightforward comfort food that delivers every single time. The first time I made it, I was just experimenting. Now, I can’t imagine my kitchen without it.
I’d love to hear how this turns out for you. Did you add extra chiles? Try the baked version? Stir in some chicken or bacon? Drop a comment below and let me know—your adaptations might inspire someone else. And if you’re looking for another cozy, one-pot meal to add to your rotation, try this creamy one-pot Cajun chicken alfredo—it’s got that same weeknight magic.
Until next time, happy cooking. And don’t forget to save a fork for yourself—trust me, you’ll need it.
Frequently Asked Questions
Can I use fresh Hatch chiles instead of frozen or canned?
Absolutely! If you can find fresh Hatch chiles, roast them under the broiler until the skin is blackened, then steam them in a covered bowl for 10 minutes. Peel off the skin, remove the seeds, and chop. You’ll need about 2-3 large chiles for this recipe. The flavor will be even more vibrant than frozen.
How can I make this less spicy for kids?
Use mild Hatch chiles instead of medium or hot. You can also reduce the amount of chiles to 1/2 cup and add more cheese to balance the heat. The cream cheese and heavy cream naturally mellow the spiciness, so it’s already pretty gentle. If you’re really worried, leave out the smoked paprika and garlic powder—they add a little extra kick.
Can I make this ahead of time for a party?
Yes! You can prepare the mac and cheese completely, then transfer it to a baking dish and refrigerate (unbaked) for up to 24 hours. When you’re ready to serve, add the panko topping and bake at 375°F for 20-25 minutes until hot and bubbly. You might need to add a splash of milk before baking since the pasta will absorb some sauce overnight.
What’s the best pasta shape for this recipe?
Short, ridged pasta works best because the sauce clings to the nooks and crannies. Cavatappi is my top choice—it’s like macaroni but with more surface area. Elbow macaroni, shells, rotini, and fusilli are all excellent options. Avoid long pasta like spaghetti or fettuccine—the sauce doesn’t coat them as well.
Can I freeze this mac and cheese?
Yes, but with a caveat. The texture will change slightly after freezing—the sauce may become a little grainy when thawed. To minimize this, undercook the pasta by about 1 minute before freezing, and add an extra splash of cream when reheating. It’s best to freeze it in individual portions so you can thaw only what you need. It will keep for up to 3 months in the freezer.
Pin This Recipe!
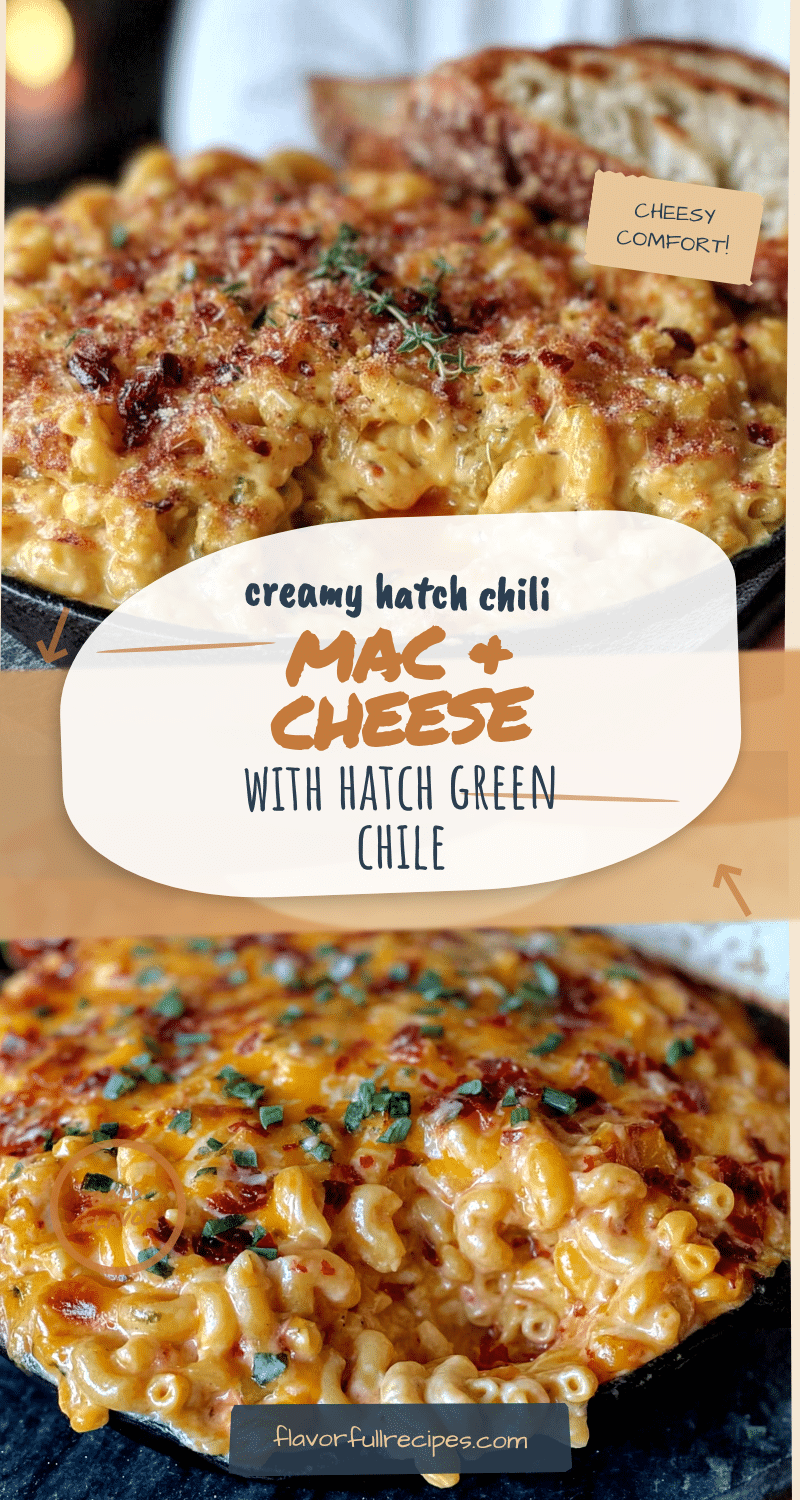

Creamy Hatch Chili Mac and Cheese: Easy 30-Minute Recipe
- Total Time: 30 minutes
- Yield: 6 servings 1x
Description
This creamy, smoky mac and cheese features roasted Hatch green chiles for a gentle heat that perfectly balances the rich cheese sauce. Ready in just 30 minutes, it’s an easy weeknight dinner that feels special enough for company.
Ingredients
- 12 ounces (340g) elbow macaroni or cavatappi
- Salt for the pasta water
- 4 tablespoons (56g) unsalted butter
- 1/4 cup (31g) all-purpose flour
- 2 cups (480ml) whole milk
- 1 cup (240ml) heavy cream
- 8 ounces (226g) sharp cheddar cheese, freshly shredded
- 4 ounces (113g) Monterey Jack cheese, freshly shredded
- 2 ounces (57g) cream cheese, softened and cut into small cubes
- 1/2 teaspoon smoked paprika
- 1/4 teaspoon garlic powder
- 1/4 teaspoon onion powder
- Salt and black pepper to taste
- 1 cup (about 8 ounces) frozen or canned Hatch green chiles, chopped
- 1/2 cup panko breadcrumbs (optional, for topping)
- 2 tablespoons melted butter (optional, for topping)
- Fresh cilantro or green onions, chopped (optional, for garnish)
Instructions
- Bring a large pot of salted water to a boil. Add the pasta and cook according to package directions until al dente, usually 8-10 minutes. Stir occasionally to prevent sticking.
- While the pasta cooks, grate the cheddar and Monterey Jack cheese. Cut the cream cheese into small cubes.
- Drain the pasta, but do not rinse it. Reserve about 1/2 cup of pasta water. Set the pasta aside in the colander. If using the same pot for the sauce, wipe it clean.
- In the same pot (or a medium saucepan), melt the butter over medium heat. Once melted and bubbling, add the flour. Whisk constantly for about 2 minutes until the roux is pale and golden and smells nutty.
- Slowly pour in the milk while whisking continuously to prevent lumps. Once all the milk is incorporated, add the heavy cream in the same way. Continue whisking until the mixture is smooth and starts to thicken, about 3-4 minutes. It should coat the back of a spoon.
- Reduce the heat to low. Add the cream cheese cubes and whisk until fully melted and incorporated, about 1 minute.
- Add the shredded cheddar and Monterey Jack cheese, one handful at a time, stirring gently with a wooden spoon or spatula after each addition until fully melted before adding the next.
- Stir in the chopped Hatch green chiles, smoked paprika, garlic powder, and onion powder. Mix until evenly distributed. Taste and add salt and pepper as needed.
- Add the drained pasta to the sauce. Fold gently until every piece of pasta is coated. If the sauce seems too thick, add a splash of the reserved pasta water and stir.
- Let the mac and cheese rest for 2-3 minutes off the heat. Give it one final stir before serving. Garnish with fresh cilantro or green onions if desired.
Notes
For the creamiest sauce, grate your own cheese from blocks—pre-shredded cheese contains anti-caking agents that prevent smooth melting. If the sauce is too thick, add a splash of reserved pasta water. For a baked version, transfer to a greased 9×13 dish, top with panko mixed with melted butter, and bake at 375°F for 15-20 minutes. Leftovers can be stored in an airtight container in the refrigerator for up to 4 days. Reheat on the stovetop with a splash of milk or cream.
- Prep Time: 10 minutes
- Cook Time: 20 minutes
- Category: Main Course
- Cuisine: American
Nutrition
- Serving Size: 1 serving (about 1.5
- Calories: 520
- Sugar: 6
- Sodium: 680
- Fat: 32
- Saturated Fat: 19
- Carbohydrates: 38
- Fiber: 2
- Protein: 20
Keywords: Hatch chili mac and cheese, creamy mac and cheese, 30-minute recipe, easy weeknight dinner, comfort food, Hatch green chiles, cheesy pasta


