“You can’t just put a chile in a recipe and call it Hatch,” my neighbor Rosa said, peering over the top of her sunglasses at the grocery bag in my hand. “You have to roast it first. That’s the whole point.”
She wasn’t being rude—she was being honest. And honestly? She was right. I’d brought home a sack of those famous New Mexico Hatch green chiles, thinking I’d just chop them up and toss them into a casserole. Rosa shook her head, laughed, and spent the next hour teaching me how to blister them over an open flame until the kitchen smelled like a campfire in the best possible way.
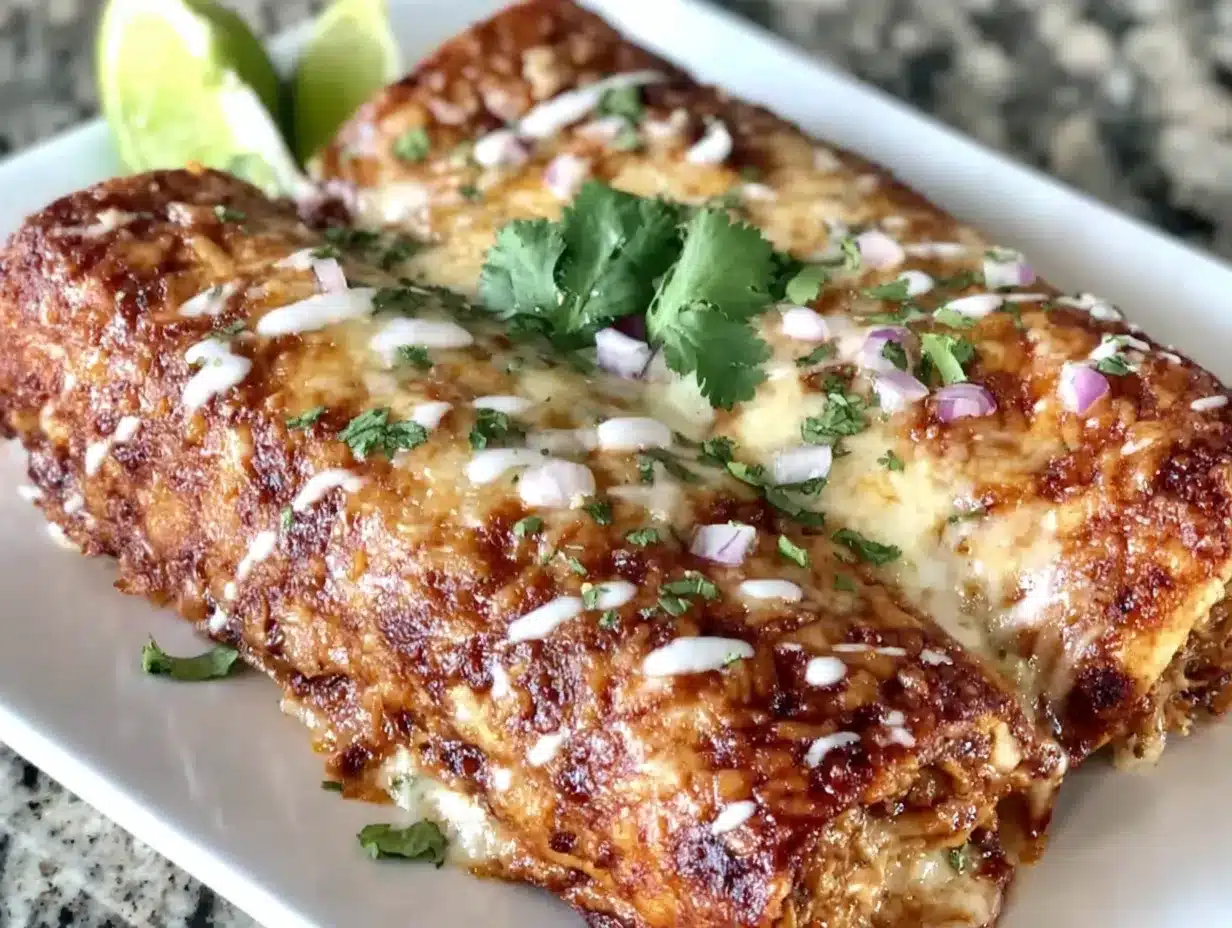
That conversation changed how I think about enchiladas. These Smoky Roasted Hatch Chicken Enchiladas aren’t just another weeknight casserole. They’re the kind of meal that makes you stop and pay attention—the smokiness from the fire-roasted chiles, the tender shredded chicken, the gooey melted cheese soaking into soft corn tortillas. It’s comfort food with a little soul.
And the best part? Once you learn how to handle those chiles, you’ll never go back to the canned stuff. Trust me on that.
Why You’ll Love This Recipe
I’ve made this recipe more times than I can count, and every single time, someone asks for the recipe. Here’s what makes it special:
- Quick & Easy: From start to finish, you’re looking at about 45 minutes. That’s faster than takeout in my neighborhood.
- Simple Ingredients: No weird specialty items. You need chicken, tortillas, cheese, cream, and those beautiful Hatch chiles. That’s it.
- Perfect for Meal Prep: This dish actually gets better overnight. Make it on Sunday, eat it all week, and thank yourself later.
- Crowd-Pleaser: I’ve served these at potlucks, family dinners, and even a casual taco night. Kids love them. Adults love them. Everyone wins.
- Unbelievably Smoky: That roasted chile flavor is something you can’t fake. It’s deep, earthy, and just a little bit spicy—the kind of heat that warms you up without making you reach for water.
What sets this recipe apart from other enchilada recipes is the roasting step. Most people skip it because it takes a few extra minutes. But honestly, that’s where all the magic happens. The charred skin, the softened flesh, that intoxicating aroma—it transforms a simple dish into something memorable.
Plus, this is the kind of meal that makes you feel like a hero in the kitchen without breaking a sweat. It’s impressive enough for guests but easy enough for a Tuesday night when you just need something good.
What Ingredients You Will Need
This recipe uses simple, wholesome ingredients that work together to create layers of smoky, creamy, cheesy goodness. Most of these are pantry staples, but the star of the show is definitely those Hatch chiles.
For the Filling
- 2 cups cooked shredded chicken (rotisserie chicken works perfectly here—I use it all the time)
- 1 cup roasted Hatch green chiles, peeled, seeded, and chopped (about 4-5 medium chiles)
- 1/2 cup diced yellow onion
- 2 cloves garlic, minced
- 4 ounces cream cheese, softened (this gives the filling that luscious texture)
- 1/2 teaspoon ground cumin
- 1/2 teaspoon smoked paprika (adds extra smokiness)
- Salt and black pepper, to taste
For the Sauce
- 2 tablespoons unsalted butter
- 2 tablespoons all-purpose flour
- 2 cups chicken broth (low-sodium is best so you can control the salt)
- 1/2 cup sour cream (full-fat works best, but Greek yogurt is a good swap)
- 1/2 cup roasted Hatch green chiles, pureed (reserve some for the sauce)
- 1/4 teaspoon garlic powder
- Salt, to taste
For Assembly
- 12 corn tortillas (white or yellow—both work fine)
- 2 cups shredded Monterey Jack cheese (or a Mexican blend if that’s what you have)
- 1/2 cup crumbled queso fresco (for topping—optional but so good)
- Fresh cilantro, chopped (for garnish)
- 1 lime, cut into wedges (for serving)
Ingredient Tips: When buying Hatch chiles, look for ones that are firm and have a bit of give when you squeeze them. If you can’t find fresh Hatch chiles, frozen roasted Hatch chiles are a great alternative—just thaw and drain them well. I’ve also used canned fire-roasted green chiles in a pinch, and while they’re not quite the same, they still deliver decent flavor. For the cheese, I recommend Tillamook or Cabot for the best melt. And if you’re using rotisserie chicken, shred it while it’s still warm—it’s so much easier.
Substitution Options: Want to make this dairy-free? Use vegan cream cheese, dairy-free sour cream, and a plant-based cheese shred. Need a gluten-free version? Swap the all-purpose flour for a 1:1 gluten-free flour blend. And if you can’t handle any heat at all, use mild roasted green chiles—they still have that smoky flavor without the kick.
Equipment Needed
You don’t need a fancy kitchen to make these enchiladas. Here’s what you’ll need:
- Baking sheet (for roasting the chiles—a rimmed one is best so nothing rolls off)
- Large skillet or frying pan (for making the sauce and sautéing the filling)
- 9×13-inch baking dish (a glass or ceramic dish works great)
- Tongs (for handling hot chiles and flipping tortillas)
- Mixing bowls (a medium one for the filling, a small one for any prep)
- Chef’s knife and cutting board (for chopping chiles, onions, and garlic)
- Wooden spoon or spatula (for stirring the sauce)
- Plastic or latex gloves (trust me on this one—chile oils can burn your hands)
If you don’t have a gas stove for roasting chiles, you can use your oven’s broiler. Just place the chiles on a baking sheet and broil them, turning every few minutes, until the skin is blackened all over. It takes a little longer, but it works perfectly. I’ve also used a grill before, and honestly, that adds even more smokiness—so if you’re already grilling something, throw those chiles on.
As for the baking dish, you can use a metal one if that’s all you have, but glass or ceramic distributes heat more evenly. And if you’re making a half batch, an 8×8-inch dish works great. Oh, and please don’t skip the gloves. I learned that lesson the hard way after rubbing my eye an hour after handling chiles. Not fun.
Preparation Method
Let’s get cooking. This recipe comes together in a few simple steps, and I’ll walk you through each one.
Step 1: Roast the Hatch Chiles
If you have a gas stove, turn a burner to medium-high heat. Place the chiles directly on the burner grate and let them roast, turning with tongs every 2-3 minutes, until the skin is completely blackened and blistered. This takes about 8-10 minutes total. If you’re using the broiler, place the chiles on a baking sheet and broil, turning occasionally, until blackened. Once they’re done, transfer them to a bowl and cover with plastic wrap. Let them steam for 10 minutes—this makes peeling so much easier.
Step 2: Peel and Chop the Chiles
After steaming, the skins should slip right off. Use your fingers or a paper towel to remove the blackened skin. Cut off the stems, slice the chiles open, and scrape out the seeds and membranes with a knife. (If you want more heat, leave some seeds in.) Chop the chiles into small pieces. Set aside half for the filling and puree the other half for the sauce using a blender or food processor.
Step 3: Make the Filling
In a large skillet over medium heat, add a drizzle of oil. Sauté the diced onion for 3-4 minutes until translucent. Add the minced garlic and cook for another 30 seconds until fragrant. Reduce the heat to low and add the shredded chicken, chopped roasted chiles, softened cream cheese, cumin, smoked paprika, salt, and pepper. Stir everything together until the cream cheese is melted and the filling is well combined. Remove from heat and set aside.
Step 4: Make the Sauce
In the same skillet (or a clean one), melt the butter over medium heat. Whisk in the flour and cook for 1-2 minutes, stirring constantly, until it forms a golden paste—this is your roux. Slowly pour in the chicken broth while whisking continuously to prevent lumps. Bring the mixture to a simmer and cook for 3-4 minutes until it thickens slightly. Reduce the heat to low and stir in the sour cream and the pureed Hatch chiles. Add garlic powder and salt to taste. The sauce should be smooth, creamy, and a little bit smoky. Keep it warm while you assemble the enchiladas.
Step 5: Warm the Tortillas
This step is crucial. Cold tortillas crack and break when you try to roll them. Heat a dry skillet over medium-high heat and warm each tortilla for about 15-20 seconds per side until they’re soft and pliable. Stack them on a plate and cover with a clean kitchen towel to keep them warm. Alternatively, you can wrap a stack of tortillas in damp paper towels and microwave for 30-40 seconds.
Step 6: Assemble the Enchiladas
Preheat your oven to 375°F (190°C). Spread about 1/2 cup of the sauce on the bottom of your 9×13-inch baking dish. Take a warm tortilla, place about 2-3 tablespoons of the chicken filling in the center, and roll it up tightly. Place it seam-side down in the dish. Repeat with the remaining tortillas and filling, arranging them snugly in a single layer. Pour the remaining sauce evenly over the top of the enchiladas, making sure to cover all the tortillas so they don’t dry out.
Step 7: Add Cheese and Bake
Sprinkle the shredded Monterey Jack cheese all over the top. Bake for 20-25 minutes until the sauce is bubbly and the cheese is melted and starting to turn golden in spots. If you want a browner top, switch to the broiler for the last 2 minutes—but watch it closely so it doesn’t burn.
Step 8: Garnish and Serve
Remove the enchiladas from the oven and let them rest for 5 minutes. This helps them set so they don’t fall apart when you serve them. Sprinkle with crumbled queso fresco and fresh cilantro. Squeeze a lime wedge over the top for brightness. Serve hot and watch everyone go quiet for a minute—that’s how you know it’s good.
Cooking Tips & Techniques
I’ve made this recipe at least a dozen times, and I’ve learned a few things along the way. Here are my best tips:
- Don’t skip the roasting step. I know it’s tempting to use canned chiles and call it a day. But honestly, fresh-roasted Hatch chiles have a depth of flavor that canned ones just can’t match. The smokiness is irreplaceable.
- Use gloves when handling chiles. I mentioned this earlier, but it’s worth repeating. The capsaicin in chiles can burn your skin and definitely your eyes. Gloves are cheap. Eye pain is not.
- Warm your tortillas properly. Cold tortillas crack and make a mess. Warm them until they’re flexible, and you’ll have perfect rolls every time.
- Don’t overfill the tortillas. It’s tempting to stuff them, but too much filling makes them impossible to roll and they’ll burst open during baking. About 2-3 tablespoons is the sweet spot.
- Let the enchiladas rest after baking. This is the hardest part because everything smells amazing. But if you cut into them right away, they’ll fall apart. Five minutes makes a huge difference.
- Toast your cumin before adding it. This is a game-changer. Toss the cumin in the pan for 30 seconds before adding it to the filling. It releases the oils and makes the flavor so much warmer and more aromatic.
One time, I forgot to warm the tortillas and ended up with a baking dish full of broken, sad enchiladas. They still tasted good, but they looked like a mess. Learn from my mistakes!
Variations & Adaptations
This recipe is flexible, and I love playing around with it. Here are some variations I’ve tried:
- Vegetarian Version: Swap the chicken for black beans, pinto beans, or roasted sweet potatoes. The smoky chiles pair beautifully with earthy beans and starchy veggies.
- Spicier Version: Add a diced jalapeño or serrano pepper to the filling, or use a mix of Hatch chiles and a hotter variety like habanero if you’re feeling brave.
- Cheese Swap: Try using pepper jack for extra heat, or a blend of cheddar and Monterey Jack for a sharper flavor. I’ve also used Oaxaca cheese, which melts into these beautiful strings.
- Green Enchilada Sauce: If you want an even greener sauce, add a handful of fresh cilantro and a tomatillo to the pureed chiles before blending. It brightens everything up.
- Make It Creamier: Stir a little heavy cream into the sauce at the end for an extra-luxurious texture. It’s not necessary, but it’s definitely indulgent.
- Gluten-Free: Use corn tortillas and a gluten-free flour blend for the roux. The rest of the ingredients are naturally gluten-free.
If you love one-pot meals, you might also enjoy this cheesy ground beef enchilada skillet—it has all the flavor with less cleanup. And for another cozy dinner idea, this crockpot white chicken chili is perfect for chilly nights.
Serving & Storage Suggestions
These enchiladas are best served hot, straight from the oven, with a few simple sides. Here’s how I like to serve them:
- Serving Temperature: Hot, with a 5-minute rest after baking. The cheese should be melted and bubbly.
- Presentation: Serve 2-3 enchiladas per person. Top with crumbled queso fresco, fresh cilantro, and a squeeze of lime. A dollop of sour cream or crema on the side is always welcome.
- Complementary Dishes: Serve with Mexican rice, refried beans, or a simple avocado and tomato salad. A side of tortilla chips and salsa is never a bad idea either.
- Beverage Pairing: A cold Mexican lager like Modelo or a bright, citrusy margarita pairs perfectly with the smoky chiles. For a non-alcoholic option, try a limeade or sparkling water with a splash of lime.
Storage Instructions: Leftover enchiladas keep well in the refrigerator for up to 4 days. Store them in an airtight container, or cover the baking dish tightly with foil. The flavors actually meld together and get even better overnight—seriously, leftovers are sometimes better than the first meal.
Freezing Instructions: These enchiladas freeze beautifully. Assemble the dish completely but don’t bake it. Cover tightly with plastic wrap and then foil, and freeze for up to 3 months. When you’re ready to eat, thaw in the refrigerator overnight and bake as directed, adding about 10 minutes to the cooking time since you’re starting from cold.
Reheating Tips: To reheat individual portions, microwave for 1-2 minutes, or until hot throughout. For the best texture, reheat in a 350°F oven for 10-15 minutes, covered with foil so the tortillas don’t dry out. If the sauce seems a little thick, add a splash of chicken broth or water before reheating.
Nutritional Information & Benefits
Here’s an approximate nutritional breakdown per serving (2 enchiladas):
- Calories: 480
- Protein: 32g
- Carbohydrates: 38g
- Fat: 22g
- Fiber: 6g
- Sugar: 4g
- Sodium: 780mg
Health Benefits: Hatch green chiles are packed with vitamin C and capsaicin, which has anti-inflammatory properties. They also contain antioxidants that support immune health. Chicken provides lean protein to keep you full and satisfied. Corn tortillas offer fiber and are naturally gluten-free. And the calcium from the cheese is great for bone health. This isn’t a diet food, but it’s a balanced meal that hits all the right notes.
Dietary Considerations: This recipe is naturally gluten-free if you use certified gluten-free tortillas and flour. It can be made dairy-free with simple substitutions. It’s also nut-free and egg-free. If you’re watching your sodium, use low-sodium broth and go easy on the added salt—the cheese and chiles already bring plenty of flavor.
Conclusion
These Smoky Roasted Hatch Chicken Enchiladas have become a staple in my kitchen, and I think they’ll become one in yours too. They’re the kind of meal that feels special without being fussy—smoky, creamy, cheesy, and just a little bit spicy. Every time I make them, I think about Rosa standing in her driveway, teaching me how to roast chiles like it was the most natural thing in the world. And honestly? It is.
I’d love to hear how these turn out for you. Did you add extra spice? Swap in a different cheese? Serve them with something unexpected? Drop a comment below and let me know—I read every single one. And if you share a photo on Pinterest or Instagram, tag me so I can see your beautiful creation!
Until next time, happy cooking—and don’t forget to roast those chiles.
Frequently Asked Questions
Can I use canned Hatch chiles instead of fresh?
Yes, you can. Canned roasted Hatch chiles are a decent substitute and save you the roasting step. Just drain them well before using. The flavor won’t be quite as smoky, but it’s still good. For the best results, look for fire-roasted canned chiles.
How do I make these enchiladas less spicy?
To reduce the heat, remove all the seeds and membranes from the chiles before chopping them. That’s where most of the capsaicin lives. You can also use a mix of Hatch chiles and milder peppers like poblano or bell pepper to tone things down.
Can I make this recipe ahead of time?
Absolutely. Assemble the enchiladas completely, but don’t bake them. Cover the dish tightly and refrigerate for up to 24 hours. When you’re ready to bake, add about 10 minutes to the cooking time since you’re starting from cold. This is actually a great make-ahead dinner for busy weeknights.
What’s the best way to shred chicken for this recipe?
I prefer using a stand mixer with the paddle attachment on low speed—it shreds the chicken in about 30 seconds without any effort. You can also use two forks to shred it by hand, or buy a rotisserie chicken and shred it while it’s still warm. Warm chicken shreds much more easily than cold chicken.
Can I use flour tortillas instead of corn?
You can, but the texture will be different. Flour tortillas are softer and less sturdy, so the enchiladas might be a bit soggier. Corn tortillas hold up better to the sauce and have a more authentic flavor. If you do use flour tortillas, warm them well and don’t oversoak them in sauce before baking.
Pin This Recipe!
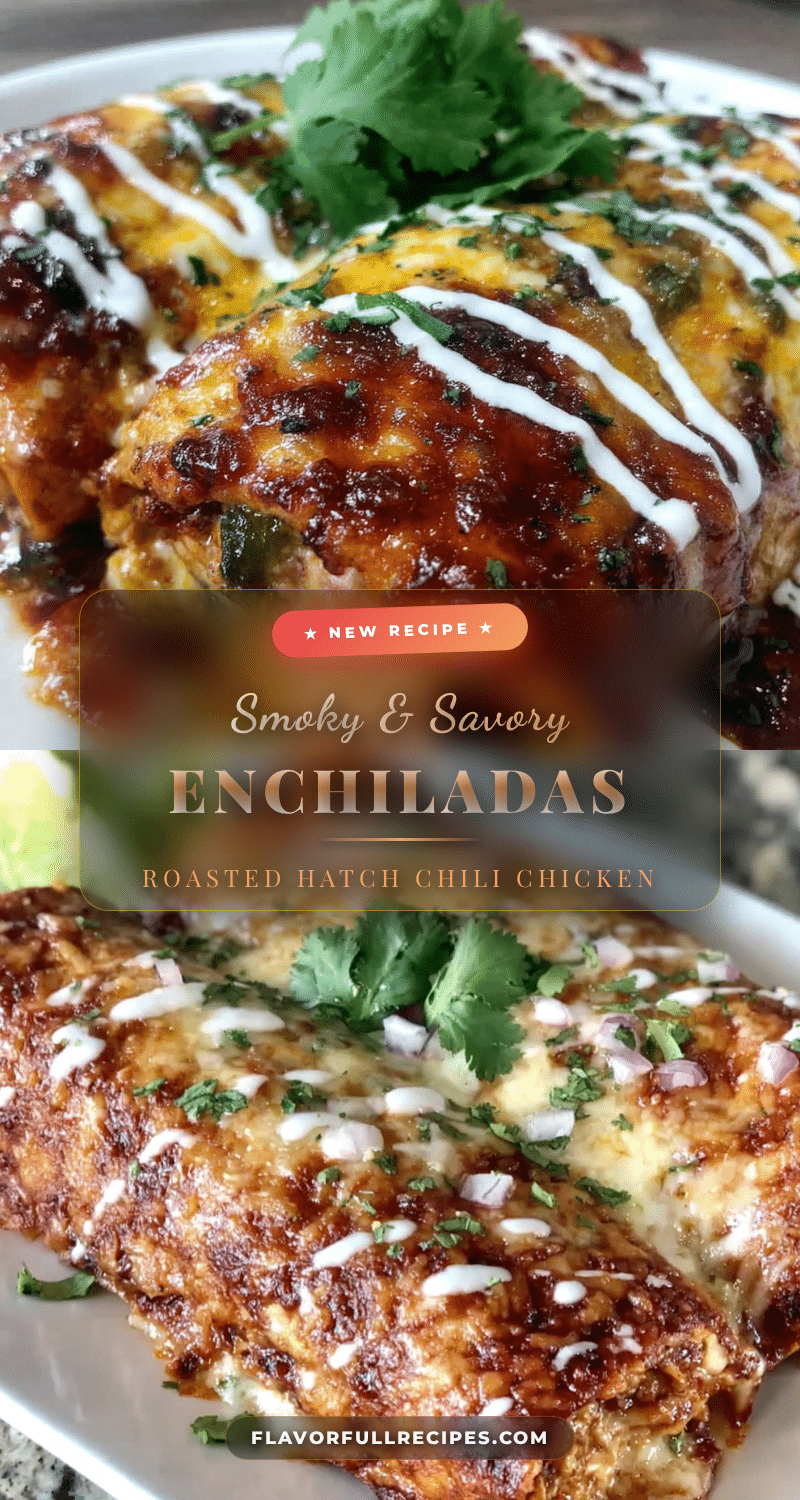

Smoky Roasted Hatch Chicken Enchiladas: Easy Weeknight Dinner
- Total Time: 45 minutes
- Yield: 6 servings 1x
Description
These Smoky Roasted Hatch Chicken Enchiladas are a quick and easy weeknight dinner featuring fire-roasted Hatch chiles, tender shredded chicken, and gooey melted cheese in soft corn tortillas, all topped with a creamy smoky sauce.
Ingredients
- 2 cups cooked shredded chicken (rotisserie chicken works perfectly)
- 1 cup roasted Hatch green chiles, peeled, seeded, and chopped (about 4–5 medium chiles)
- 1/2 cup diced yellow onion
- 2 cloves garlic, minced
- 4 ounces cream cheese, softened
- 1/2 teaspoon ground cumin
- 1/2 teaspoon smoked paprika
- Salt and black pepper, to taste
- 2 tablespoons unsalted butter
- 2 tablespoons all-purpose flour
- 2 cups chicken broth (low-sodium)
- 1/2 cup sour cream (full-fat)
- 1/2 cup roasted Hatch green chiles, pureed
- 1/4 teaspoon garlic powder
- Salt, to taste
- 12 corn tortillas (white or yellow)
- 2 cups shredded Monterey Jack cheese (or Mexican blend)
- 1/2 cup crumbled queso fresco (optional, for topping)
- Fresh cilantro, chopped (for garnish)
- 1 lime, cut into wedges (for serving)
Instructions
- Roast the Hatch chiles: Place chiles directly on a gas burner over medium-high heat, turning with tongs every 2-3 minutes until skin is blackened and blistered (8-10 minutes). Alternatively, broil on a baking sheet, turning occasionally. Transfer to a bowl, cover with plastic wrap, and let steam for 10 minutes.
- Peel and chop the chiles: Remove blackened skin, stems, seeds, and membranes. Chop half for the filling and puree the other half for the sauce using a blender or food processor.
- Make the filling: In a large skillet over medium heat, sauté diced onion in a drizzle of oil for 3-4 minutes until translucent. Add minced garlic and cook 30 seconds. Reduce heat to low, add shredded chicken, chopped roasted chiles, softened cream cheese, cumin, smoked paprika, salt, and pepper. Stir until cream cheese is melted and filling is combined. Remove from heat.
- Make the sauce: In the same skillet, melt butter over medium heat. Whisk in flour and cook 1-2 minutes until golden. Slowly pour in chicken broth while whisking continuously. Simmer 3-4 minutes until thickened. Reduce heat to low, stir in sour cream and pureed Hatch chiles. Add garlic powder and salt to taste. Keep warm.
- Warm the tortillas: Heat a dry skillet over medium-high heat. Warm each tortilla for 15-20 seconds per side until soft and pliable. Stack and cover with a kitchen towel. Alternatively, microwave a stack wrapped in damp paper towels for 30-40 seconds.
- Assemble the enchiladas: Preheat oven to 375°F (190°C). Spread 1/2 cup of sauce on the bottom of a 9×13-inch baking dish. Place 2-3 tablespoons of filling in the center of each warm tortilla, roll tightly, and place seam-side down in the dish. Pour remaining sauce evenly over the top.
- Add cheese and bake: Sprinkle shredded Monterey Jack cheese over the top. Bake for 20-25 minutes until bubbly and cheese is melted and golden. For a browner top, broil for the last 2 minutes, watching closely.
- Garnish and serve: Remove from oven and let rest for 5 minutes. Sprinkle with crumbled queso fresco and fresh cilantro. Squeeze lime wedges over the top. Serve hot.
Notes
Don’t skip roasting the chiles—it’s key for smoky flavor. Use gloves when handling chiles to avoid burning skin. Warm tortillas properly to prevent cracking. Let enchiladas rest 5 minutes after baking to set. Toast cumin before adding for enhanced flavor. For make-ahead, assemble without baking, cover, and refrigerate up to 24 hours; add 10 minutes to bake time.
- Prep Time: 15 minutes
- Cook Time: 30 minutes
- Category: Main Course
- Cuisine: Mexican
Nutrition
- Serving Size: 2 enchiladas
- Calories: 480
- Sugar: 4
- Sodium: 780
- Fat: 22
- Saturated Fat: 12
- Carbohydrates: 38
- Fiber: 6
- Protein: 32
Keywords: Hatch chicken enchiladas, roasted Hatch chiles, smoky enchiladas, easy weeknight dinner, chicken enchiladas, green chile enchiladas