I wasn’t expecting cooking advice from my accountant, but there I was, stuck in his office during tax season, listening to him describe exactly how to make the perfect standing rib roast. It was mid-April, I was stressed about numbers, and somehow we got talking about Christmas dinner. He leaned back in his chair, this quiet guy who always wore the same cardigan, and started describing this reverse sear method with such passion you’d think he was a Michelin-star chef, not someone who spends his days calculating deductions. Honestly, I almost forgot to ask about my W-2 forms.
He told me the secret wasn’t the expensive cut of meat—though that helps, let’s be honest—it was the technique and a truly ridiculous amount of garlic herb butter. He scribbled the method on a sticky note, and I shoved it in my purse, half-convinced I’d never use it. But that December, with a house full of family coming over, I pulled out that crumpled, coffee-stained note. And you know what? It was the best roast I’ve ever made. The kind where everyone stops talking mid-bite. The kind where your brother-in-law asks for the recipe three times.
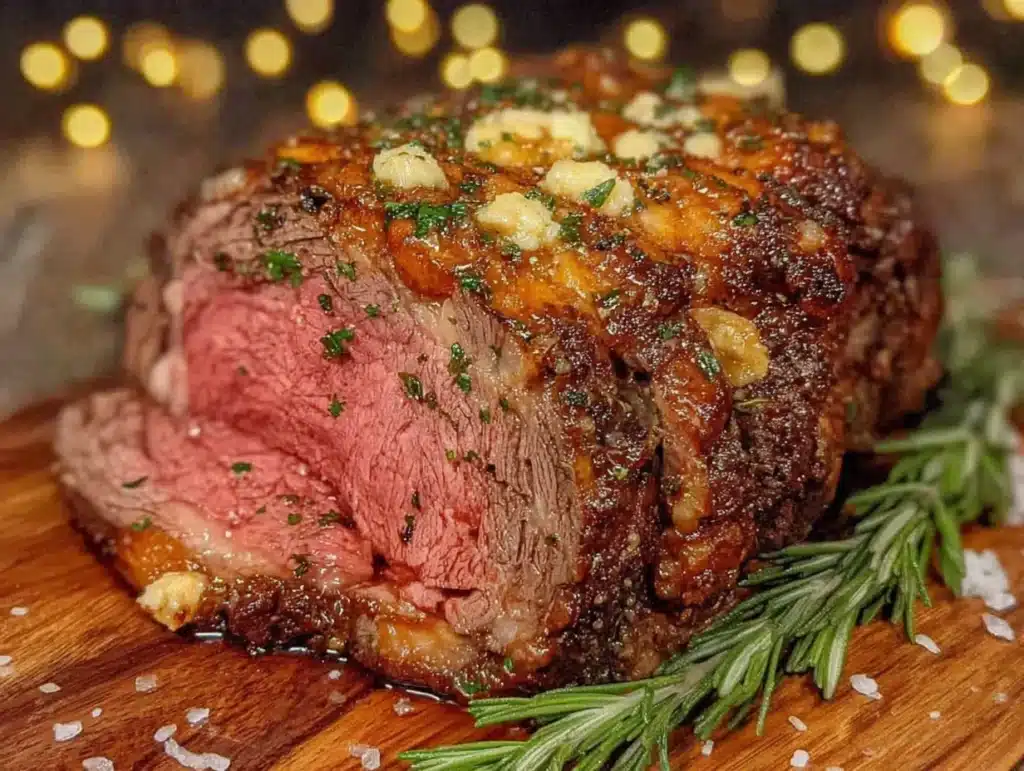
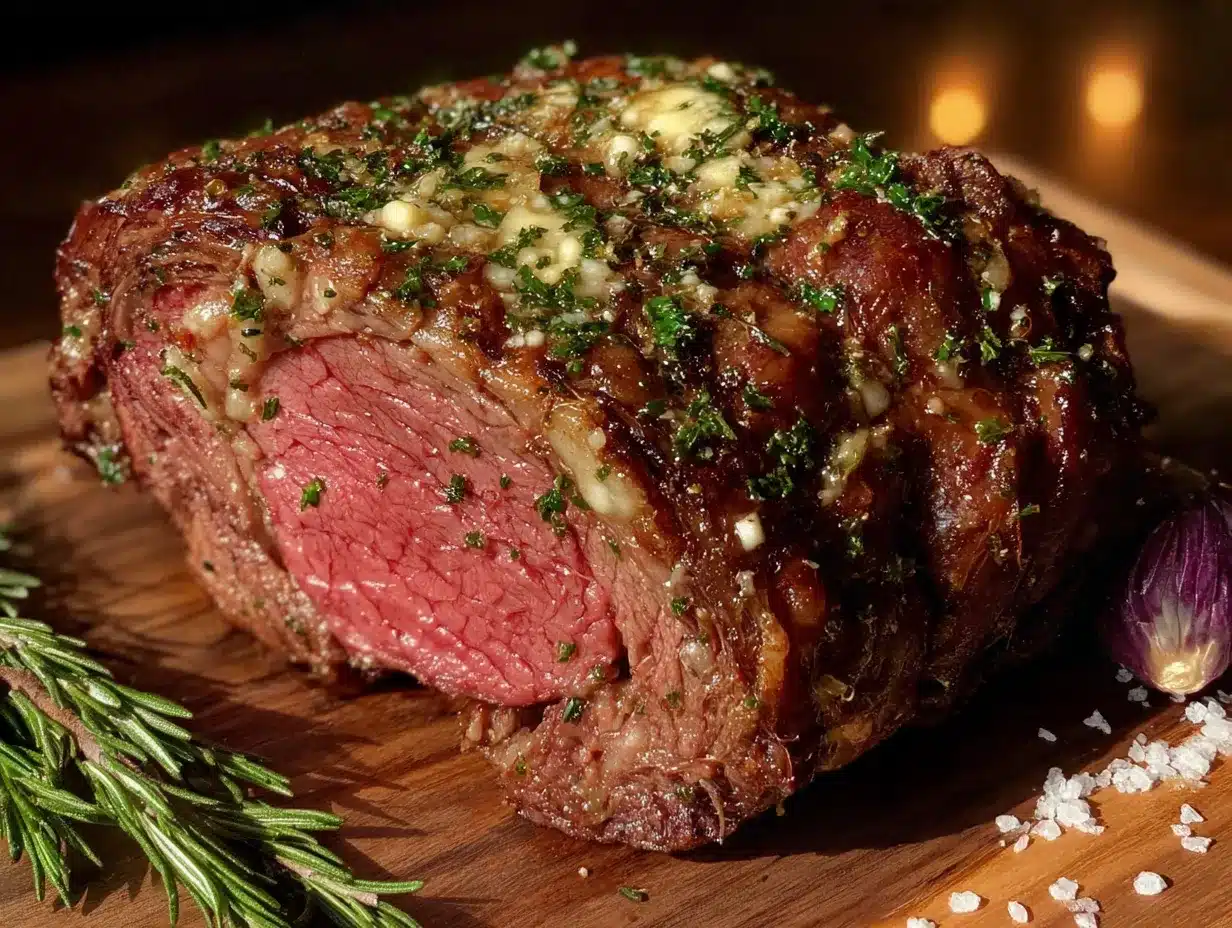
That sticky note is long gone, but the method stuck. This Perfect Garlic Herb Butter Standing Rib Roast using the reverse sear method is now my go-to for any big celebration. It sounds fancy—and it looks it too—but the technique is surprisingly forgiving. The reverse sear gives you a perfectly rosy, medium-rare center from edge to edge, while the garlic herb butter creates a crust that’s incredibly flavorful and crisp. Maybe you’ve been there, staring at a beautiful, expensive roast and feeling the pressure to not mess it up. This recipe takes that pressure away. It’s the reason I actually look forward to hosting the big holiday meal.
Why You’ll Love This Recipe
This isn’t just another roast beef recipe. After years of testing different methods—from high-heat blasts to slow braises—and a few dry, disappointing holiday dinners, I landed on this reverse sear method. It’s the technique that professional chefs use, and it’s the one I keep coming back to because it works every single time. I’ve had my fair share of kitchen fails, but this recipe has never let me down.
- Foolproof for Entertaining: The reverse sear method takes the guesswork out of cooking a large roast. You get a perfectly even doneness from edge to center, which means no more overdone ends and raw middles. It’s ideal for when you have guests and can’t afford a mistake.
- Incredible Flavor: The garlic herb butter isn’t just a rub; it’s a flavor delivery system. It seeps into the meat as it cooks, creating a crust that is savory, aromatic, and deeply satisfying. The combination of fresh rosemary, thyme, and garlic is a classic for a reason.
- Impressive Presentation: A standing rib roast is already a showstopper. When you nail the perfect crust and a beautiful pink interior, it becomes the centerpiece of the table. Your guests will think you spent all day in the kitchen.
- Less Stress, More Time: You can do the low-temperature cooking hours before your guests arrive. Then, all you have to do is a quick, hot sear right before serving. This frees you up to enjoy your party instead of being stuck in the kitchen.
- Unbelievably Tender: The slow, gentle cooking breaks down the connective tissues, resulting in meat that is so tender it practically falls apart. It’s the kind of roast that makes you close your eyes after the first bite.
This recipe is different because it focuses on technique over complexity. It’s not about a secret ingredient; it’s about the method. The reverse sear ensures you get a perfect result, and the garlic herb butter adds a layer of flavor that feels luxurious without being complicated. It is comfort food reimagined—elegant, confident, and deeply satisfying. Perfect for impressing guests without the stress, it turns a simple meal into something memorable.
What Ingredients You Will Need
This recipe uses simple, high-quality ingredients to deliver bold flavor and a beautiful presentation. The key is in the quality of the beef and the freshness of your herbs. Most of these are pantry staples, especially if you keep a well-stocked herb garden.
For the Standing Rib Roast
- 1 (4-5 pound) bone-in standing rib roast: This is the star of the show. Look for a roast with good marbling (the white flecks of fat within the muscle). I prefer a Prime grade if your budget allows, but Choice grade works wonderfully too. Ask your butcher to cut the bones off and tie them back on—this makes carving much easier later.
- 2 tablespoons kosher salt: Don’t skimp on the salt. It’s not just for flavor; it helps draw out moisture and season the meat deeply. I use Diamond Crystal kosher salt. If you use table salt, use half the amount.
- 1 tablespoon black pepper: Freshly ground is always best. It adds a nice bite that balances the richness of the beef.
For the Garlic Herb Butter
- 1/2 cup (1 stick) unsalted butter, softened: Make sure your butter is at room temperature so it blends into a smooth paste. Salted butter can be used, but you’ll need to adjust the added salt.
- 6 cloves garlic, minced: Fresh garlic is non-negotiable here. The pre-minced stuff in a jar won’t give you the same punch of flavor. I use a microplane to grate it into a paste.
- 2 tablespoons fresh rosemary, finely chopped: Rosemary is a classic pairing with beef. The piney, aromatic flavor cuts through the richness beautifully.
- 2 tablespoons fresh thyme leaves: Thyme adds a subtle, earthy note that rounds out the other herbs. Don’t use dried if you can help it; fresh herbs are key for this butter.
- 1 tablespoon fresh parsley, finely chopped: Parsley adds a touch of freshness and color. It’s not a dominant flavor, but it brightens the whole mixture.
- 1 teaspoon kosher salt: To season the butter itself.
- 1/2 teaspoon black pepper: Freshly ground.
For the Au Jus (Optional, but Recommended)
- 2 cups beef broth: Use a good quality, low-sodium broth. The Better Than Bouillon paste is a great option for flavor.
- 1/2 cup dry red wine (like Cabernet Sauvignon or Merlot): This deglazes the pan and adds incredible depth. You can substitute with more beef broth if you prefer.
- 2 tablespoons unsalted butter: For finishing the sauce and adding richness.
- 1 tablespoon all-purpose flour (optional): If you like a thicker gravy, you can whisk this in at the end.
Equipment Needed
You don’t need a ton of fancy equipment to pull this off, but a few key tools make the process much smoother. I learned the hard way that a good meat thermometer is not optional for this recipe—it’s the whole secret to success.
- Digital Meat Thermometer: This is the most important tool. An instant-read thermometer is good, but a probe-style thermometer that you can leave in the roast while it cooks is even better. It lets you monitor the internal temperature without opening the oven door.
- Large Cast Iron Skillet or Heavy-Bottomed Pan: You need this for the final sear. Cast iron is ideal because it gets screaming hot and holds that heat. If you don’t have one, a heavy stainless steel pan will work.
- Roasting Pan with a Rack: A rack elevates the roast so air can circulate evenly around it, promoting even cooking. If you don’t have a rack, you can use a few large carrots or celery stalks to prop the roast up.
- Chef’s Knife: A sharp knife is essential for trimming any excess fat and for carving the finished roast. A dull knife will just shred the beautiful meat.
- Kitchen Twine: If your butcher hasn’t tied the roast, you’ll need twine to secure the bones back onto the meat and to tie the roast into a uniform shape for even cooking.
- Aluminum Foil: For tenting the roast while it rests. This is a crucial step.
Preparation Method
This method is all about patience and precision. The reverse sear is a two-step process: first, a slow, gentle roast to bring the meat to the perfect internal temperature, and then a quick, hot sear to create a magnificent crust. Trust the process and your thermometer.
- Prep the Roast (At Least 24 Hours Before): Pat the roast dry with paper towels. This is a critical step for getting a good crust. Generously season all sides of the roast with the 2 tablespoons of kosher salt and 1 tablespoon of black pepper. Place it on a wire rack set over a baking sheet and put it in the refrigerator, uncovered, for at least 12 hours, and up to 24 hours. This dry-brining step is magic—it dries out the surface and seasons the meat all the way through. I usually do this the morning before I plan to cook it.
- Make the Garlic Herb Butter: While the roast is resting, make the butter. In a small bowl, combine the softened butter, minced garlic, chopped rosemary, thyme, parsley, 1 teaspoon of salt, and 1/2 teaspoon of pepper. Mix until everything is well combined. You can do this a day ahead and keep it covered in the fridge. Just let it come to room temperature before using so it’s spreadable.
- Bring the Roast to Room Temperature: About 2 hours before you plan to start cooking, take the roast out of the fridge. Let it sit on the counter, still on the rack. This helps it cook more evenly. Don’t skip this step, or the center will be cold while the outside overcooks.
- Preheat the Oven & Apply the Butter: Preheat your oven to 225°F (107°C). While it’s heating, pat the roast dry again with a paper towel (the dry brine will have pulled out some moisture). Rub the garlic herb butter all over the roast, covering every surface. Don’t be shy—get it into all the nooks and crannies.
- Slow Roast: Place the roast, bone-side down, on the rack in your roasting pan. Insert the probe of your meat thermometer into the thickest part of the meat, making sure it’s not touching the bone. Roast at 225°F (107°C) until the internal temperature reaches 120-125°F (49-52°C) for medium-rare. This will take about 3 to 4 hours, depending on the size of your roast. Start checking the temperature after about 2.5 hours. The roast will look a little pale and unimpressive at this point—that’s totally normal!
- Rest the Roast (First Rest): Once the roast hits your target temperature, remove it from the oven. Tent it loosely with aluminum foil and let it rest for 30 to 45 minutes. This is a crucial step. The internal temperature will continue to rise by about 5-10 degrees (this is called carryover cooking), and the juices will redistribute throughout the meat. Don’t skip this rest, or you’ll have a dry roast.
- The Final Sear: While the roast is resting, place your large cast iron skillet over high heat. Add a tablespoon of oil (like avocado or canola) with a high smoke point. Once the oil is shimmering and just about to smoke, carefully place the roast in the hot pan. Sear for 1-2 minutes per side, using tongs to hold it, until you have a deep, golden-brown crust on all sides. Don’t crowd the pan; work in batches if needed. You’re looking for color, not cooking the meat further.
- Make the Au Jus (Optional): After searing the roast, pour off the excess fat from the skillet, leaving about 2 tablespoons. Place the skillet over medium-high heat. Add the red wine and scrape up all the browned bits from the bottom of the pan (this is called deglazing). Let the wine reduce by half, about 2 minutes. Add the beef broth and bring to a simmer. Let it cook for 5-7 minutes, or until slightly reduced. Whisk in the 2 tablespoons of butter until melted. For a thicker gravy, whisk in the flour and cook for 1 minute. Season with salt and pepper to taste. Strain the jus through a fine-mesh sieve for a silky finish.
- Carve and Serve: Transfer the seared roast to a cutting board. If the bones were tied on, cut the twine and remove the bones. Slice the roast against the grain into thick, beautiful slices. Serve immediately with the warm au jus on the side.
Cooking Tips & Techniques
I’ve made this roast more times than I can count, and I’ve definitely learned a few things the hard way. Here are my best tips to help you avoid the same mistakes.
Don’t Skip the Dry Brine. I know it takes planning, but the 24-hour dry brine is non-negotiable for the best results. It’s the difference between a well-seasoned roast and one that’s salty on the outside and bland on the inside. The first time I made this, I was impatient and only brined for 4 hours. It was good, but not great. Now I always plan ahead.
Trust Your Thermometer, Not the Timer. Every oven is different, and every roast is a different shape. The only way to know if it’s done is with a good meat thermometer. I ruined an expensive roast once by relying on a cooking time chart. It came out well-done and dry. Now, I set my probe thermometer alarm for 118°F (48°C) and start paying close attention. That few degrees makes all the difference.
The Second Rest is Just as Important. A lot of people think resting is just for the big roast, but the 30-minute rest after the slow cook is crucial. It allows the carryover cooking to finish the job gently and lets the juices settle. If you skip this and go straight to the sear, you’ll have a pink center with a ring of overcooked meat around it. Patience is your friend here.
Get the Pan Screaming Hot for the Sear. The whole point of the reverse sear is to get a perfect crust without overcooking the interior. You need your pan to be ripping hot. If the oil isn’t shimmering and just starting to smoke, you’re not there yet. A good test is to flick a drop of water into the pan—if it dances and evaporates instantly, you’re ready.
Multitasking Strategy: While the roast is doing its long, slow cook, you have hours of free time. This is when you can prep your side dishes, set the table, and get yourself ready. I love that this method lets me be a guest at my own party. Then, during the 30-minute rest, I make the au jus and get my searing pan ready. The final sear takes less than 10 minutes, so it’s all very manageable.
Variations & Adaptations
This recipe is a fantastic base, and it’s easy to adapt to your tastes or what you have on hand. Here are a few of my favorite twists.
Herb Swap: Not a fan of rosemary? No problem. You can use an equal amount of fresh sage or oregano instead. I once made a version with a mix of fresh tarragon and chives from my garden, and it was surprisingly light and bright. It was a hit at a spring dinner party.
Spicy Kick: For a little heat, add 1-2 teaspoons of red pepper flakes or a finely chopped chipotle pepper in adobo sauce to your garlic herb butter. It adds a smoky warmth that’s incredible with the beef. My brother-in-law, who loves anything spicy, requests this version every time he comes over.
Garlic Lovers’ Version: If you’re like me and can’t have too much garlic, roast a whole head of garlic before making the butter. Cut the top off a head of garlic, drizzle with olive oil, wrap in foil, and roast at 400°F (204°C) for 40 minutes until soft and golden. Squeeze the roasted cloves out of their skins and mash them into the butter. It’s a sweeter, more mellow garlic flavor that’s absolutely divine.
Different Cuts: This reverse sear method works beautifully with other cuts of beef, too. Try it with a boneless ribeye roast, a top sirloin roast, or even a whole beef tenderloin. Just adjust the cooking time based on the thickness of the cut. A tenderloin will cook much faster, so start checking the temperature early.
Dairy-Free Adaptation: To make this dairy-free, substitute the butter with a high-quality vegan butter or a good olive oil. I’ve used a solid coconut oil mixed with the herbs, and it created a fantastic, crispy crust. Just make sure your vegan butter is firm enough to make a paste.
Serving & Storage Suggestions
This roast is the centerpiece of a celebratory meal. How you serve and store it can make a big difference in the overall experience.
What to Serve Alongside: The rich, savory flavor of the roast pairs beautifully with classic sides. I love serving it with creamy mashed potatoes, roasted root vegetables (like carrots and parsnips), and a bright, acidic side like a simple arugula salad with lemon vinaigrette to cut through the richness. A Yorkshire pudding is also a traditional and delicious choice. For a potluck, consider a hearty classic creamed spinach or a roasted Brussels sprouts with balsamic glaze.
Serving Temperature: Serve the roast immediately after carving. It should be warm, with the au jus served on the side in a small pitcher or gravy boat. The contrast between the warm, juicy meat and the cool, crisp sides is part of the magic.
Storage: Leftover roast is a gift. Let the meat cool completely, then wrap it tightly in plastic wrap or aluminum foil, or place it in an airtight container. It will keep in the refrigerator for up to 4 days. The flavor actually gets better as it sits.
Reheating: The best way to reheat leftover roast is to slice it and then warm it gently in a skillet with a little beef broth or au jus over medium-low heat. This prevents it from drying out. You can also reheat it in a 300°F (150°C) oven, covered with foil, until just warmed through. Avoid the microwave, as it will make the meat tough and rubbery.
Leftover Ideas: Leftover roast is fantastic in so many things. Slice it thin for incredible roast beef sandwiches with horseradish cream, dice it up for a hearty beef and barley soup, or use it in a classic beef stroganoff. The possibilities are endless.
Nutritional Information & Benefits
This is a rich, celebratory dish, so it’s not an everyday meal. But it does have some nutritional benefits, especially when enjoyed in moderation.
Beef is an excellent source of high-quality protein, which is essential for muscle building and repair. It’s also rich in important nutrients like iron, zinc, and B vitamins, particularly B12. The garlic and herbs in the butter also offer antioxidant and anti-inflammatory properties.
Estimated Nutritional Values (per 6-ounce serving, without au jus):
- Calories: 550-650
- Protein: 45-50g
- Fat: 40-45g
- Saturated Fat: 18-20g
- Carbohydrates: 1-2g
- Sodium: 600-800mg (depending on salt used)
Dietary Considerations: This recipe is naturally gluten-free and low-carb/keto-friendly. The primary allergens are dairy (butter). For a dairy-free version, see the variations section above.
I like to think of this dish as a wonderful way to treat yourself and your loved ones. It’s a nutrient-dense meal that, when part of a balanced diet, can be a fantastic source of energy and satisfaction. It’s about quality, not quantity.
Frequently Asked Questions
Can I use a boneless rib roast for this recipe?
Absolutely! A boneless rib roast works perfectly with this method. The cooking time may be slightly shorter since there’s no bone to conduct heat. Just follow the same steps and rely on your meat thermometer for doneness. The bone does add a bit of flavor, but you’ll still get an incredible result with a boneless roast.
What if I don’t have a cast iron skillet for the sear?
No worries! You can use any heavy-bottomed, oven-safe pan like stainless steel. If you don’t have a pan large enough, you can also sear the roast under the broiler. Just place it on a broiler-safe pan and broil for 2-3 minutes per side, watching it closely so it doesn’t burn.
How do I know when the roast is done without a probe thermometer?
While a probe thermometer is highly recommended, you can use an instant-read thermometer instead. Just pull the roast out of the oven every 20-30 minutes after the 2-hour mark and check the temperature in the thickest part. Be quick about it so you don’t lose too much oven heat.
Can I prepare the garlic herb butter ahead of time?
Yes, you can make the butter up to 3 days in advance. Shape it into a log using plastic wrap and store it in the refrigerator. Let it come to room temperature for about 30 minutes before applying it to the roast so it’s spreadable. You can also freeze the butter for up to 3 months.
My roast is cooked but my guests aren’t here yet. What do I do?
This is the beauty of the reverse sear! After the slow roast and first rest (step 6), you can let the roast sit at room temperature for up to 2 hours. When your guests arrive, just do the final sear. This gives you a perfect window of flexibility. You can also hold it in a 140°F (60°C) oven for up to an hour after the first rest, but it’s best to serve it soon after the sear.
Conclusion
This Perfect Garlic Herb Butter Standing Rib Roast is more than just a recipe; it’s a centerpiece for your best memories. It’s the dish you make when you want to say, “I love you,” without saying a word. It’s the meal that turns a regular Tuesday into a celebration and a holiday dinner into a legendary feast.
I hope you give this method a try. It looks and tastes like you spent hours of intense labor, but the truth is, it’s mostly hands-off. The oven does the hard work, and you get to enjoy the applause. Don’t be afraid to make it your own. Swap the herbs, add some spice, or serve it with your family’s favorite sides. The technique is the foundation; your personal touch is what makes it special.
I can’t wait to hear how it turns out for you! Did you try a different herb combination? Did your guests ask for seconds? Drop a comment below and share your experience. And if you loved this recipe, please share it with your friends and family—let’s spread the joy of a perfectly cooked roast!
Pin This Recipe!
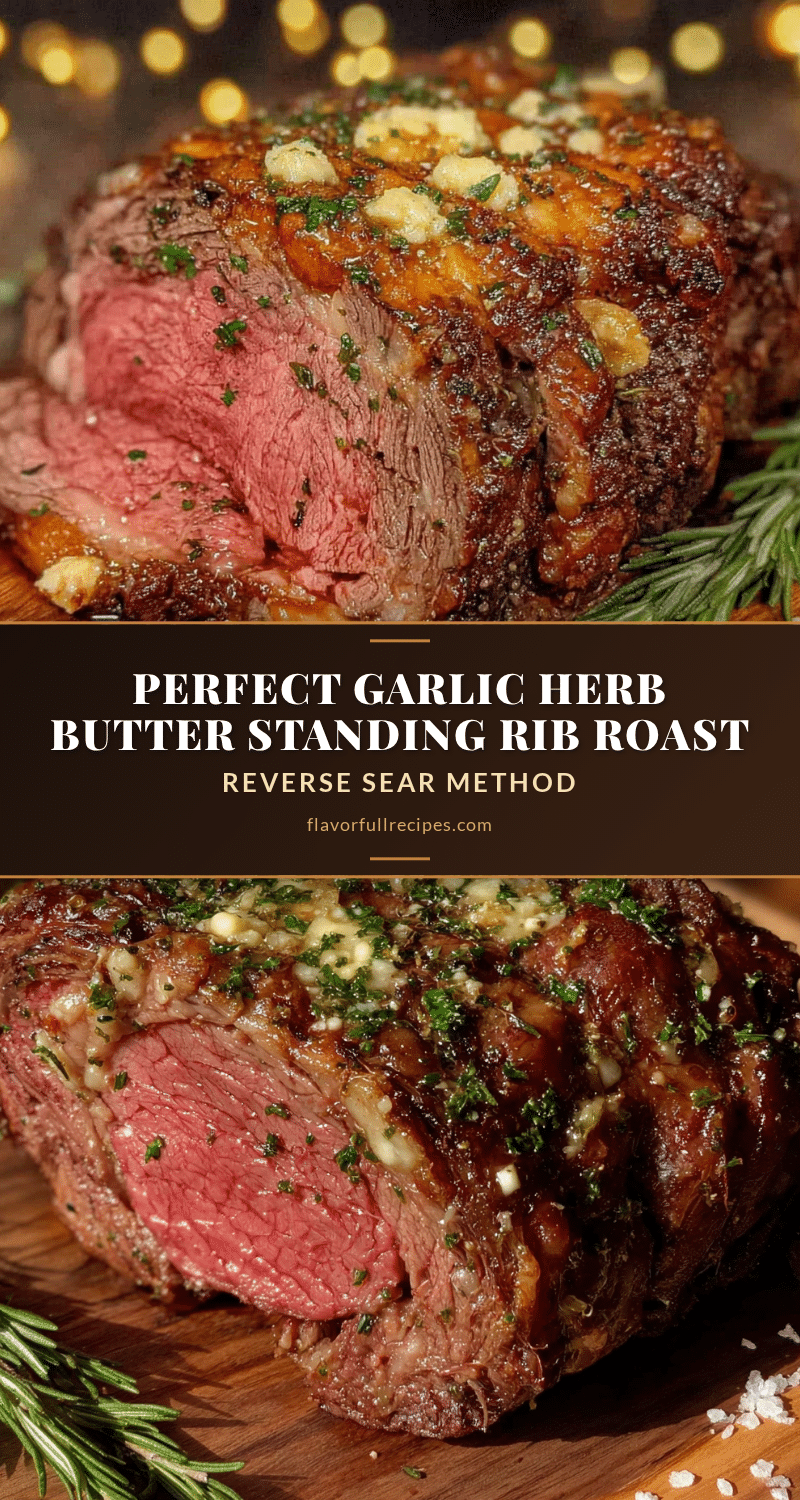
Perfect Garlic Herb Butter Standing Rib Roast
- Total Time: 4 hours 45 minutes (plus 24 hours dry brine)
- Yield: 8 servings 1x
Description
A foolproof standing rib roast recipe using the reverse sear method, featuring a flavorful garlic herb butter crust and perfectly rosy, medium-rare center. Ideal for holiday dinners and special occasions.
Ingredients
- 1 (4-5 pound) bone-in standing rib roast
- 2 tablespoons kosher salt
- 1 tablespoon black pepper, freshly ground
- 1/2 cup (1 stick) unsalted butter, softened
- 6 cloves garlic, minced
- 2 tablespoons fresh rosemary, finely chopped
- 2 tablespoons fresh thyme leaves
- 1 tablespoon fresh parsley, finely chopped
- 1 teaspoon kosher salt
- 1/2 teaspoon black pepper, freshly ground
- 2 cups beef broth, low-sodium
- 1/2 cup dry red wine (like Cabernet Sauvignon or Merlot)
- 2 tablespoons unsalted butter
- 1 tablespoon all-purpose flour (optional)
Instructions
- Prep the Roast (At Least 24 Hours Before): Pat the roast dry with paper towels. Generously season all sides with 2 tablespoons kosher salt and 1 tablespoon black pepper. Place on a wire rack over a baking sheet and refrigerate, uncovered, for at least 12 hours, up to 24 hours.
- Make the Garlic Herb Butter: In a small bowl, combine softened butter, minced garlic, chopped rosemary, thyme, parsley, 1 teaspoon salt, and 1/2 teaspoon pepper. Mix until well combined. Can be made a day ahead; bring to room temperature before using.
- Bring the Roast to Room Temperature: About 2 hours before cooking, remove roast from fridge and let sit on the counter on the rack.
- Preheat the Oven & Apply the Butter: Preheat oven to 225°F (107°C). Pat roast dry again. Rub garlic herb butter all over the roast, covering every surface.
- Slow Roast: Place roast bone-side down on rack in roasting pan. Insert meat thermometer into thickest part, avoiding bone. Roast at 225°F (107°C) until internal temperature reaches 120-125°F (49-52°C) for medium-rare, about 3 to 4 hours. Start checking after 2.5 hours.
- Rest the Roast (First Rest): Remove from oven, tent loosely with foil, and let rest for 30 to 45 minutes. Internal temperature will rise 5-10 degrees.
- The Final Sear: While roast rests, heat a large cast iron skillet over high heat with a tablespoon of high-smoke-point oil. Once shimmering, sear roast for 1-2 minutes per side until deep golden-brown crust forms on all sides.
- Make the Au Jus (Optional): After searing, pour off excess fat from skillet, leaving about 2 tablespoons. Place over medium-high heat. Add red wine and scrape up browned bits. Let wine reduce by half, about 2 minutes. Add beef broth and bring to a simmer. Cook 5-7 minutes until slightly reduced. Whisk in 2 tablespoons butter until melted. For thicker gravy, whisk in flour and cook 1 minute. Season with salt and pepper. Strain through fine-mesh sieve if desired.
- Carve and Serve: Transfer seared roast to cutting board. Remove twine and bones. Slice against the grain into thick slices. Serve immediately with warm au jus.
Notes
Dry brine the roast for at least 12 hours (up to 24) for best flavor and crust. Trust your thermometer over cooking time. The first rest after slow roasting is crucial for carryover cooking and juice redistribution. Get the pan screaming hot for the final sear to avoid overcooking the interior. The roast can be held at room temperature for up to 2 hours after the first rest before searing.
- Prep Time: 15 minutes
- Cook Time: 3 hours 30 minutes
- Category: Main Course
- Cuisine: American
Nutrition
- Serving Size: 6 ounces
- Calories: 600
- Sodium: 700
- Fat: 42
- Saturated Fat: 19
- Carbohydrates: 1.5
- Protein: 47
Keywords: standing rib roast, prime rib, reverse sear, garlic herb butter, holiday roast, beef roast, Christmas dinner