I was standing in the frozen foods aisle of a 24-hour grocery store last Tuesday night, staring at a bag of mass-produced potstickers, when a particular smell hit me—not from the freezer, but from my own memory. It was the sharp, clean scent of fresh chives being chopped, mixed with the savory warmth of pork fat hitting a hot pan. And suddenly I was six years old, standing on a wooden stool in my neighbor Mrs. Chen’s kitchen, watching her nimble fingers transform simple ingredients into little pleated parcels of joy. She’d been gone for years by then, and I hadn’t thought about those afternoons in ages. But there I was, in fluorescent lighting at 9 PM, practically tasting that first crispy bite all over again. I grabbed a bunch of fresh chives from the produce section and decided right then—I was going to figure out how to make them myself, from scratch, no shortcuts. Honestly, the first batch was a disaster. The wrappers were too thick, the filling was dry, and I burned the bottoms. But I kept at it, because that taste, that memory of Mrs. Chen’s kitchen, was worth chasing. And now, after countless test batches and a few happy accidents, I’ve got a recipe that I think would make her proud. Let me tell you, there’s nothing quite like the sound of a dozen potstickers sizzling in a hot pan before a dinner party, knowing you made every single one yourself. Maybe you’ve been there too—standing in a store, suddenly homesick for a flavor you can’t quite name.
Why You’ll Love This Recipe
These potstickers aren’t just good—they’re the kind of appetizer that makes your guests stop mid-conversation and close their eyes for a second. I’ve tested this recipe more times than I care to admit (my freezer still has evidence of my early attempts), and I can confidently say this version is foolproof for anyone hosting a gathering.
- Perfect for Entertaining: You can assemble these up to 24 hours ahead and keep them in the fridge. When your guests arrive, just pull them out and cook. The sizzle alone will build anticipation.
- Simple Ingredients: Ground pork, fresh chives, ginger, garlic, soy sauce, and basic pantry staples. No exotic grocery store trips required.
- Crowd-Pleaser: I’ve served these at potlucks, dinner parties, and casual game nights. They disappear every single time, even from picky eaters who swear they don’t like dumplings.
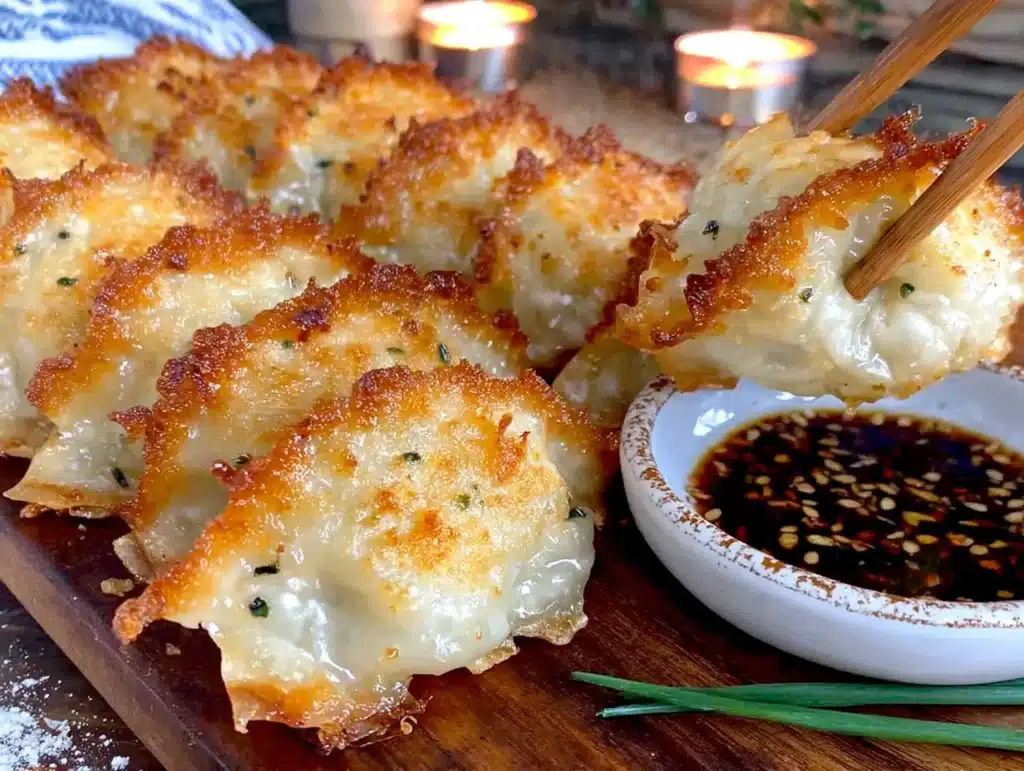
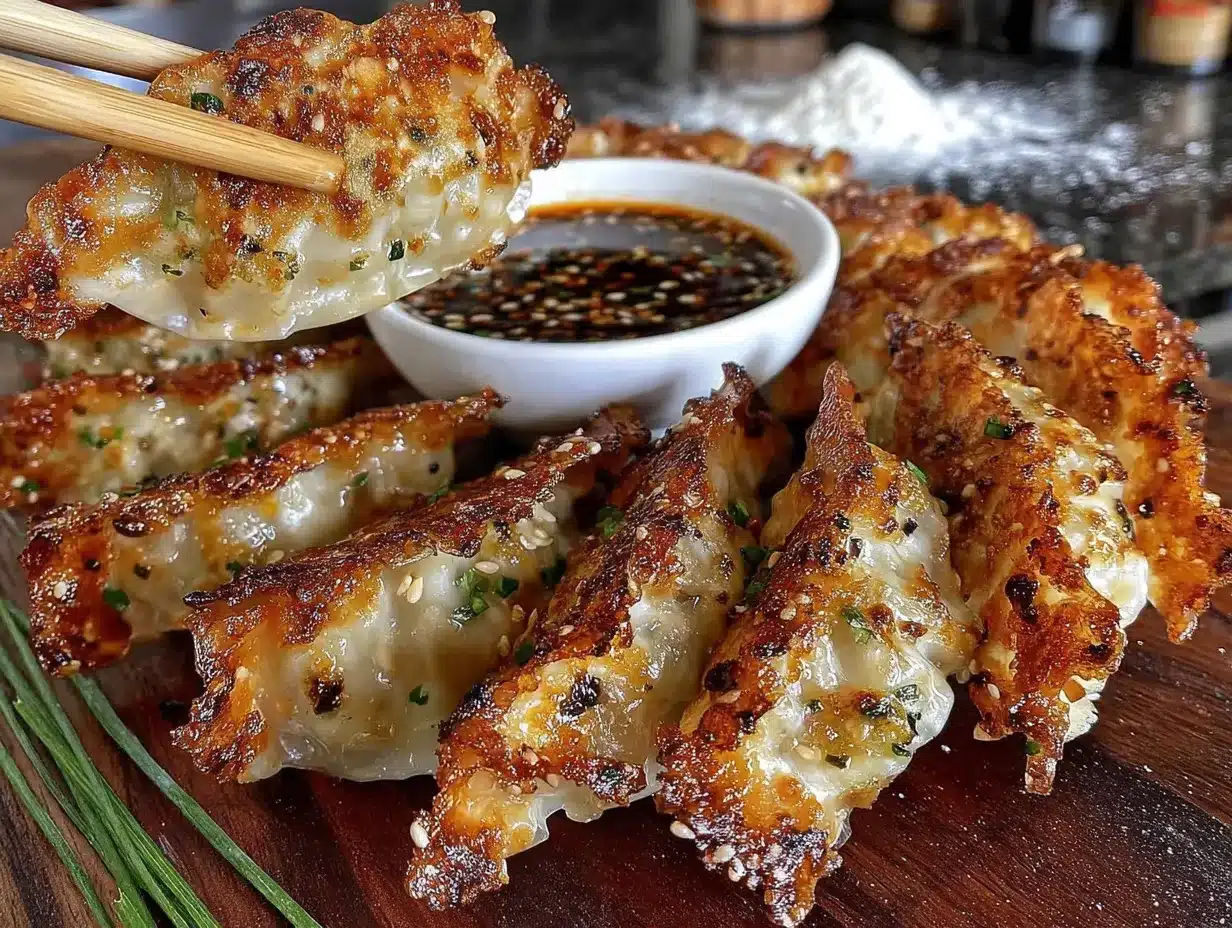
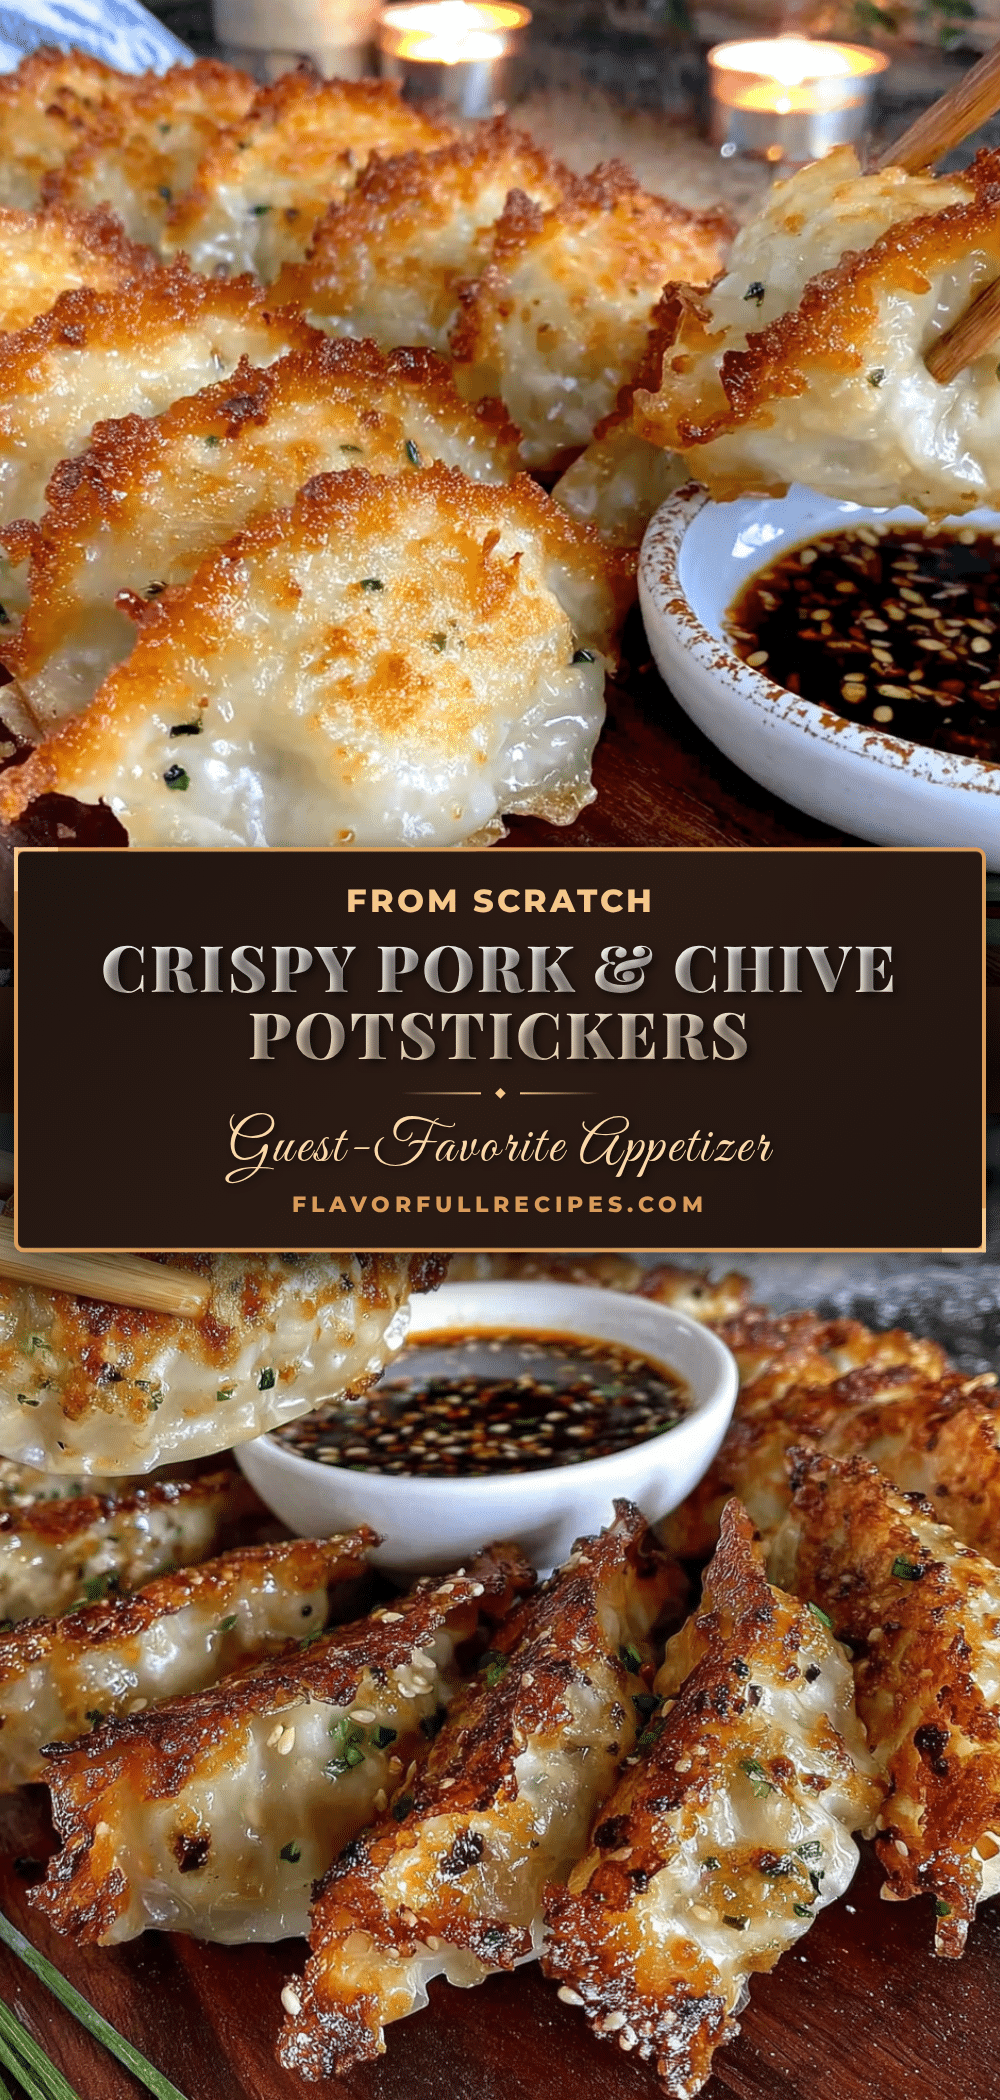
- That Perfect Texture: The bottoms get golden and crispy while the tops stay tender and chewy. The filling stays juicy and flavorful, with fresh chives cutting through the richness of the pork.
- Make-Ahead Friendly: Double the batch and freeze half. You’ll thank yourself next month when you need an impressive appetizer in 15 minutes.
What makes these different from other recipes? It’s the little details I learned through trial and error—like salting the chives first to draw out excess moisture, and using a specific water-to-flour ratio for the wrappers that gives you that perfect chew without being gummy. This isn’t just another dumpling recipe; it’s the one I bring to every gathering, the one people ask me to make for their parties, the one that made my brother-in-law finally admit that homemade is better than takeout.
What Ingredients You Will Need
This recipe uses simple, wholesome ingredients to deliver bold flavor and that signature crispy-tender texture. Most of these are probably already in your kitchen, which makes these potstickers perfect for last-minute hosting emergencies.
For the Filling
- 1 pound ground pork (80/20 blend works best—the fat keeps the filling juicy; I prefer ButcherBox for consistent quality)
- 2 cups fresh chives, finely chopped (about one large bunch; look for bright green, firm stems without wilting)
- 3 cloves garlic, minced (fresh is non-negotiable here—skip the jarred stuff)
- 1 tablespoon fresh ginger, grated (use a microplane for the best texture; frozen ginger works in a pinch)
- 2 tablespoons soy sauce (I use Kikkoman for its balanced saltiness; tamari works for gluten-free)
- 1 tablespoon sesame oil (toasted variety adds the most flavor)
- 1 teaspoon sugar (balances the savory and brings out the pork’s sweetness)
- 1/4 teaspoon white pepper (black pepper works, but white pepper has that authentic dumpling flavor)
- 1 egg white (binds everything together without making the filling dense)
For the Wrappers
- 2 cups all-purpose flour (plus extra for dusting; King Arthur gives a reliable texture)
- 1/2 cup warm water (about 110°F—warm enough to activate the gluten, not hot enough to cook the flour)
- 1/2 teaspoon salt
- 1 tablespoon vegetable oil (keeps the dough soft and pliable)
For Cooking
- 2 tablespoons vegetable oil (for pan-frying; use a neutral oil with a high smoke point like avocado or grapeseed)
- 1/3 cup water (for steaming; tap water is fine)
For the Dipping Sauce
- 3 tablespoons soy sauce
- 1 tablespoon rice vinegar (unseasoned works best; you can control the sweetness yourself)
- 1 teaspoon sesame oil
- 1 teaspoon chili oil or sriracha (optional, but highly recommended for heat lovers)
- 1 teaspoon sugar
- 1 clove garlic, minced
- 1 tablespoon chopped scallions (for garnish)
Equipment Needed
You don’t need any fancy equipment for these potstickers, which is part of their charm. Here’s what you’ll need:
- Large mixing bowl (for the filling and the dough)
- Rolling pin (a standard wooden one works perfectly; I actually prefer the tapered Asian-style rolling pin for even circles)
- Non-stick skillet or cast iron pan (12-inch works best; cast iron gives you that extra-crispy bottom, but non-stick is easier for beginners)
- Sharp knife and cutting board (for chopping chives and mincing garlic)
- Microplane or fine grater (for fresh ginger; a regular grater works but the texture won’t be as smooth)
- Small bowl of water (for sealing the wrappers)
- Baking sheet lined with parchment paper (to hold the assembled potstickers before cooking)
- Lid that fits your skillet (for the steaming step; glass lids let you watch the magic happen)
If you don’t have a rolling pin, a clean wine bottle works surprisingly well. And if making wrappers from scratch feels intimidating, you can use store-bought round dumpling wrappers from the refrigerated section of most grocery stores—just look for the ones that list flour, water, and salt as ingredients.
Preparation Method
Step 1: Make the Dough (15 minutes + 30 minutes rest)
In a large bowl, whisk together the flour and salt. Make a well in the center and pour in the warm water and vegetable oil. Using chopsticks or a fork, stir in a circular motion until the flour is mostly incorporated and a shaggy dough forms. Turn the dough out onto a lightly floured surface and knead for about 8 minutes until smooth and elastic—it should feel like your earlobe when you’re done. I know that sounds weird, but honestly, that’s the perfect texture test. Shape into a ball, wrap in plastic wrap, and let it rest at room temperature for 30 minutes. This rest is crucial; it relaxes the gluten so the wrappers don’t snap back when you roll them.
Step 2: Prepare the Filling (10 minutes)
While the dough rests, combine the ground pork, chopped chives, minced garlic, grated ginger, soy sauce, sesame oil, sugar, white pepper, and egg white in a large bowl. Use your hands to mix everything together—I promise it’s more effective than a spoon. Mix until the ingredients are just combined; overmixing can make the filling tough. Cover and refrigerate until you’re ready to assemble. Pro tip: fry a tiny patty of the filling in a pan and taste it before you commit to the whole batch. This is how I caught my early mistake of undersalting.
Step 3: Roll the Wrappers (20 minutes)
Divide the rested dough into 4 equal pieces. Keep the pieces you’re not working with covered under a damp towel to prevent drying. Roll one piece into a log about 1 inch thick, then cut into 8 equal pieces (you should get about 32 wrappers total). Roll each piece into a small ball, then flatten into a disk. Using a rolling pin, roll each disk into a 3.5-inch circle, about 1/16 inch thick. The edges should be slightly thinner than the center. As you work, keep the finished wrappers covered with a damp paper towel. This step takes practice—my first few were definitely more blob-shaped than circle-shaped, but they still tasted amazing.
Step 4: Assemble the Potstickers (30 minutes)
Place a wrapper in the palm of your non-dominant hand. Spoon about 1 tablespoon of filling into the center. Dip your finger in the small bowl of water and moisten the edge of the wrapper. Fold the wrapper in half, creating a half-moon shape, and pinch the top edge to seal. Starting from one end, pleat the edge by folding small sections of the wrapper toward the center, pressing firmly to seal. You should have 4-5 pleats. Set the finished potsticker on the parchment-lined baking sheet and cover with a damp towel. Repeat with remaining wrappers and filling. If you’re hosting a party, this is the step you can do the night before—just keep them covered in the fridge.
Step 5: Cook the Potstickers (12 minutes per batch)
Heat 1 tablespoon of vegetable oil in your skillet over medium-high heat until shimmering. Place the potstickers flat-side down in the pan, spacing them about 1/2 inch apart (don’t overcrowd; cook in batches if needed). Cook undisturbed for 2-3 minutes until the bottoms are golden brown. Carefully add 1/3 cup of water to the pan—it will sizzle and steam dramatically. Immediately cover with the lid and reduce the heat to medium. Steam for 5-6 minutes until the water has mostly evaporated and the wrappers are translucent. Remove the lid and increase the heat to medium-high. Cook for another 1-2 minutes to re-crisp the bottoms. The sound at this stage is pure magic—that crackling, sizzling noise that tells you something amazing is about to happen. Slide the potstickers onto a serving plate, crispy-side up.
Cooking Tips & Techniques
I learned most of these the hard way, so let me save you the trouble. First, don’t skip the step of salting the chives. If you don’t, they’ll release water into the filling and make everything soggy. Just toss the chopped chives with a pinch of salt and let them sit for 10 minutes, then squeeze out the excess liquid before adding them to the pork.
Temperature control is everything. If your pan is too hot, the bottoms will burn before the wrappers cook through. If it’s not hot enough, you’ll lose that signature crispiness. I use medium-high heat for the initial sear, then drop to medium for the steaming phase. Trust the process—when you hear that sizzle start to fade, that’s your cue to check the bottoms.
One mistake I made constantly in the beginning was overfilling the wrappers. Less is more here. A heaping tablespoon is plenty. If you overstuff, they’ll burst open during cooking and you’ll end up with a pan full of filling and sad, empty wrappers. I speak from experience—my first dinner party attempt resulted in what I now call “potsticker soup.”
For the best texture, make sure your wrappers are sealed tightly. Any gap will let the juices escape, and those juices are flavor gold. I run my finger along the sealed edge twice just to be sure. And here’s a trick: if you’re having trouble getting the pleats to stick, your wrappers might be drying out. Keep them covered with a damp towel at all times.
Variations & Adaptations
These potstickers are incredibly adaptable, which makes them perfect for different dietary needs and flavor preferences. Here are some variations I’ve tested:
Vegetarian Version: Substitute the ground pork with finely chopped mushrooms (shiitake or cremini work great), crumbled firm tofu, and an extra egg white for binding. Add a splash more soy sauce to compensate for the missing pork fat. My vegetarian friend Sarah requests these for every potluck, and honestly, I might like them better than the original.
Spicy Sichuan Variation: Add 1 tablespoon of Sichuan peppercorn oil and 1 teaspoon of chili bean paste (doubanjiang) to the filling. Serve with a dipping sauce made with black vinegar, chili oil, and minced garlic. The numbing heat is addictive—I made a batch for a game night and they were gone in 10 minutes.
Shrimp and Pork Combo: Replace half the ground pork with finely chopped raw shrimp. The shrimp adds a sweetness and texture that feels extra special for company. Just make sure to pat the shrimp dry before chopping so the filling doesn’t get watery.
Gluten-Free Option: Use gluten-free all-purpose flour blend (look for one with xanthan gum) for the wrappers, or use store-bought gluten-free dumpling wrappers. The texture will be slightly different—a bit more delicate—but the flavor is still fantastic. Tamari or coconut aminos work as a gluten-free soy sauce substitute.
Serving & Storage Suggestions
These potstickers are best served immediately, fresh from the pan, with that glorious crispy bottom still intact. Arrange them on a large platter with the dipping sauce in a small bowl in the center. Garnish with extra chopped scallions and a sprinkle of sesame seeds for visual appeal. Your guests will be fighting over the crispiest ones.
For a dinner party spread, serve these alongside a simple cucumber salad (thinly sliced cucumbers with rice vinegar, sugar, and chili flakes) and some steamed edamame. The cool, crunchy salad balances the rich, savory potstickers perfectly. If you’re serving a crowd, I recommend making a double batch and keeping the cooked potstickers warm in a 200°F oven on a wire rack set over a baking sheet (this prevents the bottoms from getting soggy).
Storage: Uncooked potstickers freeze beautifully. Arrange them in a single layer on a parchment-lined baking sheet and freeze until solid (about 2 hours), then transfer to a freezer bag. They’ll keep for up to 3 months. Cook directly from frozen, adding 1-2 minutes to the steaming time.
Reheating: Leftover cooked potstickers (if you have any) reheat best in a skillet with a splash of water and a lid over medium heat. Microwave works in a pinch but the bottoms won’t stay crispy. The flavors actually deepen overnight—I’ve been known to eat cold potstickers straight from the fridge the next morning, and I’m not ashamed.
Nutritional Information & Benefits
Per serving (4 potstickers, without dipping sauce): approximately 320 calories, 18g protein, 28g carbohydrates, 15g fat, 4g saturated fat, 55mg cholesterol, 680mg sodium, 2g fiber, 2g sugar.
These potstickers offer more than just great taste. Pork is a good source of B vitamins, particularly thiamine and B12, which support energy metabolism. Chives belong to the allium family and contain antioxidants that may support heart health. Ginger has anti-inflammatory properties, and garlic is well-known for its immune-supporting compounds.
For those watching their intake, this recipe is naturally dairy-free and can be made gluten-free with the substitutions mentioned above. The portion size is easy to control—four potstickers make a satisfying appetizer serving, while eight to ten work as a main course. I personally love that I can serve these to guests with different dietary needs without anyone feeling left out.
Conclusion
These crispy pork and chive potstickers are more than just an appetizer—they’re the dish that turns a regular gathering into something memorable. I’ve made them for birthday parties, holiday dinners, and quiet Tuesday nights when I needed a little comfort. Every time I hear that sizzle in the pan, I think of Mrs. Chen’s kitchen and the way she’d smile when I managed to fold a dumpling without tearing it. This recipe is my way of keeping that feeling alive, and I hope it becomes a tradition in your kitchen too.
Don’t be afraid to make these your own. Add more ginger if you love the kick, double the chives if you’re a herb fanatic, or experiment with different fillings once you’re comfortable with the folding technique. The first time you pull a pan of perfectly golden potstickers from the stove and watch your guests’ faces light up, you’ll understand why I keep coming back to this recipe.
I’d love to hear how yours turn out! Drop a comment below and let me know if you tried any variations, or tag me in your photos when you serve these at your next gathering. Happy cooking, and don’t forget to save that dipping sauce recipe—you’re going to want it on everything.
Frequently Asked Questions
Can I use store-bought wrappers instead of making my own?
Absolutely! Store-bought round dumpling wrappers from the refrigerated section work perfectly. Just look for ones that are about 3.5 inches in diameter. You’ll save about an hour of prep time, and the results are still fantastic. I use homemade wrappers when I’m trying to impress, but store-bought for weeknight dinners.
Why did my potstickers stick to the pan?
This usually happens for one of three reasons: your pan wasn’t hot enough when you added the oil, you didn’t use enough oil, or you tried to flip them too early. Make sure the oil is shimmering before adding the potstickers, and let them cook undisturbed for the full 2-3 minutes during the searing phase. A well-seasoned cast iron pan or quality non-stick skillet makes a big difference.
Can I make these ahead of time for a party?
Yes! Assemble the potstickers up to 24 hours in advance and keep them covered in the refrigerator on a parchment-lined baking sheet. You can also freeze them for up to 3 months. When you’re ready to cook, just add 1-2 minutes to the steaming time if cooking from frozen. Your guests will think you spent all day in the kitchen.
My filling came out dry. What went wrong?
The most common culprit is using lean ground pork (like 93/7). Stick with 80/20 ground pork for the juiciest results. Another possibility is overmixing the filling, which can make it dense and dry. Mix just until combined. Finally, make sure you’re not overcooking the potstickers—the filling should reach 160°F internal temperature, but anything beyond that starts drying out.
What’s the best dipping sauce for these potstickers?
The classic combination is soy sauce, rice vinegar, and a splash of sesame oil with minced garlic. I also love a spicy version with chili oil and black vinegar. For a crowd, I set out a few different options so guests can customize. My personal favorite is a simple mix of 3 parts soy sauce, 1 part rice vinegar, and a drizzle of chili oil with fresh scallions on top.
Pin This Recipe!
Guest Favorite Crispy Pork & Chive Potstickers: Best Homemade Dumplings
- Total Time: 1 hour 45 minutes
- Yield: 4 servings (4 potstickers per serving) 1x
Description
These homemade potstickers feature a juicy pork and chive filling wrapped in a tender, chewy dough, pan-fried to golden perfection. Perfect for entertaining, they can be assembled ahead of time and cooked fresh for a crowd-pleasing appetizer that disappears every time.
Ingredients
- 1 pound ground pork (80/20 blend)
- 2 cups fresh chives, finely chopped
- 3 cloves garlic, minced
- 1 tablespoon fresh ginger, grated
- 2 tablespoons soy sauce
- 1 tablespoon sesame oil (toasted)
- 1 teaspoon sugar
- 1/4 teaspoon white pepper
- 1 egg white
- 2 cups all-purpose flour
- 1/2 cup warm water (about 110°F)
- 1/2 teaspoon salt
- 1 tablespoon vegetable oil (for dough)
- 2 tablespoons vegetable oil (for pan-frying)
- 1/3 cup water (for steaming)
- 3 tablespoons soy sauce (for dipping sauce)
- 1 tablespoon rice vinegar (unseasoned)
- 1 teaspoon sesame oil (for dipping sauce)
- 1 teaspoon chili oil or sriracha (optional)
- 1 teaspoon sugar (for dipping sauce)
- 1 clove garlic, minced (for dipping sauce)
- 1 tablespoon chopped scallions (for garnish)
Instructions
- Make the dough: In a large bowl, whisk together flour and salt. Make a well in the center and pour in warm water and vegetable oil. Stir with chopsticks or a fork until a shaggy dough forms. Turn out onto a lightly floured surface and knead for about 8 minutes until smooth and elastic. Shape into a ball, wrap in plastic wrap, and let rest at room temperature for 30 minutes.
- Prepare the filling: While dough rests, combine ground pork, chopped chives, minced garlic, grated ginger, soy sauce, sesame oil, sugar, white pepper, and egg white in a large bowl. Mix with your hands until just combined. Cover and refrigerate until ready to assemble.
- Roll the wrappers: Divide rested dough into 4 equal pieces. Keep unused pieces covered with a damp towel. Roll one piece into a 1-inch thick log, then cut into 8 equal pieces (about 32 total). Roll each piece into a ball, flatten into a disk, then roll into a 3.5-inch circle about 1/16 inch thick, with edges slightly thinner than center. Keep finished wrappers covered with a damp paper towel.
- Assemble the potstickers: Place a wrapper in your palm. Spoon about 1 tablespoon of filling into the center. Dip your finger in water and moisten the edge of the wrapper. Fold in half to create a half-moon shape and pinch the top edge to seal. Starting from one end, pleat the edge by folding small sections toward the center, pressing firmly to seal (4-5 pleats). Set on a parchment-lined baking sheet and cover with a damp towel. Repeat with remaining wrappers and filling.
- Cook the potstickers: Heat 1 tablespoon vegetable oil in a skillet over medium-high heat until shimmering. Place potstickers flat-side down in the pan, spacing 1/2 inch apart. Cook undisturbed for 2-3 minutes until bottoms are golden brown. Carefully add 1/3 cup water to the pan, immediately cover with lid, and reduce heat to medium. Steam for 5-6 minutes until water mostly evaporates and wrappers are translucent. Remove lid, increase heat to medium-high, and cook 1-2 minutes to re-crisp bottoms…
- Make the dipping sauce: Combine 3 tablespoons soy sauce, 1 tablespoon rice vinegar, 1 teaspoon sesame oil, 1 teaspoon chili oil or sriracha (optional), 1 teaspoon sugar, and 1 clove minced garlic. Garnish with chopped scallions.
Notes
Salt the chopped chives with a pinch of salt and let sit for 10 minutes, then squeeze out excess liquid before adding to the filling to prevent sogginess. Use 80/20 ground pork for juiciest results. Don’t overfill wrappers—a heaping tablespoon is plenty. Keep assembled potstickers covered with a damp towel to prevent drying. For freezing, arrange uncooked potstickers in a single layer on a parchment-lined baking sheet, freeze until solid (about 2 hours), then transfer to a freezer bag for up to 3 months. Cook from frozen, adding 1-2 minutes to steaming time.
- Prep Time: 1 hour 15 minutes
- Cook Time: 12 minutes per batch
- Category: Appetizer
- Cuisine: Chinese
Nutrition
- Serving Size: 4 potstickers
- Calories: 320
- Sugar: 2
- Sodium: 680
- Fat: 15
- Saturated Fat: 4
- Carbohydrates: 28
- Fiber: 2
- Protein: 18
Keywords: potstickers, dumplings, pork and chive, homemade dumplings, crispy potstickers, Chinese appetizer, party appetizer, make-ahead appetizer