
My son came home from school one Tuesday with a half-eaten store-bought lunch kit, the cheese already sweating through its wrapper and the crackers reduced to dust. He pushed it across the counter and said, “Mom, this is sad.” And honestly, he was right. Those plastic trays with their processed meat and waxy cheese had been convenient, sure, but they were also kind of depressing. I remember staring at that sad little kit and thinking, I can absolutely do better than this. And I could do it in about the same amount of time it takes to wrestle open one of those shrink-wrapped packages.
That night, I pulled out a few bento-style containers I’d bought on a whim and never used. I sliced some decent turkey breast from the deli counter, cubed a block of cheddar I actually liked eating, and grabbed a handful of whole-grain crackers. The next morning, I packed it all up with a few grape tomatoes and a tiny container of mustard. He came home that afternoon, container empty, and said, “Can you make that again tomorrow?” That was five years ago. I haven’t bought a single store-bought lunch kit since.
This Easy Homemade Turkey & Cheese Lunchable isn’t about being fancy or complicated. It’s about taking something that already works and making it taste better, cost less, and feel like a real meal instead of a packaged compromise. It’s the kind of lunch that makes you feel good about what you’re feeding your family — or yourself, honestly, because these are just as perfect for your own workday lunch.
Why You’ll Love This Recipe
Let me tell you why this simple little lunch has completely changed how we do weekday meals in my house. It’s not just about saving money, though that’s a nice bonus.
- Cost-Effective: One batch of these homemade lunch kits costs about half of what you’d pay for four store-bought versions. And you’re getting better quality ingredients for less money. That’s a win I’ll take any day.
- Totally Customizable: Picky eater? No problem. You can swap out the turkey for ham, roast beef, or even leftover grilled chicken. Don’t like cheddar? Try provolone, gouda, or mozzarella. This recipe is more of a framework than a strict set of rules.
- Healthier Without Trying: You control the sodium, the preservatives, and the portion sizes. Real cheese instead of “cheese product.” Actual turkey instead of mechanically separated mystery meat. Your body will thank you.
- Prep in 10 Minutes: I’m not kidding. Once you’ve done it a couple times, you can throw together a week’s worth of lunches in under ten minutes flat. That’s faster than standing in line at the deli counter.
- No Special Equipment: You don’t need fancy bento boxes or compartmentalized containers, though they’re nice. A few small containers or even reusable silicone cups in a regular lunchbox work perfectly.
This recipe came out of a real need — the need to stop throwing money at mediocre lunches and start packing something my kid would actually eat. And it worked. It worked so well that I started making them for myself too. There’s something deeply satisfying about opening your lunch at work and seeing real food instead of a plastic tray with a peel-back lid.
What Ingredients You Will Need
This recipe uses simple, straightforward ingredients that you can find at any grocery store. The beauty of it is that you can mix and match based on what you like or what’s on sale.
- Turkey Breast (deli-sliced, about 8-12 ounces): I prefer oven-roasted or honey-roasted turkey from the deli counter. Ask for it sliced about medium-thick, not paper thin. You want slices that hold up when you roll or fold them. My go-to is Boar’s Head or the store-brand oven-roasted if they slice it fresh. Avoid the pre-packaged stuff if you can — it’s usually higher in sodium and has a weird texture.
- Cheddar Cheese (block, about 8 ounces): Buy a block of good cheddar and cut it yourself. Sharp or medium cheddar works best. Pre-shredded or pre-sliced cheese has anti-caking agents that make it taste a little off. A sharp white cheddar from the deli section is my personal favorite for these.
- Whole-Grain Crackers (about 1-2 cups): I use whole-wheat Ritz-style crackers or mini saltines. You can also use rice crackers, wheat thins, or even pretzel thins. The key is finding something sturdy enough to hold the cheese and turkey without crumbling.
- Fruit (optional but recommended): A small apple, a handful of grapes, some berries, or a clementine. Something sweet to balance the savory. I usually pack red grapes because they don’t bruise and my kid actually eats them.
- Vegetable (optional but recommended): Grape tomatoes, baby carrots, cucumber slices, or bell pepper strips. A little crunch and color make the lunch feel complete.
- Condiment (optional): A small container of mustard, honey mustard, ranch dressing, or even a little hummus. My son loves honey mustard with his turkey. I’m a spicy brown mustard person myself.
- Optional Add-Ins: Pickle spears, olives, a small handful of nuts, some dark chocolate chips for a tiny treat. You can really go wild here.
Equipment Needed
The equipment list for this is almost comically short. You probably already own everything you need.
- Cutting board and sharp knife: For cubing the cheese and slicing any fruit or veggies. A good chef’s knife makes quick work of a block of cheddar.
- Bento-style containers or compartmentalized lunch boxes: I use a set of three-compartment containers I found at Target for about ten bucks. They keep everything separate so crackers don’t get soggy. You can also use small silicone muffin cups inside a regular lunch container.
- Small condiment containers: These little screw-top or snap-lid containers are perfect for mustard, ranch, or hummus. I bought a pack of 12 for like six dollars on Amazon.
- Lunch bag or box with an ice pack: Since we’re using real cheese and deli meat, you’ll want to keep things cool until lunchtime. A simple insulated lunch bag with a reusable ice pack works great.
That’s it. No special gadgets, no fancy tools. Just basic kitchen stuff and a little bit of organization.
Preparation Method
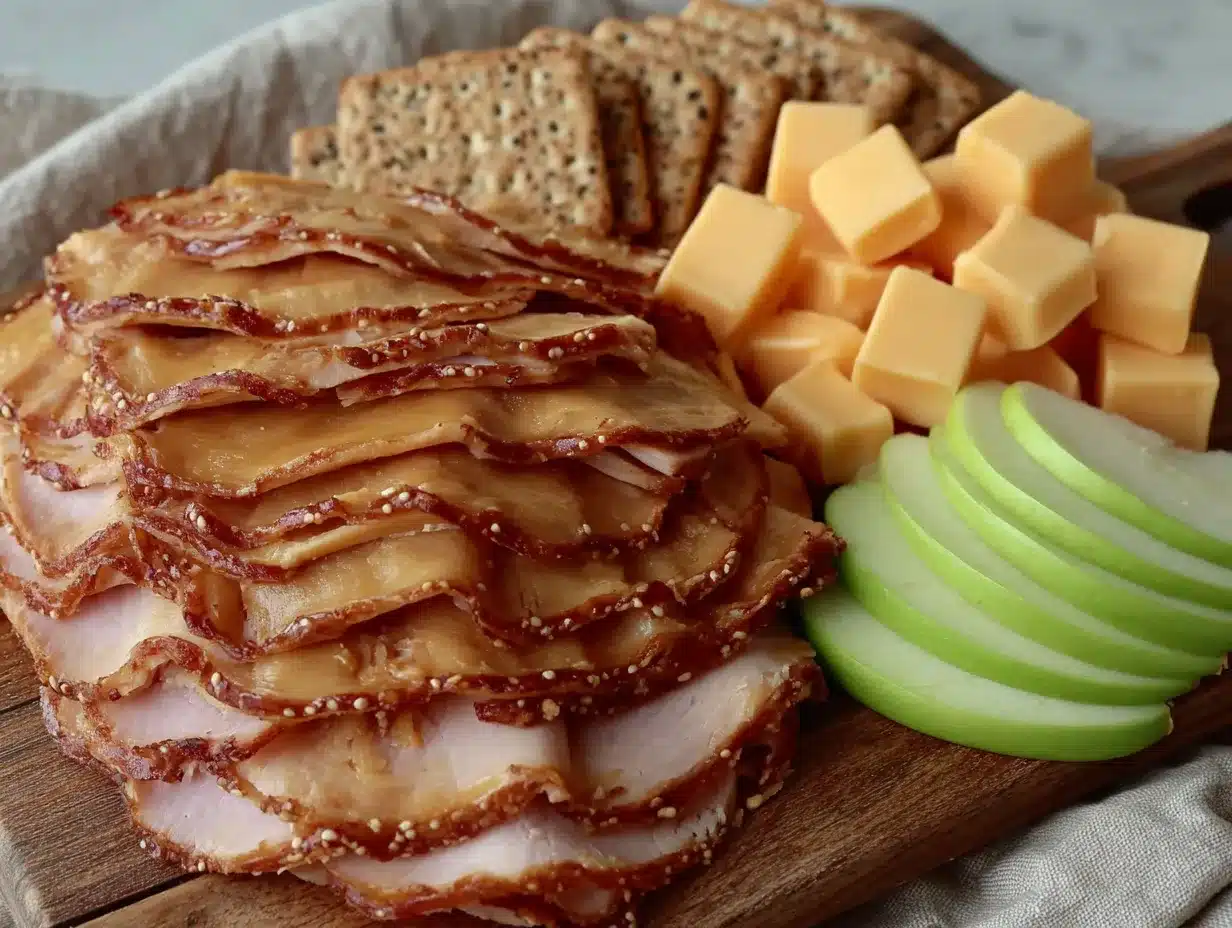
This is about as straightforward as cooking gets, but let me walk you through my exact method so you get the best results.
- Prep your cheese first. Take your block of cheddar and cut it into roughly 1/2-inch cubes. You want pieces that are big enough to feel substantial but small enough to eat in one or two bites. I usually get about 20-24 cubes from an 8-ounce block. If you’re using string cheese instead, just pull it apart into strips.
- Prep your turkey. Lay your turkey slices flat on the cutting board. If they’re large, cut them in half or into thirds. You want pieces that are easy to pick up and either roll up or fold onto a cracker. I usually roll each slice into a little cylinder and then cut it in half crosswise. That gives you little turkey roll-ups that are perfect for little hands.
- Wash and prep your produce. Rinse your grapes or berries and pat them dry. If you’re using an apple, slice it and give the slices a quick squeeze of lemon juice to keep them from browning. Cherry tomatoes just need a rinse. Baby carrots can go straight in. If you’re using cucumber, slice it into rounds about 1/4-inch thick.
- Portion your crackers. Count out about 10-12 crackers per lunch. You want enough to make several mini sandwiches but not so many that they crowd the container and break. I put them in the largest compartment of the container.
- Assemble the containers. Put the crackers in the largest compartment. Put the turkey and cheese together in another compartment. Put the fruit and veggies in the third compartment. If you’re including a condiment, put it in a small container and nestle it in wherever it fits.
- Pack it up. If you’re making these for the week, leave the containers open in the fridge overnight so everything stays fresh. In the morning, just snap on the lids, grab an ice pack, and go. The crackers stay perfectly crisp because they’re not touching anything moist.
A quick note on timing — once you get into a rhythm, you can prep five lunches in about eight minutes. I do it on Sunday evenings while I’m waiting for water to boil or something to finish in the oven. It’s the easiest meal prep I do all week.
Cooking Tips & Techniques
Okay, so there’s no actual cooking here, but I’ve learned a few things over the years that make these lunches better.
Keep things dry. This is the most important rule. Moisture is the enemy of a good lunchable. Make sure your fruit is completely dry before you put it in the container. Pat your grapes dry with a paper towel. If you’re using cucumber, lay the slices on a paper towel for a minute to draw out excess moisture. Nobody wants soggy crackers.
Cut cheese at room temperature. Cold cheese from the fridge is hard and crumbly. Let your block of cheddar sit out for about 15 minutes before you cut it. It’ll slice much more cleanly and you won’t end up with a pile of cheese dust. I learned this the hard way after ruining half a block of really good gouda.
Roll your turkey. Flat slices of turkey are fine, but rolled-up slices are more fun and easier to eat. Just roll each slice into a tight cylinder and then cut it into two or three pieces. They look like little pinwheels and kids love them. This is actually a technique I picked up from making turkey ranch pinwheel sandwiches, and it works perfectly here too.
Don’t skip the ice pack. I know it’s tempting to just throw the container in a lunch bag and go, but real cheese and deli meat need to stay cold. A good ice pack will keep everything safe and fresh until lunchtime. If you’re packing these for an adult work lunch, same rule applies.
Prep in an assembly line. Lay out all your containers, then go through each step for all of them at once. Cut all the cheese first, then all the turkey, then all the fruit. It’s way faster than doing one lunch at a time. I set up a little assembly line on my kitchen counter and it takes less than ten minutes to do five lunches.
Variations & Adaptations
This recipe is endlessly adaptable. Here are some of my favorite variations.
The Italian Version: Swap the turkey for salami or prosciutto, use provolone or mozzarella, and add a few pepperoncini and a little container of balsamic vinaigrette for dipping. It’s like an antipasto plate in lunch form. I make these for myself when I want something a little more grown-up.
The Vegetarian Version: Skip the meat entirely and double up on the cheese. Add some hummus or a hard-boiled egg for protein. I also like to add a few marinated artichoke hearts or roasted red peppers for extra flavor. My vegetarian friend requests these whenever she comes over for a picnic.
The Low-Carb Version: Replace the crackers with cucumber rounds or bell pepper strips. Use them as vessels for the cheese and turkey. It’s surprisingly satisfying and keeps the carbs way down. I do this for myself sometimes when I’m trying to eat lighter.
The Breakfast Version: Use the same concept but with breakfast-friendly ingredients — little pancakes or waffles instead of crackers, sausage links instead of turkey, and cheese cubes. Add some fruit on the side. It’s a fun breakfast-for-lunch option that kids absolutely love.
The Snack Box Version: Turn it into a snack box with a little bit of everything — cheese, crackers, fruit, veggies, a few nuts, some dark chocolate chips, and maybe a small cookie. It’s perfect for road trips or afternoon snacking.
If you want to get really creative, you can even use this same concept to build a healthy high-protein bento box with turkey and hummus for a more filling option that’s still just as easy to pack.
Serving & Storage Suggestions
These lunchables are best served cold, straight from the fridge. The contrast between the cool cheese, the room-temperature crackers, and the crisp fruit is part of what makes them so satisfying.
For serving: If you’re packing these for a school lunch, just put the container in the lunch box with an ice pack and send it on its way. For a home lunch, arrange everything on a small plate or board and let everyone build their own combinations. It’s surprisingly fun for adults too — I’ve served these at casual get-togethers as a kind of DIY snack board.
For storage: You can assemble these up to four days in advance. Keep them in the refrigerator with the lids on. The crackers will stay crisp as long as they’re in a separate compartment from any moist ingredients. I usually make five on Sunday and we eat them through Thursday. They’re still perfect on day four.
For freezing: I don’t recommend freezing assembled lunchables. The cheese gets crumbly and the fruit turns to mush when it thaws. But you can freeze the turkey and cheese separately if you buy in bulk, then assemble fresh each week.
Reheating: There’s no reheating needed here. These are meant to be eaten cold. If you want a warm lunch, this isn’t the recipe for you. But honestly, that’s part of the appeal — no microwaves, no waiting, just open and eat.
Nutritional Information & Benefits
Here’s the thing about these homemade lunchables — they’re actually pretty good for you. Here’s a rough breakdown for one serving (based on 3 ounces of turkey, 2 ounces of cheese, and about 10 crackers with a serving of fruit).
Estimated Nutritional Values (per serving):
- Calories: 380-450 (depending on cheese and cracker choices)
- Protein: 28-32 grams
- Carbohydrates: 25-30 grams
- Fat: 18-22 grams
- Fiber: 3-5 grams
- Sodium: 800-1000 mg (varies by deli meat)
Health Benefits: The turkey provides lean protein that keeps you full and focused. The cheese offers calcium and protein. The fruit adds vitamins and natural sweetness. The whole-grain crackers provide fiber and complex carbohydrates for steady energy. Compared to a store-bought lunch kit, you’re getting less sodium, no preservatives, and about twice the protein.
Dietary Considerations: This recipe can easily be made gluten-free by using gluten-free crackers. It’s naturally low in sugar (especially if you skip the sweetened fruit). If you’re watching sodium, look for low-sodium deli turkey and cheese. For a lower-fat option, use reduced-fat cheese and lean turkey breast.
Conclusion
Honestly, this Easy Homemade Turkey & Cheese Lunchable has been one of the most practical, money-saving, sanity-preserving recipes I’ve ever started making. It turned a daily frustration into something I actually look forward to. My kid eats his lunch without complaint. I save money every single week. And I feel good knowing exactly what’s going into our bodies.
The best part? You can start making these today with stuff you probably already have in your fridge. Don’t overthink it. Grab some turkey, a block of cheese, and your favorite crackers. Throw in whatever fruit or veggies are hanging around. Pack it all up in a container. That’s it. You’ve just made a better lunch than anything you can buy in a plastic tray.
I’d love to hear how yours turn out. What combinations did you try? Did your kids actually eat the vegetables? Drop a comment below and let me know. And if you’re looking for more easy lunch ideas, check out my kindergarten lunch box cheese quesadilla wedges or these creamy pasta salad lunch boxes with berries for more inspiration. Happy packing!
Frequently Asked Questions
How long do homemade lunchables stay fresh in the fridge?
These will stay fresh for up to four days in the refrigerator, as long as you keep the containers sealed and use fresh ingredients. The crackers stay crisp because they’re in a separate compartment. By day five, the fruit might start to get a little soft, so I usually only make four or five at a time.
Can I use pre-sliced cheese instead of cutting my own?
You can, but I don’t recommend it. Pre-sliced cheese has anti-caking agents that affect the texture and flavor. Plus, cubes are more fun to eat and stack better on crackers. A block of good cheddar that you cut yourself makes a noticeable difference in taste and texture.
What’s the best way to keep crackers from getting soggy?
Keep them in a completely dry, separate compartment from anything moist. Don’t put them in the same compartment as grapes, tomatoes, or cucumber. If your container only has one big compartment, use a small silicone cupcake liner or a piece of parchment paper as a barrier. Also, make sure your fruit is completely dry before packing.
Can I use leftover cooked turkey instead of deli meat?
Absolutely. Leftover roasted turkey breast works beautifully in these. Just slice or shred it and use it the same way you would deli turkey. It might be a little more tender than deli slices, but it’s even healthier since you control the seasoning and sodium. I do this after Thanksgiving with great results.
Are these lunchables safe for school nut-free policies?
Yes, as long as you don’t add any nut-containing ingredients. The basic recipe of turkey, cheese, crackers, and fruit is naturally nut-free. Just double-check your cracker ingredients — some whole-grain crackers are processed on shared equipment with nuts. If your school has strict policies, look for certified nut-free crackers.
Pin This Recipe!

Easy Homemade Turkey & Cheese Lunchable
- Total Time: 10 minutes
- Yield: 4 servings 1x
Description
A quick, customizable, and healthier alternative to store-bought lunch kits, featuring deli turkey, cubed cheddar, whole-grain crackers, and fresh fruit or veggies, all packed in a bento-style container.
Ingredients
- 8–12 ounces deli-sliced turkey breast (oven-roasted or honey-roasted)
- 8 ounces block cheddar cheese (sharp or medium)
- 1–2 cups whole-grain crackers (e.g., whole-wheat Ritz-style or mini saltines)
- 1 small apple, handful of grapes, berries, or clementine (optional)
- Grape tomatoes, baby carrots, cucumber slices, or bell pepper strips (optional)
- Small container of mustard, honey mustard, ranch dressing, or hummus (optional)
- Pickle spears, olives, nuts, or dark chocolate chips (optional)
Instructions
- Cut the block of cheddar into 1/2-inch cubes (about 20-24 cubes from 8 ounces). Let cheese sit at room temperature for 15 minutes before cutting for cleaner slices.
- Lay turkey slices flat and cut into halves or thirds. Roll each slice into a tight cylinder and cut crosswise into 2-3 pieces to make turkey roll-ups.
- Wash and prep produce: rinse grapes or berries and pat dry; slice apple and toss with lemon juice to prevent browning; rinse cherry tomatoes; slice cucumber into 1/4-inch rounds.
- Portion about 10-12 crackers per lunch into the largest compartment of a bento-style container.
- Assemble containers: place crackers in largest compartment, turkey and cheese together in another, and fruit/veggies in the third. Add condiment in a small container if using.
- Pack in a lunch bag with an ice pack to keep cool until lunchtime. For weekly prep, leave containers open in the fridge overnight, then seal and pack in the morning.
Notes
Keep ingredients dry to prevent soggy crackers. Pat fruit dry before packing. Use an ice pack to keep cheese and deli meat safe. Assemble up to 4 days in advance. For best results, cut cheese at room temperature.
- Prep Time: 10 minutes
- Cook Time: 0 minutes
- Category: Lunch
- Cuisine: American
Nutrition
- Serving Size: 1 lunch kit
- Calories: 380450
- Sugar: 1015
- Sodium: 8001000
- Fat: 1822
- Saturated Fat: 1012
- Carbohydrates: 2530
- Fiber: 35
- Protein: 2832
Keywords: homemade lunchable, turkey and cheese lunch, bento box lunch, healthy lunch for kids, easy lunch prep, no-cook lunch


