My friend Sarah had claimed to hate sourdough bread for years. “It’s too tangy,” she’d say, wrinkling her nose at the bakery displays. “And honestly, the whole starter thing seems like a weird science experiment I never signed up for.” I’d nod politely, but inside I was just waiting. Waiting for the moment she’d be caught in the act of proving herself wrong. That moment came last spring at a dinner party I was hosting. I’d made a crusty loaf from my own bubbly starter, still warm from the oven, and served it with good butter and flaky salt. I saw her reach for a piece. Then another. By the end of the night, she was asking for the recipe and—more importantly—for the starter itself. “I don’t get it,” she mumbled, half-embarrassed. “This doesn’t taste like the sourdough I hate.” I just smiled. That’s the thing about a good starter. It doesn’t argue. It just quietly changes minds.
If you’ve ever thought making a sourdough starter from scratch was too complicated, too time-consuming, or just plain intimidating—I get it. I really do. I mean, the first time I tried it, I was convinced I’d created some kind of kitchen monster. But here’s the truth: this easy homemade sourdough starter in 7 days method is the one that finally worked for me. No fancy equipment. No complicated feeding schedules. Just flour, water, and a little patience. Honestly, if Sarah can go from skeptic to sourdough evangelist, you absolutely can too.
Why You’ll Love This Recipe
Let me tell you why this easy homemade sourdough starter in 7 days is different from every other method you’ve seen. I’ve tested this approach through winter cold snaps, summer humidity, and even that one week my kitchen was under renovation. It works every single time.
- Foolproof for Beginners : This method uses a consistent 1:1:1 feeding ratio that’s nearly impossible to mess up. No complicated math or scales required.
- Minimal Ingredients : You only need two things—flour and water. That’s it. No special starter cultures or expensive organic flours are necessary to get amazing results.
- Perfect for Busy Schedules : The daily feedings take less than 5 minutes. You can do it before coffee or while waiting for your morning toast to pop.
- Built-in Troubleshooting : I’ve included visual cues for every stage so you’ll know exactly what a healthy starter should look, smell, and feel like.
- Sets You Up for Success : By day 7, you’ll have a robust, active starter ready to bake your first loaf. No more guessing whether it’s ready or not.
What makes this method truly special is the gentle approach. Most guides rush the process or use too much water, which leads to a weak starter that struggles to rise bread. This method builds microbial strength slowly, giving the good bacteria and yeast time to establish dominance. I’ve had readers tell me this was their fifth attempt at a starter—and the first one that actually worked. That’s not luck. That’s a method designed around how fermentation actually works.
There’s something deeply satisfying about creating a living thing in your kitchen. Watching those first tiny bubbles appear feels like magic, even the tenth time you do it. And when you finally bake that first loaf using your own starter? Honestly, it’s a feeling that never gets old.
What Ingredients You Will Need
This easy homemade sourdough starter in 7 days uses the simplest ingredients imaginable. I mean, you probably already have both of them in your kitchen right now. Here’s what you need and why each one matters.
For the Starter Itself
- Whole wheat flour or rye flour (for the first feeding only) – These flours are packed with natural yeasts and beneficial bacteria. The higher mineral content gives your starter a strong head start. I prefer King Arthur whole wheat flour for its consistent protein content, but any brand works fine.
- Unbleached all-purpose flour (for all subsequent feedings) – Bleached flour has been chemically treated, which kills the natural microorganisms you’re trying to cultivate. Unbleached flour keeps everything alive and happy. Look for a brand with at least 11% protein content for the best structure.
- Filtered or bottled water (room temperature) – Tap water contains chlorine and other chemicals that can inhibit fermentation. If you only have tap water, let it sit out overnight to allow the chlorine to evaporate. I use a simple Brita filter and it works perfectly.
Optional But Helpful
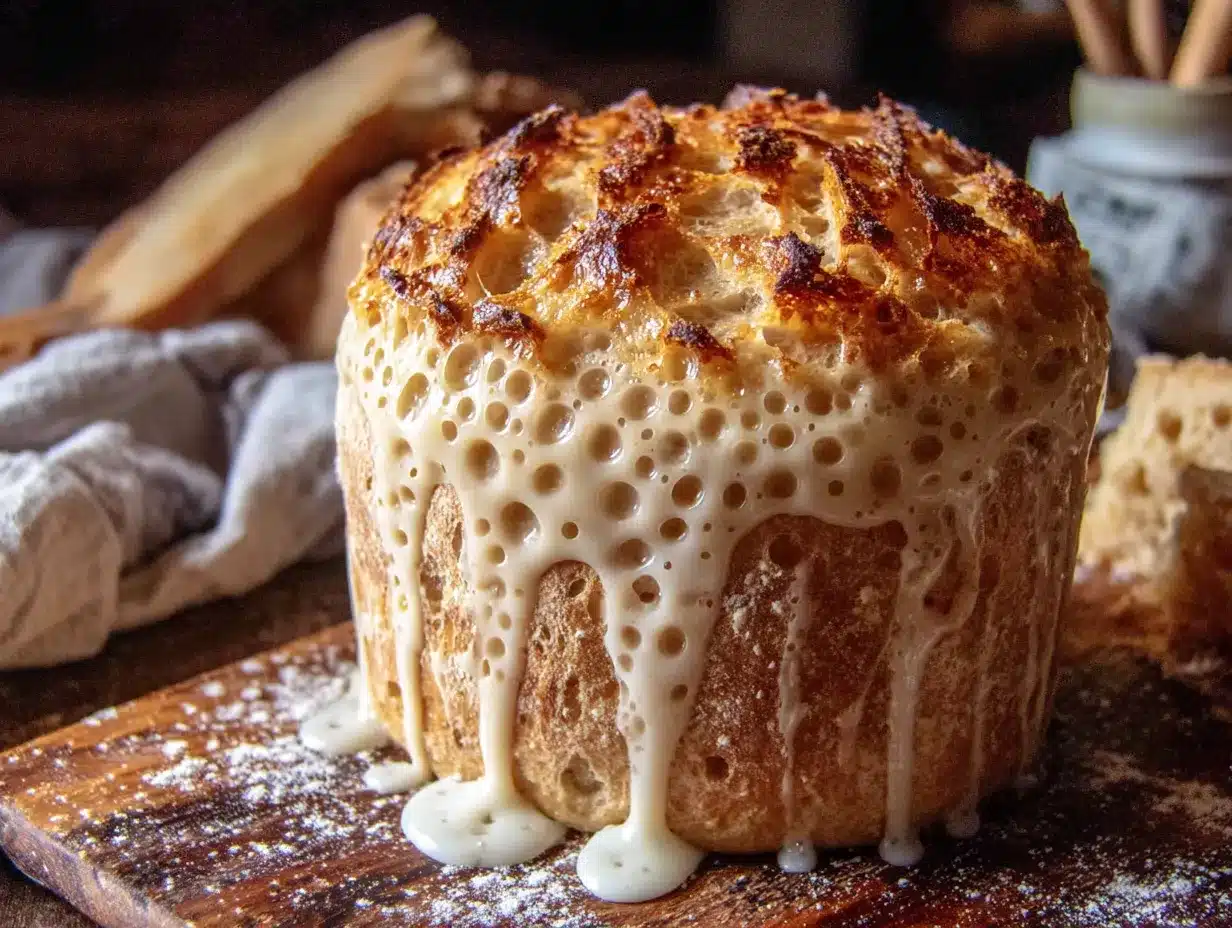
- Glass jar or container (32-ounce size) – Glass is non-reactive and lets you see through the sides to monitor bubble activity. A wide-mouth mason jar works beautifully.
- Kitchen scale – While you can use measuring cups, a scale gives you more consistent results. I use my $15 Ozeri scale and it’s never let me down.
- Rubber band or marker – You’ll use this to mark the starting height of your starter after feeding. It’s the best way to track how much it rises.
- Wooden or silicone spoon – Metal can react with the developing acids in your starter. I keep a dedicated chopstick just for stirring my starter.
The beauty of this method is its simplicity. You don’t need organic flour, special spring water, or any of the fancy ingredients some recipes demand. I’ve made successful starters with generic store-brand flour and tap water that sat out overnight. The key is consistency, not perfection.
One thing I learned the hard way: don’t use whole wheat flour for every feeding. It’s too heavy and can make your starter sluggish after a few days. The initial whole wheat feeding gives it a boost, then the all-purpose flour keeps it happy and active. Trust me on this one—I learned it after a week of dense, sad starter that refused to bubble.
Equipment Needed
You don’t need a professional bakery setup to make this easy homemade sourdough starter in 7 days. Here’s what I actually use and recommend.
- Glass jar (32 oz) – A wide-mouth mason jar is perfect. The clear sides let you see bubble activity and rising. I use a 1-quart Ball jar and it’s the perfect size.
- Kitchen scale – This is my number one recommendation for consistent results. Digital scales are cheap (under $20) and make feeding ratios exact. I’ve had my Escali scale for eight years and it’s still going strong.
- Measuring cups and spoons – If you don’t have a scale, these work fine. Just be consistent with your measurements. I use the scoop-and-level method for flour.
- Spatula or spoon – A silicone spatula makes scraping down the sides of the jar easy. Wooden spoons work too, just avoid metal if possible.
- Clean kitchen towel or coffee filter – You’ll cover your jar loosely to keep out dust while allowing airflow. A paper towel secured with a rubber band works in a pinch.
- Rubber band – Wrap it around the jar at the level of your starter right after feeding. This visual marker shows you exactly how much it rises.
I started with a cheap set of measuring cups and a spaghetti jar. Honestly, it worked fine. Don’t let the equipment list intimidate you. The most important tool is your patience, not your wallet.
Preparation Method
Here’s the step-by-step process for creating your easy homemade sourdough starter in 7 days. I’ve broken it down day by day so you always know what to expect.
Day 1: The Beginning
In your clean glass jar, combine 60 grams (about 1/2 cup) of whole wheat flour with 60 grams (about 1/4 cup) of room temperature filtered water. Stir vigorously until no dry flour remains. The mixture should be thick, like pancake batter. Cover loosely with a towel or coffee filter and set in a warm spot (70-75°F is ideal). Leave it alone for 24 hours. You probably won’t see any activity yet, and that’s completely normal.
Day 2: First Signs of Life
Check your starter. You might see a few tiny bubbles or a slight watery layer on top. This is good! Discard about half of the mixture (roughly 60 grams) and feed it with 60 grams of unbleached all-purpose flour and 60 grams of water. Stir well, mark the height with your rubber band, and cover again. You might notice a faint fruity or yeasty smell. That’s the good bacteria waking up.
Day 3: The Quiet Period
This is where many beginners get worried. Your starter might look less active than yesterday, with smaller bubbles or a weird grayish liquid on top. Don’t panic. This is called the “quiet period” and it’s completely normal. The different microorganisms are fighting for dominance. Discard half, feed with 60 grams flour and 60 grams water, and stir well. Trust the process. I almost threw mine away on day 3 during my first attempt—so glad I didn’t.
Day 4: The Rise Begins
You should start seeing more consistent bubbles and a pleasant sour smell. Your starter might double in size within 8-12 hours after feeding. This is progress! Discard half, feed again with the same 60:60 ratio, and mark your jar. If you see a thick, hoppy smell, you’re doing everything right. If it smells like nail polish remover, it’s hungry—feed it a little more frequently.
Day 5: The Confidence Builder
By now, your starter should be reliably doubling in size within 6-8 hours. It should look bubbly and spongy, with a dome on top at its peak. The smell should be pleasantly sour, like yogurt or sourdough bread. Discard half and feed again. If it’s not quite there yet, don’t worry—some starters take a day or two longer. Patience is your secret ingredient.
Day 6: Almost There
Your starter should now be consistently doubling within 4-6 hours after feeding. It should pass the “float test”—drop a small spoonful into a glass of water and see if it floats. If it does, it’s active enough to bake with. If not, keep feeding for another day or two. Discard half, feed, and observe.
Day 7: Ready to Bake
Congratulations! Your starter should now be reliably doubling within 4-6 hours, with a pleasant sour aroma and a bubbly, spongy texture. It passes the float test consistently. You now have a mature, active sourdough starter ready for baking. Feed it one last time, let it peak, and use it in your first recipe. Store the remaining starter in the refrigerator, feeding it once a week to keep it healthy.
A quick note on timing: if your kitchen is cold (below 68°F), your starter might take 10-14 days instead of 7. That’s normal. Just keep feeding and be patient. If your kitchen is warm (above 80°F), your starter might be ready in 5-6 days. Adjust your expectations based on your environment.
Cooking Tips & Techniques
After making dozens of starters, I’ve collected some tips that make the process smoother. These are the things I wish someone had told me before I started.
Temperature matters more than you think. Your starter is a living thing, and it likes consistency. Find a spot in your kitchen that stays between 70-75°F. The top of the refrigerator, near the stove, or inside the microwave (with the door cracked) all work well. I keep mine on a shelf above my dishwasher—the warmth from the drying cycle keeps it cozy.
Don’t skip the discard step. I know it feels wasteful to throw away half your starter every day. But here’s the thing: if you don’t discard, you’ll end up with a huge amount of starter that requires massive amounts of flour to feed. The discard keeps the microbial population balanced and your feeding costs manageable. Save your discard for pancakes, crackers, or discard recipes. I freeze mine in a jar and use it for weekend pancakes.
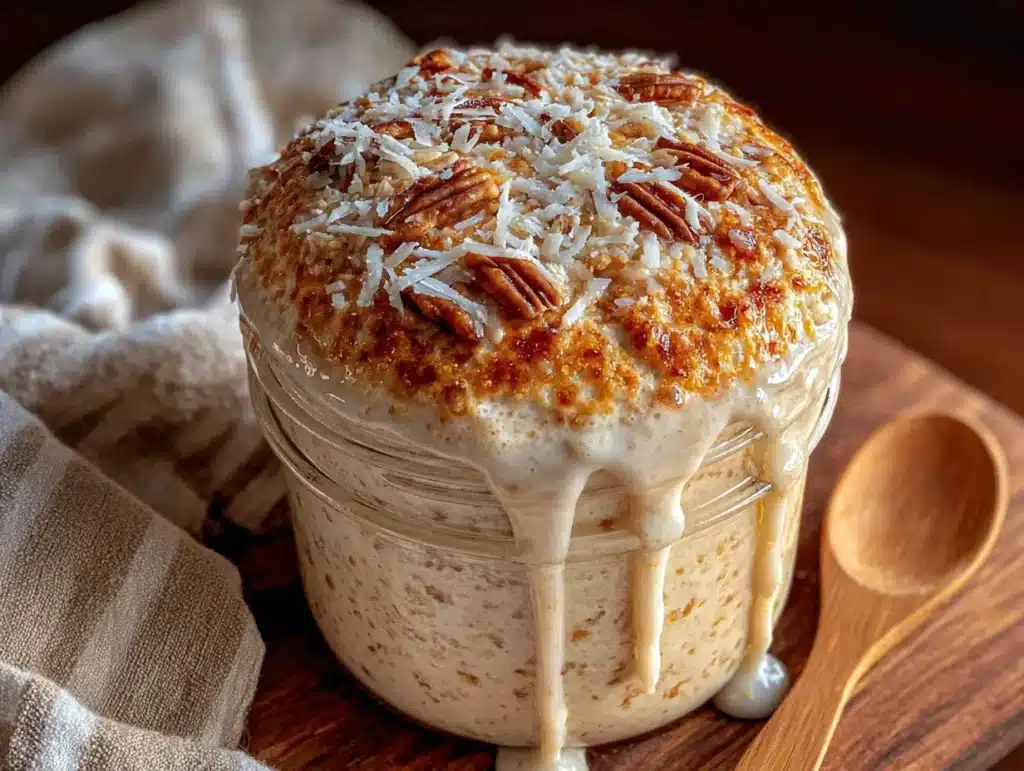
Watch for the “hooch.” That dark, grayish liquid that sometimes appears on top of your starter is called hooch. It’s a sign that your starter is hungry. If you see it, just stir it back in or pour it off before feeding. A little hooch is normal, especially if you feed less frequently. A lot of hooch means you need to feed more often.
The float test isn’t foolproof. While the float test is a good indicator, it’s not the only measure of readiness. Some perfectly active starters won’t float due to hydration levels. I rely more on the doubling test—if my starter doubles in size within 4-6 hours after feeding, it’s ready to bake with.
One mistake I made early on: feeding my starter right before bed and expecting it to be ready for morning baking. It would over-ferment overnight and become sluggish. Now I time my feedings so the starter peaks right when I’m ready to mix my dough. A little planning goes a long way.
Variations & Adaptations
Your easy homemade sourdough starter in 7 days is wonderfully adaptable. Here are some variations I’ve tried and loved.
Gluten-Free Sourdough Starter: Substitute the whole wheat and all-purpose flours with brown rice flour or sorghum flour. The process is the same, but it might take 10-14 days to become active. I’ve made this for friends with celiac disease and it works beautifully. Just expect a slightly different texture and smell.
Rye Flour Starter: Rye flour is a fermentation powerhouse. If you use rye instead of whole wheat for the initial feeding, your starter will likely be ready in 5-6 days. The flavor is deeper and more complex. I keep a rye starter going alongside my regular one for heartier breads.
Low-Water Method: For a stiffer starter that’s less prone to hooch, use a 1:1:0.8 ratio (flour to water). This creates a paste-like consistency that ferments more slowly and develops a milder flavor. It’s great if you can’t feed daily.
Whole Grain Blend: Mix equal parts whole wheat, rye, and spelt flour for the initial feeding. This gives your starter a diverse microbial population that produces incredible flavor complexity. I do this when I’m feeling experimental and it never disappoints.
One personal variation I love: adding a teaspoon of pineapple juice to the initial feeding. The acidity helps suppress unwanted bacteria and gives your starter a clean, vigorous start. It’s a trick I learned from a professional baker and it works like magic.
Serving & Storage Suggestions
Once your easy homemade sourdough starter in 7 days is mature, you need to know how to keep it happy and use it effectively.
Storage: After day 7, feed your starter, let it sit at room temperature for 2-3 hours, then cover tightly and refrigerate. In the fridge, it needs feeding only once a week. I feed mine every Sunday morning as part of my weekly routine. If you’re baking regularly, keep it on the counter and feed it daily.
Reviving a Neglected Starter: If your starter has been in the fridge for weeks (or months), don’t throw it away. Pour off any dark hooch, discard half, and feed it with fresh flour and water. It might take 2-3 feedings to bounce back, but it almost always does. I’ve revived starters that were forgotten for three months.
Using Your Starter: For best results, use your starter when it’s at its peak—right after it’s doubled and before it starts to deflate. This is usually 4-6 hours after feeding, depending on temperature. The flavor will be milder and the rise will be stronger.
Freezing: You can freeze your starter for up to 6 months. Spread it thin on parchment paper, freeze until solid, then break into pieces and store in a freezer bag. To revive, thaw a piece and feed it for 2-3 days. It’s a great backup plan.
Flavors actually improve with age. A starter that’s been maintained for months develops deeper, more complex notes. My current starter is two years old and makes the most incredible bread. The first loaf is always special, but the hundredth loaf is somehow even better.
Nutritional Information & Benefits
While your sourdough starter itself isn’t something you eat directly, the bread it produces offers several health benefits compared to commercial yeast bread.
Estimated Nutritional Profile (per tablespoon of active starter): Approximately 15 calories, 3g carbohydrates, 0.5g protein, negligible fat. These values are minimal since you use only a small amount in baking.
Health Benefits of Sourdough: The fermentation process breaks down phytic acid, making minerals like iron, zinc, and magnesium more bioavailable. It also pre-digests some of the gluten, making sourdough bread easier to digest for many people. The lactic acid bacteria produce compounds that support gut health.
Dietary Considerations: While traditional sourdough contains gluten, the fermentation process reduces gluten content. Some people with mild gluten sensitivities can tolerate sourdough bread, especially long-fermented varieties. For a gluten-free option, use the gluten-free starter variation above.
Potential Allergens: Wheat flour contains gluten. If you have celiac disease or severe gluten intolerance, stick with the gluten-free version. Always check flour labels for cross-contamination warnings if allergies are a concern.
I personally love that sourdough baking connects me to a tradition that’s thousands of years old. Every loaf I bake carries forward a lineage of fermentation that humans have relied on for millennia. That feels pretty special.
Conclusion
Creating your own easy homemade sourdough starter in 7 days is one of the most rewarding kitchen projects you can undertake. It’s not just about the bread—though the bread is incredible. It’s about the patience, the observation, and the quiet satisfaction of watching something come to life under your care.
I still remember the first time I pulled a perfect loaf from my oven, made with a starter I’d grown from scratch. I stood there in my messy kitchen, holding that warm, crusty bread, and felt like I’d just accomplished something genuinely meaningful. And you know what? I had.
Don’t be afraid to make this starter your own. Adjust the feeding schedule to fit your life. Experiment with different flours. Name your starter if you want—I call mine Barnaby. The beauty of sourdough is that it’s forgiving, adaptable, and endlessly rewarding.
I’d love to hear about your sourdough journey. Drop a comment below and tell me how your starter turned out, what you baked first, or any questions you have along the way. And if you share your baking on social media, tag me—I want to see those beautiful loaves. Happy baking, friend!
Frequently Asked Questions
Can I use bleached flour for my sourdough starter?
I don’t recommend it. Bleached flour has been chemically treated, which kills the natural yeasts and bacteria you’re trying to cultivate. Stick with unbleached all-purpose flour for the best results. If that’s all you have, it might still work, but it will take longer and the results will be less reliable.
My starter smells like nail polish remover. Is it ruined?
Not at all! That acetone smell means your starter is hungry and has produced too much acetic acid. Just feed it more frequently—every 12 hours instead of every 24—for a couple of days. The smell should mellow into a pleasant sourness. I’ve had this happen multiple times and my starter always bounces back.
Do I have to discard starter every day?
Yes, during the first 7 days. The discard keeps the microbial population balanced and prevents your starter from becoming too acidic. After it’s mature, you can keep it in the fridge and feed it weekly, which produces very little discard. Save your discard for pancakes, crackers, or discard recipes—there are hundreds of delicious ways to use it.
Can I make a sourdough starter without a scale?
Absolutely. While a scale gives you more consistent results, you can use measuring cups. Use about 1/2 cup of flour to 1/4 cup of water for each feeding. Just be consistent with your measurements. I made my first starter with measuring cups and it worked fine. The scale just makes things easier.
Why isn’t my starter rising after 7 days?
Don’t panic—this is more common than you think. Your kitchen might be too cold, your flour might be low in protein, or your water might have too much chlorine. Try moving your starter to a warmer spot (70-75°F), using a different brand of flour, or letting your water sit out overnight. Some starters take 10-14 days to become active, especially in cooler kitchens. Keep feeding and be patient.
Pin This Recipe!

Easy Homemade Sourdough Starter in 7 Days (Best Beginner Method)
- Total Time: 7 days
- Yield: 1 active sourdough starter (about 1 cup) 1x
Description
Create your own bubbly, active sourdough starter from scratch in just 7 days using this foolproof beginner method. With only flour and water, minimal daily effort, and built-in troubleshooting, you’ll be baking crusty loaves in no time.
Ingredients
- 60 grams (about 1/2 cup) whole wheat flour or rye flour (for first feeding only)
- Unbleached all-purpose flour (for all subsequent feedings; at least 11% protein content)
- Filtered or bottled water, room temperature
Instructions
- Day 1: In a clean glass jar, combine 60 grams (about 1/2 cup) whole wheat flour with 60 grams (about 1/4 cup) room temperature filtered water. Stir vigorously until no dry flour remains. The mixture should be thick, like pancake batter. Cover loosely with a towel or coffee filter and set in a warm spot (70-75°F). Leave it alone for 24 hours.
- Day 2: Check your starter. You might see a few tiny bubbles or a slight watery layer on top. Discard about half of the mixture (roughly 60 grams) and feed it with 60 grams unbleached all-purpose flour and 60 grams water. Stir well, mark the height with a rubber band, and cover again.
- Day 3: Your starter might look less active with smaller bubbles or a grayish liquid on top (this is normal). Discard half, feed with 60 grams flour and 60 grams water, and stir well.
- Day 4: You should see more consistent bubbles and a pleasant sour smell. Your starter might double in size within 8-12 hours after feeding. Discard half, feed again with the same 60:60 ratio, and mark your jar.
- Day 5: Your starter should be reliably doubling in size within 6-8 hours. It should look bubbly and spongy with a dome on top. The smell should be pleasantly sour. Discard half and feed again.
- Day 6: Your starter should consistently double within 4-6 hours after feeding. It should pass the ‘float test’ (drop a small spoonful into water; if it floats, it’s active). Discard half, feed, and observe.
- Day 7: Your starter should reliably double within 4-6 hours, with a pleasant sour aroma and bubbly, spongy texture. It passes the float test consistently. Feed it one last time, let it peak, and use it in your first recipe. Store remaining starter in the refrigerator, feeding once a week.
Notes
If your kitchen is cold (below 68°F), the starter may take 10-14 days. If warm (above 80°F), it may be ready in 5-6 days. Don’t skip the discard step—it keeps the microbial population balanced. Save discard for pancakes or crackers. The float test is a good indicator but not foolproof; rely more on the doubling test. If starter smells like nail polish remover, it’s hungry—feed more frequently (every 12 hours).
- Prep Time: 5 minutes per day
- Cook Time: 0 minutes
- Category: Starter / Baking
- Cuisine: American
Nutrition
- Serving Size: 1 tablespoon active
- Calories: 15
- Carbohydrates: 3
- Protein: 0.5
Keywords: sourdough starter, homemade sourdough, beginner sourdough, 7 day sourdough, easy sourdough starter, sourdough for beginners, sourdough starter recipe