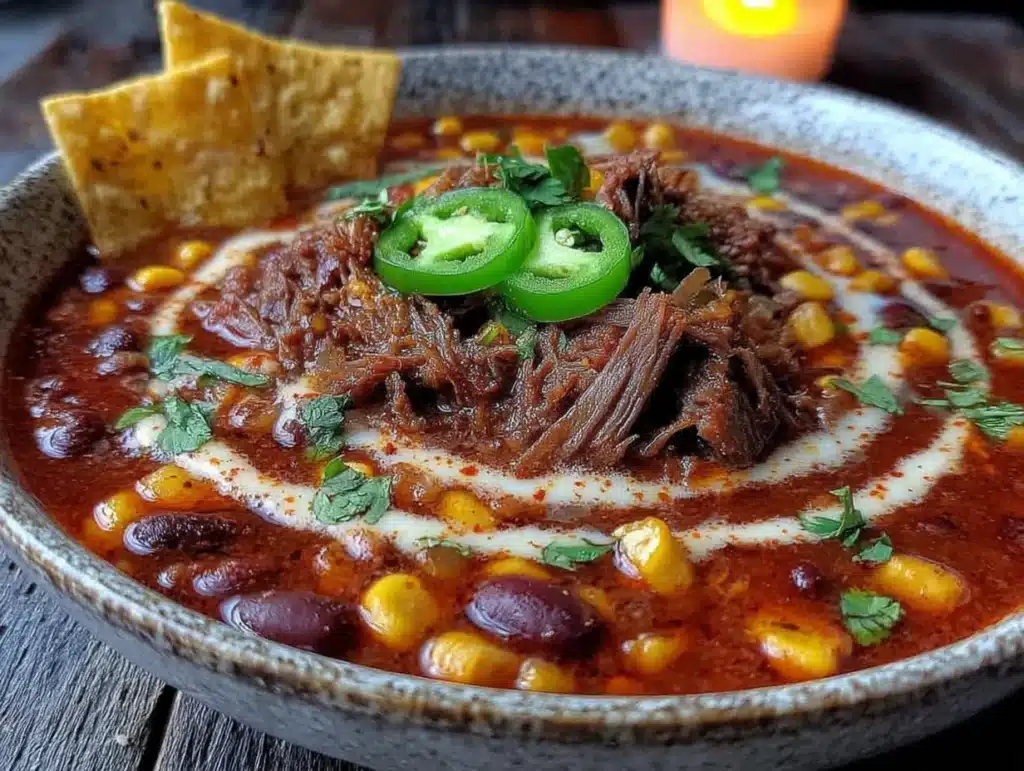
I was standing in the frozen food aisle of our local Publix last Tuesday when this random, sharp craving hit me. It wasn’t for anything fancy — just that warm, creamy, slightly tangy taco soup my neighbor brought over after my daughter was born. She was an older woman named Edna who kept to herself mostly, but she showed up with this pot of soup and a loaf of cornbread, and I remember thinking, “This is the easiest thing I’ve ever tasted, and I need to figure out how she did it.” Edna passed away a few years ago, and I never got her exact recipe. But I’ve spent the last three winters trying to recreate that exact feeling — that moment of sitting on my couch, exhausted, holding a sleeping baby, and taking a bite of something that just made everything feel okay. This dump-and-go version is the closest I’ve gotten. Honestly, it might even be a little better, because there’s no stress involved. You just toss everything in a pot and let it do its thing. Maybe you’ve been there — craving something deeply comforting but having zero energy to actually cook. This soup is for those nights.
Why You’ll Love This Recipe
This isn’t just another taco soup recipe floating around the internet. After testing about six different versions over the past year, I can tell you this one is the winner. Here’s why you’re going to absolutely love it:
- Quick & Easy: We’re talking five ingredients and about five minutes of active work. It comes together in under 30 minutes, which is perfect for those weeknights when you’re staring at the pantry wondering what to make.
- Simple Ingredients: No fancy grocery trips needed. You likely already have ground beef or chicken in your freezer, and the rest is just canned goods and seasoning packets. I mean, it doesn’t get much simpler than that.
- Perfect for Busy Weeknights: This is the kind of meal you make on a Tuesday when you have soccer practice at 5:30 and a mountain of laundry staring at you. It practically cooks itself.
- Crowd-Pleaser: I’ve served this at potlucks, family dinners, and even a casual book club meeting. It always gets rave reviews. Kids love it, adults love it, and nobody guesses it only took ten minutes of effort.
- Unbelievably Delicious: The combination of creamy ranch seasoning with the bold taco spices creates this flavor that just works. It’s comfort food that feels a little indulgent but doesn’t weigh you down.
What makes this recipe different from the rest is the ranch dressing mix. I know, it sounds weird at first. But trust me — that tangy, herby flavor cuts through the richness of the cream cheese and ground beef in a way that plain taco seasoning just can’t do on its own. It’s the secret weapon here. This is the kind of soup that makes you close your eyes after the first bite and just breathe for a second. It’s that good.
What Ingredients You Will Need
This recipe uses simple, wholesome ingredients to deliver bold flavor and satisfying texture without the fuss. Most of these are pantry staples or things you probably already have on hand.
- Ground beef (1 lb / 450g): I prefer using 85/15 ground beef for the best flavor without being too greasy. You can also use ground turkey or ground chicken if you’re looking for a leaner option. Just make sure to drain any excess fat after browning. Pro tip: I’ve found that the 80/20 blend gives a richer flavor if you’re not worried about the extra fat.
- Ranch dressing mix (1 packet / 1 oz / 28g): This is the magic ingredient. I recommend using Hidden Valley brand for the most consistent results, but any brand works. If you’re watching your sodium, look for the reduced-sodium version. Adds that tangy, herby depth that makes this soup different.
- Taco seasoning mix (1 packet / 1 oz / 28g): Use your favorite brand. I personally like the Ortega or Old El Paso varieties, but honestly, even the store brand works great here. If you have a homemade blend, use about 2-3 tablespoons.
- Cream cheese (8 oz / 226g): This is what makes the soup ultra-creamy. Use full-fat cream cheese for the best texture — the low-fat versions can get a little grainy when melted. Let it sit out for about 15 minutes before adding it so it melts more smoothly. Adds richness and body.
- Canned diced tomatoes with green chiles (10 oz / 283g): One can of Rotel or any brand of diced tomatoes with green chiles. If you like things mild, use the original. If you want some heat, grab the hot version. Adds acidity and a little kick.
- Canned corn (15 oz / 425g), drained: You can use whole kernel corn or creamed corn for a slightly sweeter, thicker soup. I usually go with whole kernel because I like the texture, but creamed corn works beautifully too. Adds sweetness and texture.
- Canned black beans (15 oz / 425g), drained and rinsed: Rinsing the beans removes the excess sodium and that canned taste. If you prefer, you can use pinto beans or kidney beans instead. Adds fiber and heartiness.
- Beef broth (1 cup / 240ml): Use low-sodium beef broth so you can control the salt level. Chicken broth or vegetable broth also work if that’s what you have on hand. Adds depth and thins the soup to the perfect consistency.
Optional toppings: Shredded cheddar cheese, sour cream, sliced green onions, fresh cilantro, crushed tortilla chips, or diced avocado. These aren’t necessary, but they really take the soup to the next level. I almost always add a handful of crushed tortilla chips on top for that crunch.
Equipment Needed
One of the best things about this recipe is that you don’t need any fancy equipment. Here’s what you’ll need:
- Large pot or Dutch oven (5-6 quart / 5-6 liter): This is your main vessel. I use my trusty enameled cast iron Dutch oven because it distributes heat evenly and cleans up nicely, but any large pot will work. Budget tip: A standard 6-quart stockpot from the grocery store works perfectly.
- Wooden spoon or spatula: For browning the meat and stirring everything together. A silicone spatula works great too.
- Colander: For draining the canned beans and corn, and for draining the fat from the ground beef.
- Cutting board and knife: Only if you’re adding fresh toppings like green onions or cilantro. For the soup itself, you don’t need to chop a thing.
- Can opener: You’ll be opening quite a few cans, so make sure yours is working properly. I’ve had one break mid-recipe and it was not fun.
Optional but helpful: An immersion blender if you want to partially blend the soup for a creamier texture. I don’t usually do this because I like the chunky texture, but it’s a nice option if you prefer a smoother soup.
Preparation Method
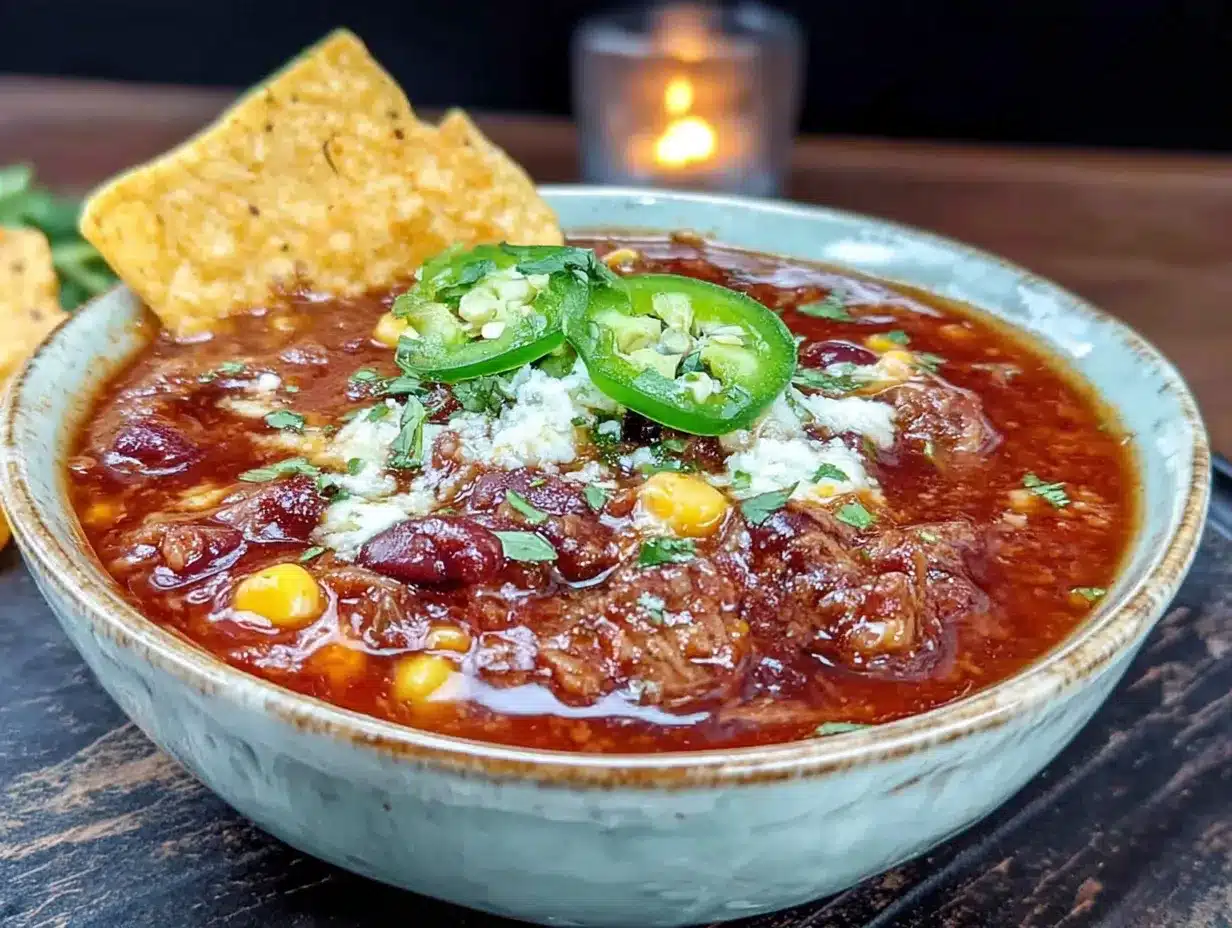
Alright, let’s get cooking. This is the easiest soup you’ll ever make, I promise.
- Brown the ground beef (5-7 minutes): Place your large pot or Dutch oven over medium-high heat. Add the ground beef and break it up with your wooden spoon. Cook for about 5-7 minutes, stirring occasionally, until the beef is fully browned and no longer pink. Sensory cue: You’ll hear that satisfying sizzle as the meat hits the hot pot, and the kitchen will start smelling amazing. Pro tip: Don’t drain the fat yet — we’ll do that next.
- Drain the excess fat: Carefully pour the cooked ground beef into a colander set over a bowl or the sink to drain off the excess fat. Return the beef to the pot. If you’re using a leaner meat like ground turkey, you might not have much fat to drain at all.
- Add the seasoning packets (1 minute): Sprinkle the ranch dressing mix and taco seasoning mix over the browned beef. Stir everything together until the beef is evenly coated in the seasonings. This is where the magic starts — the smell will be incredible.
- Add the cream cheese (2-3 minutes): Cut the cream cheese into a few chunks and add it to the pot. Stir continuously over medium heat until the cream cheese is completely melted and incorporated into the beef mixture. Visual cue: The mixture will look glossy and creamy, with no visible white streaks of cream cheese. Troubleshooting tip: If your cream cheese is too cold, it might take a little longer to melt. That’s okay — just keep stirring and it will come together.
- Add the remaining ingredients (1 minute): Pour in the can of diced tomatoes with green chiles (undrained), the drained corn, the drained and rinsed black beans, and the beef broth. Stir everything together until it’s well combined. The soup will look a little thin at this point, but don’t worry — it will thicken as it simmers.
- Bring to a simmer (5-7 minutes): Increase the heat to high and bring the soup to a gentle boil. Once it starts bubbling, reduce the heat to low and let it simmer for about 5-7 minutes. This allows all the flavors to meld together beautifully. Sensory cue: You’ll see small bubbles breaking the surface, and the soup will start to thicken slightly.
- Taste and adjust (1 minute): Give the soup a taste. Does it need more salt? A pinch of cumin? A squeeze of lime juice? This is your chance to adjust. I usually add a little black pepper and sometimes a dash of hot sauce if I’m feeling spicy.
- Serve and enjoy: Ladle the soup into bowls and top with your favorite garnishes. I love adding a dollop of sour cream, a sprinkle of shredded cheddar cheese, and a handful of crushed tortilla chips for that crunch. Serve immediately while it’s hot and creamy.
Total time: About 20-25 minutes from start to finish. Active time is maybe 10 minutes. The rest is just simmering.
Cooking Tips & Techniques
I’ve made this soup probably a dozen times now, and I’ve learned a few things along the way. Here are my best tips for getting it perfect every time:
- Don’t skip draining the beans and corn. I know it seems like an extra step, but if you don’t drain them, your soup will be watery and thin. The extra liquid from the cans throws off the consistency entirely. Trust me, I learned this the hard way when I was rushing one night.
- Let the cream cheese come to room temperature. I know, I know, nobody plans that far ahead. But if you can let the cream cheese sit out for 15-20 minutes before adding it, it will melt so much more smoothly. Cold cream cheese tends to clump up and take forever to incorporate.
- Use a wooden spoon, not a whisk. The cream cheese can get stuck in a whisk, and it’s a pain to clean. A wooden spoon or silicone spatula works much better for stirring everything together.
- Don’t boil the soup vigorously. Once you add the cream cheese, you want to keep the heat at a gentle simmer. Boiling can cause the cream cheese to separate and get grainy. Low and slow is the way to go.
- Make it ahead of time. This soup actually tastes better the next day. The flavors have more time to meld together, and the texture gets even creamier. I sometimes make it the night before and just reheat it for dinner the next day.
- Double the recipe. This soup freezes beautifully, so I often make a double batch. It’s perfect for those nights when you just don’t feel like cooking. Just thaw it in the fridge overnight and reheat it on the stove.
Common mistake to avoid: Adding too much broth. I know the recipe calls for 1 cup, but if you’re tempted to add more because the soup looks thick, resist the urge. The soup will thin out as it simmers, and you want it to be creamy, not watery. If you do accidentally add too much liquid, just let it simmer a little longer to reduce.
Variations & Adaptations
One of the best things about this soup is how versatile it is. Here are some of my favorite ways to change it up:
- Make it in the slow cooker: Brown the ground beef first, then add everything to your slow cooker. Cook on low for 4-6 hours or on high for 2-3 hours. Stir in the cream cheese during the last 30 minutes so it melts smoothly. This is perfect for busy days when you want dinner ready when you walk in the door.
- Make it vegetarian: Skip the ground beef and add an extra can of black beans and a can of pinto beans. You can also add some frozen corn or diced bell peppers for extra texture. Use vegetable broth instead of beef broth. It’s just as satisfying and hearty.
- Make it spicy: Use hot Rotel instead of the original, add a diced jalapeño when you brown the beef, or stir in a teaspoon of chipotle powder. I made this version for a game day party and it was a huge hit with the spice lovers.
- Make it lighter: Use ground turkey or ground chicken, low-fat cream cheese, and reduced-sodium broth and seasonings. It still tastes amazing, just with fewer calories. I’ve made this version many times and nobody has ever complained.
- Add more veggies: Diced bell peppers, zucchini, or even some spinach stirred in at the end are great additions. This is a good way to sneak in some extra nutrients without changing the flavor much.
- Use different beans: I’ve made this with pinto beans, kidney beans, and even chickpeas. All of them work great. Just make sure to drain and rinse them first.
My personal favorite variation: I once added a can of cream of chicken soup (undiluted) along with the other ingredients, and it made the soup even creamier and richer. It’s not something I do every time, but it’s a nice treat when I want something extra decadent.
Serving & Storage Suggestions
This soup is incredibly versatile when it comes to serving and storing. Here’s everything you need to know:
Serving suggestions: Serve the soup hot, straight from the pot. Ladle it into bowls and let everyone customize their own toppings. I like to set up a little topping bar with shredded cheese, sour cream, diced avocado, sliced green onions, fresh cilantro, and crushed tortilla chips. It makes the meal feel special without any extra work. This soup pairs beautifully with a side of cornbread or some warm flour tortillas for dipping.
Storage instructions: Let the soup cool completely before storing it. Transfer it to an airtight container and refrigerate for up to 4-5 days. The flavors actually get better as they sit, so don’t be surprised if it tastes even better the next day. Pro tip: The soup will thicken as it sits in the fridge, so when you reheat it, you might want to add a splash of beef broth or water to thin it back to your desired consistency.
Freezing instructions: This soup freezes beautifully. Let it cool completely, then transfer it to freezer-safe containers or zip-top bags. Leave a little room for expansion. It will keep in the freezer for up to 3 months. To thaw, place the container in the refrigerator overnight. Reheat on the stovetop over medium-low heat, stirring occasionally, until warmed through. You can also reheat individual portions in the microwave.
Reheating tips: The best way to reheat this soup is on the stovetop over medium-low heat. Stir it occasionally to prevent the bottom from scorching. If the soup seems too thick, add a splash of broth or water. If you’re using the microwave, heat it in 30-second intervals, stirring between each, until it’s hot. Note: The cream cheese might separate slightly when reheated, but a good stir will bring it back together.
Nutritional Information & Benefits
Here’s the approximate nutritional breakdown for one serving (based on 6 servings, without toppings):
| Nutrient | Amount per Serving |
|---|---|
| Calories | 380-420 |
| Protein | 25g |
| Fat | 22g |
| Carbohydrates | 28g |
| Fiber | 6g |
| Sugar | 6g |
| Sodium | 1200-1400mg |
Note: These values are estimates and will vary based on the specific brands you use and any toppings you add.
Health benefits: This soup actually has some surprising health benefits despite tasting so indulgent. The black beans are packed with fiber and protein, which help keep you full and satisfied. The tomatoes provide a good dose of vitamin C and lycopene, a powerful antioxidant. The beef is a great source of iron and B vitamins. And the cream cheese, while not exactly a health food, does provide some calcium. My perspective: I think this soup is a great example of how you can eat well without feeling deprived. It’s hearty and satisfying, so you’re less likely to reach for unhealthy snacks later. It’s all about balance, right?
Dietary considerations: This recipe is naturally gluten-free (just check your seasoning packets to make sure). It can be made dairy-free by using a dairy-free cream cheese alternative. It’s also easily adaptable for a lower-carb diet by serving it with cauliflower rice instead of tortilla chips.
Conclusion
This Easy Dump-and-Go Creamy Taco Soup is one of those recipes that just works. It’s simple enough for a busy weeknight but delicious enough to serve to guests. The combination of taco seasoning and ranch dressing mix creates a flavor that’s uniquely satisfying, and the cream cheese makes it luxuriously creamy without any complicated steps. I honestly think Edna would approve of this version — it captures that same feeling of comfort and ease that her soup had all those years ago.
I really hope you give this recipe a try. Feel free to customize it based on what you have in your pantry or what your family loves. And if you make it, I’d love to hear how it turned out! Leave a comment below and let me know what toppings you used, or share a photo of your soup. Don’t forget to pin this recipe for later and share it with your friends who need an easy dinner idea. Happy cooking, friends!
Frequently Asked Questions
Can I use ground turkey instead of ground beef?
Absolutely! Ground turkey or ground chicken work perfectly in this recipe. Just keep in mind that leaner meats might not have as much flavor, so you could add a tablespoon of olive oil when browning to help with that. The seasoning packets do a lot of the heavy lifting anyway.
Can I make this soup in an Instant Pot?
Yes, you can! Use the sauté function to brown the ground beef, then add all the other ingredients except the cream cheese. Pressure cook on high for 5 minutes, then do a quick release. Stir in the cream cheese until it’s melted and smooth. It’s even faster than the stovetop method.
How can I make this soup thicker?
If you prefer a thicker soup, you have a few options. You can let it simmer longer to reduce the liquid, or you can mash some of the beans with a fork before adding them to the soup. Another trick is to mix a tablespoon of cornstarch with a little cold water and stir it in during the last few minutes of cooking.
Can I use fresh tomatoes instead of canned?
Yes, but you’ll need about 1.5 cups of diced fresh tomatoes. Since fresh tomatoes have more liquid than canned, you might want to let the soup simmer a little longer to thicken up. I’d also recommend adding a small can of diced green chiles separately if you want that same flavor profile.
How do I store leftovers and how long do they last?
Store leftovers in an airtight container in the refrigerator for up to 4-5 days. The soup will thicken as it sits, so add a splash of broth or water when reheating. You can also freeze it for up to 3 months. Just thaw it in the fridge overnight and reheat on the stovetop.
Pin This Recipe!


Easy Dump-and-Go Creamy Taco Soup (Best 5-Ingredient Recipe!)
- Total Time: 25 minutes
- Yield: 6 servings 1x
Description
This creamy taco soup comes together in under 30 minutes with just five main ingredients. It’s the ultimate comfort food for busy weeknights, featuring a secret weapon of ranch dressing mix for a tangy, herby depth that makes it unforgettable.
Ingredients
- 1 lb (450g) ground beef (85/15 recommended)
- 1 packet (1 oz / 28g) ranch dressing mix (e.g., Hidden Valley)
- 1 packet (1 oz / 28g) taco seasoning mix
- 8 oz (226g) cream cheese, softened
- 1 can (10 oz / 283g) diced tomatoes with green chiles (e.g., Rotel), undrained
- 1 can (15 oz / 425g) corn, drained
- 1 can (15 oz / 425g) black beans, drained and rinsed
- 1 cup (240ml) low-sodium beef broth
- Optional toppings: shredded cheddar cheese, sour cream, sliced green onions, fresh cilantro, crushed tortilla chips, diced avocado
Instructions
- Brown the ground beef in a large pot or Dutch oven over medium-high heat for 5-7 minutes, breaking it up with a wooden spoon, until fully cooked and no longer pink.
- Drain the excess fat from the beef using a colander, then return the beef to the pot.
- Sprinkle the ranch dressing mix and taco seasoning mix over the beef and stir until evenly coated.
- Cut the cream cheese into chunks and add to the pot. Stir continuously over medium heat until completely melted and incorporated (2-3 minutes).
- Add the undrained diced tomatoes with green chiles, drained corn, drained and rinsed black beans, and beef broth. Stir until well combined.
- Increase heat to high and bring to a gentle boil. Reduce heat to low and simmer for 5-7 minutes, allowing flavors to meld and soup to thicken slightly.
- Taste and adjust seasoning as needed (e.g., salt, pepper, cumin, lime juice, hot sauce).
- Ladle into bowls and serve hot with desired toppings.
Notes
For best results, let cream cheese come to room temperature before adding. Do not boil vigorously after adding cream cheese to prevent graininess. Soup thickens as it sits; add a splash of broth when reheating. Freezes well for up to 3 months.
- Prep Time: 10 minutes
- Cook Time: 15 minutes
- Category: Main Course
- Cuisine: Mexican-American
Nutrition
- Serving Size: 1 serving (about 1.5
- Calories: 400
- Sugar: 6
- Sodium: 1300
- Fat: 22
- Saturated Fat: 10
- Carbohydrates: 28
- Fiber: 6
- Protein: 25
Keywords: taco soup, creamy taco soup, dump-and-go soup, 5-ingredient recipe, easy weeknight dinner, ground beef soup, ranch taco soup