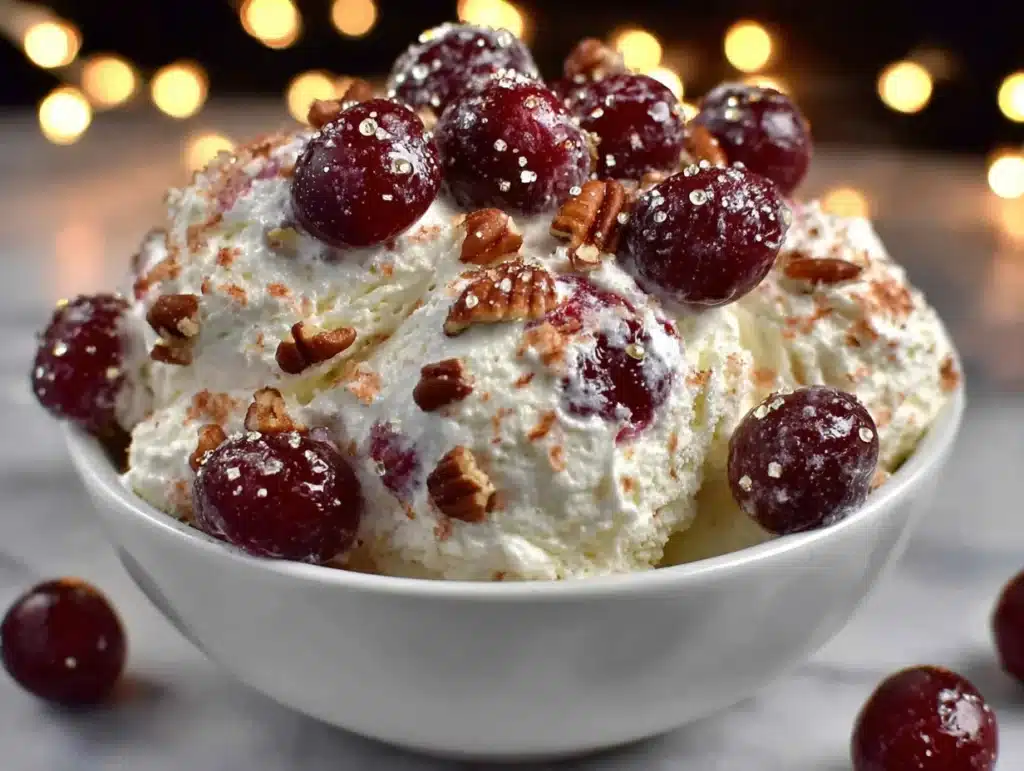
My neighbor, Mrs. Patterson, wasn’t trying to impress anyone. I’d stopped by to borrow a cup of sugar—a cliché, I know—and this cold, creamy, cherry-studded cloud of a dessert hit me before I even got past her screen door. She was standing there in her gardening clogs, wiping her hands on her apron, and she just said, “Oh, that? It’s nothing. Just something I threw together.”
Let me tell you, it was anything but nothing. That first bite was a revelation. It was like eating a sweet, velvety snowbank that melted on your tongue, punctuated by bursts of tart cherry. Honestly, I stood in her kitchen, fork halfway to my mouth, and just stared at the bowl. She looked at me like I was crazy. “It’s just cream cheese and Cool Whip, honey,” she said, as if that explained the magic. And maybe it does.
I begged her for the recipe, and she scribbled it on a scrap of envelope paper. It was barely three lines long. That’s when I knew this was something special—a recipe that didn’t need a novel to explain itself. It was just simple, honest, and ridiculously good. I’ve been making it ever since, and it never fails to get the same reaction I had that afternoon. You know that feeling when you take a bite of something and you just have to close your eyes for a second? That’s this dessert.
It’s the kind of recipe you keep in your back pocket for when you need a showstopper without the show. No oven required, no complicated steps, just a bowl, a spatula, and about ten minutes of your time. It’s become my secret weapon for potlucks, holidays, and those nights when I just need something sweet, fast. And every time I make it, I think of Mrs. Patterson and her nonchalant genius.
Why You’ll Love This Recipe
This Easy Cherries in the Snow Cream Cheese Dessert Salad is more than just a pretty bowl of pink and white. It’s a lifeline for busy people who still want to bring something amazing to the table. I’ve tested this recipe a dozen times, tweaking the ratios and trying different brands, and I can honestly say this version is the one. It’s the sweet spot between creamy, tangy, and fruity.
- Quick & Easy: You can have this ready in about 10 minutes. Seriously. No baking, no boiling, no fuss. It’s perfect for those weeknights when you need a dessert but your energy is already spent.
- Simple Ingredients: You probably have most of these in your fridge and pantry right now. Cream cheese, powdered sugar, vanilla, heavy cream, and a can of cherry pie filling. That’s it.
- Perfect for Any Occasion: It works for a weeknight treat, a holiday dessert table, a summer barbecue, or a potluck. It’s a crowd-pleaser that looks way more impressive than the effort it requires.
- Crowd-Pleaser: I’ve served this to kids, grandparents, and everyone in between. It disappears every single time. The combination of creamy, sweet, and tart is universally loved.
- Unbelievably Delicious: The texture is what gets everyone. It’s light and fluffy, almost like a mousse, but with a rich cream cheese base that gives it substance. It’s comfort food in a bowl.
What makes this recipe different from all the others I’ve tried is the balance. Some versions are too sweet, some are too tangy, and some just taste like Cool Whip with fruit stirred in. This one has a perfect, creamy, slightly tangy base that lets the cherries shine without being overpowering. It’s not just another version—it’s the best version. It’s the one that makes people ask for the recipe, just like I did.
What Ingredients You Will Need
This recipe uses a handful of simple ingredients that work together to create something truly special. The magic is in the simplicity—each component has a job, and they all do it perfectly. Here’s what you’ll need:
- 8 oz cream cheese, softened: This is the backbone of the dessert. It gives the “snow” its rich, creamy texture and a slight tang that balances the sweetness. Make sure it’s at room temperature so it blends smoothly. I prefer Philadelphia brand for its consistent creaminess.
- 1/2 cup powdered sugar: This sweetens the cream cheese without making it grainy. Granulated sugar would leave a gritty texture, so stick with powdered sugar here. Sift it if you want to be extra careful, but honestly, I rarely bother.
- 1 teaspoon vanilla extract: A good vanilla adds depth and warmth to the creamy base. Pure vanilla extract is best, but imitation will work in a pinch.
- 1 cup heavy whipping cream: This is what makes the “snow” light and fluffy. When whipped to stiff peaks, it folds into the cream cheese mixture to create an airy, mousse-like texture. Do not substitute with Cool Whip for the homemade version—the real cream makes a difference in texture and flavor. (But if you’re in a rush, you can use an 8 oz tub of Cool Whip instead, and skip the whipping step.)
- 1 (21 oz) can cherry pie filling: This is where the “cherries” come in. The sweet, glossy filling with whole cherries is the perfect topping. I recommend using a good quality brand like Lucky Leaf or Wilderness. You can also use a 21 oz can of cherry pie filling for the classic version.
Ingredient Selection Tips: For the cream cheese, look for blocks, not the spreadable kind in a tub. The blocks have a better texture for this dessert. For the heavy cream, make sure it’s cold—this helps it whip up faster and hold its shape longer. If you’re using the cherry pie filling, give it a quick stir before spooning it over the top to make sure the cherries are evenly distributed in the syrup.
Substitution Guidance: If you’re dairy-free, you can use a plant-based cream cheese and coconut cream (the solid part from a can of full-fat coconut milk) instead of heavy cream. The flavor will be slightly different, but it will still be delicious. For a lower-sugar version, you can use a sugar substitute like Swerve Confectioners in place of the powdered sugar.
Equipment Needed
You don’t need a fancy kitchen to make this dessert. Here’s what you’ll need:
- Large mixing bowl: For beating the cream cheese and whipping the cream. A glass or stainless steel bowl works best.
- Electric hand mixer or stand mixer: This makes the job quick and easy. You can whip the cream by hand with a whisk, but it will take some elbow grease. I’ve done it both ways, and the mixer is definitely my preference.
- Spatula: For folding the whipped cream into the cream cheese mixture. A rubber spatula is best for scraping the sides of the bowl.
- Serving bowl or dish: A glass bowl is nice so you can see the layers, but any bowl will do. You can also use a 9×13 inch dish if you want a thinner, more spread-out dessert.
- Measuring cups and spoons: For accurate measurements. I use my trusty set from OXO—they’re easy to read and sturdy.
Budget-Friendly Options: If you don’t have an electric mixer, you can use a whisk and a lot of arm strength. It’s a great arm workout! Or, you can use a food processor to whip the cream, but be careful not to over-whip it into butter.
Preparation Method
This is where the magic happens. Follow these steps, and you’ll have a dessert that looks like it took hours of work.
- Soften the cream cheese: Take the cream cheese out of the fridge about 30 minutes before you start. It should be soft to the touch but not melted. If you’re short on time, you can microwave it in 10-second bursts until soft, but be careful not to overheat it.
- Beat the cream cheese: In a large mixing bowl, beat the softened cream cheese with an electric mixer on medium speed until it’s smooth and creamy, about 2 minutes. Scrape down the sides of the bowl with a spatula.
- Add the sugar and vanilla: Add the powdered sugar and vanilla extract to the cream cheese. Beat on low speed until the sugar is incorporated, then increase to medium and beat for another minute until the mixture is light and fluffy. It should look like a thick frosting.
- Whip the cream: In a separate bowl, pour the cold heavy whipping cream. Using clean beaters (or a clean whisk attachment), beat the cream on medium-high speed. Start slow to avoid splashing, then increase speed. Whip until stiff peaks form—this means when you lift the beaters, the cream stands up in peaks that don’t flop over. This usually takes about 3-4 minutes. Be careful not to over-whip, or you’ll end up with butter.
- Fold it together: Add about one-third of the whipped cream to the cream cheese mixture. Gently fold it in with a spatula using a cutting motion—down through the middle, across the bottom, and up over the top. This incorporates the cream without deflating it. Add the remaining whipped cream in two batches, folding gently until no white streaks remain. The mixture should be light, airy, and uniform in color.
- Assemble the dessert: Transfer the creamy mixture to your serving bowl or dish. Spread it evenly with the spatula. Then, spoon the cherry pie filling evenly over the top. You can spread it gently to cover the entire surface, or leave it in dollops for a more rustic look.
- Chill: Cover the bowl with plastic wrap and refrigerate for at least 2 hours. This allows the flavors to meld and the texture to set. The longer it chills, the better it gets—overnight is ideal.
Troubleshooting Tips: If your cream cheese mixture looks lumpy, it wasn’t soft enough. Let it sit at room temperature a bit longer next time. If your whipped cream turns into butter, you over-whipped it. Start fresh with a new batch of cream—it happens to the best of us. If the cherry filling slides off the top, your cream cheese mixture might be too soft. Make sure it’s well-chilled before serving.
Sensory Cues: When you’re folding the cream into the cream cheese, you’ll feel the mixture become lighter and airier under your spatula. When it’s done, it should look like a soft, pillowy cloud. The cherry topping should be glossy and jewel-toned, a beautiful contrast to the white “snow.”
Cooking Tips & Techniques
Over the years, I’ve learned a few tricks that make this dessert even better. Here are my best tips:
- The cream cheese must be soft. This is non-negotiable. If it’s cold, you’ll end up with lumps that no amount of beating can fix. Trust me, I’ve learned this the hard way. Set it out early, or give it a quick, gentle zap in the microwave.
- Chill your bowl and beaters. For the whipped cream, a cold bowl and cold beaters help the cream whip up faster and hold its shape better. Pop your metal bowl and beaters in the freezer for 10 minutes before you start.
- Don’t over-mix the cream. Watch closely as you whip. The cream goes from soft peaks (droopy peaks) to stiff peaks (standing peaks) fairly quickly. Once you see stiff peaks, stop immediately. Over-whipped cream is grainy and can separate.
- Fold, don’t stir. When combining the whipped cream with the cream cheese, use a gentle folding motion. Stirring vigorously will deflate the air you just whipped into the cream, resulting in a dense, flat dessert. Be patient and gentle.
- Let it rest. The chilling time is crucial. It allows the flavors to meld and the texture to set into a perfect, sliceable consistency. I know it’s hard to wait, but it’s worth it. I once served it right after making it, and it was good, but the next day? It was phenomenal.
Variations & Adaptations
This recipe is a fantastic base for experimentation. Here are a few ways to change it up:
- Berry Bliss: Swap the cherry pie filling for blueberry, strawberry, or mixed berry pie filling. Each one gives a completely different flavor profile. I love the blueberry version for a summer picnic.
- Chocolate Cherry: Add a tablespoon of unsweetened cocoa powder to the cream cheese mixture before adding the sugar. It creates a chocolate cherry combination that’s absolutely divine. My kids beg for this version.
- Nutty Crunch: Sprinkle a handful of toasted chopped pecans or almonds over the cherry topping before chilling. The crunch adds a wonderful textural contrast to the creamy “snow.”
- Lighter Version: Use reduced-fat cream cheese and light Cool Whip instead of homemade whipped cream. It won’t be as rich, but it’s still delicious and cuts the calories significantly.
- Individual Servings: Instead of making one large bowl, spoon the cream cheese mixture into small dessert cups or glasses, then top with cherries. These are perfect for parties and portion control. I’ve done this for bridal showers, and they look so elegant.
Serving & Storage Suggestions
This dessert is best served cold, straight from the refrigerator. The texture is at its peak when it’s well-chilled—firm enough to hold its shape but still incredibly creamy.
Serving Temperature: Serve it chilled. It should be cold to the touch, like a cheesecake. If it sits out for more than 30 minutes, it will start to soften and lose its structure.
Presentation: Spoon it into a beautiful glass bowl to show off the layers. You can garnish with a few fresh mint leaves or a sprinkle of chocolate shavings for a touch of elegance. For a casual weeknight, just serve it straight from the bowl—no one will complain.
Complementary Dishes: This dessert pairs beautifully with a simple sugar cookie or a buttery shortbread. It also works as a topping for angel food cake or pound cake. For a drink, a cup of black coffee or a glass of cold milk is perfect.
Storage Instructions: Store leftovers in an airtight container in the refrigerator for up to 3 days. The texture will soften slightly over time, but the flavor will only get better. I actually think it’s even better on day two.
Reheating (if needed): This is a cold dessert, so no reheating is required. If you’ve frozen it (yes, you can freeze it!), let it thaw in the refrigerator overnight before serving. It will be a bit softer after thawing, but still delicious.
Flavor Development: The flavors meld beautifully overnight. The cherry syrup seeps into the cream cheese base just a little, creating a beautiful marbled effect. It’s a great make-ahead dessert for this reason.
Nutritional Information & Benefits
While this is definitely a treat, it’s not without its redeeming qualities. Here’s a rough estimate of the nutritional information per serving (based on 8 servings):
| Nutrient | Amount per Serving |
|---|---|
| Calories | ~350 |
| Fat | ~22g |
| Carbohydrates | ~35g |
| Protein | ~4g |
| Sugar | ~28g |
Health Benefits of Key Ingredients: Cream cheese provides calcium and protein, while the heavy cream adds a dose of healthy fats that help keep you full. Cherries are packed with antioxidants and anti-inflammatory compounds. So, while it’s not health food, it’s not empty calories either.
Dietary Considerations: This recipe is naturally vegetarian. For a gluten-free version, simply verify that your powdered sugar is gluten-free (most are). As mentioned, you can make it dairy-free with plant-based substitutes.
Potential Allergens: This recipe contains dairy (cream cheese, heavy cream). It does not contain nuts, eggs, or gluten in its standard form.
Personal Wellness Perspective: I believe in balance. This is a dessert for celebrations and special moments. It’s meant to be enjoyed, not worried over. One serving won’t derail a healthy lifestyle, but it will absolutely make your day a little sweeter.
Conclusion
This Easy Cherries in the Snow Cream Cheese Dessert Salad is more than just a recipe—it’s a memory in the making. It’s the dessert that people will ask you to bring to every gathering. It’s the one that makes you look like a hero with almost zero effort. Honestly, it’s the kind of recipe that makes you wonder why you ever bothered with complicated desserts in the first place.
I love this recipe because it reminds me of Mrs. Patterson and her casual brilliance. It reminds me that the best things in life are often the simplest. And it reminds me that you don’t need a culinary degree or a pantry full of exotic ingredients to create something truly wonderful. You just need a little cream cheese, some cherries, and a willingness to share a little sweetness with the people you love.
I encourage you to make this your own. Play with the toppings, adjust the sweetness, try different fruits. And when you do, I’d love to hear about it. Drop a comment below and tell me how it turned out. Did you use a different fruit? Did you add a secret ingredient? Share your version! And don’t forget to pin this recipe for later—you’re going to want to make it again and again.
Now go make some snow. Your taste buds will thank you.
FAQs
Can I use Cool Whip instead of heavy cream?
Absolutely! If you’re short on time or just prefer the convenience, you can substitute 8 ounces of thawed Cool Whip for the homemade whipped cream. Just fold it into the cream cheese mixture the same way you would the whipped cream. The texture will be slightly different—lighter and a bit more airy—but it’s still delicious.
Can I make this dessert ahead of time?
Yes, and I actually recommend it! This dessert needs at least 2 hours to chill and set, but it’s even better if you make it the day before. The flavors have time to meld, and the texture becomes perfectly firm. Just keep it covered in the refrigerator until you’re ready to serve.
Can I use fresh cherries instead of pie filling?
You can, but it requires a little more work. Fresh cherries won’t have the same thick, glossy syrup as pie filling. You would need to pit the cherries, cook them down with some sugar and a thickener like cornstarch, and let them cool before using. For the quick and easy version, stick with the canned pie filling—it’s a time-saver that works perfectly.
How long will this dessert keep in the fridge?
Stored in an airtight container, this dessert will keep for 3 to 4 days in the refrigerator. The texture will soften slightly over time, but the flavor will continue to develop. I actually think it’s even better on the second day. Just make sure to keep it well-covered so it doesn’t absorb any odors from the fridge.
Can I freeze this dessert?
Yes, you can freeze it! Prepare the dessert in a freezer-safe container, but don’t add the cherry topping yet. Freeze the cream cheese mixture for up to 2 months. When you’re ready to serve, thaw it in the refrigerator overnight, then add the cherry pie filling just before serving. The texture will be slightly softer after freezing, but it’s still a wonderful treat. I’ve done this for holiday prep, and it’s a lifesaver.
Print
Easy Cherries in the Snow Cream Cheese Dessert Recipe
- Total Time: 2 hours 10 minutes (includes chilling)
- Yield: 8 servings 1x
Description
A quick and easy no-bake dessert featuring a creamy, fluffy cream cheese base topped with sweet cherry pie filling. Perfect for potlucks, holidays, or any occasion where you need a showstopper with minimal effort.
Ingredients
- 8 oz cream cheese, softened
- 1/2 cup powdered sugar
- 1 teaspoon vanilla extract
- 1 cup heavy whipping cream
- 1 (21 oz) can cherry pie filling
Instructions
- Soften the cream cheese: Take the cream cheese out of the fridge about 30 minutes before you start. It should be soft to the touch but not melted. If you’re short on time, you can microwave it in 10-second bursts until soft, but be careful not to overheat it.
- Beat the cream cheese: In a large mixing bowl, beat the softened cream cheese with an electric mixer on medium speed until it’s smooth and creamy, about 2 minutes. Scrape down the sides of the bowl with a spatula.
- Add the sugar and vanilla: Add the powdered sugar and vanilla extract to the cream cheese. Beat on low speed until the sugar is incorporated, then increase to medium and beat for another minute until the mixture is light and fluffy. It should look like a thick frosting.
- Whip the cream: In a separate bowl, pour the cold heavy whipping cream. Using clean beaters (or a clean whisk attachment), beat the cream on medium-high speed. Start slow to avoid splashing, then increase speed. Whip until stiff peaks form—this means when you lift the beaters, the cream stands up in peaks that don’t flop over. This usually takes about 3-4 minutes. Be careful not to over-whip, or you’ll end up with butter.
- Fold it together: Add about one-third of the whipped cream to the cream cheese mixture. Gently fold it in with a spatula using a cutting motion—down through the middle, across the bottom, and up over the top. This incorporates the cream without deflating it. Add the remaining whipped cream in two batches, folding gently until no white streaks remain. The mixture should be light, airy, and uniform in color.
- Assemble the dessert: Transfer the creamy mixture to your serving bowl or dish. Spread it evenly with the spatula. Then, spoon the cherry pie filling evenly over the top. You can spread it gently to cover the entire surface, or leave it in dollops for a more rustic look.
- Chill: Cover the bowl with plastic wrap and refrigerate for at least 2 hours. This allows the flavors to meld and the texture to set. The longer it chills, the better it gets—overnight is ideal.
Notes
Make sure the cream cheese is at room temperature to avoid lumps. Chill the bowl and beaters for best whipped cream results. The dessert can be made a day ahead and improves overnight. For a shortcut, substitute 8 oz thawed Cool Whip for the homemade whipped cream.
- Prep Time: 10 minutes
- Cook Time: 0 minutes
- Category: Dessert
- Cuisine: American
Nutrition
- Serving Size: 1 serving (1/8 of re
- Calories: 350
- Sugar: 28
- Sodium: 180
- Fat: 22
- Saturated Fat: 13
- Carbohydrates: 35
- Fiber: 1
- Protein: 4
Keywords: cherries in the snow, cream cheese dessert, no-bake dessert, easy dessert, cherry dessert, potluck dessert