I was trying to make a lighter version of chicken marsala. That was the plan, anyway. I had the mushrooms sliced, the fresh thyme picked, and I was feeling pretty good about myself for attempting something that sounded so fancy on a random Wednesday night. But somewhere between answering a text from my sister about weekend plans and realizing I was completely out of marsala wine, the whole thing fell apart. I grabbed the nearest bottle of something that looked like it could work—it was white wine vinegar. Not the same thing, not even close. I poured it in before my brain caught up, and the smell alone told me I had messed up. There was no saving that sauce. So I scraped the whole sad mess into the trash, looked at my raw chicken thighs sitting there, and made a decision on the fly. I coated them in what I had on hand: garlic, Parmesan, breadcrumbs, and a prayer. What came out of that oven was nothing like the marsala I planned—and honestly, way, way better. That crispy, golden, cheesy crust was a happy accident I’ve been chasing ever since. And now I’m sharing it with you, because maybe you’ve had one of those nights where dinner goes sideways, and you need something that actually works.
Why You’ll Love This Recipe
Let me tell you why these crispy garlic Parmesan chicken thighs have become my go-to for those cozy dinner nights when I need a win. I’ve tested this recipe at least a dozen times after that initial happy accident, tweaking the crust, adjusting the oven temperature, and figuring out what makes that perfect crunch happen every single time.
- Quick & Easy : From fridge to table in about 40 minutes. No marinating overnight, no complicated techniques. Just mix, coat, and bake.
- Simple Ingredients : You probably have garlic, Parmesan, and breadcrumbs in your kitchen right now. No fancy grocery trips required.
- Perfect for Cozy Nights : This is the kind of dinner you want when it’s raining outside, you’re in sweatpants, and you need something that feels like a hug on a plate.
- Crowd-Pleaser : My picky-eating nephew asked for seconds. My dad, who rarely comments on food, said it was “restaurant quality.” That’s the kind of feedback that keeps me coming back to this recipe.
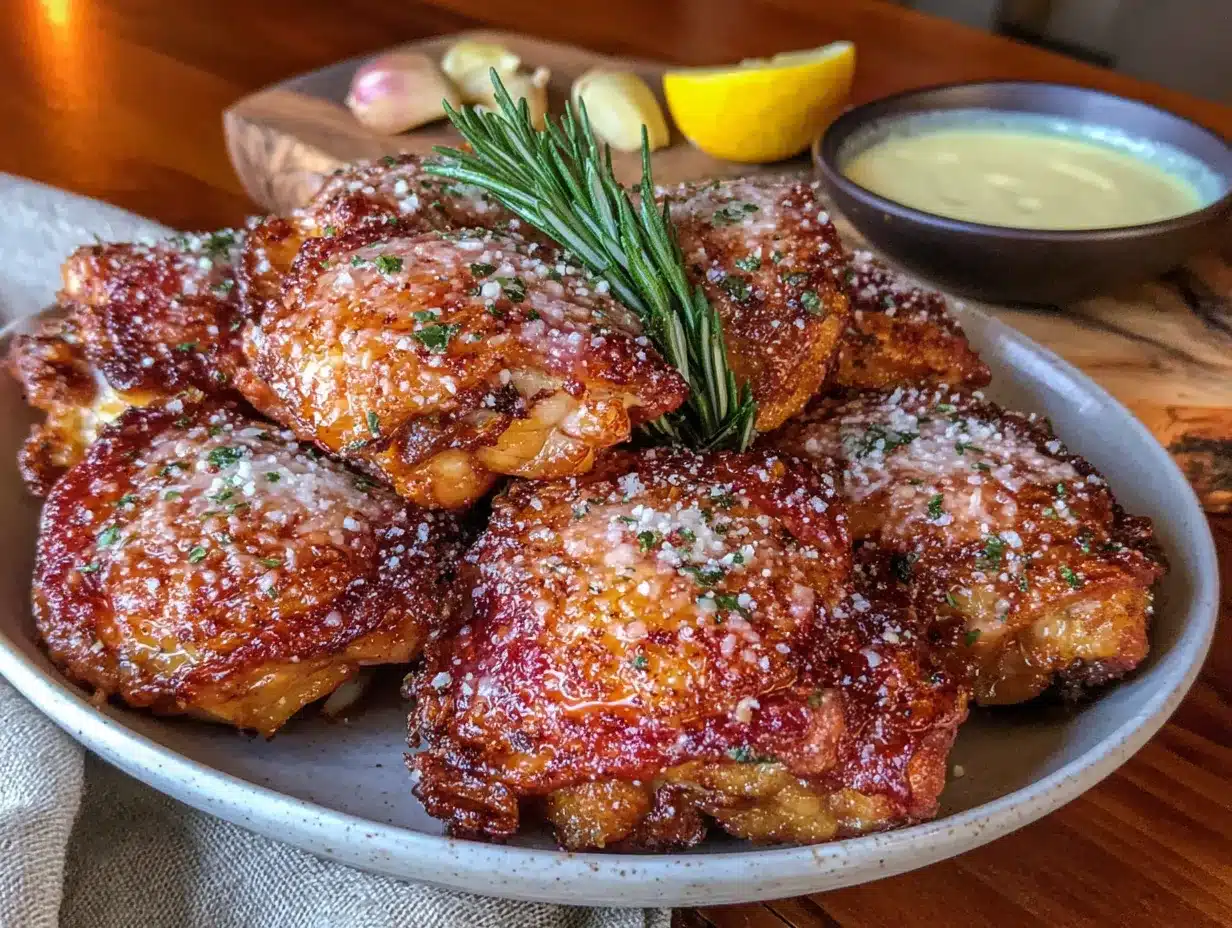
- Unbelievably Delicious : The crust gets this insane golden-brown crunch, while the chicken stays juicy and tender inside. The garlic and Parmesan combo is pure comfort food magic.
What makes this recipe different from all the other baked chicken recipes out there? It’s the technique—pressing that Parmesan-garlic mixture firmly onto the skin so it forms a real crust, not just a sprinkle on top. Plus, a little trick with butter that gives it that fried-chicken texture without actually frying. This is the kind of meal that makes you close your eyes after the first bite. It’s comfort food reimagined—simpler, faster, but with the same soul-soothing satisfaction you crave on a cozy night in.
What Ingredients You Will Need
This recipe uses simple, honest ingredients that work together to create something special. Most of these are pantry staples, so you’re probably already halfway there.
- Chicken Thighs – 6 bone-in, skin-on chicken thighs (about 2 pounds total). The skin is crucial here—it gets crispy and helps the coating stick. I prefer bone-in for more flavor, but boneless works too if you adjust the cooking time.
- Parmesan Cheese – 1 cup freshly grated Parmesan cheese. Please skip the green can stuff for this recipe. Freshly grated melts better and gives you that golden crust. I use Parmigiano-Reggiano when I’m feeling fancy.
- Garlic – 4 cloves, minced. Fresh garlic makes a huge difference here. The pre-minced stuff in jars tends to burn in the oven. Trust me, I learned this the hard way.
- Panko Breadcrumbs – 1 cup. Panko gives you that extra-crunchy texture that regular breadcrumbs just can’t match. They’re lighter and crispier.
- Butter – 3 tablespoons, melted. This is my secret weapon. Brushing the chicken with butter before coating helps the crust get that deep golden color and rich flavor.
- Olive Oil – 1 tablespoon. A little oil mixed with the butter prevents burning and helps everything crisp evenly.
- Dried Italian Seasoning – 1 teaspoon. Adds that herby backbone to the crust. You can use a mix of dried oregano, basil, and thyme if you don’t have Italian seasoning.
- Paprika – 1 teaspoon. Not just for color—it adds a subtle smokiness that complements the garlic and Parmesan beautifully.
- Salt and Black Pepper – 1 teaspoon salt and ½ teaspoon black pepper. Season generously. Chicken thighs can handle it.
- Fresh Parsley – For garnish. Optional but nice. A little green on top makes it look like you tried harder than you actually did.
If you’re out of panko, crushed pork rinds work great for a low-carb option. And for a dairy-free version, use nutritional yeast instead of Parmesan and vegan butter—it won’t be exactly the same, but it’ll still be delicious.
Equipment Needed
You don’t need a fancy kitchen to make this recipe work. Here’s what you’ll actually use:
- Baking Sheet – A rimmed baking sheet works best. The rim catches any butter that might drip off. I use a half-sheet pan, which is the standard size you see in most kitchens.
- Wire Rack – Placing a wire rack on your baking sheet is a game-changer. It lets air circulate under the chicken, so the bottom gets crispy too. No soggy bottoms here. If you don’t have one, just flip the chicken halfway through.
- Mixing Bowls – One shallow bowl for the butter mixture, one for the coating. Nothing fancy needed.
- Tongs – For handling the chicken without making a mess. Silicone-tipped ones are nice so you don’t scratch your baking sheet.
- Garlic Press – Not essential, but it saves time and gives you evenly minced garlic. I’ve used a knife plenty of times and it works fine.
- Instant-Read Thermometer – This is the one tool I’d actually recommend buying if you don’t have one. It takes the guesswork out of cooking chicken and guarantees it’s done perfectly every time.
Budget-friendly tip: If you don’t have a wire rack, line your baking sheet with foil and flip the chicken halfway through cooking. It won’t be quite as crispy on the bottom, but it’ll still be delicious.
Preparation Method
Let’s get cooking. Follow these steps, and you’ll have the crispiest, most flavorful chicken thighs of your life.
- Preheat your oven to 400°F (200°C). Place a wire rack on a rimmed baking sheet and spray it lightly with cooking spray. This prevents sticking and makes cleanup easier.
- Pat the chicken thighs dry with paper towels. This is important—moisture is the enemy of crispy skin. Take an extra 30 seconds to really get them dry. You’ll thank me later.
- Season the chicken with salt and pepper on both sides. Don’t be shy here. Chicken thighs can handle a generous amount of seasoning.
- In a shallow bowl, combine the melted butter and olive oil. Stir in the minced garlic. Let it sit for a minute so the garlic infuses into the butter.
- In another shallow bowl, mix together the panko breadcrumbs, grated Parmesan, Italian seasoning, and paprika. Use a fork to combine everything evenly.
- Working with one thigh at a time, dip the chicken into the butter mixture, turning to coat all sides. Let any excess drip off before moving to the next step.
- Press the chicken into the breadcrumb mixture, making sure to coat every surface. Really press it in—this is what creates that thick, crunchy crust. Don’t just sprinkle it on top.
- Place the coated thighs on the wire rack, skin side up. Leave a little space between each piece so the heat can circulate.
- Bake for 35-40 minutes, or until the internal temperature reaches 165°F (74°C) when tested with an instant-read thermometer. The crust should be deep golden brown and crispy to the touch.
- Let the chicken rest for 5 minutes before serving. This allows the juices to redistribute and keeps the meat tender. I know it’s hard to wait, but it’s worth it.
Sensory cue: At the 25-minute mark, your kitchen should smell like garlic and Parmesan heaven. The crust will start looking golden around the edges. That’s when you know it’s working.
Troubleshooting tip: If your crust isn’t browning after 30 minutes, turn on the broiler for the last 2-3 minutes. Watch it carefully—it can go from golden to burnt very quickly.
Cooking Tips & Techniques
I’ve made this recipe enough times to know where things can go wrong. Here’s what I’ve learned:
Don’t skip drying the chicken. The first time I made this, I was in a hurry and skipped patting the chicken dry. The crust came out soggy and pale. Lesson learned. Moisture on the skin creates steam, and steam prevents crisping. Take those extra 30 seconds.
Use freshly grated Parmesan. I know it’s tempting to use the pre-shredded stuff in a bag, but it contains anti-caking agents that prevent it from melting properly. Freshly grated Parmesan creates a cohesive crust that actually sticks to the chicken. I’ve made this mistake twice before it stuck.
Let the butter mixture sit with the garlic. Don’t just stir and immediately dip. Letting the garlic sit in the warm butter for a minute or two mellows its sharpness and infuses the butter with flavor. Raw garlic can be harsh and can burn in the oven.
Press, don’t sprinkle. When coating the chicken, really press the breadcrumb mixture into the butter-coated skin. I use my fingers and really pack it on. Think of it like you’re giving the chicken a little armor.
Use a wire rack. This is non-negotiable for the crispiest results. Air needs to circulate under the chicken to crisp the bottom. If you don’t have one, flip the chicken halfway through, but know you’re sacrificing some crunch.
Let it rest. I know you’re hungry. I get it. But cutting into the chicken immediately lets all those juices run out onto the plate, leaving you with dry meat. Five minutes is all it takes.
Variations & Adaptations
This recipe is flexible. Here are some ways to make it your own:
Spicy Version: Add ½ teaspoon of cayenne pepper and 1 teaspoon of red pepper flakes to the breadcrumb mixture. The heat pairs beautifully with the garlic and Parmesan. My husband loves this version—I call it “angry chicken.”
Lemon Herb Twist: Add the zest of one lemon and 2 tablespoons of fresh chopped rosemary to the breadcrumb mixture. Squeeze fresh lemon juice over the chicken right before serving. It brightens up the whole dish and makes it feel lighter.
Low-Carb Option: Replace the panko breadcrumbs with crushed pork rinds or almond flour mixed with extra Parmesan. The texture won’t be exactly the same, but it’s still delicious. I’ve tried both, and pork rinds give you the closest crunch.
Air Fryer Method: Cook at 375°F (190°C) for 18-22 minutes, flipping halfway through. The air fryer makes the crust incredibly crispy in less time. Just make sure not to overcrowd the basket.
Dairy-Free Adaptation: Use vegan butter and nutritional yeast instead of Parmesan. It won’t have the same cheesy flavor, but the nutritional yeast gives it a savory, umami kick that’s surprisingly good.
Serving & Storage Suggestions
These chicken thighs are versatile enough for any cozy dinner night. Here’s how to serve and store them:
Serving Temperature: Serve hot, right out of the oven. The crust is at its crispiest within the first 15 minutes. If you’re making a side dish, time it so everything finishes together.
What to Serve With: I love these with mashed potatoes and a simple green salad. The creamy potatoes balance the crispy chicken perfectly. Roasted vegetables like asparagus, broccoli, or Brussels sprouts also work great. For a lighter option, try a lemony arugula salad.
Storage: Store leftover chicken in an airtight container in the refrigerator for up to 4 days. The crust will soften, but the flavor will still be there. I’ve been known to eat the leftovers cold, straight from the fridge—don’t judge me.
Reheating: The oven is your best friend here. Reheat at 350°F (175°C) for 10-15 minutes. The microwave will make the crust soggy, so avoid it if you can. An air fryer works great too—3-4 minutes at 350°F and you’re good to go.
Freezing: You can freeze the cooked chicken thighs for up to 3 months. Wrap them individually in plastic wrap, then place in a freezer bag. Thaw in the refrigerator overnight and reheat in the oven. The crust won’t be as crispy, but the flavor holds up well.
Flavor Development: Honestly, these chicken thighs taste even better the next day. The garlic and Parmesan flavors meld together overnight, and the chicken stays moist. I sometimes make a double batch just for leftovers.
Nutritional Information & Benefits
Here’s a rough breakdown per serving (one chicken thigh):
- Calories: 380
- Protein: 28g
- Fat: 24g
- Carbohydrates: 12g
- Fiber: 1g
- Sugar: 1g
Health Benefits: Chicken thighs are a great source of protein, iron, and B vitamins. They have more fat than chicken breasts, but that fat is what keeps them juicy and flavorful. Plus, fat helps you absorb fat-soluble vitamins from your side dishes.
Dietary Considerations: This recipe is naturally low-carb and can be made gluten-free by using gluten-free panko breadcrumbs. It’s not dairy-free as written, but the variations section has a dairy-free option.
Potential Allergens: Contains dairy (butter, Parmesan) and gluten (breadcrumbs). If you’re serving someone with allergies, make sure to use appropriate substitutions.
My Personal Take: I don’t believe in “guilt-free” eating, but I do believe in eating food that makes you feel good. This recipe uses real ingredients, reasonable portions, and it’s homemade—which automatically makes it healthier than takeout. Plus, cooking at home means you control the quality of everything that goes into your body.
Conclusion
This crispy garlic Parmesan chicken thighs recipe started as a complete disaster, and honestly, I’m grateful for that failed marsala. Sometimes the best things in the kitchen happen when you stop following the plan and start trusting your instincts. This recipe is proof that you don’t need fancy techniques or hard-to-find ingredients to make something truly memorable.
I hope you give these chicken thighs a try on your next cozy dinner night. Customize them however you like—make them spicy, add lemon, or keep it simple. The beauty of this recipe is that it works no matter what. And if something goes wrong? Well, maybe that’s just the start of your own happy accident.
I’d love to hear how yours turn out. Drop a comment below and let me know if you made any changes or if this became a new favorite in your kitchen. Share this recipe with someone who needs a cozy night in. And remember—sometimes the best meals are the ones you never planned to make.
Frequently Asked Questions
Can I use chicken breasts instead of thighs?
Yes, you can. Boneless, skinless chicken breasts will work, but they’ll cook faster—about 25-30 minutes at 400°F. Keep an eye on the internal temperature and pull them at 165°F. The crust might not be as crispy since there’s no skin, but the flavor will still be great.
How do I keep the crust from falling off?
The key is patting the chicken completely dry and pressing the breadcrumb mixture firmly into the butter coating. Also, letting the chicken rest for 5 minutes after baking helps the crust set. If you cut into it immediately, the crust is more likely to slide off.
Can I make this ahead of time?
You can prepare the coating mixture and clean the chicken ahead of time, but I don’t recommend coating the chicken until you’re ready to bake. The breadcrumbs will get soggy if they sit too long. You can, however, bake the chicken, let it cool, and reheat it later—it just won’t be quite as crispy.
What if I don’t have panko breadcrumbs?
Regular breadcrumbs work, but they won’t give you the same crunch. You can also crush up crackers, cornflakes, or even pork rinds for a different texture. I’ve used crushed potato chips in a pinch, and it was surprisingly good.
How do I know when the chicken is fully cooked?
The safest way is to use an instant-read thermometer. Insert it into the thickest part of the thigh without touching the bone. You’re looking for 165°F (74°C). If you don’t have a thermometer, cut into the thickest part—the juices should run clear, and the meat should no longer be pink.
Pin This Recipe!
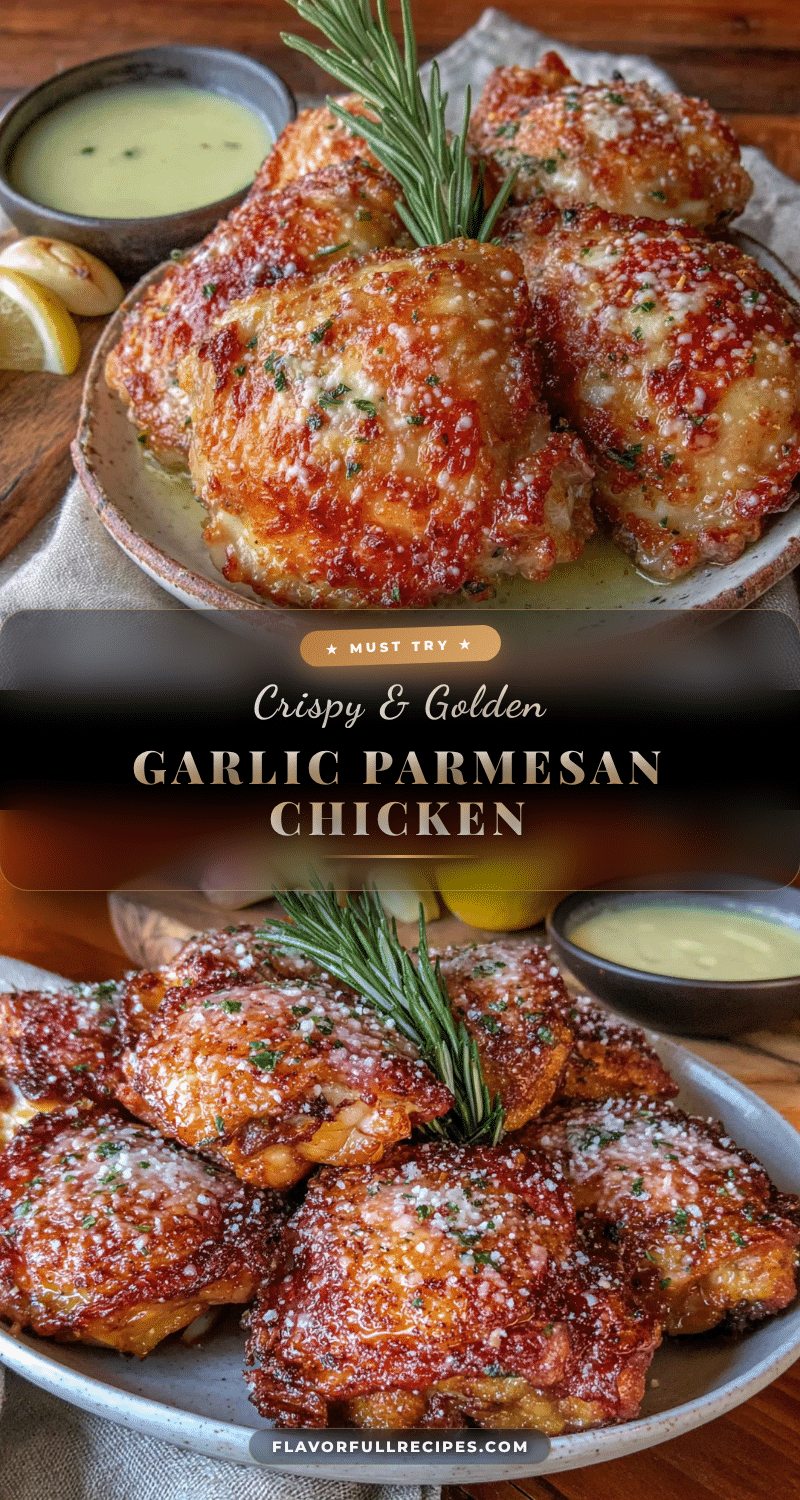

Crispy Garlic Parmesan Chicken Thighs: Easy Cozy Dinner Recipe
- Total Time: 50 minutes
- Yield: 6 servings 1x
Description
These crispy garlic Parmesan chicken thighs are a happy accident turned go-to dinner. With a golden, crunchy crust and juicy, tender meat, they’re perfect for cozy nights when you need a comforting, foolproof meal.
Ingredients
- 6 bone-in, skin-on chicken thighs (about 2 pounds)
- 1 cup freshly grated Parmesan cheese
- 4 cloves garlic, minced
- 1 cup panko breadcrumbs
- 3 tablespoons butter, melted
- 1 tablespoon olive oil
- 1 teaspoon dried Italian seasoning
- 1 teaspoon paprika
- 1 teaspoon salt
- ½ teaspoon black pepper
- Fresh parsley for garnish (optional)
Instructions
- Preheat oven to 400°F (200°C). Place a wire rack on a rimmed baking sheet and spray lightly with cooking spray.
- Pat chicken thighs dry with paper towels.
- Season chicken with salt and pepper on both sides.
- In a shallow bowl, combine melted butter and olive oil. Stir in minced garlic and let sit for 1 minute.
- In another shallow bowl, mix panko breadcrumbs, grated Parmesan, Italian seasoning, and paprika.
- Working one at a time, dip chicken into butter mixture, turning to coat. Let excess drip off.
- Press chicken into breadcrumb mixture, coating all surfaces. Press firmly to create a thick crust.
- Place coated thighs on the wire rack, skin side up, leaving space between each piece.
- Bake for 35-40 minutes, until internal temperature reaches 165°F (74°C) and crust is deep golden brown.
- Let chicken rest for 5 minutes before serving. Garnish with fresh parsley if desired.
Notes
For extra crispiness, use a wire rack to allow air circulation. If crust isn’t browning after 30 minutes, broil for the last 2-3 minutes. Let chicken rest 5 minutes before serving to keep juices inside.
- Prep Time: 15 minutes
- Cook Time: 35 minutes
- Category: Main Course
- Cuisine: American
Nutrition
- Serving Size: 1 chicken thigh
- Calories: 380
- Sugar: 1
- Sodium: 680
- Fat: 24
- Saturated Fat: 9
- Carbohydrates: 12
- Fiber: 1
- Protein: 28
Keywords: crispy chicken thighs, garlic parmesan chicken, baked chicken thighs, easy dinner recipe, cozy dinner