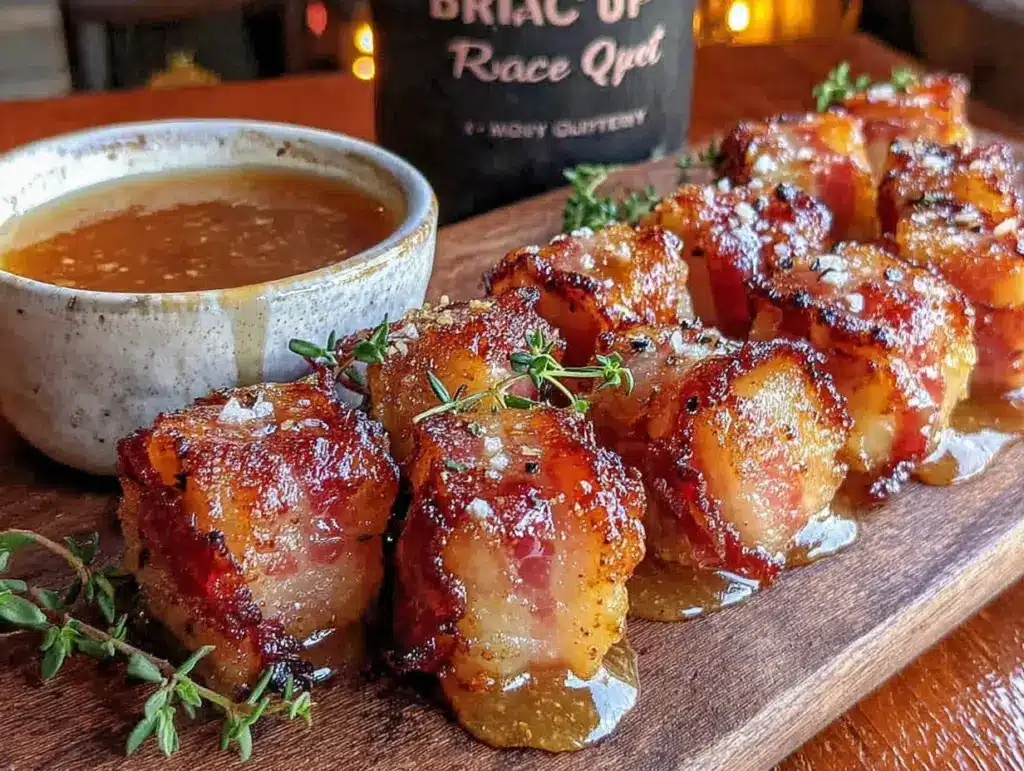
My friend Jenna swore she didn’t like cooked fruit. For years. We’re talking a solid decade of her pushing aside any baked apple or grilled peach that came her way at potlucks. Then, last fall, I was testing appetizers for a small gathering and made a batch of these bacon-wrapped apple bites mostly for myself, honestly. I figured I’d have leftovers for lunch the next day. I turned my back to grab the maple glaze off the counter, and when I looked again, Jenna had three of them on a napkin and was reaching for a fourth. She froze, caught red-handed—or rather, maple-glazed-fingered—and just said, “Okay, you got me. These are ridiculous.” That moment of quiet, smug satisfaction? That’s the whole energy of this recipe.
It’s funny how the best recipes come from stubbornness, isn’t it? I had this vision of a sweet and salty bite that didn’t feel heavy or fussy. Something you could make for a football party but also serve at a holiday dinner without anyone raising an eyebrow. The apples give you that crisp, tart bite that cuts through the smoky bacon, and the maple glaze ties it all together like it was meant to be. I won’t lie—the first few test batches were a mess. The apples got mushy, the bacon slid off, and I nearly gave up. But there’s something about the smell of bacon and maple simmering together that kept me coming back to the kitchen. Maybe you’ve been there, too, chasing a flavor combo that just feels right.
What finally clicked was the technique. You can’t just wrap an apple slice and hope for the best. You need the right apple, the right bacon thickness, and a little patience with the glaze. Once I figured that out, these little bites became my secret weapon. I keep making them because they’re the kind of appetizer that disappears before you can even put out the main dish. And honestly, watching someone who “hates” cooked fruit go back for thirds? That’s a win I’ll take any day.
Why You’ll Love This Recipe
I’ve tested this recipe more times than I care to admit, and I can tell you with confidence—this is the version that works. It’s been family-approved, neighbor-tested, and even survived a Super Bowl party where people were oddly picky. Here’s why it stands out:
- Quick & Easy: These come together in about 30 minutes from start to finish. Perfect for last-minute guests or that moment you realize you forgot to bring an appetizer to book club.
- Simple Ingredients: You only need five ingredients, and three of them are probably in your kitchen right now. No weird specialty items or trips to three different stores.
- Perfect for Fall Gatherings: These scream autumn vibes. Apple season, maple season, cozy sweater season—they fit right in at Thanksgiving, Halloween parties, or a casual Sunday football watch.
- Crowd-Pleaser: I’ve served these to kids, grandparents, and that one friend who claims they don’t like sweets. Every single person went back for more. It’s almost annoying how popular they are.
- Unbelievably Delicious: The contrast between the crispy bacon, the tender-yet-firm apple, and the sticky maple glaze is next-level. It’s that perfect sweet-salty combo that makes you close your eyes after the first bite.
What makes this recipe different from all the other bacon-wrapped appetizers out there? It’s the balance. Most versions are either too sweet or too salty, or the apple turns into mush. I spent weeks tweaking the bake time, the apple variety, and the glaze ratio to get it just right. The result is a bite that’s crisp, juicy, and coated in just enough glaze to feel indulgent without being overwhelming. It’s comfort food reimagined—faster, simpler, but with the same soul-soothing satisfaction. Perfect for impressing guests without stress, or turning a simple Tuesday night into something a little more memorable.
What Ingredients You Will Need
This recipe uses simple, wholesome ingredients to deliver bold flavor and satisfying texture without the fuss. Most of these are pantry staples, especially if you’re a fan of breakfast foods or fall baking. Here’s what you’ll need:
For the Bacon-Wrapped Apple Bites
- Apples, 2 large (I recommend Honeycrisp or Granny Smith—more on why below)
- Bacon, 12 slices (standard cut works best; avoid thick-cut or thin-cut for this recipe)
- Maple syrup, 1/4 cup (use pure maple syrup, not pancake syrup—it makes a difference in flavor)
- Brown sugar, 2 tablespoons (light or dark both work; dark gives a deeper molasses note)
- Cinnamon, 1/2 teaspoon (optional, but it adds a lovely warmth)
Ingredient Tips & Selection Notes:
Choosing the right apple is critical here. You want something that holds its shape during baking and provides a tart contrast to the sweet glaze. Honeycrisp apples are my go-to—they’re firm, juicy, and have that perfect sweet-tart balance. Granny Smith apples work beautifully too if you prefer a tarter bite that really cuts through the bacon fat. Avoid soft apples like Red Delicious or McIntosh, which will turn mushy and fall apart. I learned that the hard way after a very sad batch of apple mush wrapped in bacon.
For the bacon, standard cut is your friend. Thick-cut bacon takes too long to crisp up, and by the time it’s done, the apples are overcooked. Thin-cut bacon burns before the apples soften. I’ve tested both, and standard cut (about 1/16 inch thick) is the sweet spot. I personally prefer Wright Brand or Oscar Mayer for consistent results, but any good-quality standard-cut bacon works.
The maple syrup is non-negotiable in my book. Please don’t use the artificially flavored pancake syrup—it has a completely different consistency and sweetness profile. Pure maple syrup (Grade A Dark Amber is my favorite) gives you that rich, woodsy flavor that makes the glaze so addictive. If you’re in a pinch, you can substitute honey, but the flavor will be different.
Substitution Guidance:
- Gluten-free: This recipe is naturally gluten-free as written.
- Dairy-free: Also naturally dairy-free. No substitutions needed.
- Low-sugar: You can reduce the brown sugar to 1 tablespoon and use a sugar-free maple syrup, but the glaze won’t be as sticky or caramelized.
- Paleo/Whole30: Use coconut sugar instead of brown sugar and ensure your bacon is sugar-free. It works, but the flavor profile shifts slightly.
Equipment Needed
You don’t need much fancy equipment for this recipe, which is part of its charm. Here’s what you’ll need:
- Baking sheet (rimmed is best to catch any bacon drippings)
- Parchment paper or aluminum foil (for easy cleanup—trust me on this)
- Wire rack (fits inside the baking sheet; this helps the bacon crisp evenly on all sides)
- Small saucepan (for making the glaze)
- Sharp knife (for cutting the apples—a dull knife makes this frustrating)
- Cutting board
- Pastry brush (for applying the glaze; a spoon works in a pinch)
- Toothpicks (optional, but helpful for securing the bacon if needed)
Personal Note on Equipment: I used to skip the wire rack and just put the bites directly on the baking sheet. Big mistake. The bottoms got soggy, and the bacon didn’t crisp evenly. A simple wire rack makes a world of difference. You can find them at any kitchen store for under $10, and they’re worth every penny. If you don’t have one, you can use a broiler pan, but the rack is easier to clean. Also, line your baking sheet with parchment paper—the cleanup is infinitely easier. I forgot once and spent 20 minutes scrubbing caramelized maple syrup off the pan. Never again.
Preparation Method
Let’s get cooking. I’ll walk you through this step by step, with all the little details I wish someone had told me the first time.
Step 1: Preheat and Prep
Preheat your oven to 400°F (200°C). Line a rimmed baking sheet with parchment paper or aluminum foil, and place a wire rack on top. This setup allows hot air to circulate around the bites, giving you crispy bacon on all sides. While the oven heats, core your apples and cut them into wedges. You want each wedge to be about 1/2 inch thick at the widest part—too thin and they’ll dry out, too thick and they won’t cook through. I usually get about 8-10 wedges per apple, depending on size. Set the wedges aside.
Step 2: Prepare the Bacon
Cut each bacon slice in half crosswise. You’ll have 24 half-slices. If your bacon is particularly long, you might get away with cutting it into thirds, but halves are easier to handle. Here’s a tip I learned the hard way: let the bacon sit at room temperature for about 5 minutes before cutting. Cold bacon is stiff and tears easily. Room-temp bacon cuts cleanly and wraps more cooperatively.
Step 3: Wrap the Apples
Take one apple wedge and wrap it with a half-slice of bacon, overlapping the ends slightly on the back side. Place the wrapped wedge seam-side down on the wire rack. The weight of the apple and the rack will help hold the bacon in place as it cooks. Don’t worry if the bacon doesn’t stay perfectly tight—it will shrink as it cooks and grip the apple. If you’re nervous about it unraveling, you can secure it with a toothpick, but I rarely find it necessary. Repeat with the remaining apple wedges and bacon.
Step 4: First Bake
Place the baking sheet in the preheated oven and bake for 15 minutes. At this point, the bacon should be starting to render its fat and turn golden around the edges, but it won’t be fully crispy yet. The apples will have softened slightly but should still hold their shape. If your bacon looks very pale after 15 minutes, give it another 2-3 minutes—ovens vary.
Step 5: Make the Maple Glaze
While the bites are baking, make the glaze. In a small saucepan over medium heat, combine the maple syrup, brown sugar, and cinnamon (if using). Stir constantly until the brown sugar dissolves and the mixture is smooth and slightly thickened, about 2-3 minutes. Remove from heat. The glaze will thicken further as it cools, so don’t worry if it looks thin. Taste it—yes, it’s that good. Try not to drink it straight from the pan. (I have no self-control around this stuff.)
Step 6: Glaze and Finish
After the first 15-minute bake, remove the baking sheet from the oven. Using a pastry brush, generously brush each bacon-wrapped apple bite with the maple glaze. Don’t be shy—the glaze is what makes these magical. Return the sheet to the oven and bake for another 8-10 minutes, until the bacon is crispy and caramelized. The glaze will bubble and darken slightly—that’s perfect. Keep an eye on them during the last few minutes; maple syrup can burn quickly if left unattended.
Step 7: Rest and Serve
Remove the baking sheet from the oven and let the bites rest on the wire rack for 5 minutes. This is crucial—the glaze is molten hot and will burn your mouth if you dive in immediately. I speak from experience. The resting time also allows the bacon to firm up a bit, giving you that perfect crispy bite. Transfer to a serving platter and serve warm. These are best enjoyed within 15-20 minutes of coming out of the oven.
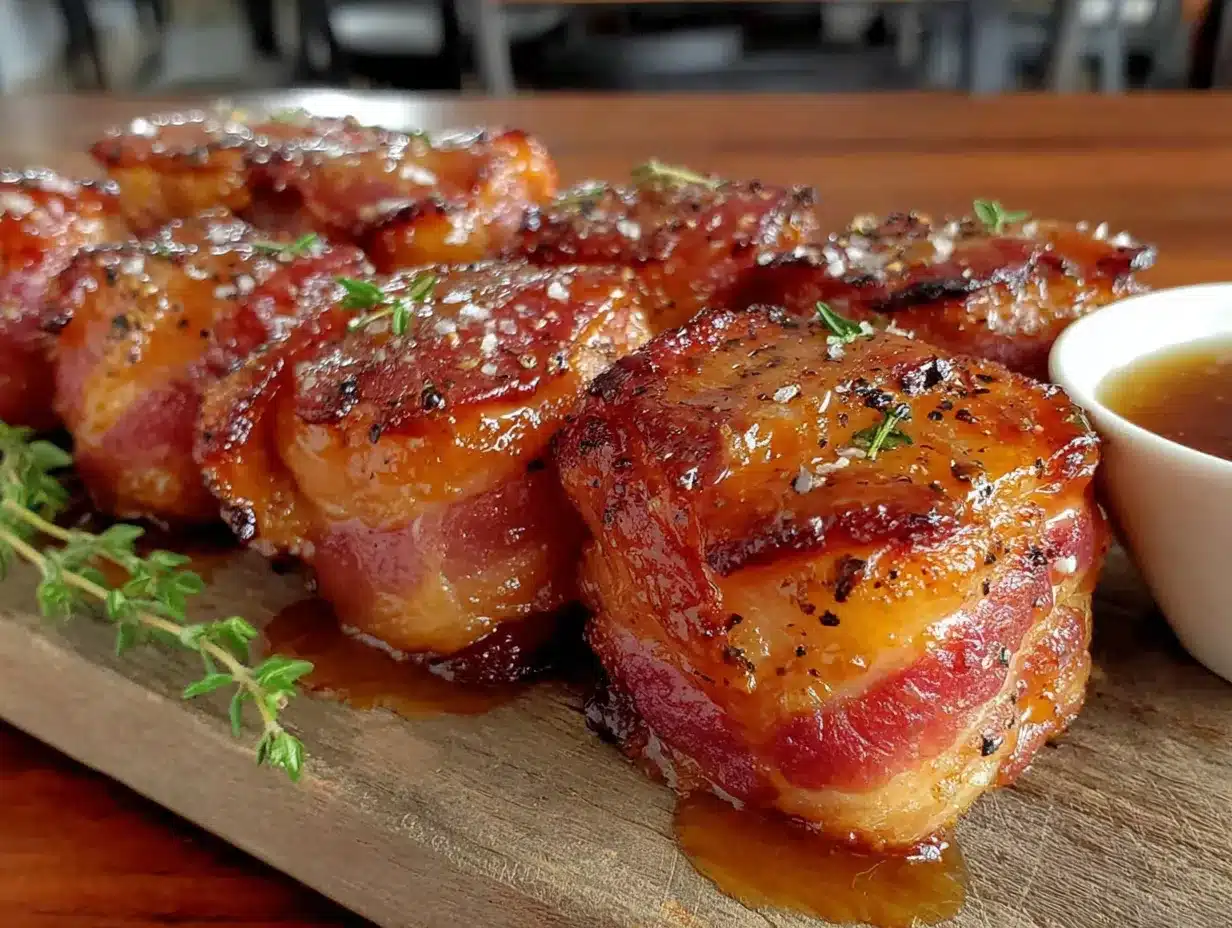
Sensory Cues: The kitchen should smell like a cozy autumn morning—smoky bacon, sweet maple, and warm cinnamon. The bacon should be deep golden brown and slightly shrunken around the apple. When you bite into one, you should hear a slight crack from the bacon, followed by the tender-yet-firm resistance of the apple. The glaze should be sticky but not runny.
Cooking Tips & Techniques
I’ve made these bites more times than I can count, and I’ve made every mistake in the book. Here’s what I’ve learned so you don’t have to repeat my failures.
Don’t Overcrowd the Rack. Leave a little space between each bite—about 1/2 inch. If they’re touching, they’ll steam instead of crisp, and you’ll end up with flabby bacon. I made this mistake during a test batch for a party and ended up with 24 sad, soggy bites. Not my finest moment.
Pat the Apple Wedges Dry. After cutting the apples, give them a quick pat with a paper towel. Excess moisture on the apple surface creates steam, which prevents the bacon from adhering properly and crisping up. This one simple step made a huge difference in my results.
Use a Meat Thermometer for Consistency. If you’re nervous about doneness, the bacon should reach an internal temperature of 165°F (74°C) for food safety, but honestly, you’re looking for visual cues more than temperature here. The bacon should be deep golden brown and the glaze should be bubbling and slightly darkened.
Timing and Multitasking Strategy. Here’s how I streamline the process: While the oven preheats, I core and cut the apples. While the first bake is happening, I make the glaze. That way, everything is ready to go when the timer goes off. Total active time is about 10 minutes; the rest is hands-off oven time.
Consistency Tip: Cut your apple wedges as uniformly as possible. Uneven sizes mean some will be perfectly cooked while others are overdone or underdone. I aim for wedges that are roughly the same thickness—about 1/2 inch at the widest point. It takes an extra 30 seconds, and it’s worth it.
Variations & Adaptations
One of the best things about this recipe is how adaptable it is. Here are some variations I’ve tried and loved:
Spicy Maple Version: Add 1/4 teaspoon of cayenne pepper or red pepper flakes to the maple glaze. The heat cuts through the sweetness beautifully and gives the bites a surprising kick. I made this version for a game day party, and it was the first thing to disappear. Just be careful not to overdo it—a little heat goes a long way.
Pecan-Crusted Bites: After brushing on the glaze in Step 6, sprinkle each bite with finely chopped pecans before returning to the oven. The nuts toast in the oven and add a lovely crunch that complements the bacon and apple. This is my go-to for holiday gatherings when I want something that feels a little more special.
Balsamic Glaze Variation: Swap the maple syrup for balsamic glaze (the thick, syrupy kind you can buy or make by reducing balsamic vinegar). The tangy, slightly sweet balsamic pairs beautifully with the apple and bacon. Reduce the brown sugar to 1 tablespoon since balsamic glaze is already sweet. This version feels more sophisticated and works well for dinner parties.
Air Fryer Adaptation: If you don’t want to heat up the oven, these work great in an air fryer. Preheat the air fryer to 375°F (190°C). Place the wrapped bites in the basket in a single layer (you may need to work in batches). Cook for 8 minutes, then brush with glaze and cook for another 3-4 minutes until crispy. The air fryer version is actually my preferred method when I’m only making a small batch—it’s faster and the bacon gets incredibly crispy.
Dairy-Free and Gluten-Free: This recipe is naturally both, so no adaptations needed. Always double-check your bacon label, as some brands add gluten-containing ingredients. Most standard bacon is gluten-free, but it’s worth verifying.
Serving & Storage Suggestions
Serving Temperature: These bites are best served warm, straight from the oven. The bacon is at its crispiest, the apple is tender but not mushy, and the glaze is perfectly sticky. If you’re serving them at a party, try to time the final bake so they come out just as guests arrive. They’ll hold their heat for about 15-20 minutes on the platter.
Presentation Ideas: Arrange the bites on a wooden serving board or a white platter for contrast. Garnish with a sprinkle of fresh thyme leaves or a light dusting of cinnamon for visual appeal. I like to serve them with small bowls of extra maple glaze or a dollop of crème fraîche for dipping. The tangy cream balances the sweetness beautifully.
Complementary Dishes: These bites pair wonderfully with a crisp green salad dressed with a simple vinaigrette—the acidity cuts through the richness. They’re also fantastic alongside a cheese board with sharp cheddar, aged gouda, or blue cheese. For drinks, try a dry hard cider, a crisp Sauvignon Blanc, or a bourbon cocktail. The smoky-sweet flavor profile loves a little booze.
Storage Instructions: If you have leftovers (unlikely, but possible), store them in an airtight container in the refrigerator for up to 3 days. The bacon will lose its crispness, but the flavor will still be great. To reheat, place them on a wire rack over a baking sheet and warm in a 350°F (175°C) oven for 5-7 minutes. Avoid the microwave—it turns the bacon rubbery and the apple mushy. I learned that lesson after a very disappointing leftover lunch.
Flavor Development: Interestingly, the flavors meld and deepen after a day in the fridge. The maple glaze soaks into the apple slightly, and the smoky bacon flavor becomes more pronounced. If you’re making these ahead for a party, you can prep the wrapped bites (without glaze) a day in advance, store them covered in the fridge, and then bake and glaze them fresh. This is my preferred method for stress-free entertaining.
Nutritional Information & Benefits
Here’s the nutritional breakdown per serving (2 bites, based on 12 servings total):
- Calories: 185
- Total Fat: 11g
- Saturated Fat: 3.5g
- Cholesterol: 20mg
- Sodium: 320mg
- Total Carbohydrates: 18g
- Dietary Fiber: 1g
- Sugars: 15g
- Protein: 5g
Health Benefits: Apples are packed with fiber and vitamin C, and they contain antioxidants that support heart health. The fiber helps with digestion and keeps you feeling full. Bacon gets a bad rap, but in moderation, it provides protein and B vitamins. The maple syrup offers trace minerals like zinc and manganese. Is this a health food? No. But it’s a treat made with real ingredients, and there’s value in that. I believe in balance—enjoying something indulgent without guilt, knowing that the rest of your diet is nourishing your body.
Dietary Considerations: This recipe is naturally gluten-free and dairy-free. It contains pork (bacon), so it’s not suitable for vegetarian, vegan, or halal diets. The sugar content is moderate, so if you’re watching your sugar intake, you can reduce the brown sugar or use a sugar-free maple syrup alternative. Always check your bacon label for any added sugars or preservatives if you have specific dietary needs.
FAQs
Can I make these ahead of time for a party?
Yes! You can prep the wrapped apple bites (without the glaze) up to 24 hours in advance. Store them covered in the refrigerator, then bake and glaze them fresh on the day of your party. The apples may darken slightly from oxidation, but a quick brush of lemon juice on the cut sides before wrapping will prevent that.
Why did my bacon turn out soggy instead of crispy?
This usually happens for one of three reasons: the bacon was too thick, the apple wedges were too wet, or the bites were overcrowded on the rack. Make sure you’re using standard-cut bacon, pat the apple wedges dry before wrapping, and leave space between each bite on the wire rack. Also, don’t skip the wire rack—placing them directly on the baking sheet traps steam underneath.
Can I use a different type of apple?
Absolutely. I recommend Honeycrisp or Granny Smith for their firm texture and balanced flavor, but Fuji, Braeburn, or Pink Lady also work well. Avoid soft apples like Red Delicious, Gala, or McIntosh, which will turn mushy during baking. If you only have soft apples on hand, reduce the first bake time by 2-3 minutes.
What if I don’t have a wire rack?
You can still make these without one, but the bottoms won’t be as crispy. Place the wrapped bites directly on a parchment-lined baking sheet, but flip them halfway through the first bake (after about 8 minutes) to help the bacon cook evenly. Alternatively, you can use a broiler pan, which has a similar slotted design. If you make these often, I highly recommend investing in a simple wire rack—it makes a noticeable difference.
Can I use turkey bacon instead of pork bacon?
You can, but the results won’t be the same. Turkey bacon is leaner and won’t crisp up as well. It also shrinks less, so it might not grip the apple as tightly. If you’re using turkey bacon, reduce the first bake time by 2-3 minutes and watch closely to prevent burning. The flavor will be milder, so consider adding a pinch of smoked paprika to the glaze for extra smokiness.
Conclusion
These crispy bacon-wrapped apple bites with maple glaze are the kind of recipe that makes you look like a hero with almost no effort. They’re salty, sweet, crispy, and tender all at once—a perfect bite that disappears faster than you can make them. I love how versatile they are, fitting in at casual game days and fancy holiday parties alike. And honestly, I love that they changed Jenna’s mind about cooked fruit. There’s something deeply satisfying about that.
I hope you give these a try and make them your own. Maybe you’ll add a pinch of cayenne for heat, or a sprinkle of pecans for crunch. Maybe you’ll serve them with a tangy dip or pair them with your favorite fall cocktail. Whatever you do, I’d love to hear about it. Drop a comment below and let me know how they turned out—did anyone in your house get caught with their hand in the cookie jar, so to speak? Share your photos, your tweaks, your stories. That’s what makes cooking so fun, isn’t it? The shared joy of a really good bite.
Happy cooking, friends. Go make something delicious.
Pin This Recipe!
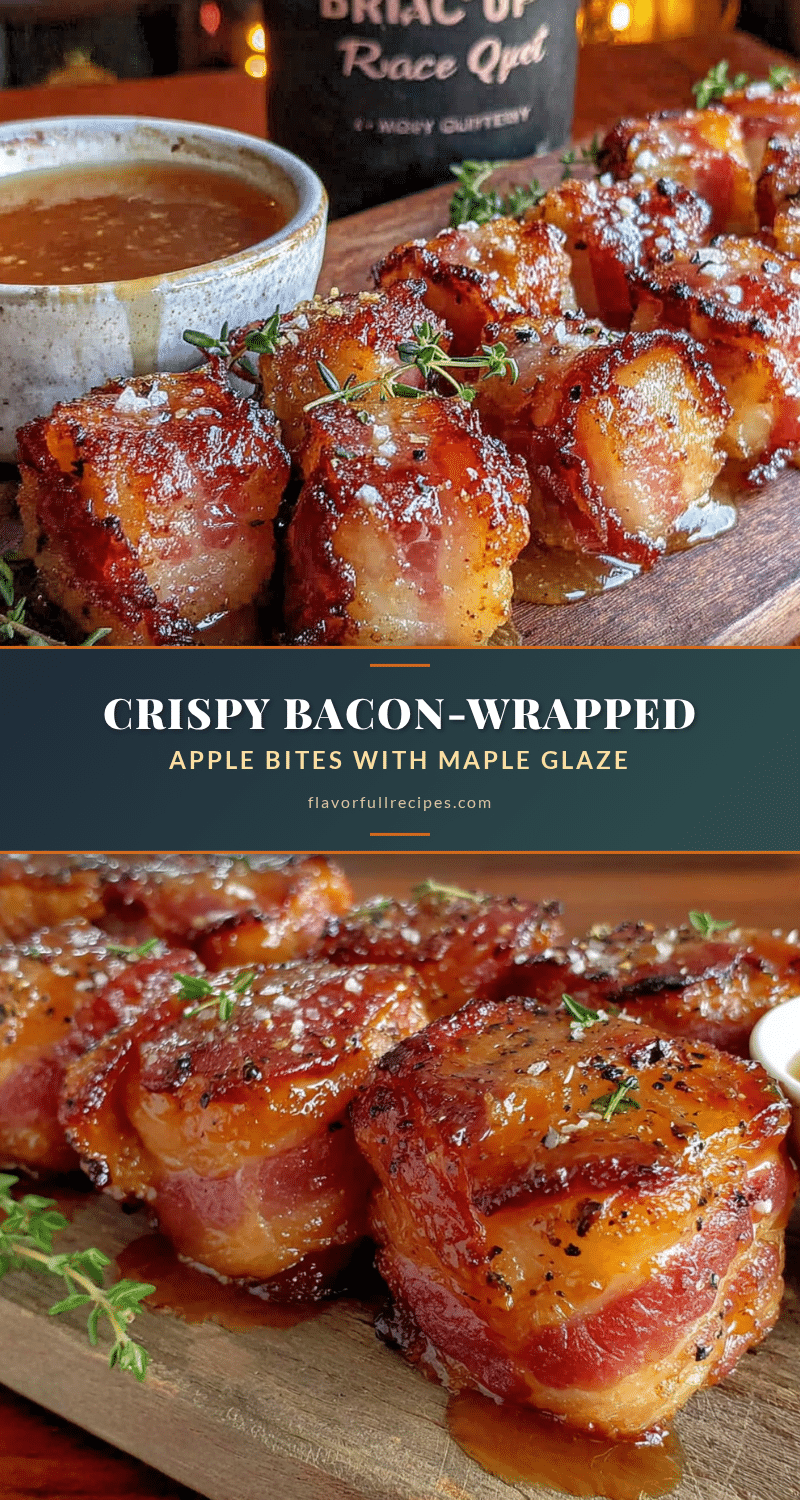

Crispy Bacon-Wrapped Apple Bites: Easy Maple Glazed Appetizer
- Total Time: 35 minutes
- Yield: 12 servings (2 bites per serving) 1x
Description
These crispy bacon-wrapped apple bites with maple glaze are the perfect sweet and salty appetizer. Quick to make with just five ingredients, they’re a crowd-pleaser for fall gatherings, game days, or holiday parties.
Ingredients
- 2 large apples (Honeycrisp or Granny Smith recommended)
- 12 slices bacon (standard cut)
- 1/4 cup pure maple syrup
- 2 tablespoons brown sugar (light or dark)
- 1/2 teaspoon cinnamon (optional)
Instructions
- Preheat oven to 400°F (200°C). Line a rimmed baking sheet with parchment paper or aluminum foil and place a wire rack on top.
- Core the apples and cut into wedges about 1/2 inch thick at the widest part. Set aside.
- Cut each bacon slice in half crosswise to make 24 half-slices. Let bacon sit at room temperature for 5 minutes before cutting for easier handling.
- Wrap each apple wedge with a half-slice of bacon, overlapping the ends slightly on the back side. Place seam-side down on the wire rack.
- Bake for 15 minutes until bacon starts to render and turn golden around the edges.
- While bites bake, make the glaze: In a small saucepan over medium heat, combine maple syrup, brown sugar, and cinnamon (if using). Stir constantly until brown sugar dissolves and mixture is smooth and slightly thickened, about 2-3 minutes. Remove from heat.
- Remove baking sheet from oven. Brush each bacon-wrapped apple bite generously with the maple glaze.
- Return to oven and bake for another 8-10 minutes until bacon is crispy and caramelized. Watch closely to prevent burning.
- Remove from oven and let rest on wire rack for 5 minutes before serving. Serve warm.
Notes
For best results, use standard-cut bacon and firm apples like Honeycrisp or Granny Smith. Pat apple wedges dry before wrapping to help bacon crisp. Don’t overcrowd the rack—leave space between bites. The glaze can burn quickly, so watch during the last few minutes of baking. Leftovers can be stored in an airtight container in the refrigerator for up to 3 days; reheat in a 350°F oven for 5-7 minutes.
- Prep Time: 10 minutes
- Cook Time: 25 minutes
- Category: Appetizer
- Cuisine: American
Nutrition
- Serving Size: 2 bites
- Calories: 185
- Sugar: 15
- Sodium: 320
- Fat: 11
- Saturated Fat: 3.5
- Carbohydrates: 18
- Fiber: 1
- Protein: 5
Keywords: bacon wrapped apple bites, maple glazed appetizer, easy appetizer, fall appetizer, sweet and salty appetizer