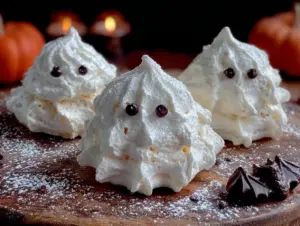
The Halloween party was in six hours and I’d completely forgotten. Everyone else would be bringing elaborate themed desserts—I saw the photos on social media the night before. A graveyard cake with chocolate tombstones. Cupcakes with buttercream spiders. Someone had clearly spent three days on a haunted gingerbread house. And me? I had a half-empty bag of sugar, some egg whites from a baking project earlier that week, and absolutely no plan. Honestly, I almost just grabbed a bag of candy from the store on the way.
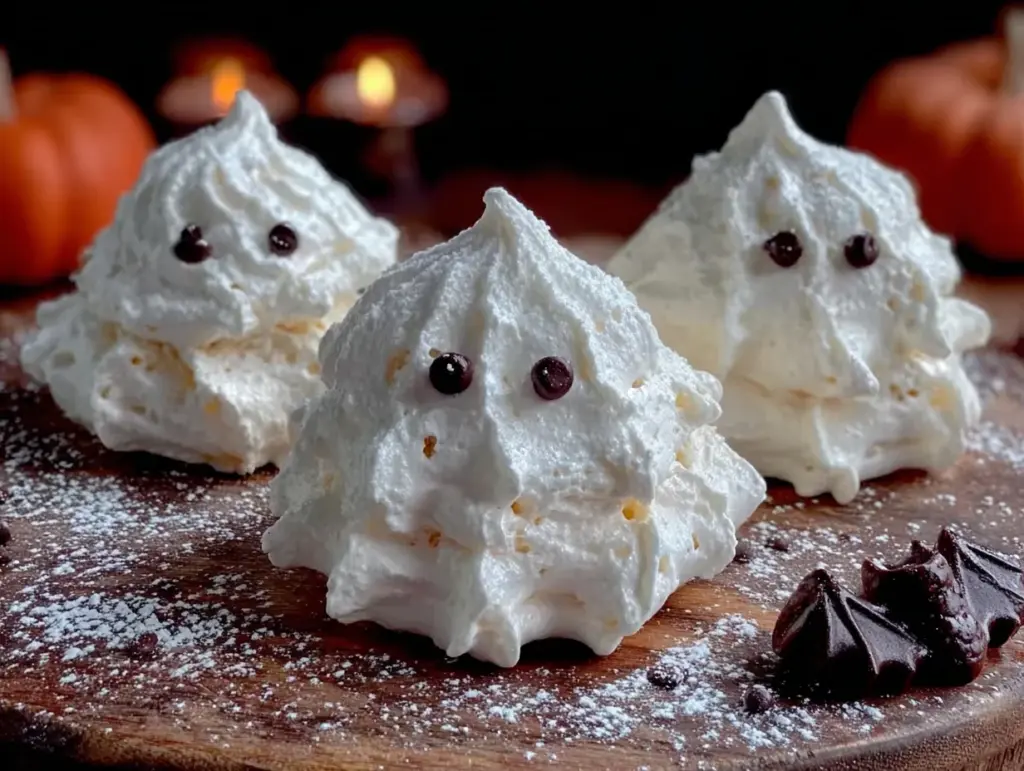
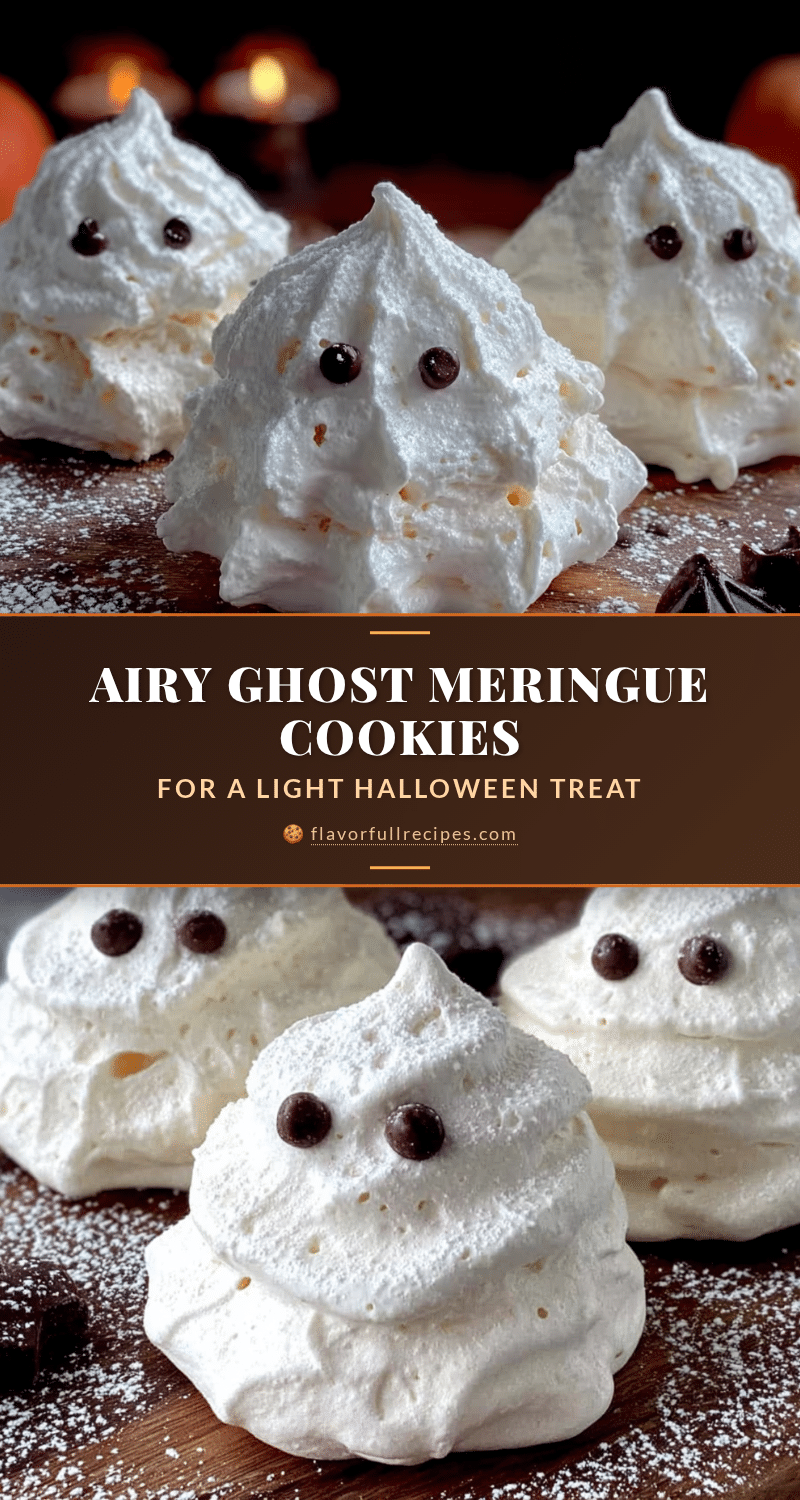
But then I remembered these little airy ghost meringue cookies I’d made once, years ago. They’re ridiculously simple—like, embarrassingly simple. You pipe them into little ghost shapes, bake them low and slow, and suddenly you have these light, crisp, adorable little ghosts that look like they’re floating on the plate. I mean, I wasn’t trying to win anything. I was just trying not to show up empty-handed.
Here’s the thing though. When I walked into that party with a platter of these ghost meringue cookies, they were gone in twenty minutes. People kept coming back for more. Someone asked if I’d taken a class. Another person wanted the recipe. And I’m standing there thinking, “I literally made these in under an hour with three ingredients.” Maybe you’ve been there—the accidental win when you least expect it. That’s this recipe. It’s the underdog of Halloween treats. And honestly? It’s the one I keep making every year now, even when I have plenty of time to plan.
Why You’ll Love This Recipe
These airy ghost meringue cookies aren’t just another Halloween dessert. They’re the kind of recipe that makes you look like you put in way more effort than you actually did. I’ve tested this method at least a dozen times across different humidity levels and egg white temperatures, and I can tell you—it works every single time when you follow the right steps.
- Quick & Easy: From start to finish, you’re looking at about 1 hour and 30 minutes total, with only about 15 minutes of active hands-on time. The oven does the rest of the work.
- Simple Ingredients: You need exactly three main ingredients—egg whites, sugar, and vanilla extract. That’s it. No special trip to the store for obscure Halloween supplies.
- Perfect for Halloween Parties: These little ghosts are the star of any Halloween spread. They’re light, not too sweet, and completely adorable.
- Crowd-Pleaser: Kids love them because they look like ghosts. Adults love them because they’re not another heavy chocolate dessert.
- Unbelievably Delicious: The texture is what gets people. They’re crispy on the outside, slightly chewy in the center, and they literally melt in your mouth.
What makes these different from every other meringue cookie recipe out there? It’s the technique. I use a specific method for whipping the egg whites that creates an ultra-stable foam, which means your ghosts hold their shape perfectly during baking. No flat, sad ghosts here. Plus, the low-and-slow baking method ensures they dry out completely without browning, so they stay that perfect ghostly white.
This is the recipe that makes you close your eyes after the first bite. It’s Halloween comfort food reimagined—lighter, faster, but with the same festive satisfaction. Perfect for impressing guests without stress, or turning a simple Tuesday into something memorable.
What Ingredients You Will Need
This recipe uses simple, pantry-friendly ingredients to create something truly magical. The beauty of meringue is that it’s more about technique than fancy ingredients. Here’s what you’ll need:
- 3 large egg whites, room temperature (for best volume, let them sit out for 30 minutes)
- ¾ cup (150g) granulated white sugar (I recommend using superfine sugar if you can find it—it dissolves faster)
- ½ teaspoon vanilla extract (use pure vanilla extract, not imitation, for the best flavor)
- ¼ teaspoon cream of tartar (this stabilizes the egg whites and helps them hold their shape)
- Pinch of fine sea salt (balances the sweetness)
- Optional: Black gel food coloring (for drawing faces on the ghosts after baking)
A few notes on ingredients from my kitchen to yours. Room temperature egg whites are non-negotiable here. I learned this the hard way when I tried to rush things with cold eggs and ended up with flat, weepy meringue. Cold egg whites don’t whip up as high, and they’re more likely to collapse. So plan ahead and pull your eggs out of the fridge about 30 minutes before you start.
For the sugar, regular granulated sugar works perfectly fine. But if you have superfine sugar—sometimes labeled as caster sugar—it dissolves into the egg whites more quickly, which gives you a smoother, more stable meringue. I’ve used both, and honestly, the difference is subtle but noticeable if you’re paying attention.
The cream of tartar is your secret weapon. It’s an acid that helps stabilize the egg white foam, making it less likely to deflate when you pipe it. If you don’t have cream of tartar, you can substitute with ½ teaspoon of fresh lemon juice or white vinegar. I’ve done it in a pinch and it works fine.
For the vanilla, I really recommend spending the extra dollar or two on pure vanilla extract. The imitation stuff has an artificial taste that becomes more noticeable in a simple recipe like this where vanilla is one of the only flavorings.
Equipment Needed
You don’t need a lot of fancy equipment for these ghost meringue cookies, which is part of why I love this recipe. Here’s what you’ll need:
- Electric stand mixer or hand mixer (you can whip egg whites by hand with a whisk, but honestly, your arm will give out before you get stiff peaks—I speak from experience)
- Large mixing bowl (make sure it’s completely clean and dry—any grease will ruin your meringue)
- Piping bag (disposable ones are fine, or you can use a resealable plastic bag with the corner snipped off)
- Large round piping tip (about ½-inch opening, or you can just snip the bag directly)
- Baking sheet (lined with parchment paper—do NOT use wax paper)
- Rubber spatula (for folding in the vanilla)
- Cooling rack (for cooling the cookies completely)
If you don’t have a piping bag, don’t stress. I’ve made these using a sturdy zip-top bag with the corner snipped off, and they turned out just as cute. The key is to cut a small opening—about ¼ to ½ inch—so you have control over the shape. Too big and your ghosts will come out blobby.
One tip about the mixing bowl: I keep a separate glass or metal bowl specifically for whipping egg whites. Plastic bowls can retain traces of grease even after washing, and grease is the enemy of meringue. If you’re using a plastic bowl, wipe it down with a bit of lemon juice or vinegar before you start to remove any residue.
Preparation Method
Alright, let’s get into the actual making of these adorable ghost meringue cookies. I’ll walk you through every step with the little tricks I’ve picked up along the way.
- Preheat your oven to 200°F (95°C). Yes, this is very low. That’s intentional. We’re drying the meringue, not baking it. Line a large baking sheet with parchment paper and set it aside.
- Prepare your piping bag. Fit your piping bag with a large round tip, or just get a zip-top bag ready. If you’re using a disposable bag, snip about ½ inch off the tip and insert the piping tip. Twist the bag above the tip to keep the meringue from leaking out while you fill it.
- Whip the egg whites. Place your room temperature egg whites in the clean, dry mixing bowl. Add the cream of tartar and pinch of salt. Start mixing on medium speed until the egg whites become foamy and bubbly—about 30-45 seconds. You should see lots of tiny bubbles forming.
- Gradually add the sugar. This is the most important step. With the mixer running on medium-high speed, add the sugar one tablespoon at a time. I know it feels tedious, but trust me on this. Adding the sugar slowly gives it time to dissolve completely. If you dump it all in at once, your meringue will be grainy and less stable. Take about 2-3 minutes to add all the sugar.
- Whip to stiff peaks. Once all the sugar is in, increase the speed to high and whip for another 5-7 minutes. You’re looking for stiff, glossy peaks that hold their shape when you lift the whisk. Here’s how to test: stop the mixer, lift the whisk attachment straight up. The meringue should form a peak that stands straight up without drooping. If the peak flops over, keep whipping. Also, rub a tiny bit of meringue between your fingers—if it feels smooth and not gritty, the sugar is fully dissolved.
- Add the vanilla. Pour in the vanilla extract and give it one more quick whip—about 15 seconds—just to incorporate it evenly. Don’t overmix at this point or you risk deflating the meringue.
- Fill your piping bag. Use your rubber spatula to gently scoop the meringue into the piping bag. Don’t overfill—about halfway is good. Twist the top of the bag to seal it.
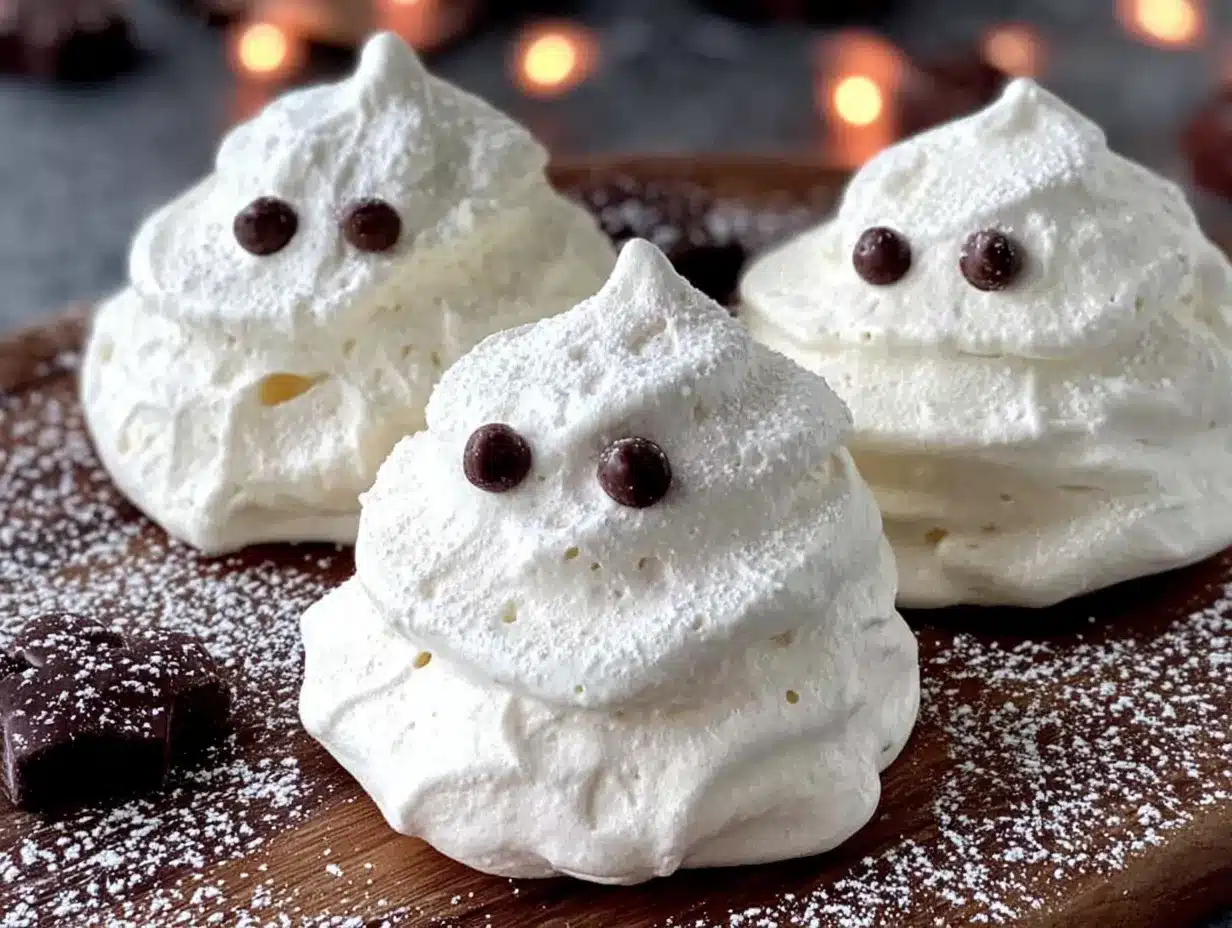
- Pipe the ghosts. Hold the piping bag straight up and down, about ½ inch above the parchment paper. Squeeze gently to create a round base—about 1½ inches wide. Then, as you continue squeezing, slowly lift the bag straight up to create a tall, tapered ghost shape. Stop squeezing and pull the bag away quickly to create a little peak on top. Space them about 1 inch apart—they don’t spread much, but you want room for air circulation. I usually get about 24-30 ghosts from one batch.
- Bake low and slow. Place the baking sheet in the preheated oven and bake for 60-75 minutes. The meringues are done when they’re completely dry and firm to the touch. They should lift easily off the parchment paper without sticking. If they still feel sticky or soft, give them another 10-15 minutes. Every oven is different, so start checking at the 60-minute mark.
- Cool completely. Turn off the oven and leave the meringues inside with the door slightly open for another 30 minutes. This helps them dry out completely and prevents cracking from sudden temperature changes. Then transfer them to a wire rack to cool completely.
- Add faces (optional but adorable). Once the ghosts are completely cool, use black gel food coloring and a tiny paintbrush or toothpick to draw little ghost faces on them. Two dots for eyes and a little oval mouth. You can also use melted dark chocolate in a piping bag if you prefer.
A few troubleshooting notes: If your meringue is weeping (little beads of liquid forming) or cracking, it usually means the oven temperature was too high or the meringue wasn’t whipped enough. If the ghosts are browning, your oven runs hot—try reducing the temperature by 10-15 degrees next time.
Cooking Tips & Techniques
I’ve made these airy ghost meringue cookies more times than I can count, and I’ve definitely learned a few things the hard way. Here are my best tips for success:
Humidity is your enemy. Meringue hates humidity. If it’s a rainy or humid day, your meringue might not set properly. The sugar absorbs moisture from the air, which can make your cookies sticky and soft. If you can, make these on a dry day. If you can’t wait, try adding an extra 15 minutes to the baking time.
Don’t overbake. I know I said to bake them low and slow, but there’s a fine line between perfectly dry and overbaked. Overbaked meringue turns a slight tan color and can get brittle. You want them to be dry but still pale white. That’s why I recommend checking at the 60-minute mark.
Separate eggs carefully. This is crucial. Even a tiny speck of egg yolk in your egg whites will prevent them from whipping up properly. I separate each egg into a small bowl first, then add the white to the mixing bowl. That way, if one yolk breaks, you haven’t ruined the whole batch.
Room temperature matters. I mentioned this before, but it bears repeating. Cold egg whites don’t whip as high. Take them out of the fridge 30 minutes before you start. If you’re in a rush, you can place the eggs in a bowl of warm water for 5 minutes.
Piping technique practice. If you’ve never piped meringue before, practice a few ghosts on a separate piece of parchment before you start on your main sheet. You’ll get a feel for the pressure and speed. Don’t worry if the first few look a little wonky—they’ll still taste delicious.
Multitasking strategy. While your meringue is baking, you can prep other Halloween treats or set up your serving platter. The long baking time is actually a blessing—it gives you time to get everything else ready.
Variations & Adaptations
One of the best things about this recipe is how easy it is to customize. Here are some variations I’ve tried and loved:
Chocolate Ghosts: Replace 2 tablespoons of the granulated sugar with 2 tablespoons of unsweetened cocoa powder. Sift the cocoa powder with the sugar before adding it to the egg whites. You’ll get chocolate-flavored ghosts that are still light and airy. I made these for a friend who “doesn’t do plain meringue” and she ate six of them.
Peppermint Specters: Add ¼ teaspoon of peppermint extract along with the vanilla. These are perfect for a Halloween-Christmas crossover party (yes, those exist, and they’re surprisingly fun). You can also crush a candy cane and sprinkle the pieces on top before baking.
Pumpkin Spice Phantoms: Whisk 1 teaspoon of pumpkin pie spice into the sugar before adding it to the egg whites. The warm spices complement the vanilla beautifully and give the ghosts a subtle fall flavor. These are my personal favorite for October gatherings.
Vegan Version: You can make these with aquafaba—the liquid from a can of chickpeas. Use 3 tablespoons of aquafaba per egg white (so 9 tablespoons total). Whip it the same way you would egg whites, with the cream of tartar and sugar. It takes a bit longer to reach stiff peaks, but it works. I’ve tested this and the texture is slightly different—a bit chewier—but still delicious.
Colorful Ghosts: Add a drop or two of gel food coloring to the meringue before piping. Pastel colors work best—think pale purple, soft green, or light orange. Just be careful not to overmix the color in, or you’ll deflate the meringue. Swirl it in gently with a toothpick for a marbled effect.
Serving & Storage Suggestions
These ghost meringue cookies are best served at room temperature. They’re light and airy, and they literally melt in your mouth. I like to arrange them on a dark platter or black serving board to make the white ghosts really pop. You can scatter some candy corn or Halloween sprinkles around the base for extra festive flair.
For a Halloween party, arrange the ghosts in a cluster on a large plate as if they’re having a little ghost gathering. Add some dry ice underneath a separate bowl for a spooky fog effect (just be careful with dry ice—use gloves and follow safety instructions).
These pair beautifully with a warm drink. I love serving them alongside hot apple cider, pumpkin spice lattes, or even a simple cup of hot chocolate. The sweetness of the meringue balances the warmth of the drink perfectly.
For storage, place the cooled meringues in an airtight container at room temperature. Do NOT refrigerate them—the moisture in the fridge will make them sticky and soft. They’ll keep for up to 2 weeks if stored properly, though honestly, they never last that long in my house.
You can also freeze these for up to 3 months. Place them in a single layer in a freezer-safe container with parchment paper between layers. Thaw at room temperature for about 30 minutes before serving. The texture might be slightly less crisp after freezing, but they’re still delicious.
One note about humidity: If you live in a humid climate, add a few grains of uncooked rice to the storage container. The rice will absorb excess moisture and help keep your meringues crisp. I learned this trick from a friend in Florida, and it works like a charm.
Nutritional Information & Benefits
These airy ghost meringue cookies are surprisingly light compared to most Halloween treats. Here’s the estimated nutritional breakdown per cookie (based on 24 cookies):
- Calories: 28
- Total Fat: 0g
- Saturated Fat: 0g
- Cholesterol: 0mg
- Sodium: 14mg
- Total Carbohydrates: 6g
- Sugars: 6g
- Protein: 1g
These cookies are naturally fat-free and cholesterol-free, making them a lighter option for Halloween indulgence. The egg whites provide a small amount of protein, and the sugar content is relatively low per cookie compared to most Halloween candies.
If you’re watching your sugar intake, you can reduce the sugar to ½ cup (100g) instead of ¾ cup. The meringue won’t be quite as stable, and the texture will be slightly less crisp, but it’s a viable option. I’ve tested this and found that the cookies are still delicious, just a bit more delicate.
These are naturally gluten-free, dairy-free, and nut-free, making them a safe option for many dietary restrictions. Always check your specific ingredients for cross-contamination if you’re serving someone with severe allergies.
Conclusion
These airy ghost meringue cookies are proof that you don’t need a complicated recipe to create something truly special. They’re simple enough for a last-minute Halloween party, but impressive enough to be the talk of the gathering. The best part? They’re made with ingredients you probably already have in your kitchen.
I love that this recipe gives you room to play. Make them plain, add cocoa for chocolate ghosts, or experiment with different extracts and spices. Each batch can be a little different, and that’s part of the fun. The ghosts themselves are so forgiving—even the wonky ones are adorable in their own way.
So whether you’re preparing for a big Halloween bash or just want to make something fun with the kids on a October afternoon, give these ghost meringue cookies a try. I promise they’ll disappear faster than you expect. And if you come up with your own fun variation, I’d love to hear about it. Drop a comment below and share your ghostly creations!
Happy Halloween, and happy baking!
Frequently Asked Questions
Can I make these ghost meringue cookies ahead of time?
Absolutely! These cookies store beautifully at room temperature in an airtight container for up to 2 weeks. Just make sure they’re completely cool before storing, and keep them away from moisture. They’re actually a great make-ahead treat for Halloween parties.
Why did my meringue turn out flat?
Flat meringue usually means one of three things: your egg whites weren’t at room temperature, there was a trace of grease or yolk in the bowl, or you didn’t whip them long enough. Make sure your bowl and whisk are spotlessly clean, and whip until you get stiff, glossy peaks that hold their shape.
Can I use liquid egg whites from a carton?
I don’t recommend it. Carton egg whites are pasteurized at high temperatures, which can affect their ability to whip into stiff peaks. Fresh egg whites from whole eggs give you the best volume and stability. If you must use carton whites, look for ones labeled “whipable” and add an extra pinch of cream of tartar.
How do I know when the meringues are done baking?
They’re done when they lift easily off the parchment paper without sticking. They should be completely dry to the touch and feel firm. If they still feel sticky or soft, give them another 10-15 minutes. You can also gently tap one—it should sound hollow.
Can I pipe other shapes besides ghosts?
Yes! This meringue recipe works for any shape. You can pipe pumpkins, bats, or simple round cookies. Just keep in mind that thinner shapes will bake faster, and thicker shapes will need more time. Keep an eye on them and adjust your baking time accordingly.
Pin This Recipe!
Airy Ghost Meringue Cookies: Easy Halloween Treat Recipe
- Total Time: 1 hour 30 minutes
- Yield: 24-30 cookies 1x
Description
These light, crisp, and adorable ghost-shaped meringue cookies are the perfect last-minute Halloween treat. Made with just a few simple ingredients, they’re surprisingly easy to make and always a crowd-pleaser.
Ingredients
- 3 large egg whites, room temperature
- ¾ cup (150g) granulated white sugar (superfine sugar recommended)
- ½ teaspoon pure vanilla extract
- ¼ teaspoon cream of tartar
- Pinch of fine sea salt
- Optional: Black gel food coloring (for drawing faces)
Instructions
- Preheat your oven to 200°F (95°C). Line a large baking sheet with parchment paper.
- Prepare your piping bag with a large round tip (about ½-inch opening) or a zip-top bag with the corner snipped off.
- Place room temperature egg whites in a clean, dry mixing bowl. Add cream of tartar and salt. Mix on medium speed until foamy and bubbly, about 30-45 seconds.
- With the mixer running on medium-high speed, add the sugar one tablespoon at a time, taking about 2-3 minutes. This helps the sugar dissolve completely.
- Increase speed to high and whip for 5-7 minutes until stiff, glossy peaks form. The meringue should hold its shape and feel smooth when rubbed between fingers.
- Add vanilla extract and whip for about 15 seconds to incorporate.
- Gently scoop the meringue into the piping bag. Don’t overfill—about halfway is good.
- Pipe ghosts: Hold the piping bag straight up, about ½ inch above the parchment. Squeeze to create a 1½-inch round base, then slowly lift the bag straight up while squeezing to create a tall, tapered ghost shape. Stop squeezing and pull away quickly to create a peak. Space about 1 inch apart. Makes about 24-30 ghosts.
- Bake for 60-75 minutes until completely dry and firm to the touch. They should lift easily off the parchment without sticking.
- Turn off the oven and leave meringues inside with the door slightly open for 30 minutes to dry completely and prevent cracking.
- Transfer to a wire rack to cool completely.
- Optional: Once cool, use black gel food coloring and a tiny paintbrush or toothpick to draw ghost faces (two dots for eyes and an oval mouth).
Notes
Humidity is the enemy of meringue—make on a dry day if possible. For best results, ensure egg whites are at room temperature and the bowl is completely grease-free. If meringue weeps or cracks, oven temperature may be too high or meringue under-whipped. Store in an airtight container at room temperature for up to 2 weeks; do not refrigerate. For humid climates, add a few grains of uncooked rice to the storage container to absorb moisture.
- Prep Time: 15 minutes
- Cook Time: 60-75 minutes
- Category: Dessert
- Cuisine: American
Nutrition
- Serving Size: 1 cookie
- Calories: 28
- Sugar: 6
- Sodium: 14
- Carbohydrates: 6
- Protein: 1
Keywords: Halloween cookies, meringue cookies, ghost cookies, easy Halloween treat, airy meringue, gluten-free dessert, low-calorie cookies