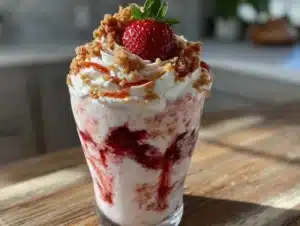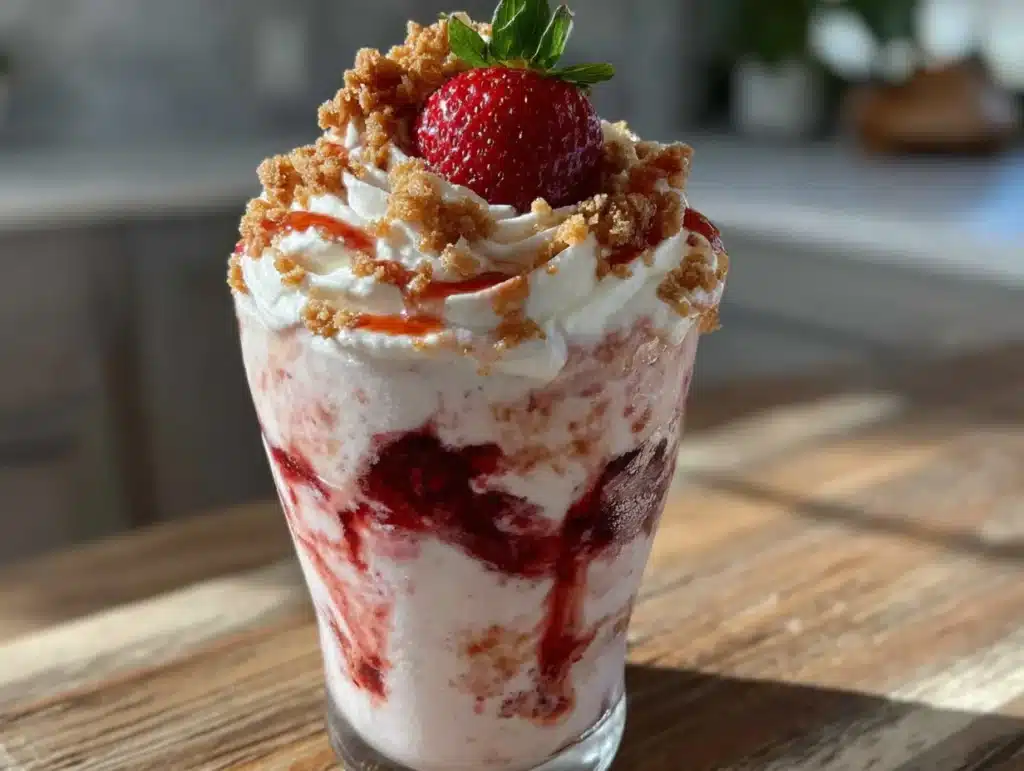
The church potluck was in six hours and I’d completely forgotten. I mean, completely. I was standing in my kitchen at 2 PM on a Saturday, staring into the fridge like it might magically produce something impressive. Everyone else would be bringing their grandmother’s famous casseroles, those layered Jell-O salads that take two days to set, and pies with crusts that looked like they belonged in a bakery window. I had a carton of cottage cheese, some frozen strawberries from last summer’s farmer’s market haul, and a brand new Ninja Creami I’d bought on a whim three weeks ago and hadn’t even taken out of the box yet.
Let me tell you, the panic was real. I almost called my mom to ask what she thought about bringing a bag of chips. But then I remembered that thing sitting in the corner of my pantry, still in its shipping box. I’d bought it after seeing one too many videos of people turning protein shakes into ice cream, and honestly, I’d been too intimidated to try it. Desperate times, though. I grabbed the manual, ripped open the box, and started throwing things into the blender.
The cottage cheese was the secret weapon here. I know, I know—cottage cheese in dessert sounds like something your health-obsessed aunt would bring to a family gathering. But hear me out. I blended it until it was silky smooth, added the frozen strawberries, a scoop of vanilla protein powder, and a splash of almond milk. The mixture went into the pint container, froze for about four hours (I was cutting it close), and then I held my breath as I ran it through the Creami.
Honestly? The first bite made me laugh out loud. It was creamy, tangy, sweet, and tasted exactly like a strawberry cheesecake you’d pay eight dollars for at a fancy café. I brought it to the potluck feeling sheepish, explaining to everyone that it was “just a frozen protein thing I threw together.” By the end of the night, three people had asked for the recipe, and one lady offered to trade me her famous seven-layer dip for the second pint I’d hidden in my freezer. That’s when I knew this was something special. It’s been my go-to ever since—especially on those cozy nights when you want dessert but also want to feel good about what you’re eating. Maybe you’ve been there too.
Why You’ll Love This Recipe
This isn’t just another protein ice cream recipe that tastes like frozen chalk. This is the real deal—a creamy, indulgent strawberry cheesecake experience that happens to be packed with protein. I’ve tested this at least a dozen times, tweaking the ratios, swapping ingredients, and even letting my neighbor (a former pastry chef) try it blind. She couldn’t tell it was made with cottage cheese. That’s the kind of win we’re talking about here.
- Quick & Easy: From blender to frozen pint in under 10 minutes of active prep. The hardest part is waiting for it to freeze.
- Simple Ingredients: No weird protein powders or sugar alcohols required. You probably have most of this in your kitchen right now.
- Perfect for Cozy Nights: This is the dessert you make when you’re curled up on the couch, wearing your softest sweater, and need something that feels like a hug.
- Crowd-Pleaser: I’ve served this to protein skeptics, picky kids, and even my dad who “doesn’t do healthy desserts.” Every single person asked for seconds.
- Unbelievably Delicious: The texture is what gets you. It’s not icy or grainy—it’s smooth, creamy, and has that slight tanginess that makes cheesecake so addictive.
What makes this recipe different from the countless other protein ice creams out there is the cottage cheese trick. When blended properly, it creates an ultra-smooth base that mimics the richness of cream cheese without the heavy calories or fat. The protein powder adds structure, the strawberries bring natural sweetness and color, and the whole thing comes together in a way that feels almost too good to be true. But I promise you, it’s real. This is comfort food reimagined—healthier, faster, but with the same soul-soothing satisfaction that makes you close your eyes after the first bite.
What Ingredients You Will Need
This recipe uses simple, wholesome ingredients that work together to create a dessert that’s both satisfying and surprisingly nutritious. The magic is in the combination—each ingredient plays a specific role in achieving that creamy, cheesecake-like texture without any of the guilt.
- 1 cup cottage cheese (full-fat or 4% milkfat recommended) — This is the base of your cheesecake flavor. I’ve tested this with Good Culture and Daisy brands, and both work beautifully. The key is to blend it until completely smooth—no lumps allowed. If you’re dairy-sensitive, try a lactose-free cottage cheese, but avoid fat-free versions as they can make the final texture watery.
- 1 cup frozen strawberries (unsweetened) — Frozen berries are actually better here than fresh because they have less water content, which means a creamier final texture. Look for strawberries that are deep red and whole, not mushy. In summer, you can use fresh berries, but freeze them first for at least 4 hours to get the same effect.
- 1 scoop vanilla protein powder (about 30g) — I use Orgain Simple Vanilla or Legion Athletics Whey+ for the best flavor and texture. The protein powder adds structure to the ice cream and helps it achieve that scoopable consistency. If you’re using a plant-based protein powder, look for one that’s specifically labeled as “smooth blending” to avoid grittiness.
- 1/4 cup unsweetened almond milk (or any milk of your choice) — This helps everything blend smoothly. Regular dairy milk works great, as does oat milk or coconut milk. Start with less and add more if needed—you want the mixture to be thick but pourable.
- 2 tablespoons powdered sweetener (optional, or to taste) — I use monk fruit sweetener or allulose, but you can also use honey, maple syrup, or regular sugar. The frozen strawberries add natural sweetness, so taste your mixture before adding extra sweetener. Some protein powders are already quite sweet, so you might not need any at all.
- 1 teaspoon vanilla extract — This enhances the cheesecake flavor and rounds out the tanginess of the cottage cheese. Pure vanilla extract is best, but imitation vanilla will work in a pinch.
- 1/4 teaspoon salt — A tiny pinch of salt balances the sweetness and brings out the strawberry flavor. Don’t skip it—it makes a surprising difference.
- Optional: 1 tablespoon graham cracker crumbs (for topping) — This is entirely optional, but if you want that authentic cheesecake experience, a sprinkle of crushed graham crackers on top takes it to another level.
Equipment Needed
The good news is that you don’t need a professional kitchen to make this recipe work. Here’s what you’ll need:
- Ninja Creami (any model) — This is the star of the show. I have the Ninja Creami Deluxe, but the original Creami works just as well. If you don’t have one yet, watch for sales—I got mine for about $150 and it’s paid for itself in saved ice cream money.
- High-speed blender or food processor — You need something powerful enough to turn cottage cheese into a silky smooth puree. I use a Vitamix, but a Nutribullet or even a good immersion blender will work. The key is patience—blend until you can’t see any curds.
- Ninja Creami pint containers — These come with the machine, but you can buy extra ones on Amazon. I recommend having at least two so you can prep multiple flavors at once.
- Measuring cups and spoons — Accuracy matters here, especially with the liquid. Too much almond milk and your ice cream won’t set properly.
- Spatula — For scraping every last bit of that creamy mixture into the pint container. Don’t waste a drop.
- Freezer-safe flat surface — Make sure your freezer has a flat spot where the pint can sit level while freezing. I learned this the hard way after a tilted pint created an uneven spin.
If you don’t have a Ninja Creami yet, I’ll be honest—this recipe specifically requires it. The Creami’s unique spin-and-scrape technology is what creates that perfect ice cream texture from frozen solid bases. But if you’re on a budget, look for refurbished models or check Facebook Marketplace. I’ve seen them for as low as $80.
Preparation Method
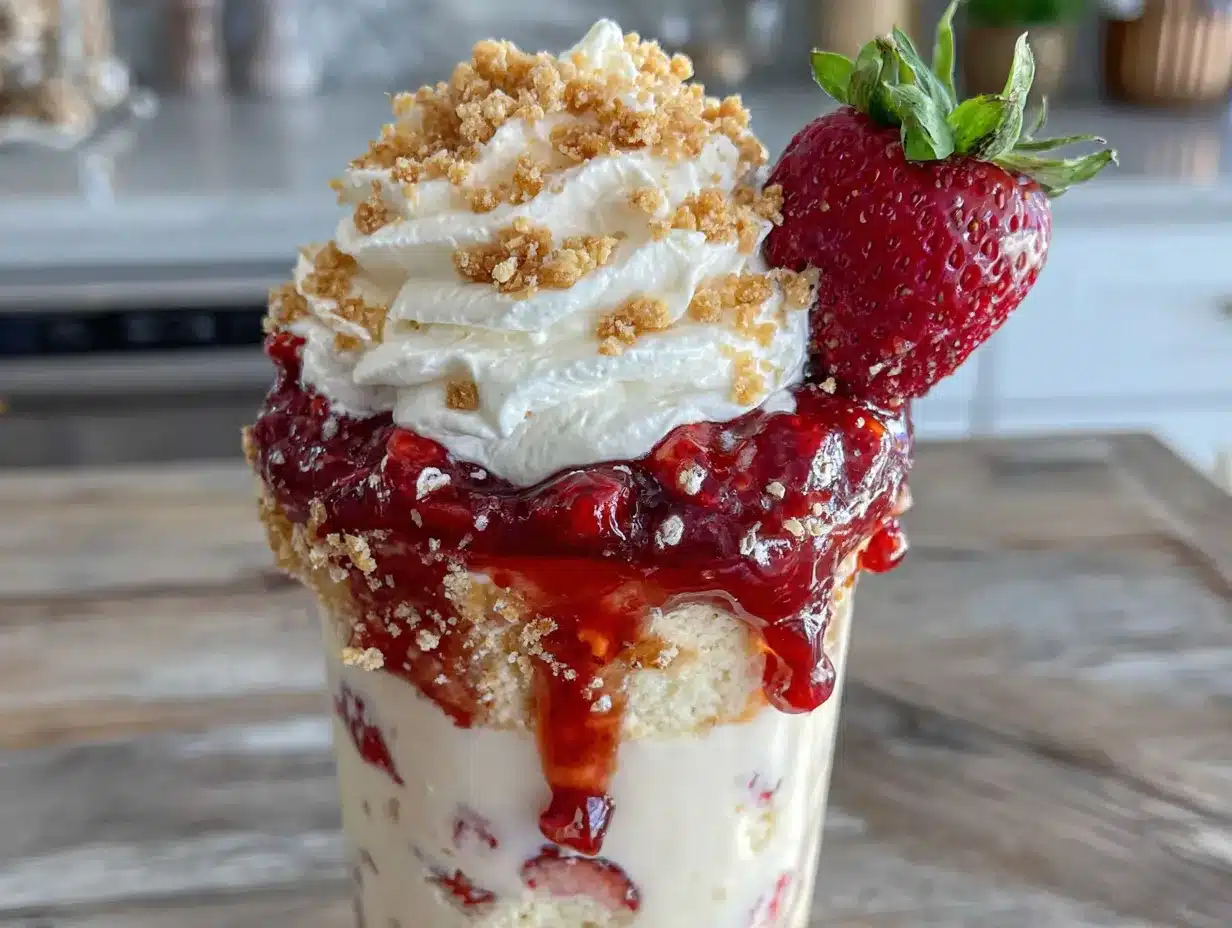
This is where the magic happens. Follow these steps carefully, and you’ll have a pint of strawberry cheesecake protein ice cream that rivals anything from the store—minus the weird ingredients and sugar crash.
- Blend the cottage cheese until smooth. Add the cottage cheese to your blender and blitz on high for about 30-45 seconds. Stop and scrape down the sides, then blend again until the mixture is completely silky with no visible curds. This step is non-negotiable—lumpy cottage cheese will ruin the texture. I once rushed this step and ended up with little cottage cheese bits in my ice cream. Not ideal.
- Add the remaining ingredients. To the blended cottage cheese, add the frozen strawberries, vanilla protein powder, almond milk, vanilla extract, salt, and sweetener if using. Blend on high for another 30-60 seconds until everything is fully combined and the strawberries are broken down. The mixture should be thick, smooth, and a pretty pale pink color. If it looks too thick to pour, add another tablespoon of almond milk.
- Taste and adjust. Here’s where you can customize. Dip a clean spoon in and taste the mixture. Is it sweet enough? Does it need more vanilla? A little more salt? Adjust now before freezing. Remember that freezing dulls sweetness slightly, so make it a touch sweeter than you think you want.
- Pour into the Ninja Creami pint. Carefully pour the mixture into your clean, dry Creami pint container. Leave about 1/2 inch of headspace at the top—the mixture will expand slightly as it freezes. Tap the container gently on the counter to release any air bubbles.
- Freeze for at least 24 hours. I know, I know—this is the hardest part. But trust me, the 24-hour freeze is crucial. The mixture needs to be completely solid (down to -7°F or colder) for the Creami to work its magic. I’ve tried rushing it at 4 hours and ended up with a soupy mess. Place the pint on a flat surface in the coldest part of your freezer. Don’t stack anything on top of it.
- Run the Creami cycle. Remove the frozen pint from the freezer and take off the lid. Place it in the outer bowl of your Ninja Creami, lock the lid into place, and select the “Ice Cream” cycle. Let it run through the full cycle—it takes about 2-3 minutes. You’ll hear it scraping and spinning, and when it’s done, you should have a perfectly creamy, scoopable ice cream.
- Check the texture. Open the lid and take a look. If the ice cream looks crumbly or dry, add a tablespoon of almond milk and run the “Re-spin” cycle. If it looks too soft or melty, it might need to be colder—pop it back in the freezer for 15-20 minutes before re-spinning. My first attempt came out crumbly, and I almost gave up. The re-spin saved it completely.
- Add toppings and serve. Scoop your finished ice cream into a bowl, sprinkle with graham cracker crumbs if you’re feeling fancy, and enjoy immediately. The texture is best right after spinning, but you can also freeze it for later (see storage tips below).
Cooking Tips & Techniques
After making this recipe more times than I can count, I’ve collected a few hard-earned lessons that will save you from my early mistakes.
Don’t skip the cottage cheese blending step. I know it’s tempting to just dump everything in and blend it all at once, but blending the cottage cheese first ensures a completely smooth base. If you blend everything together, the strawberries can hide little curds of cottage cheese, and you won’t notice until you’re eating your finished ice cream and biting into weird lumpy bits. Trust me, take the extra 30 seconds.
Temperature matters more than you think. The Ninja Creami works best when the base is frozen solid—not just frozen, but solid. If your freezer is on the warmer side (like mine, which my husband keeps adjusting), the ice cream might come out softer than expected. I bought a small freezer thermometer for $8 and now I know exactly when my pints are ready. Aim for 0°F or colder.
Protein powder makes a difference. Not all protein powders are created equal for ice cream. Whey-based powders tend to create a creamier texture, while plant-based powders can sometimes result in a slightly grainier finish. If you’re using plant-based protein, add an extra tablespoon of almond milk and run an extra re-spin cycle. I learned this the hard way when I tried a new vegan protein powder and ended up with something that resembled frozen sand.
Patience with the re-spin is key. If your first spin comes out crumbly or powdery, don’t panic. This happens when the base is too cold or has too little liquid. Add a tablespoon of milk, run the re-spin cycle, and watch the magic happen. I’ve had to do this three times in a row once (my freezer was acting up), and it still turned out perfect.
Plan ahead for multiple servings. This recipe makes one pint, which is about two generous servings. I usually make two or three pints at once on Sunday evening, freeze them, and then I have healthy dessert ready all week. It’s a game-changer for those evenings when you want something sweet but don’t want to put in any effort.
Variations & Adaptations
One of the best things about this recipe is how endlessly adaptable it is. Here are some of my favorite variations:
Chocolate Strawberry Cheesecake: Replace the vanilla protein powder with chocolate protein powder and add 1 tablespoon of unsweetened cocoa powder. The chocolate-strawberry combination is classic for a reason, and it adds a rich depth that feels extra indulgent. I made this for Valentine’s Day and it was a hit.
Vegan Version: Use a high-quality plant-based cottage cheese (like Kite Hill or Good Culture’s plant-based option) and a vegan vanilla protein powder. Swap the almond milk for oat milk or coconut milk for extra creaminess. The texture will be slightly different—a bit less rich—but still delicious. My vegan friend approved this version, which is high praise.
Low-Carb/Keto Adaptation: Use a sugar-free vanilla protein powder and skip the sweetener entirely, or use a few drops of liquid stevia. The frozen strawberries add some natural carbs, so this version is better suited for low-carb diets rather than strict keto. I’ve also tried adding 1 tablespoon of MCT oil for extra healthy fats and a creamier texture—it works beautifully.
Mixed Berry Cheesecake: Swap half the strawberries for frozen raspberries or blueberries. The combination of berries creates a more complex flavor profile and a gorgeous deep purple color. My kids love this version, and I love that they’re getting extra antioxidants.
Cookies and Cream Twist: Add 2 crushed Oreo cookies (or gluten-free sandwich cookies) to the mixture before freezing. The cookie pieces get distributed throughout the ice cream during the Creami cycle, creating a cookies and cream cheesecake hybrid. This is my guilty pleasure version—it’s still high in protein, but it feels like a total cheat.
Serving & Storage Suggestions
This strawberry cheesecake protein ice cream is best enjoyed immediately after spinning, when the texture is at its creamiest. I like to serve it in a chilled bowl with a sprinkle of crushed graham crackers and a few fresh strawberry slices on top. If you’re feeling extra cozy, drizzle a little sugar-free chocolate sauce over the top—it’s a game-changer.
For a complete dessert experience, pair this with a warm cup of herbal tea or a small espresso. The contrast between the cold, creamy ice cream and the hot drink is pure comfort. I also love serving this after a light dinner—it feels indulgent without being heavy, and the protein helps keep me satisfied until morning.
Storage Instructions: If you don’t finish the entire pint (rare, but it happens), you can store the leftovers in the freezer. Press a piece of plastic wrap directly onto the surface of the ice cream to prevent ice crystals from forming, then put the lid back on. It will keep for up to 2 weeks, but the texture is best within the first 3 days.
Reheating/Re-spinning: When you’re ready to eat the leftovers, remove the pint from the freezer and let it sit at room temperature for 5-10 minutes. Then run it through the “Re-spin” cycle on your Ninja Creami. This will restore the creamy texture. If it’s still too hard, add a splash of almond milk before re-spinning. I’ve found that the flavor actually improves after a day or two—the strawberry and cheesecake flavors meld together beautifully.
Make-Ahead Tip: This recipe is perfect for meal prep. Make 3-4 pints on a Sunday, freeze them solid, and then you have healthy dessert ready whenever the craving strikes. Just remember to take one out of the freezer about 10 minutes before you want to spin it.
Nutritional Information & Benefits
This cozy strawberry cheesecake protein pint isn’t just delicious—it’s also packed with nutritional benefits that make it a smart choice for dessert lovers. Here’s the breakdown for one serving (half the pint, approximately 1 cup):
| Nutrient | Amount Per Serving |
|---|---|
| Calories | 220-250 |
| Protein | 25-30g |
| Carbohydrates | 15-20g |
| Fiber | 3-4g |
| Sugar | 8-10g (naturally occurring from strawberries) |
| Fat | 6-8g |
| Calcium | 15% DV |
The cottage cheese provides a significant amount of casein protein, which digests slowly and keeps you feeling full and satisfied. Strawberries are packed with vitamin C and antioxidants, while the protein powder supports muscle recovery and satiety. This dessert is naturally gluten-free (depending on your protein powder) and can be made vegetarian-friendly. If you’re watching your sugar intake, the unsweetened strawberries and optional sugar-free sweetener keep this recipe friendly for most dietary needs.
One note: if you have a dairy sensitivity, the cottage cheese may be an issue. Try the vegan variation above, or look for lactose-free cottage cheese options. The protein content will be slightly lower, but the taste will still be amazing.
Conclusion
This cozy Ninja Creami strawberry cheesecake protein pint has become a staple in my kitchen for good reason. It’s the dessert that makes you feel good about treating yourself—creamy, indulgent, and packed with protein that actually keeps you satisfied. Whether you’re recovering from a tough workout, craving something sweet on a cold evening, or just want to impress your friends at a potluck (without spending hours in the kitchen), this recipe delivers every single time.
Don’t be afraid to make it your own. Swap the strawberries for your favorite berries, experiment with different protein powder flavors, or load it up with toppings that make you happy. The beauty of this recipe is how forgiving and flexible it is. I’ve made it with whatever I had on hand, and it’s never let me down.
I’d love to hear how yours turns out! Drop a comment below and let me know what variations you tried, or tag me in your photos on Pinterest. And if you have a friend who thinks healthy desserts can’t be delicious, make them a pint of this—I promise they’ll change their mind. Happy spinning, friends!
Frequently Asked Questions
Can I use fresh strawberries instead of frozen?
Technically yes, but I don’t recommend it. Fresh strawberries have a higher water content, which can make your ice cream icy instead of creamy. If you only have fresh berries, freeze them for at least 4 hours before using. This helps maintain that perfect texture.
Why did my ice cream come out crumbly?
This usually happens when the base is too cold or doesn’t have enough liquid. Don’t worry—it’s fixable! Add a tablespoon of almond milk and run the “Re-spin” cycle. If it’s still crumbly, add another tablespoon and re-spin again. This has saved many of my early attempts.
Can I make this without a Ninja Creami?
This recipe is specifically designed for the Ninja Creami’s unique spinning mechanism. Without it, you’d need an ice cream maker with a similar freezing and churning process. That said, you can pour the mixture into a loaf pan, freeze it, and stir it every 30 minutes for 3-4 hours to break up ice crystals. The texture won’t be as smooth, but it’ll still taste great.
How long does this keep in the freezer?
Stored properly (with plastic wrap pressed onto the surface), this ice cream will keep for up to 2 weeks. However, the texture is best within the first 3 days. After that, you might notice some ice crystals forming. A quick re-spin with a splash of milk usually fixes this.
Is this recipe kid-friendly?
Absolutely! My nieces and nephews go crazy for this. The strawberry flavor is naturally sweet and appealing, and the creamy texture feels just like regular ice cream. Plus, you can feel good about giving them a dessert that’s packed with protein and fruit. Just adjust the sweetener to your family’s taste.
Pin This Recipe!
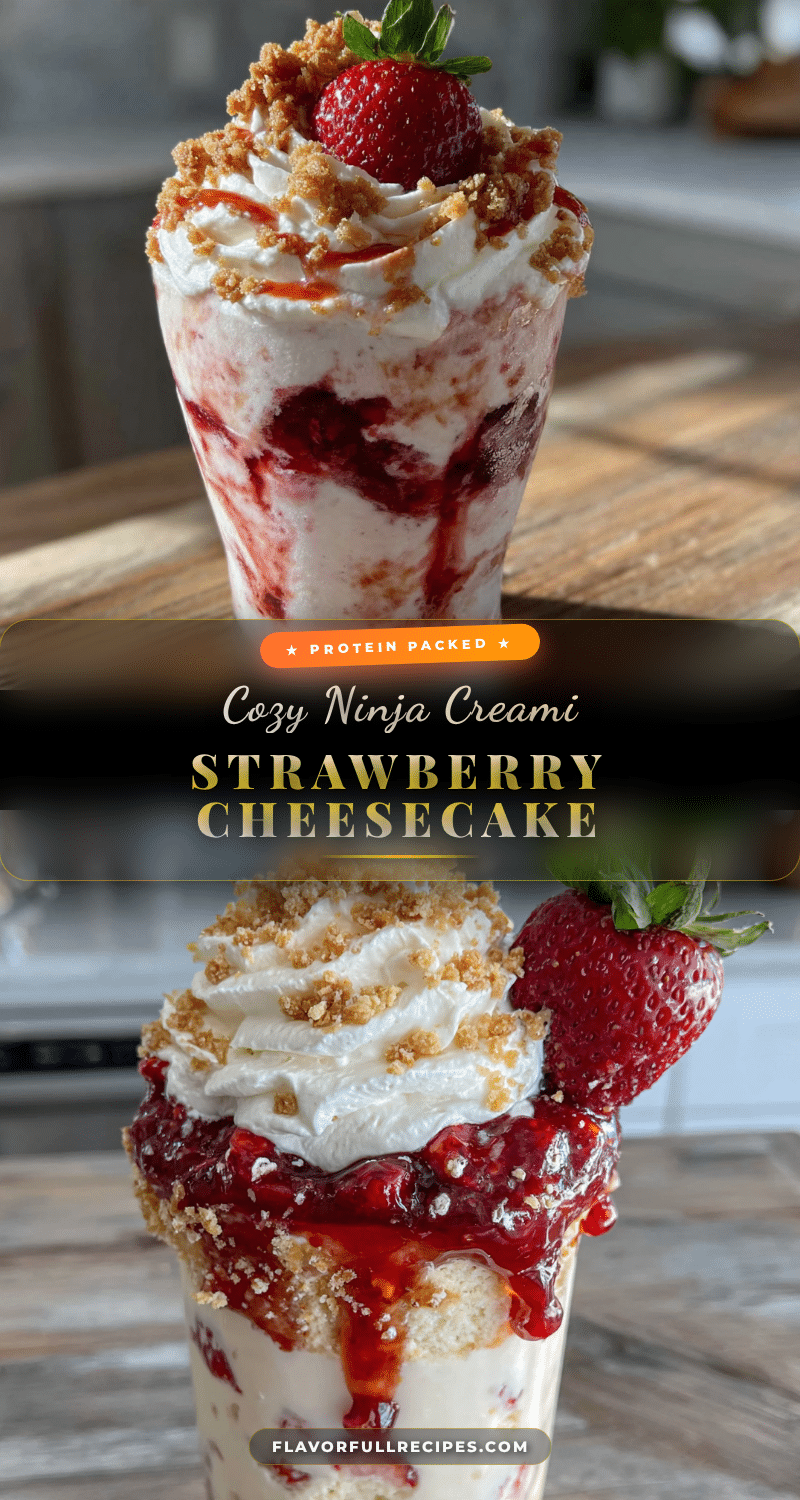

Cozy Ninja Creami Strawberry Cheesecake Protein Pint – Easy High-Protein Dessert
- Total Time: 24 hours 10 minutes (includes freezing time)
- Yield: 2 servings 1x
Description
A creamy, indulgent strawberry cheesecake protein ice cream made with cottage cheese and frozen strawberries, perfect for a cozy night in. This easy Ninja Creami recipe is packed with protein and tastes like a fancy café dessert.
Ingredients
- 1 cup cottage cheese (full-fat or 4% milkfat recommended)
- 1 cup frozen strawberries (unsweetened)
- 1 scoop vanilla protein powder (about 30g)
- 1/4 cup unsweetened almond milk (or any milk of your choice)
- 2 tablespoons powdered sweetener (optional, or to taste)
- 1 teaspoon vanilla extract
- 1/4 teaspoon salt
- Optional: 1 tablespoon graham cracker crumbs (for topping)
Instructions
- Blend the cottage cheese until smooth. Add the cottage cheese to your blender and blitz on high for about 30-45 seconds. Stop and scrape down the sides, then blend again until the mixture is completely silky with no visible curds.
- Add the remaining ingredients. To the blended cottage cheese, add the frozen strawberries, vanilla protein powder, almond milk, vanilla extract, salt, and sweetener if using. Blend on high for another 30-60 seconds until everything is fully combined and the strawberries are broken down. The mixture should be thick, smooth, and a pretty pale pink color. If it looks too thick to pour, add another tablespoon of almond milk.
- Taste and adjust. Dip a clean spoon in and taste the mixture. Is it sweet enough? Does it need more vanilla? A little more salt? Adjust now before freezing. Remember that freezing dulls sweetness slightly, so make it a touch sweeter than you think you want.
- Pour into the Ninja Creami pint. Carefully pour the mixture into your clean, dry Creami pint container. Leave about 1/2 inch of headspace at the top—the mixture will expand slightly as it freezes. Tap the container gently on the counter to release any air bubbles.
- Freeze for at least 24 hours. Place the pint on a flat surface in the coldest part of your freezer. Don’t stack anything on top of it.
- Run the Creami cycle. Remove the frozen pint from the freezer and take off the lid. Place it in the outer bowl of your Ninja Creami, lock the lid into place, and select the ‘Ice Cream’ cycle. Let it run through the full cycle—it takes about 2-3 minutes.
- Check the texture. Open the lid and take a look. If the ice cream looks crumbly or dry, add a tablespoon of almond milk and run the ‘Re-spin’ cycle. If it looks too soft or melty, it might need to be colder—pop it back in the freezer for 15-20 minutes before re-spinning.
- Add toppings and serve. Scoop your finished ice cream into a bowl, sprinkle with graham cracker crumbs if you’re feeling fancy, and enjoy immediately.
Notes
Don’t skip blending the cottage cheese first for a smooth texture. Freeze for at least 24 hours for best results. If the ice cream comes out crumbly, add a tablespoon of almond milk and re-spin. For best texture, enjoy immediately after spinning. Store leftovers with plastic wrap pressed onto the surface for up to 2 weeks.
- Prep Time: 10 minutes
- Cook Time: 0 minutes
- Category: Dessert
- Cuisine: American
Nutrition
- Serving Size: 1 cup (half the pint
- Calories: 220250
- Sugar: 810
- Fat: 68
- Carbohydrates: 1520
- Fiber: 34
- Protein: 2530
Keywords: strawberry cheesecake, protein ice cream, Ninja Creami, high-protein dessert, healthy dessert, cottage cheese ice cream, easy ice cream