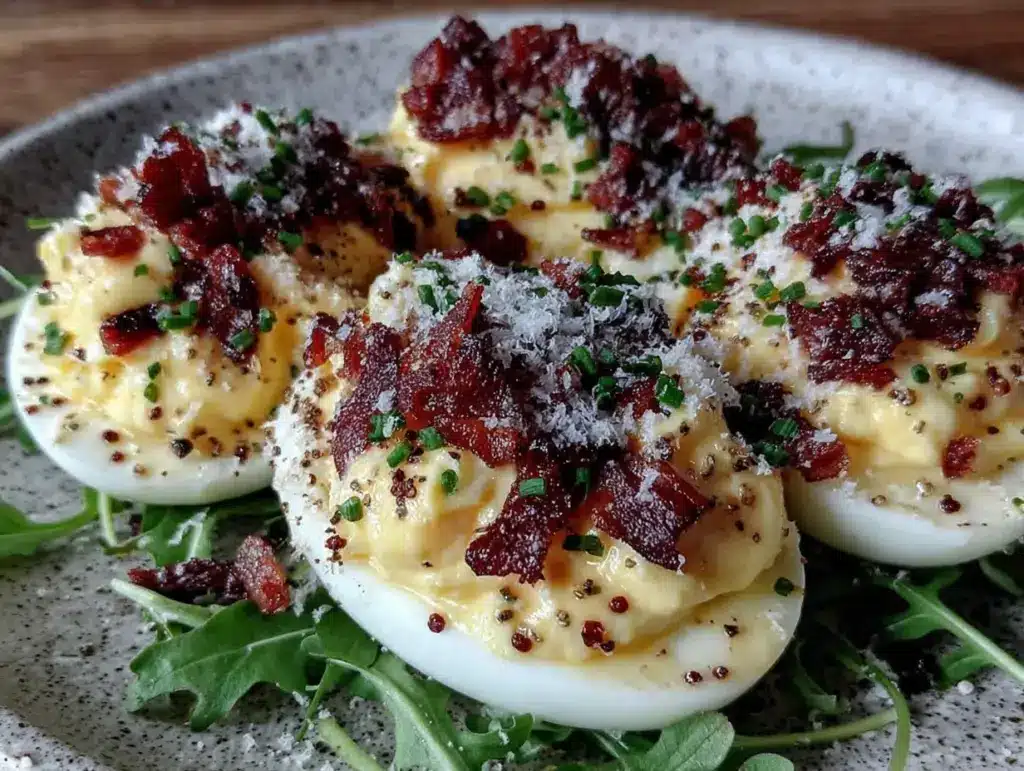
I was standing in the middle of a hardware store last Tuesday — not a place where food epiphanies usually happen — when the smell hit me. It wasn’t paint or lumber or fertilizer. It was the faint, greasy, impossibly familiar scent of someone microwaving a hard-boiled egg in the break room. And just like that, I was seven years old again, sitting on a wobbly stool at my Aunt Carol’s kitchen counter, watching her peel a dozen eggs with the kind of focus most people reserve for brain surgery. She’d line them up on a platter like little soldiers, and I’d sneak the broken ones when she wasn’t looking. She always pretended not to notice.
Aunt Carol passed about five years ago, and I haven’t thought about her deviled eggs in forever. But standing there in aisle four, holding a bag of mulch I didn’t need, I could suddenly feel the cool weight of that platter in my hands. I could hear the pop of the bacon she’d fry up separate — never mixed into the filling, just crumbled on top like a salty little crown. She’d sprinkle chives from her garden over everything, and the smell of egg, bacon, and fresh onion would fill her tiny kitchen. Honestly, I haven’t made deviled eggs since I was a teenager. I guess I thought they were too simple, too old-fashioned, too much like something you’d only see at a church potluck. But maybe you’ve been there — that moment when a random scent drags you back to a person you miss, and you realize the only way to hold onto them is to make their food again.
So I bought the eggs. I bought the bacon. I texted my neighbor for chives because my garden is a disaster. And I stood in my own kitchen, trying to remember exactly how Aunt Carol did it — not from a recipe, but from the way her hands moved. This is that attempt. This is my version of Classic Deviled Eggs with Crispy Bacon and Chives, and let me tell you, it’s the one I’ll be making from now on.
Why You’ll Love This Recipe
These aren’t your grandma’s deviled eggs — well, okay, they kind of are, but with a few upgrades that make them absolutely unforgettable. I’ve tested this recipe about seven times now (my coworkers are very happy about it), and every single batch disappeared in minutes. Here’s why this one works:
- Quick & Easy: You’ll have these ready in about 30 minutes, most of which is just waiting for eggs to boil. Perfect for last-minute gatherings or when you need a dish that looks fancy without the stress.
- Simple Ingredients: Eggs, bacon, chives, mayo, mustard, and a few pantry staples. That’s it. No weird ingredients you’ll never use again.
- Perfect for Any Occasion: Easter brunch, game day parties, summer barbecues, or just a Tuesday night snack. These eggs fit everywhere.
- Crowd-Pleaser: I’ve watched picky kids and food-snob adults both go back for thirds. The crispy bacon on top is basically magic.
- Unbelievably Delicious: The filling is creamy without being heavy, tangy from the mustard, and the bacon adds that salty crunch that makes every bite satisfying. It’s comfort food in two bites.
What makes this recipe different from the rest? It’s the texture. Most deviled eggs have a smooth filling, which is fine, but adding finely chopped bacon inside the yolk mixture gives it a subtle smokiness throughout. Then you top it with more bacon and fresh chives, so every single egg has that perfect contrast of creamy and crunchy. It’s not just another version — it’s the version I keep coming back to, and I think you will too.
This recipe is the kind that makes you close your eyes after the first bite. It’s familiar but better, like hearing an old song you love performed live for the first time. Perfect for impressing guests without breaking a sweat, or turning a simple snack into something that feels like a hug.
What Ingredients You Will Need
This recipe uses simple, honest ingredients to deliver big flavor. Most of these are probably already in your kitchen, which is exactly how Aunt Carol would have wanted it.
- Large eggs (6 eggs, hard-boiled and peeled) — Use eggs that are at least a week old for easier peeling. Fresh eggs are a nightmare to peel, trust me.
- Bacon (4 slices, cooked until crispy) — I prefer thick-cut bacon for the best texture. This crispy bacon method works perfectly every time. Save 2 tablespoons of the rendered bacon fat for the filling if you’re feeling bold.
- Mayonnaise (3 tablespoons) — Use full-fat mayo for the creamiest result. I like Hellmann’s or Duke’s, but any brand works.
- Yellow mustard (1 teaspoon) — Adds that classic tang. You can use Dijon for a sharper flavor.
- Apple cider vinegar (1/2 teaspoon) — Brightens everything up. White vinegar works in a pinch.
- Salt (1/4 teaspoon, or to taste)
- Black pepper (1/8 teaspoon, freshly ground)
- Fresh chives (2 tablespoons, finely chopped) — Plus extra for garnish. If you don’t have fresh, use 1 tablespoon dried chives, but fresh really is better here.
- Paprika (for garnish, optional but classic) — Smoked paprika adds a lovely depth.
Ingredient Tips: For the creamiest filling, make sure your eggs are fully hard-boiled but not overcooked — that green ring around the yolk is a sign of overcooking. I’ve found that farm-fresh eggs have richer yolks, but standard grocery store eggs work just fine. If you’re watching your diet, you can substitute Greek yogurt for half the mayo, but honestly, it changes the texture a bit. Save that swap for a different batch.
Equipment Needed
Nothing fancy here — you probably already own all of this. But a few specific tools make the process smoother:
- Medium saucepan — For boiling the eggs. Any pot works, but one with a lid is helpful.
- Mixing bowl — For the yolk filling. A medium bowl is perfect.
- Fork or potato masher — For mashing the yolks. I use a fork because it’s easier to control.
- Piping bag or zip-top bag — For filling the egg whites neatly. A zip-top bag with the corner snipped off works beautifully and costs nothing.
- Skillet — For cooking the bacon. Cast iron gives the crispiest results.
- Paper towels — For draining the bacon and patting the eggs dry.
- Sharp knife and cutting board — For chopping chives and bacon.
- Serving platter — Something that holds the eggs snugly so they don’t slide around.
I’ve used a cheap piping bag from the grocery store, and honestly, a sandwich bag works just as well. Don’t overthink the equipment — focus on the ingredients and technique.
Preparation Method
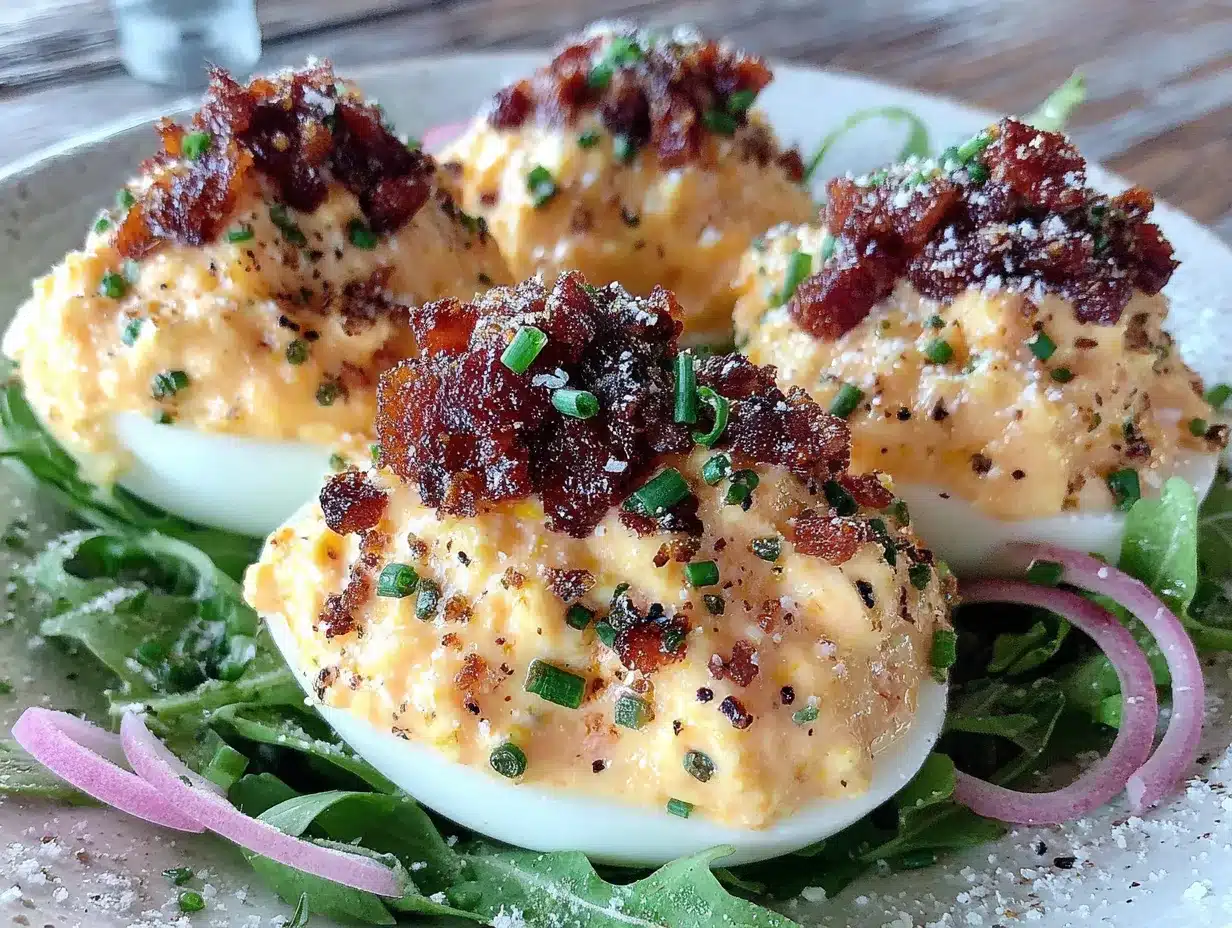
Let’s get cooking. This is straightforward, but I’ll walk you through every step so you get perfect results.
Step 1: Hard-Boil the Eggs
Place your 6 eggs in a single layer in a medium saucepan. Cover them with cold water by about an inch. Bring the water to a rolling boil over high heat — this takes about 8-10 minutes. Once boiling, cover the pot, turn off the heat, and let the eggs sit in the hot water for exactly 12 minutes. While they sit, prepare an ice bath: fill a large bowl with cold water and plenty of ice cubes. After 12 minutes, transfer the eggs to the ice bath using a slotted spoon. Let them cool for at least 10 minutes. This shock stops the cooking and makes peeling so much easier. I’ve skipped the ice bath before, trust me — don’t do it. You’ll end up with torn, ugly egg whites.
Step 2: Cook the Bacon
While the eggs are cooling, cook your 4 slices of bacon in a skillet over medium heat. Cook until deeply golden and crispy, about 6-8 minutes, flipping once halfway through. Transfer the bacon to a paper towel-lined plate to drain and cool. Once cool, crumble or finely chop the bacon. Reserve about 2 tablespoons of the rendered bacon fat if you want to add it to the filling — it’s optional but incredible.
Step 3: Peel the Eggs
Gently tap each egg on the counter to crack the shell all over, then roll it between your palms to loosen the shell. Start peeling from the wider end — there’s usually an air pocket there that makes it easier. Rinse the peeled eggs under cool water to remove any tiny shell fragments. Pat them dry with a paper towel. If you end up with a few ugly eggs, don’t worry — they’ll taste the same, and you can hide them in the back of the platter.
Step 4: Cut and Prepare the Egg Whites
Using a sharp knife, slice each egg in half lengthwise. Gently pop out the yolks into a medium mixing bowl. Arrange the egg white halves on a serving platter, cut-side up. If they wobble, slice a tiny bit off the bottom to create a flat surface — just don’t cut through to the hollow center.
Step 5: Make the Filling
To the bowl with the yolks, add 3 tablespoons mayonnaise, 1 teaspoon yellow mustard, 1/2 teaspoon apple cider vinegar, 1/4 teaspoon salt, and 1/8 teaspoon black pepper. Mash everything together with a fork until smooth and creamy. Taste it — this is important. Adjust the salt, mustard, or vinegar to your liking. Fold in half of the crumbled bacon and 1 tablespoon of the chopped chives. If you reserved the bacon fat, stir in 1 teaspoon of it now for extra smokiness.
Step 6: Fill the Egg Whites
Spoon the filling into a piping bag or a zip-top bag with a small corner snipped off. Pipe the filling generously into each egg white half, mounding it slightly in the center. If you don’t have a bag, use a small spoon — it’s less pretty but tastes exactly the same.
Step 7: Garnish and Serve
Sprinkle the remaining crumbled bacon over the filled eggs. Top with the remaining chopped chives and a light dusting of paprika if using. Serve immediately or refrigerate until ready. The filling should be creamy and rich, the bacon crispy, and the chives fresh — that contrast is everything.
Cooking Tips & Techniques
I’ve made deviled eggs more times than I can count, and I’ve definitely made my share of mistakes. Here’s what I’ve learned so you don’t have to repeat my errors:
- Don’t overcook the eggs. That green ring around the yolk isn’t just ugly — it makes the filling taste sulfurous. Stick to the 12-minute rest time, and you’ll get perfectly yellow yolks every time.
- Peel under running water. If the shell is being stubborn, peel the egg under a gentle stream of cool water. The water gets between the shell and the egg white, making it slide off more easily.
- Let the bacon cool completely. If you add warm bacon to the filling, it’ll soften and lose its crunch. Patience pays off here.
- Chill the filling before piping. For the neatest presentation, refrigerate the filling for 15 minutes before piping. It firms up slightly and holds its shape better.
- Make extra filling. I always make a little more filling than I think I need. If you have leftover, spread it on toast or crackers — it’s delicious.
- Use a piping tip for fancy presentation. A star tip creates those classic ridged swirls that look like they came from a catering company. But honestly, a simple round opening looks beautiful too.
One thing I learned the hard way: don’t assemble these too far in advance if you’re serving them immediately. The bacon loses its crunch after a few hours in the fridge. If you’re prepping ahead, keep the filling, egg whites, bacon, and chives separate, then assemble right before serving. Your guests will thank you.
Variations & Adaptations
This recipe is flexible — here are a few ways to make it your own:
Spicy Southwest Version
Add 1/2 teaspoon smoked paprika and a pinch of cayenne pepper to the filling. Top with crumbled bacon, pickled jalapeños, and a drizzle of sriracha. It’s smoky, spicy, and absolutely addictive.
Herb Garden Version
Swap the chives for a mix of fresh dill, parsley, and tarragon. Use 1 tablespoon total of mixed herbs in the filling and another tablespoon for garnish. The dill pairs beautifully with the mustard and vinegar.
Lighter Version
Replace half the mayonnaise with plain Greek yogurt. Use turkey bacon instead of regular bacon, cooked until very crispy. The filling will be slightly tangier and less rich, but still delicious. I’ve made this for potlucks and nobody noticed the swap.
Smoked Salmon Version
Omit the bacon and fold 2 ounces of finely chopped smoked salmon into the filling. Top with fresh dill and a tiny caper. This is my go-to for brunch parties — it feels fancy without any extra work.
Honestly, the best variation is the one you make with what you have. I once made these with leftover prosciutto instead of bacon, and it was fantastic. Don’t be afraid to experiment.
Serving & Storage Suggestions
These deviled eggs are best served chilled or at room temperature — never hot. Arrange them on a platter with the filled sides facing up, and garnish just before serving to keep the bacon crisp.
What to serve with them: They’re perfect alongside classic potato salad, grilled meats, or a fresh green salad. For brunch, pair them with mimosas and fresh fruit. For game day, set them next to wings and veggie sticks. They disappear fast, so make extra.
Storage: Store leftover deviled eggs in an airtight container in the refrigerator for up to 2 days. Place them in a single layer, or use a deviled egg carrier if you have one. The filling may soften slightly, but they’ll still taste great.
Reheating: Don’t reheat these — they’re meant to be served cold. If you’ve refrigerated them, let them sit at room temperature for 10 minutes before serving to take the chill off.
Make-ahead tip: Boil and peel the eggs up to 3 days in advance. Cook the bacon and chop the chives up to 1 day ahead. Store everything separately in the fridge. Assemble the deviled eggs no more than 4 hours before serving for the best texture.
Nutritional Information & Benefits
Here’s the approximate nutritional breakdown for one deviled egg (based on 12 servings from 6 eggs):
| Nutrient | Amount per serving |
|---|---|
| Calories | 95 |
| Protein | 6g |
| Fat | 7g |
| Saturated Fat | 2g |
| Carbohydrates | 1g |
| Fiber | 0g |
| Sugar | 0g |
| Sodium | 180mg |
| Cholesterol | 95mg |
Eggs are a fantastic source of high-quality protein, vitamin B12, and choline, which supports brain health. Bacon adds protein and flavor, but also sodium and saturated fat — that’s why we use it as a garnish rather than the main event. Chives provide a small amount of vitamin K and antioxidants. This recipe is naturally gluten-free and low-carb, making it suitable for keto and paleo diets. If you have egg allergies, this recipe obviously isn’t for you, but it’s easy to adapt with vegan egg alternatives if needed.
I believe in balance — these deviled eggs are a treat, not an everyday food. But when you do make them, they’re absolutely worth every bite.
Conclusion
There’s something beautiful about a recipe that connects you to someone you love, even if they’re not around anymore. Every time I make these Classic Deviled Eggs with Crispy Bacon and Chives, I think of Aunt Carol standing at her counter, peeling eggs with that quiet focus, pretending not to notice me sneaking the broken ones. This recipe is my way of keeping her close, one bite at a time.
But more than that, it’s just a really, really good deviled egg. The creamy filling, the salty bacon crunch, the fresh pop of chives — it’s simple, it’s satisfying, and it always gets compliments. Whether you’re making these for a holiday gathering, a summer cookout, or just because you had a rough day and need something comforting, they deliver.
I’d love to hear how yours turn out. Did you add a twist? Use a different herb? Forget to save the bacon fat and improvise? Drop a comment below and let me know. And if you loved this recipe, share it with a friend who needs a little comfort food in their life. Happy cooking!
Frequently Asked Questions
Can I make these deviled eggs ahead of time?
Yes! You can boil and peel the eggs up to 3 days in advance. Cook the bacon and chop the chives up to 1 day ahead. Store everything separately in the refrigerator. Assemble the deviled eggs no more than 4 hours before serving for the best texture and flavor.
How do I get the eggs to peel easily?
Use eggs that are at least a week old — fresh eggs are much harder to peel. After boiling, shock them in an ice bath for 10 minutes. Start peeling from the wider end where the air pocket is, and peel under running water if the shell is stubborn.
Can I use a different type of mustard?
Absolutely. Yellow mustard gives the classic tang, but Dijon mustard adds a sharper, more sophisticated flavor. Spicy brown mustard works well too. Start with 1 teaspoon and adjust to taste.
How do I keep the bacon crispy on top?
Add the bacon garnish right before serving. If you’re making these ahead, store the crumbled bacon separately and sprinkle it on just before you bring the platter to the table. The bacon will soften after a few hours in the fridge.
Can I freeze deviled eggs?
I don’t recommend freezing deviled eggs. The texture of both the egg whites and the filling changes dramatically after freezing and thawing — they become watery and rubbery. These are best made fresh and enjoyed within 2 days.
Pin This Recipe!


Classic Deviled Eggs with Crispy Bacon & Chives
- Total Time: 35 minutes
- Yield: 12 deviled eggs (6 servings of 2 eggs each) 1x
Description
Creamy deviled eggs topped with crispy bacon and fresh chives. This upgraded version adds finely chopped bacon inside the filling for a subtle smokiness throughout, then tops each egg with more bacon and chives for the perfect contrast of creamy and crunchy.
Ingredients
- 6 large eggs
- 4 slices bacon, thick-cut preferred
- 3 tablespoons mayonnaise, full-fat
- 1 teaspoon yellow mustard
- 1/2 teaspoon apple cider vinegar
- 1/4 teaspoon salt
- 1/8 teaspoon black pepper, freshly ground
- 2 tablespoons fresh chives, finely chopped, divided
- Paprika for garnish (optional)
Instructions
- Place eggs in a single layer in a medium saucepan. Cover with cold water by about an inch. Bring to a rolling boil over high heat (8-10 minutes). Once boiling, cover the pot, turn off the heat, and let eggs sit in hot water for exactly 12 minutes.
- While eggs sit, prepare an ice bath: fill a large bowl with cold water and plenty of ice cubes. After 12 minutes, transfer eggs to the ice bath using a slotted spoon. Let cool for at least 10 minutes.
- While eggs are cooling, cook bacon in a skillet over medium heat until deeply golden and crispy, about 6-8 minutes, flipping once. Transfer to a paper towel-lined plate to drain and cool. Once cool, crumble or finely chop. Reserve 2 tablespoons rendered bacon fat if desired.
- Peel eggs: gently tap each egg on the counter to crack shell all over, roll between palms to loosen, then peel starting from the wider end. Rinse under cool water to remove shell fragments. Pat dry.
- Slice each egg in half lengthwise. Gently pop out yolks into a medium mixing bowl. Arrange egg white halves on a serving platter, cut-side up.
- To the bowl with yolks, add mayonnaise, yellow mustard, apple cider vinegar, salt, and black pepper. Mash together with a fork until smooth and creamy. Taste and adjust seasoning. Fold in half of the crumbled bacon and 1 tablespoon of chopped chives. If using, stir in 1 teaspoon reserved bacon fat.
- Spoon filling into a piping bag or zip-top bag with a small corner snipped off. Pipe filling generously into each egg white half, mounding slightly in the center.
- Sprinkle remaining crumbled bacon over filled eggs. Top with remaining chopped chives and a light dusting of paprika if using. Serve immediately or refrigerate until ready.
Notes
Use eggs that are at least a week old for easier peeling. Don’t overcook eggs to avoid green ring around yolk. For best texture, assemble no more than 4 hours before serving and add bacon garnish just before serving. Store leftovers in an airtight container in the refrigerator for up to 2 days. Do not freeze.
- Prep Time: 15 minutes
- Cook Time: 20 minutes
- Category: Appetizer
- Cuisine: American
Nutrition
- Serving Size: 2 deviled eggs
- Calories: 190
- Sodium: 360
- Fat: 14
- Saturated Fat: 4
- Carbohydrates: 2
- Protein: 12
Keywords: deviled eggs, bacon, chives, appetizer, party food, Easter, game day, gluten-free, low-carb, keto