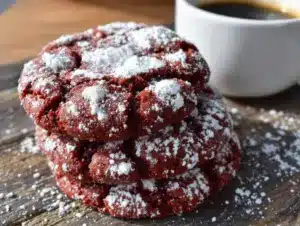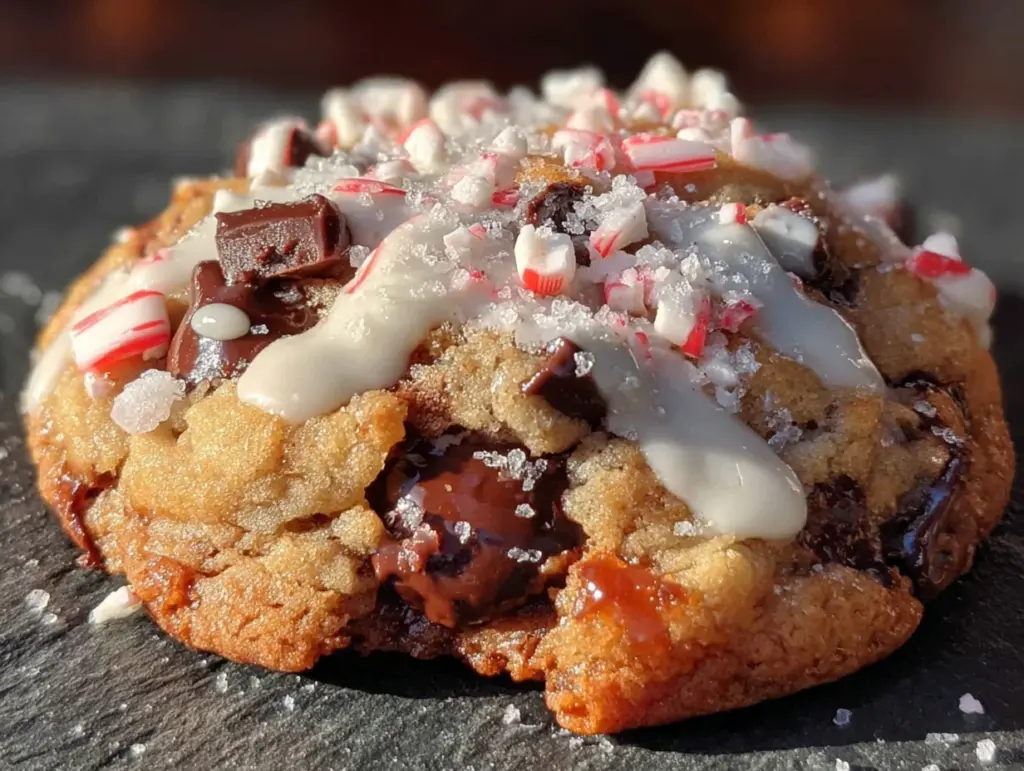
I want a peppermint bark chocolate chip cookie right now. Like, the kind that cracks on top, has melty chocolate chips, and little bits of crushed candy cane that stay crunchy even after baking. I have everything I need except for one thing—the peppermint bark itself. Not the store-bought kind wrapped in shiny plastic, but the homemade version I made last week that’s sitting in a ziplock bag in the pantry. The one I told myself I’d save for hot chocolate. Well, plans change.
Here’s the thing about holiday baking. You want something that feels special but doesn’t require a culinary degree. Something that looks like you spent hours on it but really came together in one bowl. These peppermint bark chocolate chip cookies hit that sweet spot. They’re chewy in the middle, crispy around the edges, and studded with chocolate chunks and peppermint pieces that make every bite different. My sister called them “the cookie version of Christmas morning.” I think she’s right.
I’ve been testing this recipe for about three weeks now. The first batch was too flat. The second was too cakey. But this version? This is the one. The butter is browned just enough to add nuttiness without overpowering the mint. The chocolate chips stay soft. And the peppermint bark? It melts into the dough in all the right ways. You don’t just taste peppermint—you taste the creamy white chocolate and the dark chocolate from the bark itself. It’s layered. It’s cozy. It’s the cookie I’ll be making for every holiday party from now on.
Why You’ll Love This Recipe
I’ve been baking cookies for over fifteen years, and I can tell you honestly—this recipe is different. It’s not just another chocolate chip cookie with mint extract thrown in. The peppermint bark adds texture and flavor in a way that feels intentional.
- Quick & Easy: From start to finish, you’re looking at about 30 minutes. No chilling required. Mix, scoop, bake, done.
- Simple Ingredients: You probably have most of these in your kitchen already. Butter, sugar, flour, eggs. The only special item is the peppermint bark, which you can make or buy.
- Perfect for the Holidays: These cookies belong on a Christmas cookie platter. They’re festive without being fussy. Great for cookie swaps, parties, or just eating by the tree.
- Crowd-Pleaser: Kids love the candy cane crunch. Adults love the sophisticated peppermint-chocolate combo. Everyone wins.
- Unbelievably Delicious: The browned butter adds a toasty depth. The peppermint bark melts into pools of white and dark chocolate. The edges are slightly crisp, the centers are soft. It’s next-level comfort food.
What makes this recipe different from the rest? It’s the browned butter and the peppermint bark working together. Most peppermint cookies use extract, which can taste artificial. By using actual peppermint bark, you get real chocolate and real peppermint in every bite. Plus, the bark pieces stay visible in the dough, so each cookie looks as good as it tastes. This isn’t just another version of a holiday cookie. It’s the best version.
Honestly, this is the kind of cookie that makes you close your eyes after the first bite. It’s comfort food reimagined—familiar but surprising. Perfect for impressing guests without stress, or turning a quiet December evening into something memorable.
What Ingredients You Will Need
This recipe uses simple, wholesome ingredients to deliver bold flavor and satisfying texture without the fuss. Most are pantry staples, which makes this an easy last-minute bake when holiday cravings hit.
- Unsalted butter, 1 cup (2 sticks) — browned and slightly cooled. I use Kerrygold for its rich flavor, but any good unsalted butter works.
- Light brown sugar, 1 cup, packed — adds moisture and that chewy texture. Dark brown sugar works too if you want a deeper molasses flavor.
- Granulated sugar, 1/2 cup — helps the cookies spread just enough and adds crispness to the edges.
- Large egg, 1, room temperature — binds everything together. If you forget to take it out early, place it in warm water for 5 minutes.
- Large egg yolk, 1 — extra yolk adds richness and chewiness. This is my secret for soft centers.
- Vanilla extract, 2 teaspoons — pure vanilla, not imitation. It rounds out the peppermint flavor beautifully.
- All-purpose flour, 2 cups + 2 tablespoons — I use Gold Medal. Spoon and level it; don’t scoop directly from the bag or you’ll get too much flour.
- Baking soda, 1 teaspoon — helps the cookies spread and brown evenly.
- Salt, 1/2 teaspoon — enhances all the flavors. I use fine sea salt.
- Semi-sweet chocolate chips, 1 cup — use good quality like Ghirardelli or Guittard. They hold their shape better during baking.
- Peppermint bark, 1 cup, chopped into small pieces — homemade or store-bought. I prefer making my own with dark chocolate and white chocolate layers, but Ghirardelli peppermint bark from the store works great too.
- Crushed candy canes, 1/4 cup — for topping right after baking. Optional, but highly recommended for that festive crunch.
Ingredient Notes: If you’re making your own peppermint bark, use good quality chocolate. The better the chocolate, the better the cookie. For the candy canes, crush them in a ziplock bag with a rolling pin. Don’t pulverize them—you want small pieces, not powder. If you’re dairy-free, you can substitute the butter with a good vegan butter stick (I like Miyoko’s), but the texture will be slightly different.
Equipment Needed
You don’t need a fancy kitchen to make these cookies. Here’s what you’ll need:
- Large mixing bowl — any medium-to-large bowl works. I use a glass one so I can see if the butter is properly incorporated.
- Whisk — for mixing the wet ingredients and dry ingredients separately.
- Rubber spatula — for folding in the chocolate chips and peppermint bark. A wooden spoon works too, but the spatula is gentler on the dough.
- Baking sheets — two standard half-sheet pans. If you only have one, let it cool completely between batches.
- Parchment paper — non-negotiable. It prevents sticking and helps the cookies brown evenly. Silicone mats work too, but the cookies spread slightly less.
- Cookie scoop — a 1.5-tablespoon scoop is perfect for uniform cookies. If you don’t have one, use two spoons to portion the dough.
- Cooling rack — for letting the cookies cool completely. If you don’t have one, transfer the cookies to a plate after 5 minutes on the baking sheet.
- Small saucepan — for browning the butter. A light-colored pan helps you see the color change.
Budget-Friendly Tip: You don’t need a stand mixer for this recipe. Everything is mixed by hand with a whisk and spatula. Saves on cleanup too.
Preparation Method
Let’s get baking. This recipe comes together quickly, so read through all the steps before you start. Trust me, it helps.
- Brown the butter. Place the 1 cup of butter in a small saucepan over medium heat. Stir constantly with a rubber spatula or wooden spoon. The butter will foam, then turn golden, then start to smell nutty—like toasted hazelnuts. This takes about 5-7 minutes. Once you see brown specks forming at the bottom and the butter smells fragrant, remove it from the heat immediately. Pour it into a large mixing bowl to stop the cooking. Let it cool for 10 minutes. Don’t skip this step; hot butter will cook the eggs.
- Mix the sugars and butter. Add the brown sugar and granulated sugar to the cooled browned butter. Whisk vigorously for about 1 minute until the mixture looks like wet sand and smells amazing. It should be well combined but not creamy—there’s no creaming step here.
- Add the egg, egg yolk, and vanilla. Crack the egg and extra yolk into the bowl. Add the vanilla extract. Whisk until everything is smooth and glossy, about 30 seconds. The mixture might look a little separated at first; keep whisking until it comes together.
- Combine the dry ingredients. In a separate bowl, whisk together the flour, baking soda, and salt. Make sure there are no clumps of baking soda—nobody wants a bitter bite.
- Add the dry ingredients to the wet. Pour the flour mixture into the butter-sugar mixture. Use a rubber spatula to fold everything together gently. Stir just until no streaks of flour remain. Overmixing makes cookies tough. Stop when it looks like a cohesive dough.
- Fold in the chocolate chips and peppermint bark. Add the semi-sweet chocolate chips and chopped peppermint bark. Fold 3-4 times until evenly distributed. The dough will be thick and slightly sticky. That’s perfect.
- Preheat the oven to 375°F (190°C). While the oven heats, line two baking sheets with parchment paper. Space the dough scoops about 2 inches apart—these cookies spread, but not excessively.
- Scoop the dough. Use a 1.5-tablespoon cookie scoop to portion the dough. Roll each portion into a ball between your palms. Place 6-8 dough balls on each baking sheet. Don’t flatten them; they’ll spread on their own.
- Bake for 10-12 minutes. Bake one sheet at a time in the center of the oven. The cookies are done when the edges are golden brown and the centers look slightly puffy and underdone. They’ll continue baking on the hot sheet after you pull them out. For softer cookies, bake for 10 minutes. For crispier edges, go to 12 minutes.
- Top with crushed candy canes. As soon as the cookies come out of the oven, sprinkle a pinch of crushed candy canes on top of each one. Press gently so they stick. This step is optional but adds that signature peppermint bark look and crunch.
- Cool on the baking sheet for 5 minutes. This is important. The cookies are fragile right out of the oven. Let them set on the sheet before transferring to a cooling rack. After 5 minutes, use a spatula to move them to the rack to cool completely.
- Repeat with remaining dough. Let the baking sheet cool completely before scooping the next batch. If you put dough on a hot sheet, the butter will melt before the cookie sets, and you’ll get flat cookies.
Visual Cue: The dough should be thick enough to hold its shape when scooped. If it seems too soft, pop it in the fridge for 15 minutes. The cookies should spread to about 2.5 inches in diameter. If they’re spreading too much, your butter might have been too warm. Next time, chill the dough briefly.
Cooking Tips & Techniques
I’ve made a lot of mistakes in the kitchen. Let me save you from mine.
Brown the butter low and slow. The first time I made these, I cranked the heat too high. The butter burned in under 2 minutes. Burnt butter tastes bitter and ruins the cookies. Keep the heat at medium and stir constantly. The moment you see brown specks, pull it off the heat. It goes from perfect to burnt fast.
Don’t skip cooling the butter. I know it’s tempting to speed things up. But if you add the eggs to hot butter, you’ll end up with scrambled eggs in your cookie dough. Not a good look. Let the butter cool for a full 10 minutes. It should be warm but not hot to the touch.
Use room temperature eggs. Cold eggs seize up the butter mixture and make the dough stiff. If you forgot to take the eggs out early, place them in a bowl of warm water for 5 minutes. Problem solved.
Measure flour correctly. This is the number one mistake home bakers make. Scooping flour directly from the bag packs it down, and you end up with too much flour. The cookies turn out dry and cakey. Instead, spoon the flour into your measuring cup, then level it off with a knife. It takes 5 extra seconds and makes a huge difference.
Chill the dough if needed. If your kitchen is warm or your butter was too soft, the dough might be sticky. That’s fine. Just pop the bowl in the fridge for 15-20 minutes before scooping. Chilled dough spreads less and bakes up thicker.
Bake one sheet at a time. I know you want to bake both sheets at once to save time. But the oven temperature drops when you open the door, and the cookies on the top rack bake differently from the ones on the bottom. Bake one sheet at a time in the center of the oven for consistent results. Your patience will be rewarded.
Let them cool on the sheet. Those first 5 minutes on the hot baking sheet are crucial. The cookies continue to bake and set. If you move them too soon, they’ll fall apart. If you leave them too long, they’ll stick. Set a timer for 5 minutes. It’s worth it.
Variations & Adaptations
One of the best things about this recipe is how adaptable it is. Here are some variations I’ve tried and loved.
Gluten-Free Version: Substitute the all-purpose flour with a 1:1 gluten-free baking flour blend. I like King Arthur Measure for Measure. The texture will be slightly more tender, but the flavor is still fantastic. Add an extra tablespoon of flour if the dough seems too wet.
Dark Chocolate Lover’s Twist: Swap the semi-sweet chocolate chips for dark chocolate chunks. Use dark chocolate peppermint bark instead of the classic version. The bitterness of the dark chocolate balances the sweetness of the candy canes beautifully. This is my personal favorite variation.
White Chocolate Peppermint: Replace the semi-sweet chips with white chocolate chips. Use white chocolate peppermint bark. The cookies become sweeter and more candy-like. Perfect for kids or anyone with a serious sweet tooth.
Double Chocolate Version: Add 1/4 cup of unsweetened cocoa powder to the flour mixture. Reduce the flour by 2 tablespoons to compensate. The result is a rich, fudgy chocolate cookie with peppermint bark pieces throughout. It’s like a brownie and a cookie had a holiday baby.
No-Candy-Cane Option: If you don’t like candy canes, skip the crushed topping. The peppermint bark in the dough provides plenty of peppermint flavor. You can also top the cookies with flaky sea salt instead for a sweet-salty finish.
Air Fryer Adaptation: Yes, you can make these in an air fryer. Preheat the air fryer to 325°F (160°C). Place 4-5 dough balls in the basket, leaving space between them. Bake for 6-8 minutes, checking at the 6-minute mark. The cookies won’t spread as much, so flatten them slightly before baking. They turn out soft and chewy with crispy edges.
I tried the double chocolate version last week and brought a batch to my neighbor. She said they were the best cookies she’d ever had. That’s the kind of feedback that keeps me experimenting.
Serving & Storage Suggestions
These cookies are best served slightly warm, when the chocolate chips are still soft and the peppermint bark is slightly melty. Let them cool for 5 minutes on the baking sheet, then transfer to a plate and serve immediately. The contrast between the warm cookie and the cool candy cane crunch is divine.
For a Cookie Platter: Arrange the cookies on a large platter with other holiday treats. They pair beautifully with creamy white chocolate cranberry bark with pistachios for a festive dessert spread. Add some brown butter pumpkin chocolate chip cookies for a fall-inspired twist. The combination of flavors is unforgettable.
Beverage Pairings: A cold glass of milk is the classic choice. But these cookies also go well with hot cocoa, peppermint mocha, or a warm cup of chai tea. For an adult option, try them with a glass of dark stout or a peppermint martini.
Storage: Store the cookies in an airtight container at room temperature for up to 5 days. Place a slice of bread in the container to keep them soft—the bread absorbs excess moisture and the cookies stay chewy. Replace the bread slice every 2 days.
Freezer Instructions: These cookies freeze beautifully. You can freeze the baked cookies or the raw dough. For baked cookies, place them in a single layer in a freezer-safe container, separated by parchment paper. Freeze for up to 3 months. Thaw at room temperature for 30 minutes before serving. For the dough, scoop it into balls and place them on a parchment-lined baking sheet. Freeze until solid, then transfer to a freezer bag. Bake from frozen, adding 2-3 minutes to the baking time.
Reheating: Pop a cookie in the microwave for 10 seconds to bring back that fresh-from-the-oven softness. Or warm them in a 300°F (150°C) oven for 5 minutes. The peppermint bark gets slightly melty again, and the edges crisp up perfectly.
One thing I love about these cookies is how the flavors develop over time. On day two, the peppermint flavor mellows and the chocolate becomes more pronounced. They’re still delicious, just different. I actually prefer them on day one, but my husband likes them better on day two. Try both and see which you prefer.
Nutritional Information & Benefits
Let’s be real—these are cookies. They’re a treat, not a health food. But that doesn’t mean they’re devoid of any nutritional value. Here’s a rough estimate per cookie (based on 24 cookies):
| Nutrient | Amount Per Cookie |
|---|---|
| Calories | 185 kcal |
| Total Fat | 10 g |
| Saturated Fat | 6 g |
| Cholesterol | 35 mg |
| Sodium | 95 mg |
| Total Carbohydrates | 24 g |
| Dietary Fiber | 1 g |
| Sugars | 16 g |
| Protein | 2 g |
Health Highlights: The dark chocolate in the peppermint bark and chocolate chips contains antioxidants called flavonoids, which are linked to heart health. Peppermint has been used for centuries to aid digestion—so consider these cookies a digestive aid (I’m only half joking). The butter provides fat-soluble vitamins A, D, E, and K. Again, these are cookies. Enjoy them in moderation and don’t overthink the nutrition.
Dietary Considerations: This recipe contains gluten, dairy, and eggs. For a gluten-free version, see the variations section above. For a dairy-free version, use vegan butter and dairy-free chocolate. The texture will be slightly different, but still delicious.
Allergen Note: Peppermint bark often contains soy lecithin. Check the label if you have a soy allergy. Candy canes are typically gluten-free, but always verify the brand if you have celiac disease.
I believe in balance. I eat salads most days, but when December rolls around, I make cookies. Life is short. Enjoy the peppermint bark.
Conclusion
So here’s the deal. These peppermint bark chocolate chip cookies are everything you want in a holiday cookie—festive, delicious, and surprisingly easy to make. The browned butter adds depth. The peppermint bark adds crunch and sweetness. The chocolate chips add richness. It’s a combination that works, and it works well.
I’ve tested this recipe more times than I can count, and this version is the one I keep coming back to. It’s the cookie I bring to parties, the one I mail to friends, the one I eat standing over the kitchen counter at 11 p.m. when everyone else is asleep. It’s that good.
I’d love to hear how yours turn out. Did you try a variation? Did you add extra candy canes? Did you double the batch? Drop a comment below and let me know. And if you loved this recipe, share it with a friend who needs a little holiday cheer. We could all use more cookies in our lives.
Happy baking, friends. May your cookies be chewy, your chocolate be melty, and your holidays be bright.
Frequently Asked Questions
Can I use store-bought peppermint bark instead of homemade?
Absolutely. Store-bought peppermint bark works perfectly. I’ve used Ghirardelli peppermint bark and it turns out great. Just chop it into small pieces before adding it to the dough. Homemade is fun if you have the time, but store-bought saves you a step and tastes just as good in the cookies.
Why did my cookies spread too much?
This usually happens when the butter is too warm or the dough isn’t chilled. If your kitchen is warm, pop the dough in the fridge for 15-20 minutes before baking. Also, make sure you measured the flour correctly. Too little flour leads to flat, greasy cookies. Spoon and level your flour for best results.
Can I freeze the cookie dough?
Yes, and I actually recommend it. Scoop the dough into balls and place them on a parchment-lined baking sheet. Freeze until solid, then transfer to a freezer bag. When you’re ready to bake, place the frozen dough balls on a baking sheet and add 2-3 minutes to the baking time. No need to thaw first.
How do I keep the cookies soft for days?
Store them in an airtight container with a slice of bread. The bread releases moisture, which keeps the cookies soft. Replace the bread slice every 2 days. This trick works for all soft cookies, not just these peppermint bark ones. It’s my grandmother’s secret, and it never fails.
Can I make these cookies without peppermint bark?
Technically yes, but they won’t be the same. If you don’t have peppermint bark, you can substitute with 1/2 cup of white chocolate chips and 1/4 cup of crushed candy canes. Add 1/4 teaspoon of peppermint extract to the dough for extra flavor. The texture and taste will be different, but still delicious. For a similar holiday cookie experience, try my easy soft batch chocolate chip cookies and add crushed candy canes on top.
Pin This Recipe!


Best Peppermint Bark Chocolate Chip Cookies Recipe
- Total Time: 27 minutes
- Yield: 24 cookies 1x
Description
These peppermint bark chocolate chip cookies are chewy in the middle, crispy around the edges, and studded with chocolate chunks and peppermint pieces. Made with browned butter and real peppermint bark, they’re the perfect festive treat for holiday parties, cookie swaps, or cozy nights by the tree.
Ingredients
- 1 cup (2 sticks) unsalted butter, browned and slightly cooled
- 1 cup packed light brown sugar
- 1/2 cup granulated sugar
- 1 large egg, room temperature
- 1 large egg yolk
- 2 teaspoons vanilla extract
- 2 cups + 2 tablespoons all-purpose flour
- 1 teaspoon baking soda
- 1/2 teaspoon salt
- 1 cup semi-sweet chocolate chips
- 1 cup peppermint bark, chopped into small pieces
- 1/4 cup crushed candy canes (for topping)
Instructions
- Brown the butter: Place 1 cup of butter in a small saucepan over medium heat. Stir constantly until the butter foams, turns golden, and smells nutty (about 5-7 minutes). Remove from heat immediately and pour into a large mixing bowl. Let cool for 10 minutes.
- Mix the sugars and butter: Add brown sugar and granulated sugar to the cooled browned butter. Whisk vigorously for about 1 minute until the mixture looks like wet sand.
- Add the egg, egg yolk, and vanilla: Crack the egg and extra yolk into the bowl, add vanilla extract. Whisk until smooth and glossy, about 30 seconds.
- Combine the dry ingredients: In a separate bowl, whisk together flour, baking soda, and salt.
- Add the dry ingredients to the wet: Pour the flour mixture into the butter-sugar mixture. Fold gently with a rubber spatula until no streaks of flour remain. Do not overmix.
- Fold in the chocolate chips and peppermint bark: Add semi-sweet chocolate chips and chopped peppermint bark. Fold 3-4 times until evenly distributed. The dough will be thick and slightly sticky.
- Preheat the oven to 375°F (190°C). Line two baking sheets with parchment paper.
- Scoop the dough: Use a 1.5-tablespoon cookie scoop to portion the dough. Roll each portion into a ball and place 6-8 dough balls on each baking sheet, spacing them about 2 inches apart. Do not flatten.
- Bake for 10-12 minutes: Bake one sheet at a time in the center of the oven. Cookies are done when edges are golden brown and centers look slightly puffy and underdone.
- Top with crushed candy canes: As soon as cookies come out of the oven, sprinkle a pinch of crushed candy canes on top of each one. Press gently to stick.
- Cool on the baking sheet for 5 minutes, then transfer to a cooling rack to cool completely.
- Repeat with remaining dough, letting the baking sheet cool completely between batches.
Notes
For best results, brown the butter low and slow to avoid burning. Let the butter cool for a full 10 minutes before adding eggs. Use room temperature eggs. Measure flour by spooning and leveling. If dough is too sticky, chill for 15-20 minutes before scooping. Bake one sheet at a time for even results. Let cookies cool on the baking sheet for 5 minutes before transferring.
- Prep Time: 15 minutes
- Cook Time: 12 minutes
- Category: Dessert
- Cuisine: American
Nutrition
- Serving Size: 1 cookie
- Calories: 185
- Sugar: 16
- Sodium: 95
- Fat: 10
- Saturated Fat: 6
- Carbohydrates: 24
- Fiber: 1
- Protein: 2
Keywords: peppermint bark cookies, chocolate chip cookies, holiday cookies, Christmas cookies, peppermint cookies, brown butter cookies