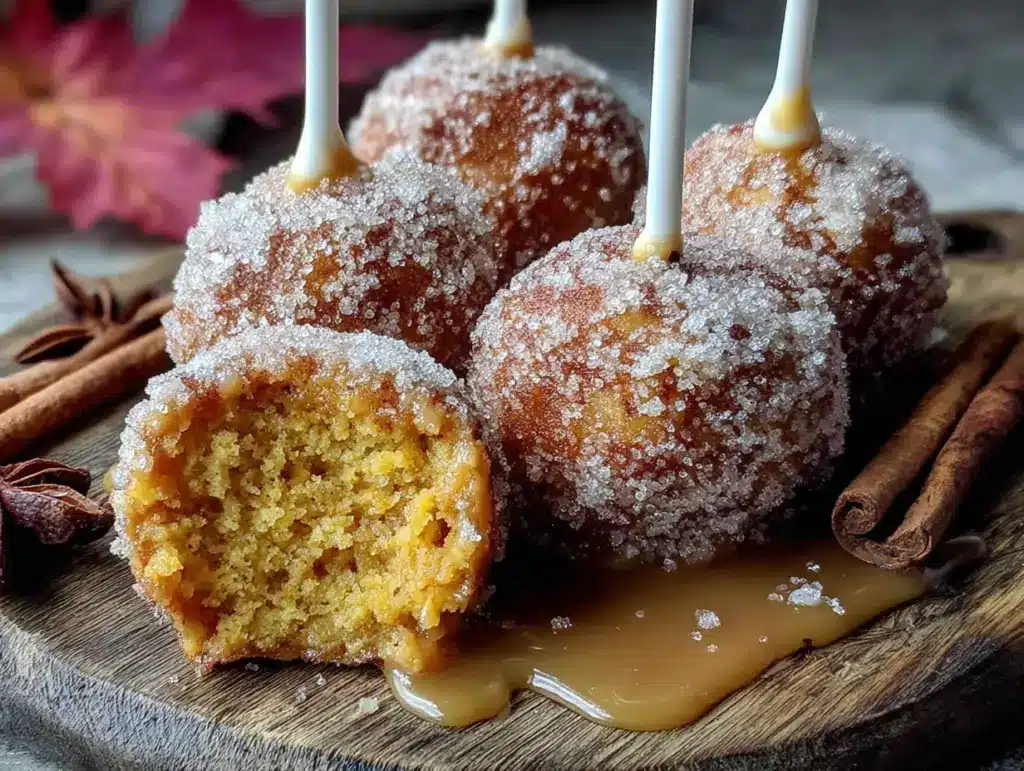
There used to be a tiny bakery tucked behind a vintage clothing store in my old neighborhood that made the most incredible little pumpkin cake pops. They called them “Pumpkin Dusties” because they were rolled in a heavy coat of cinnamon sugar that sparkled under the cafe lights. When the bakery closed suddenly—I still remember walking by and seeing the “For Lease” sign taped to the window—I honestly felt a little lost. Those little cake pops were my Tuesday afternoon ritual, the thing I grabbed after a long shift when I needed something small but deeply satisfying.
After maybe seven or eight tries—some that crumbled into disaster, a few that were way too dense, and one batch that I accidentally over-spiced so badly my roommate begged me to stop—I finally cracked the code. And let me tell you, this version might actually be better than the original. Not because I’m some kind of baking genius, but because I figured out a shortcut that makes them weeknight-friendly without losing that bakery magic.
These quick cinnamon sugar pumpkin cake pops are everything you want in a fall treat: tender, spiced just right, and rolled in that crackly cinnamon-sugar coating that makes you close your eyes after the first bite. Maybe you’ve had that experience where you’re craving something specific but don’t have three hours to fuss with cake pops that require chilling and dipping and all that extra work. I’ve been there. That’s exactly why I streamlined this recipe. It comes together fast, uses simple ingredients you probably already have, and delivers that same cozy feeling without the bakery price tag or the hassle.
Why You’ll Love This Recipe
Let’s be real for a second—cake pops have a reputation for being finicky. The dipping, the melting, the way they sometimes slide right off the stick. I’ve been developing recipes for over a decade, and I’ve tested more cake pop methods than I care to admit. This one is different. It’s built for people who want the payoff without the production.
- Quick & Easy: These come together in about 30 minutes flat. No chilling required before rolling, no complicated dipping in melted chocolate. Just mix, bake, crumble, roll, and coat. Perfect for those evenings when you need a treat but also need to get dinner on the table.
- Simple Ingredients: Everything here is a pantry staple. Canned pumpkin, basic baking staples, and cinnamon sugar. No special trips to specialty stores or hunting down unusual ingredients.
- Perfect for Weeknights: These are small enough to satisfy a craving without leaving you with a whole cake to eat. Plus, they’re portable—grab a couple for the morning commute or pack them in lunchboxes.
- Crowd-Pleaser: I’ve brought these to potlucks, holiday parties, and casual get-togethers. They disappear fast. Kids love the poppable size, and adults appreciate that they’re not overly sweet.
- Unbelievably Delicious: The texture is where these shine. The inside is tender and moist from the pumpkin, while the outside has that crackly cinnamon-sugar shell that adds just the right crunch. It’s comfort food in two bites.
What makes this recipe different from every other pumpkin cake pop out there? It’s the method. Instead of baking a whole cake and crumbling it, we bake a thin sheet of pumpkin cake that bakes in half the time. Then we mix it with a simple binder—just a little cream cheese frosting—and roll it immediately. No waiting for the cake to cool completely, no struggling with sticky fingers. It’s the kind of efficiency that comes from making the same mistake fifty times until you figure out a better way.
This recipe is the kind that makes you feel like you’ve pulled off something special even when you’re short on time. It’s comfort food reimagined for real life—faster, simpler, but with the same soul-soothing satisfaction that makes pumpkin season worth waiting for.
What Ingredients You Will Need
This recipe uses simple, wholesome ingredients to deliver that cozy pumpkin flavor and satisfying texture without any fuss. Most of these are pantry staples, which makes this the kind of recipe you can pull together on a whim.
For the Pumpkin Cake Base
- 1 cup all-purpose flour (spooned and leveled—don’t scoop directly from the bag or you’ll pack in too much)
- 1 teaspoon baking powder (make sure it’s fresh for the best rise)
- 1/2 teaspoon baking soda
- 1/2 teaspoon salt
- 1 teaspoon ground cinnamon (I prefer McCormick for consistent flavor)
- 1/2 teaspoon ground nutmeg (freshly grated if you have it, but pre-ground works fine)
- 1/4 teaspoon ground ginger
- 1/4 teaspoon ground cloves (optional, but it adds that classic pumpkin pie depth)
- 1/2 cup canned pumpkin puree (not pumpkin pie filling—look for 100% pure pumpkin. Libby’s is my go-to)
- 1/3 cup granulated sugar
- 1/4 cup packed brown sugar (light or dark both work; dark adds more molasses flavor)
- 1/4 cup vegetable oil (or melted coconut oil for a subtle flavor twist)
- 1 large egg, room temperature
- 1 teaspoon vanilla extract
For the Binder
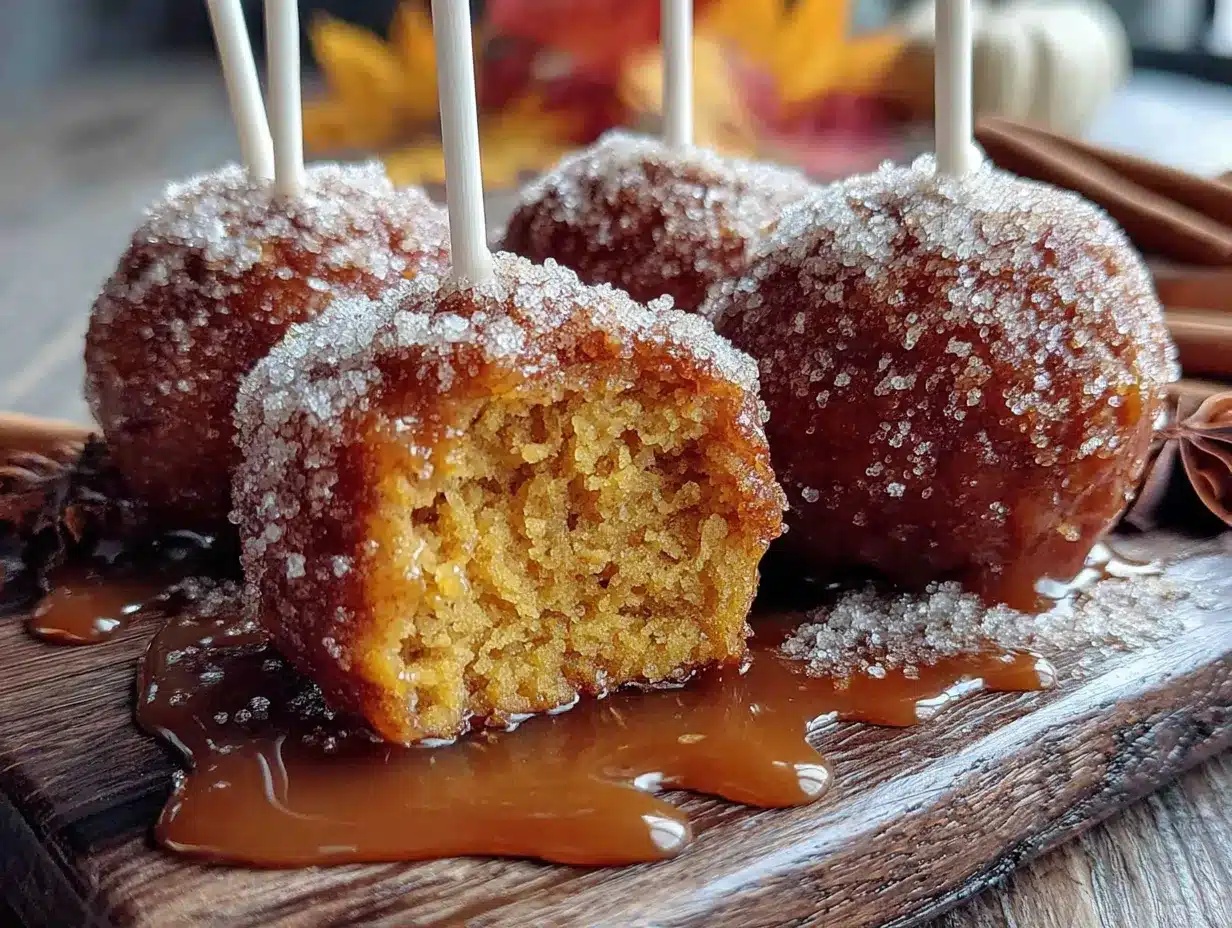
- 3 tablespoons cream cheese frosting (store-bought is totally fine—I use Duncan Hines when I’m in a hurry. You can also use homemade if you have it on hand)
For the Cinnamon Sugar Coating
- 1/2 cup granulated sugar
- 1 tablespoon ground cinnamon
- 2 tablespoons melted butter (for helping the coating stick)
A quick note on ingredient selection: The quality of your cinnamon really matters here. Since it’s the star of the coating, use a fresh bottle. I learned this the hard way after making a batch with cinnamon that had been sitting in my cabinet for two years. The cake pops tasted dusty instead of vibrant. Trust me on this one.
For the pumpkin, make sure you’re using pure pumpkin puree, not pumpkin pie filling. The pie filling has added sugar and spices that will throw off the balance. If you open a can and only need half, the rest freezes beautifully in a zip-top bag for future batches.
Equipment Needed
You don’t need much for this recipe, which is part of the beauty. Here’s what you’ll need:
- 8×8 inch baking pan (or a 9×9 inch pan—the cake will just be slightly thinner)
- Mixing bowls (one medium, one large)
- Whisk (for dry ingredients)
- Rubber spatula (for folding the batter)
- Parchment paper (for lining the pan—trust me, this saves so much cleanup)
- Cooling rack (optional but helpful)
- Large rimmed baking sheet (for holding the rolled cake pops)
- Small bowl (for the cinnamon sugar mixture)
- Pastry brush (for brushing melted butter on the cake pops)
- Cookie scoop or tablespoon (for portioning evenly)
If you don’t have an 8×8 pan, you can use a 9×9 pan and just reduce the baking time by a few minutes. I’ve also made these using a muffin tin—just divide the batter into 12 muffin cups and bake for about 12 minutes. The texture will be slightly different but still delicious. As for the pastry brush, a silicone one is easiest to clean, but a regular bristle brush works fine too. Just make sure it’s clean and dry before you start.
Preparation Method
Let’s walk through this step by step. I’ve included time estimates and sensory cues so you know exactly what to look for at each stage.
- Preheat your oven to 350°F (175°C). Line your 8×8 baking pan with parchment paper, leaving a little overhang on two sides. This makes lifting the cake out later so much easier. Lightly grease the parchment with cooking spray.
- Mix the dry ingredients. In a medium bowl, whisk together the flour, baking powder, baking soda, salt, cinnamon, nutmeg, ginger, and cloves. Set this aside. The spices should smell warm and inviting—if your cinnamon doesn’t smell like much, it’s probably time to replace it.
- Mix the wet ingredients. In a large bowl, whisk together the pumpkin puree, granulated sugar, brown sugar, vegetable oil, egg, and vanilla extract. Whisk until everything is smooth and well combined. The mixture will be a beautiful deep orange color and smell like fall in a bowl.
- Combine wet and dry. Pour the dry ingredients into the wet ingredients and fold together with a rubber spatula until just combined. A few small lumps are totally fine—overmixing will make the cake tough. The batter should be thick but spreadable, similar to a muffin batter.
- Bake the cake. Pour the batter into the prepared pan and spread it evenly. Bake for 18-22 minutes, or until a toothpick inserted in the center comes out clean or with just a few moist crumbs. The edges should be lightly golden and pulling away from the sides of the pan. Let the cake cool in the pan for about 5 minutes, then transfer it to a cooling rack to cool completely. Note: You want the cake fully cooled before moving to the next step. Warm cake will make the frosting binder too soft and your cake pops will be sticky and hard to roll.
- Crumble the cake. Once the cake is completely cool, break it into large chunks and place them in a large bowl. Use your hands or a fork to crumble the cake into fine, even crumbs. There shouldn’t be any large pieces remaining. This takes about 2-3 minutes. The crumbs should feel dry but not dusty.
- Add the binder. Add the 3 tablespoons of cream cheese frosting to the crumbled cake. Use your hands to mix it in thoroughly, squeezing the mixture together until it holds its shape when pressed. The texture should feel like slightly damp sand that clumps together easily. If it’s too dry, add another teaspoon of frosting. If it’s too wet, add a tablespoon of additional cake crumbs.
- Roll the cake pops. Using a cookie scoop or a tablespoon, portion out the mixture and roll it between your palms into smooth balls. Aim for about 1-inch diameter. Place each ball on a parchment-lined baking sheet as you go. You should get about 20-24 cake pops from this recipe. Pro tip: Lightly dampen your hands with water if the mixture starts sticking to your palms.
- Prepare the cinnamon sugar coating. In a small bowl, mix together the granulated sugar and ground cinnamon. In another small bowl, melt the 2 tablespoons of butter in the microwave (about 20 seconds should do it).
- Coat the cake pops. Working one at a time, brush each cake pop lightly with melted butter, then roll it in the cinnamon sugar mixture until fully coated. Place the coated cake pops back on the baking sheet. The butter helps the sugar stick and adds a subtle richness that makes these irresistible.
- Let them set. Let the cake pops sit at room temperature for about 10 minutes so the coating adheres. Then they’re ready to serve! If you want a firmer texture, pop them in the refrigerator for 15 minutes before serving.
Cooking Tips & Techniques
I’ve made this recipe more times than I can count, and I’ve learned a few things along the way. Here are the tips that make the biggest difference:
Don’t overbake the cake. I know it’s tempting to leave it in the oven an extra few minutes “just to be safe,” but an overbaked cake will be dry and crumbly. The cake pops need some moisture to hold together. Pull the cake when a toothpick comes out with just a few moist crumbs attached. It should feel springy to the touch.
Let the cake cool completely. This is non-negotiable. If you crumble the cake while it’s still warm, the steam will make the crumbs soggy and the frosting binder won’t incorporate properly. I’ve made this mistake exactly once, and I ended up with a sticky mess that wouldn’t roll into balls. Give it at least 30 minutes on the cooling rack.
Use a light hand with the binder. The cream cheese frosting is there to hold everything together, not to make the cake pops taste like frosting. Start with 3 tablespoons and add more only if needed. The mixture should hold together when squeezed but not feel greasy or wet.
Roll with confidence. When shaping the cake pops, apply even pressure with your palms. If you’re too gentle, they’ll fall apart. If you press too hard, they’ll be dense. Aim for a smooth, round shape with no cracks. If cracks appear, the mixture is too dry—add a tiny bit more frosting.
Toast the coating for extra crunch. Here’s a trick I discovered by accident: after coating the cake pops in cinnamon sugar, place them on a baking sheet and pop them under the broiler for 30-45 seconds. Watch them carefully—the sugar will bubble and caramelize slightly, creating an incredible crunchy shell. This is optional but absolutely worth the extra minute.
Variations & Adaptations
One of the best things about this recipe is how adaptable it is. Here are some variations I’ve tried and loved:
Gluten-Free Version
Substitute the all-purpose flour with a 1:1 gluten-free baking flour blend. I’ve had great results with Bob’s Red Mill Gluten-Free 1-to-1 Baking Flour. The texture will be slightly more delicate, so handle the cake pops gently when rolling. Everything else stays the same.
Dairy-Free Version
Use a dairy-free cream cheese frosting (Tofutti makes a good one) and substitute the butter in the coating with melted coconut oil or a vegan butter alternative. The flavor will be slightly different but still delicious. I made this version for a friend with dairy allergies and she said they were “better than the real thing.”
Pumpkin Spice Latte Twist
Add 1 tablespoon of instant espresso powder to the dry ingredients and use a vanilla bean paste instead of vanilla extract. The coffee flavor enhances the pumpkin and cinnamon beautifully. This version tastes like your favorite fall coffee drink in cake pop form.
Maple Pecan Variation
Swap the brown sugar for maple sugar (or just use 1/4 cup maple syrup and reduce the oil by 1 tablespoon). Add 1/4 cup finely chopped pecans to the cake crumb mixture. For the coating, mix in a tablespoon of maple sugar with the cinnamon sugar. This version is dangerously good.
Chocolate-Dipped Version
Instead of the cinnamon sugar coating, melt 1 cup of semi-sweet chocolate chips with 1 teaspoon of coconut oil. Dip each cake pop in the melted chocolate, tap off the excess, and place on parchment paper. Sprinkle with a little sea salt before the chocolate sets. This turns them into an entirely different treat—more decadent, more dessert-like.
Serving & Storage Suggestions
These cake pops are best served at room temperature, which is when the texture is most tender and the cinnamon sugar coating is at its crunchiest. If you’ve refrigerated them, let them sit out for about 15 minutes before serving.
They’re perfect on their own as a quick snack, but they also pair beautifully with a hot cup of coffee or a glass of cold milk. For a dessert board, arrange them alongside fresh apple slices, caramel dip, and maybe a few chocolate-covered pretzels. They make a gorgeous addition to any fall gathering.
Storage: Place the cake pops in an airtight container, layered between sheets of parchment paper. They’ll keep at room temperature for up to 3 days. If you live in a humid climate, store them in the refrigerator to prevent the coating from getting sticky. They’ll last up to a week in the fridge.
Freezing: These freeze beautifully. Place the uncoated cake pops on a baking sheet and freeze until solid (about 1 hour). Transfer them to a freezer-safe bag or container. When you’re ready to serve, thaw them in the refrigerator overnight, then brush with butter and roll in cinnamon sugar. You can also freeze the coated cake pops, but the coating may soften slightly during thawing. I usually freeze a batch without the coating so I can finish them fresh whenever a craving hits.
Make-Ahead Tip: You can bake the cake up to 2 days in advance and keep it wrapped tightly at room temperature. Crumble and assemble the cake pops when you’re ready. The cinnamon sugar coating is best applied the day you plan to serve them, but they’ll still be good the next day.
Nutritional Information & Benefits
Here’s the honest truth: these are a treat, not a health food. But they’re made with real ingredients, and there are a few nutritional bright spots worth mentioning.
| Per Cake Pop (based on 24 pops) | Approximate Value |
|---|---|
| Calories | 110-130 |
| Total Fat | 5g |
| Saturated Fat | 2g |
| Carbohydrates | 17g |
| Sugar | 11g |
| Protein | 1.5g |
| Fiber | 1g |
| Vitamin A | 35% DV |
The pumpkin puree is the real star here nutritionally. It’s packed with vitamin A (beta-carotene), which supports eye health and immune function. It also adds fiber and moisture without a lot of fat. The cinnamon has anti-inflammatory properties and may help with blood sugar regulation. So while these are absolutely a dessert, they’re not completely empty calories.
If you’re watching your sugar intake, you can reduce the sugar in the cake by a tablespoon or two without affecting the texture too much. The coating is harder to reduce since the sugar is what creates that crackly shell. For a lower-sugar option, try the chocolate-dipped variation with dark chocolate, which has less sugar than milk chocolate.
These are not gluten-free in their standard form, but the gluten-free variation works well. They contain dairy from the cream cheese frosting and butter, but the dairy-free version is a solid alternative. As always, check your specific ingredients if you have allergies or sensitivities.
Conclusion
These quick cinnamon sugar pumpkin cake pops are the kind of recipe that makes you feel like you’ve pulled off something special without spending your whole evening in the kitchen. They capture everything I loved about those bakery cake pops from my old neighborhood—the tender crumb, the warm spices, that irresistible crackly coating—but they’re designed for real life. For Tuesday nights when you need a little joy. For last-minute gatherings where you want to bring something homemade. For those moments when only a pumpkin treat will do.
I hope you make these your own. Add a pinch of cardamom if that’s your thing. Double the cinnamon sugar coating because why not? Swap in a different frosting binder if cream cheese isn’t your style. The recipe is a starting point, not a rulebook. That’s the beauty of cooking—you get to make it yours.
If you try these, I’d love to hear how they turn out. Drop a comment below and let me know if you made any fun variations. And if you’re looking for another quick fall treat, you might enjoy my easy pumpkin bread recipe or these cinnamon sugar baked donuts. Happy baking, friends!
Frequently Asked Questions
Can I use fresh pumpkin instead of canned?
Yes, you can! Just make sure to cook and puree the pumpkin first, then drain off any excess liquid. Fresh pumpkin has more water than canned, so you may need to squeeze it in a clean kitchen towel to remove extra moisture. Start with 1/2 cup of the drained puree.
Why did my cake pops fall apart?
This usually happens for one of three reasons: the cake was too dry (overbaked), there wasn’t enough frosting binder, or the mixture wasn’t pressed together firmly enough when rolling. Try adding an extra tablespoon of frosting and squeezing the mixture more firmly in your hands.
Can I make these without cream cheese frosting?
Absolutely. You can substitute the cream cheese frosting with vanilla buttercream, a few tablespoons of melted white chocolate, or even a little maple syrup mixed with powdered sugar. The binder just needs to be something sweet and sticky that helps the crumbs hold together.
How do I get the cinnamon sugar to stick better?
The melted butter is key here. Make sure you’re brushing it on evenly and not missing any spots. If the coating still isn’t sticking, try rolling the cake pops in the cinnamon sugar immediately after brushing with butter—don’t let the butter soak in first.
Can I use a cake mix instead of making the cake from scratch?
Yes, and I’ve done it plenty of times when I’m really short on time. Use a spice cake mix or a yellow cake mix and add 1/2 cup of pumpkin puree and 1 teaspoon of cinnamon. Bake according to the package directions (it may take a few extra minutes due to the pumpkin). Then proceed with crumbling and rolling as directed.
Pin This Recipe!
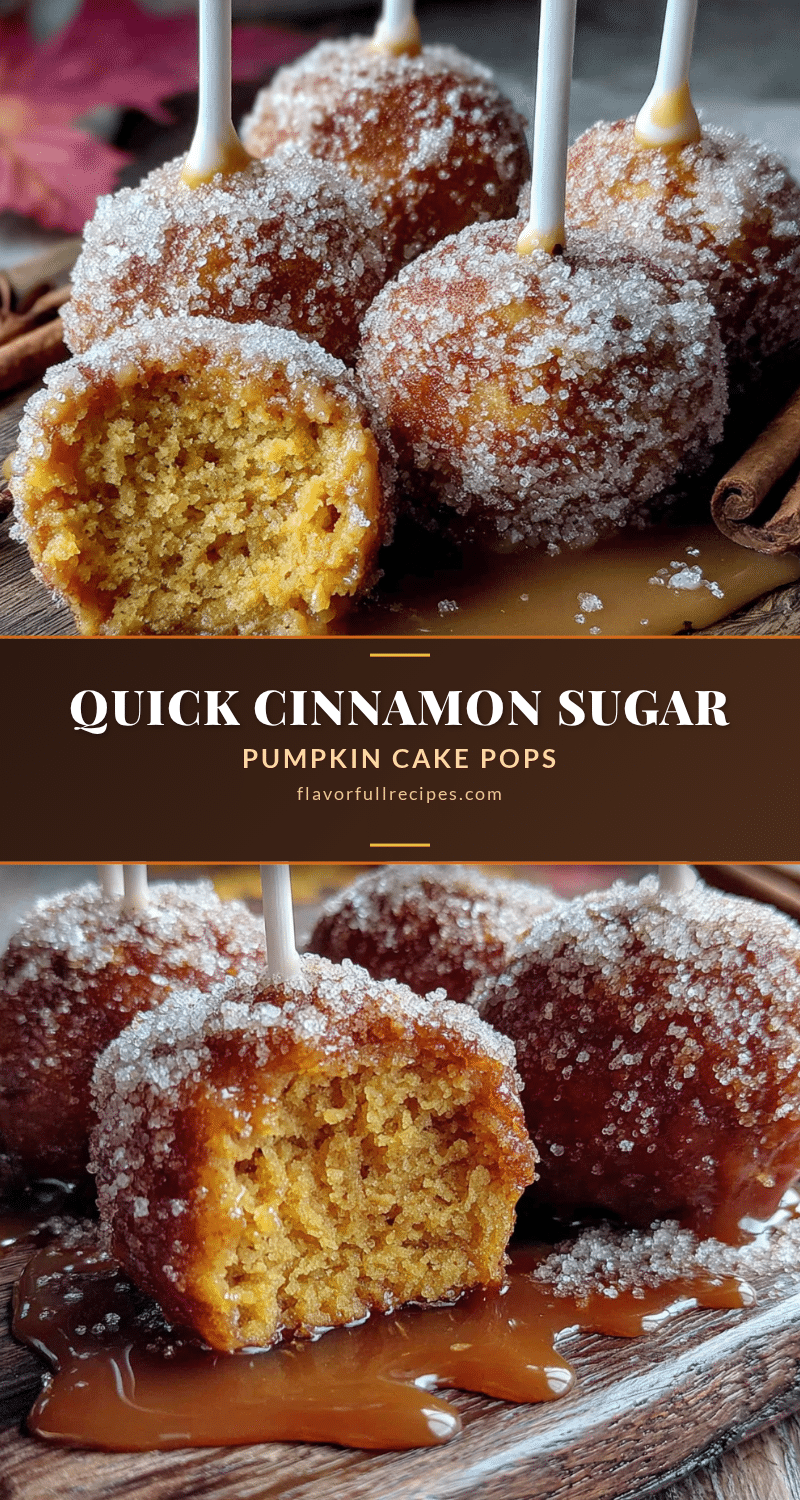

Best Easy Pumpkin Cake Pops with Cinnamon Sugar
- Total Time: 35 minutes
- Yield: 20-24 cake pops 1x
Description
Tender, spiced pumpkin cake pops rolled in a crackly cinnamon-sugar coating. A quick and easy fall treat that comes together in about 30 minutes with simple pantry ingredients.
Ingredients
- 1 cup all-purpose flour (spooned and leveled)
- 1 teaspoon baking powder
- 1/2 teaspoon baking soda
- 1/2 teaspoon salt
- 1 teaspoon ground cinnamon
- 1/2 teaspoon ground nutmeg
- 1/4 teaspoon ground ginger
- 1/4 teaspoon ground cloves (optional)
- 1/2 cup canned pumpkin puree (100% pure, not pumpkin pie filling)
- 1/3 cup granulated sugar
- 1/4 cup packed brown sugar (light or dark)
- 1/4 cup vegetable oil (or melted coconut oil)
- 1 large egg, room temperature
- 1 teaspoon vanilla extract
- 3 tablespoons cream cheese frosting (store-bought or homemade)
- 1/2 cup granulated sugar (for coating)
- 1 tablespoon ground cinnamon (for coating)
- 2 tablespoons melted butter (for coating)
Instructions
- Preheat your oven to 350°F (175°C). Line an 8×8 inch baking pan with parchment paper, leaving overhang on two sides. Lightly grease the parchment with cooking spray.
- In a medium bowl, whisk together the flour, baking powder, baking soda, salt, cinnamon, nutmeg, ginger, and cloves. Set aside.
- In a large bowl, whisk together the pumpkin puree, granulated sugar, brown sugar, vegetable oil, egg, and vanilla extract until smooth and well combined.
- Pour the dry ingredients into the wet ingredients and fold together with a rubber spatula until just combined. A few small lumps are fine; do not overmix.
- Pour the batter into the prepared pan and spread evenly. Bake for 18-22 minutes, or until a toothpick inserted in the center comes out clean or with a few moist crumbs. Let cool in the pan for 5 minutes, then transfer to a cooling rack to cool completely.
- Once the cake is completely cool, break it into large chunks and place in a large bowl. Use your hands or a fork to crumble the cake into fine, even crumbs (about 2-3 minutes).
- Add the 3 tablespoons of cream cheese frosting to the crumbled cake. Use your hands to mix thoroughly, squeezing the mixture together until it holds its shape when pressed. If too dry, add another teaspoon of frosting; if too wet, add a tablespoon of additional cake crumbs.
- Using a cookie scoop or tablespoon, portion out the mixture and roll between your palms into smooth balls about 1 inch in diameter. Place on a parchment-lined baking sheet. You should get about 20-24 cake pops.
- In a small bowl, mix together the 1/2 cup granulated sugar and 1 tablespoon ground cinnamon. In another small bowl, melt the 2 tablespoons of butter.
- Working one at a time, brush each cake pop lightly with melted butter, then roll in the cinnamon sugar mixture until fully coated. Place coated cake pops back on the baking sheet.
- Let the cake pops sit at room temperature for about 10 minutes so the coating adheres. Serve at room temperature. For a firmer texture, refrigerate for 15 minutes before serving.
Notes
For best results, ensure the cake is completely cool before crumbling. Use fresh cinnamon for the coating. If the mixture is too sticky, lightly dampen hands with water when rolling. For extra crunch, place coated cake pops under the broiler for 30-45 seconds (watch carefully). Store in an airtight container at room temperature for up to 3 days, or refrigerate for up to a week. Freeze uncoated cake pops for up to 3 months.
- Prep Time: 15 minutes
- Cook Time: 20 minutes
- Category: Dessert
- Cuisine: American
Nutrition
- Serving Size: 1 cake pop
- Calories: 120
- Sugar: 11
- Sodium: 95
- Fat: 5
- Saturated Fat: 2
- Carbohydrates: 17
- Fiber: 1
- Protein: 1.5
Keywords: pumpkin cake pops, cinnamon sugar, fall dessert, easy cake pops, pumpkin treats, quick dessert, weeknight dessert