The power went out halfway through my third attempt at this casserole. There I was, standing in my dimly lit kitchen, three heads of garlic already roasting in the oven before I realized the storm had knocked out the electricity. I remember just staring at the half-mixed bowl of corn, cream cheese, and shredded cheddar, wondering if I should just give up and order pizza.
That was the summer I became obsessed with recreating the corn casserole from The Rusty Spoon, this tiny farm-to-table place in upstate New York that closed its doors back in 2019. Their version was this magical thing—creamy, cheesy, with these little pockets of sweet roasted garlic that would just melt on your tongue. When they shut down, I actually drove three hours for their last weekend service. That’s how good this dish was.
After twelve tries—twelve, I’m not kidding, and some were honestly pretty sad—I finally nailed it. The power outage attempt was actually the breakthrough. Something about having to work slower, more deliberately, with just the gas stove and a flashlight propped against a jar of paprika, made me pay attention to the little things I’d been rushing through. Maybe you’ve been there, chasing a restaurant memory that feels impossible to recreate at home. Let me tell you, this creamy cheesy roasted garlic corn casserole is the one that finally stopped my search.
Why You’ll Love This Recipe
This isn’t just another corn casserole recipe floating around the internet. I tested this thing six times before I felt confident sharing it, and my neighbor Linda (who runs a small catering business) gave it her official “this is going on my menu” approval. So you’re getting something that’s actually been vetted by someone who cooks professionally, not just a random blog recipe that might fall apart in your oven.
- Quick & Easy : Comes together in about 40 minutes total, with only 10 minutes of active prep. Perfect for those nights when you need a side dish that looks impressive but doesn’t demand your whole afternoon.
- Simple Ingredients : No weird specialty items. You probably have most of this stuff in your kitchen right now—corn, cream cheese, cheddar, garlic. The only thing you might need to grab is some heavy cream.
- Perfect for Holiday Gatherings : This dish has become my go-to for Thanksgiving, Easter brunch, and summer barbecues. It fits in anywhere, honestly.
- Crowd-Pleaser : I’ve served this to kids who “don’t like corn” and adults who asked for the recipe before finishing their first helping. It’s that good.
- Unbelievably Delicious : The texture is what gets people. It’s creamy but not mushy, cheesy but not greasy, with those little bursts of sweet roasted garlic that make you close your eyes after the first bite.
What makes this different from every other corn casserole out there? It’s the roasted garlic, honestly. Most recipes just throw in garlic powder or raw minced garlic, which gives you that sharp, harsh flavor. Roasting the garlic first transforms it into something sweet and buttery that melds perfectly with the corn and cheese. It’s comfort food reimagined—familiar enough to feel like home, but special enough to impress guests without any stress.
What Ingredients You Will Need
This creamy cheesy roasted garlic corn casserole uses simple, wholesome ingredients to deliver bold flavor and satisfying texture without the fuss. Most of these are pantry staples or easy to find at any grocery store.
For the Roasted Garlic
- 3 whole heads of garlic (look for firm bulbs with tight skins)
- 2 tablespoons olive oil (I prefer extra virgin for roasting)
- Pinch of salt
For the Casserole Base

- 4 cups frozen corn kernels, thawed and drained (about two 16-ounce bags; I like the sweet corn variety best)
- 8 ounces cream cheese, softened to room temperature (full-fat works best for creaminess)
- 1/2 cup heavy cream (adds richness; half-and-half works in a pinch)
- 2 large eggs, lightly beaten
- 1 tablespoon granulated sugar (just a touch to enhance the corn’s natural sweetness)
- 1 teaspoon salt
- 1/2 teaspoon black pepper
- 1/4 teaspoon smoked paprika (optional but adds a lovely depth)
For the Cheesy Topping
- 1 1/2 cups shredded sharp cheddar cheese (I recommend Tillamook or Cabot for best melting)
- 1/2 cup freshly grated Parmesan cheese (skip the canned stuff—it makes a difference)
- 2 tablespoons unsalted butter, melted
- 1/2 cup panko breadcrumbs (optional, for a crunchy topping)
Ingredient Tips: For the corn, you can absolutely use fresh corn cut off the cob during summer months—about 6 ears will give you the right amount. Just blanch the ears for 2 minutes first to loosen the kernels. If using frozen corn, make sure to thaw and drain it well. Too much water will make your casserole soupy, and nobody wants that.
Substitution Guidance: Need to make this gluten-free? Skip the panko breadcrumbs and use crushed pork rinds or almond flour mixed with a little melted butter for the topping. Dairy-free? Use vegan cream cheese and plant-based shredded cheddar, though the texture will be slightly different. I’ve tested the dairy-free version and it’s still delicious, just a tad less creamy.
Equipment Needed
You don’t need a fancy kitchen to pull this off. Here’s what you’ll need:
- Small baking dish (8×8 or 9×9 works perfectly; a 2-quart casserole dish is fine too)
- Aluminum foil for covering the garlic while it roasts
- Medium mixing bowl for combining ingredients
- Small skillet for toasting panko if you’re using it (optional)
- Chef’s knife and cutting board
- Garlic roaster or just a piece of foil folded into a packet
- Hand mixer or whisk (hand mixer makes the cream cheese smoother)
- Measuring cups and spoons
If you don’t have a garlic roaster, don’t stress. Just wrap the garlic heads in foil with a drizzle of oil and a pinch of salt—works like a charm. I’ve used that method for years and honestly prefer it. For the mixing bowl, any medium bowl will do, but I like using a glass one so I can see if everything’s combined properly. Budget-friendly tip: a 9×9 glass baking dish costs about $10 and works for so many things beyond this casserole.
Preparation Method
Let’s walk through this step by step. Trust me, each step matters, but none of them are complicated.
- Preheat your oven to 400°F (200°C). This is important because you’ll be roasting the garlic at this temperature, and you want the oven fully heated before anything goes in. While it’s heating, take your cream cheese out of the fridge so it can start softening.
- Roast the garlic. Take each head of garlic and slice off the top quarter-inch to expose the cloves. Place each head on a piece of aluminum foil large enough to wrap it completely. Drizzle about 2 teaspoons of olive oil over each exposed head, sprinkle with a tiny pinch of salt, then wrap the foil tightly around each one. Place them directly on the oven rack and roast for 35-40 minutes. You’ll know they’re done when the cloves are soft and golden, and you can easily pierce them with a knife. The smell at this point is absolutely incredible—sweet, nutty, and mellow.
- While the garlic roasts, prep your corn mixture. In your medium mixing bowl, combine the thawed and drained corn, softened cream cheese, heavy cream, beaten eggs, sugar, salt, pepper, and smoked paprika if using. Use your hand mixer on low speed (or a sturdy whisk) to combine everything until the cream cheese is fully incorporated and the mixture is smooth. Don’t overmix—just until it’s combined. You want some texture from the corn kernels remaining intact.
- Lower the oven temperature. Once the garlic is done, remove it from the oven and let it cool for about 5 minutes. Reduce the oven temperature to 375°F (190°C). This lower temperature ensures the casserole bakes evenly without the edges burning before the center sets.
- Extract the roasted garlic. When the garlic is cool enough to handle, squeeze each clove from the bottom—the soft roasted garlic will just pop right out. It should be like squeezing toothpaste from a tube. Mash the roasted garlic cloves with a fork until you have a smooth paste. Stir this paste into your corn mixture until it’s evenly distributed. This is where the magic happens—that sweet, mellow garlic flavor gets into every bite.
- Assemble the casserole. Pour the corn mixture into your greased 8×8 baking dish and spread it evenly. In a small bowl, combine the shredded cheddar, Parmesan, and melted butter. Sprinkle this cheese mixture evenly over the top of the casserole. If you’re using the panko breadcrumbs, sprinkle them over the cheese and press down lightly so they stick.
- Bake the casserole. Place the dish in the preheated 375°F oven and bake for 25-30 minutes. The casserole is done when the edges are golden brown and bubbly, the center is set (it should jiggle just slightly when you shake the dish), and a knife inserted in the center comes out clean. The top should be beautifully browned and slightly crispy if you used the panko.
- Rest before serving. This is crucial—let the casserole rest for at least 5-10 minutes after coming out of the oven. This allows it to set properly so you get clean slices instead of a soupy mess. I know it’s hard to wait, but trust me on this one. The first time I made it, I cut into it immediately and ended up with something that looked more like corn soup than casserole.
Sensory cues to watch for: When you’re mixing the batter, it should feel thick and creamy, not runny. When you squeeze the roasted garlic, it should be soft enough to mash with almost no effort. When the casserole is done baking, the kitchen will smell like a combination of toasted cheese and caramelized corn—it’s intoxicating.
Cooking Tips & Techniques
After making this creamy cheesy roasted garlic corn casserole more times than I care to count, I’ve picked up a few tricks that make a real difference.
Don’t skip the draining step. I learned this the hard way. My fourth attempt was a watery disaster because I just dumped the frozen corn straight into the bowl without thawing and draining it first. Frozen corn releases a surprising amount of water as it thaws, and that extra liquid will make your casserole loose and sad. Thaw it in a colander set over a bowl, then pat it dry with paper towels if you’re feeling extra thorough.
Room temperature ingredients matter. I know, I know, everyone says this and it feels like a hassle. But cold cream cheese straight from the fridge will leave you with lumpy batter no matter how hard you mix. Give it at least 30 minutes on the counter. Same goes for the eggs—if you forget to take them out, just place them in a bowl of warm water for 5 minutes.
Toast your panko for extra crunch. If you’re using the breadcrumb topping, toast the panko in a dry skillet over medium heat for 2-3 minutes before sprinkling it on. This gives you a deeper golden color and a crunchier texture that contrasts beautifully with the creamy casserole underneath. I forgot to do this once and the topping came out pale and slightly soggy—still edible, but not nearly as good.
Watch your baking time. Every oven runs a little differently. My old apartment oven would bake this in exactly 25 minutes, but my current one needs the full 30. Start checking at the 22-minute mark. The edges should be bubbling and the top should be golden. If the top is browning too quickly but the center isn’t set yet, tent the dish loosely with foil for the last 5-10 minutes.
Make-ahead tip: You can assemble the entire casserole (without the topping) up to 24 hours in advance. Just cover and refrigerate. When you’re ready to bake, add the cheese and panko topping, then bake for an extra 5-10 minutes since you’re starting from cold. This is a lifesaver for holiday meals when you’re juggling a dozen dishes at once.
Variations & Adaptations
One of the best things about this recipe is how flexible it is. Here are some variations I’ve tried and loved:
Spicy Southwest Version: Add one diced jalapeño (seeds removed if you want less heat), 1/2 cup of canned diced green chiles, and swap the cheddar for pepper jack cheese. The smoky heat pairs amazingly with the sweet corn and roasted garlic. I made this for a Super Bowl party and it was gone in 15 minutes.
Bacon Lover’s Twist: Cook 6 slices of bacon until crispy, crumble them, and stir half into the corn mixture before baking. Sprinkle the remaining bacon over the cheesy topping right before serving. The salty, smoky bacon adds another layer of flavor that’s absolutely addictive. Fair warning: this version disappears fastest at potlucks.
Herb-Infused Version: Stir in 2 tablespoons of fresh chopped chives and 1 tablespoon of fresh thyme leaves into the corn mixture. The herbs brighten up the dish and make it feel lighter, perfect for spring and summer gatherings. I’ve also used fresh dill in this version and it was surprisingly good.
Dairy-Free Adaptation: Use vegan cream cheese (I like Kite Hill), unsweetened oat milk instead of heavy cream, and dairy-free shredded cheddar. The texture will be slightly less creamy, but the flavor still holds up. I tested this for a friend with lactose intolerance and she asked for seconds.
Keto-Friendly Option: Skip the sugar and panko breadcrumbs. Use full-fat cream cheese and heavy cream. Top with extra cheddar and some crushed pork rinds for crunch. This version clocks in at about 4 net carbs per serving and is incredibly satisfying for a low-carb diet.
Serving & Storage Suggestions
This creamy cheesy roasted garlic corn casserole is versatile enough to serve with almost anything. I love it alongside a simple roasted chicken or grilled pork chops. It’s also fantastic with holiday meals—think Thanksgiving turkey, Easter ham, or even Christmas prime rib. For a lighter meal, pair it with a crisp green salad dressed with lemon vinaigrette to cut through the richness.
Serving temperature: Serve this casserole warm, not piping hot. Letting it rest for that 5-10 minutes after baking brings all the flavors together and makes it easier to serve clean portions. If you’re bringing it to a potluck, it actually holds its temperature pretty well in a covered dish for about 30-40 minutes.
Storage instructions: Leftovers keep beautifully in an airtight container in the refrigerator for up to 4 days. The flavors actually meld together even more overnight, so leftovers might taste even better than the fresh version. I’ve been known to eat it cold straight from the fridge the next morning—don’t judge me, it’s that good.
Freezing tips: This casserole freezes surprisingly well. Let it cool completely, then wrap the dish tightly in plastic wrap followed by a layer of aluminum foil. Freeze for up to 3 months. To reheat, thaw overnight in the refrigerator, then warm in a 350°F oven for about 20 minutes covered, then 5 minutes uncovered to crisp up the top. I’ve done this multiple times and you honestly can’t tell it was frozen.
Reheating methods: For individual portions, the microwave works fine—just heat in 30-second intervals until warmed through. For the whole casserole, the oven is better. Cover with foil and reheat at 350°F for 15-20 minutes, then remove the foil for the last 5 minutes to re-crisp the topping.
Nutritional Information & Benefits
Here’s the nutritional breakdown for one serving (based on 8 servings per casserole):
| Nutrient | Amount Per Serving |
|---|---|
| Calories | 290 |
| Total Fat | 19g |
| Saturated Fat | 11g |
| Cholesterol | 85mg |
| Sodium | 420mg |
| Total Carbohydrates | 22g |
| Dietary Fiber | 2g |
| Sugars | 6g |
| Protein | 10g |
Beyond the numbers, this dish actually has some solid nutritional benefits. Corn is a good source of fiber and contains antioxidants like lutein and zeaxanthin that support eye health. Garlic is known for its immune-boosting properties—and roasting it doesn’t diminish those benefits much. The calcium from the cheese and cream supports bone health. Is this a health food? No. But as comfort food goes, it’s not bad for you either. I personally love that I can serve this to my family knowing they’re getting real food with recognizable ingredients, not preservatives or artificial flavors.
Dietary considerations: This recipe contains dairy, eggs, and gluten (from the panko). For gluten-free, use gluten-free panko or skip the topping. For egg-free, you can try using a flax egg (1 tablespoon ground flaxseed mixed with 3 tablespoons water) but I haven’t tested that version myself.
Conclusion
This creamy cheesy roasted garlic corn casserole is one of those recipes that feels special without being complicated. It’s the dish that makes people say, “Wow, what’s in this?” and then go back for seconds. Whether you’re serving it at a holiday dinner, a summer barbecue, or just a regular Tuesday night, it brings that warm, comforting feeling that only really good food can deliver.
I’d love for you to try this and make it your own. Maybe add some bacon, throw in some jalapeños, or keep it exactly as written—it’s forgiving enough to handle whatever you throw at it. The roasted garlic is the real star here, transforming something ordinary into something you’ll crave. After all those failed attempts in my dimly lit kitchen, I can honestly say this version was worth every single one.
If you make this, come back and let me know how it turned out! Leave a comment below or tag me in your photos. I genuinely love hearing about your kitchen victories—especially the ones that took a few tries to get right. Happy cooking, friends!
Frequently Asked Questions
Can I use fresh corn instead of frozen?
Absolutely! Fresh corn works beautifully in this recipe. You’ll need about 6 ears of corn. Just blanch the ears in boiling water for 2 minutes, then cut the kernels off the cob. Make sure to pat them dry with paper towels before adding them to the mixture to avoid extra moisture.
Can I make this casserole ahead of time?
Yes, you can assemble the casserole (without the topping) up to 24 hours in advance and keep it covered in the refrigerator. When you’re ready to bake, add the cheese and panko topping, then bake for an extra 5-10 minutes since you’re starting from a cold dish.
How do I know when the casserole is fully baked?
The casserole is done when the edges are golden brown and bubbly, the center is set (it should jiggle just slightly when you shake the dish), and a knife inserted in the center comes out clean. Start checking at the 22-minute mark since oven temperatures can vary.
Can I freeze the leftovers?
Yes, this casserole freezes wonderfully. Let it cool completely, then wrap it tightly in plastic wrap followed by aluminum foil. It will keep for up to 3 months. Thaw overnight in the refrigerator and reheat in a 350°F oven until warmed through.
What can I substitute for the cream cheese?
For a lighter version, you can use Neufchâtel cheese, which has about one-third less fat than regular cream cheese. For a dairy-free option, use vegan cream cheese like Kite Hill or Miyoko’s. The texture will be slightly less creamy, but the flavor will still be delicious.
Pin This Recipe!
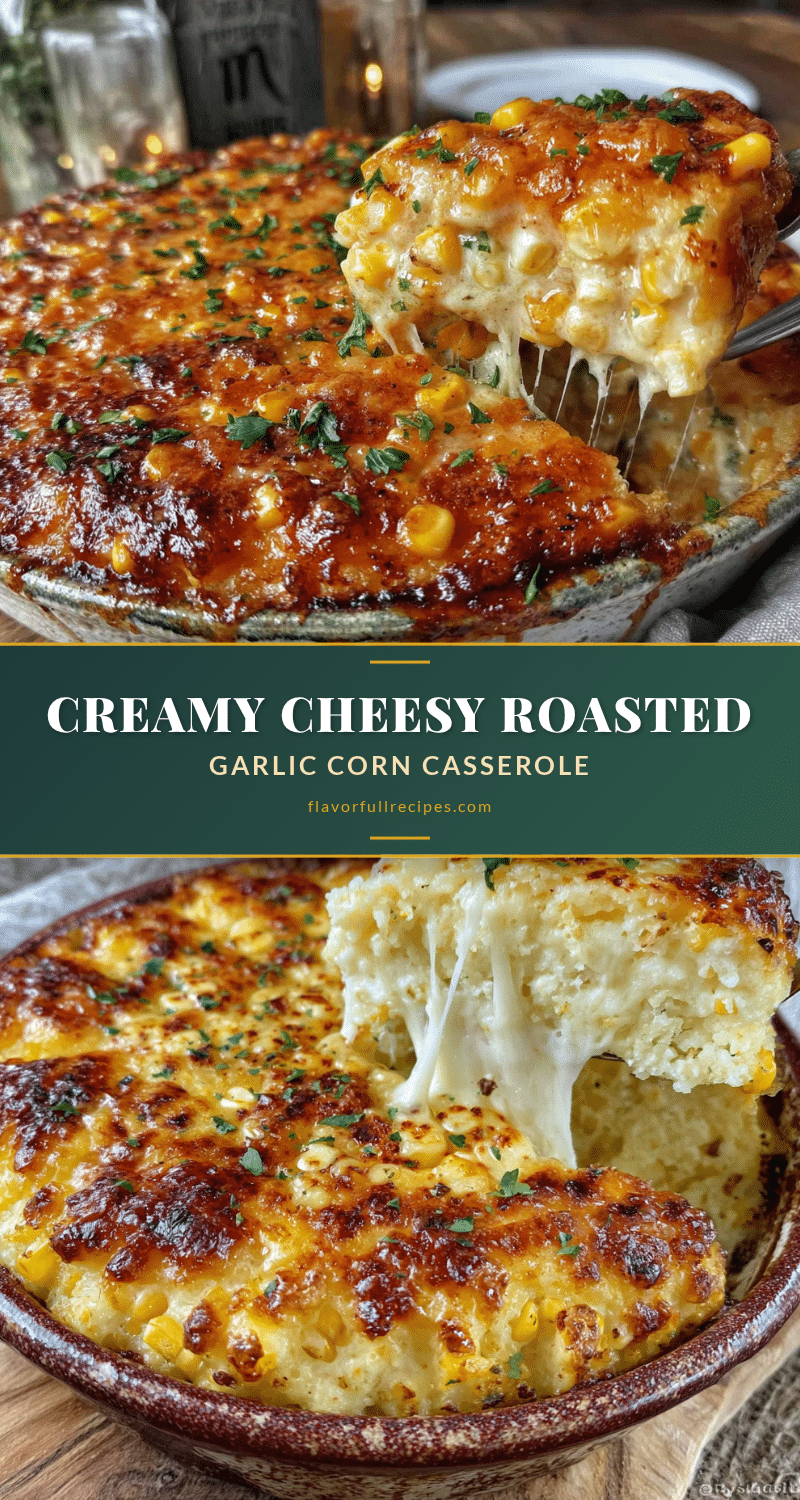

Creamy Cheesy Roasted Garlic Corn Casserole: Easy Side Dish
- Total Time: 40 minutes
- Yield: 8 servings 1x
Description
This creamy, cheesy corn casserole features sweet roasted garlic and a golden, crunchy topping. It’s a quick and easy side dish perfect for holidays, barbecues, or any weeknight meal.
Ingredients
- 3 whole heads of garlic
- 2 tablespoons olive oil
- Pinch of salt
- 4 cups frozen corn kernels, thawed and drained (about two 16-ounce bags)
- 8 ounces cream cheese, softened to room temperature
- 1/2 cup heavy cream
- 2 large eggs, lightly beaten
- 1 tablespoon granulated sugar
- 1 teaspoon salt
- 1/2 teaspoon black pepper
- 1/4 teaspoon smoked paprika (optional)
- 1 1/2 cups shredded sharp cheddar cheese
- 1/2 cup freshly grated Parmesan cheese
- 2 tablespoons unsalted butter, melted
- 1/2 cup panko breadcrumbs (optional)
Instructions
- Preheat your oven to 400°F (200°C).
- Roast the garlic: Slice off the top quarter-inch of each garlic head to expose the cloves. Place each head on a piece of aluminum foil, drizzle with about 2 teaspoons of olive oil, and sprinkle with a pinch of salt. Wrap tightly and roast directly on the oven rack for 35-40 minutes, until cloves are soft and golden.
- While the garlic roasts, prepare the corn mixture: In a medium mixing bowl, combine the thawed and drained corn, softened cream cheese, heavy cream, beaten eggs, sugar, salt, pepper, and smoked paprika (if using). Mix with a hand mixer on low speed or a whisk until smooth and combined. Do not overmix.
- Once the garlic is done, remove from the oven and let cool for about 5 minutes. Reduce the oven temperature to 375°F (190°C).
- Extract the roasted garlic: Squeeze each clove from the bottom to release the soft garlic. Mash with a fork into a smooth paste, then stir into the corn mixture until evenly distributed.
- Assemble the casserole: Pour the corn mixture into a greased 8×8 baking dish and spread evenly. In a small bowl, combine the shredded cheddar, Parmesan, and melted butter. Sprinkle this cheese mixture evenly over the top. If using panko breadcrumbs, sprinkle them over the cheese and press down lightly.
- Bake at 375°F (190°C) for 25-30 minutes, until the edges are golden brown and bubbly, the center is set, and a knife inserted in the center comes out clean.
- Let the casserole rest for 5-10 minutes before serving to allow it to set properly.
Notes
For best results, use room temperature cream cheese and eggs. Thaw and drain frozen corn well to avoid a watery casserole. To make ahead, assemble without topping up to 24 hours in advance, then add topping and bake for an extra 5-10 minutes. Leftovers keep in the refrigerator for up to 4 days or freeze for up to 3 months.
- Prep Time: 10 minutes
- Cook Time: 30 minutes
- Category: Side Dish
- Cuisine: American
Nutrition
- Serving Size: 1 serving (1/8 of ca
- Calories: 290
- Sugar: 6
- Sodium: 420
- Fat: 19
- Saturated Fat: 11
- Carbohydrates: 22
- Fiber: 2
- Protein: 10
Keywords: corn casserole, roasted garlic, cheesy corn casserole, easy side dish, holiday side dish, creamy corn casserole