My friend Jenna had sworn off holiday dips for years. Years. Every December, when the cookie exchanges and office parties rolled around, she’d show up with a store-bought veggie tray and that was it. “Dips are too much work,” she’d say, waving her hand at my seven-layer taco dip like I’d just suggested we build a gingerbread house from scratch. “And they never look as good as the picture anyway.” I let her have her opinion because, honestly, I was too busy eating my weight in warm spinach-artichoke dip to argue.
Then last Christmas Eve, I brought this Easy Christmas Tree Cake Dip with Vanilla Wafers to her annual get-together. I set it down on the coffee table next to the cookies, not saying a word. About twenty minutes later, I spotted her standing by the table with a vanilla wafer in one hand, the other hand holding a second wafer she’d just loaded with the dip. She looked caught—like a kid with their hand in the candy jar. “Okay, fine,” she muttered, crumbs falling from her lips. “This is ridiculous. Give me the recipe.”
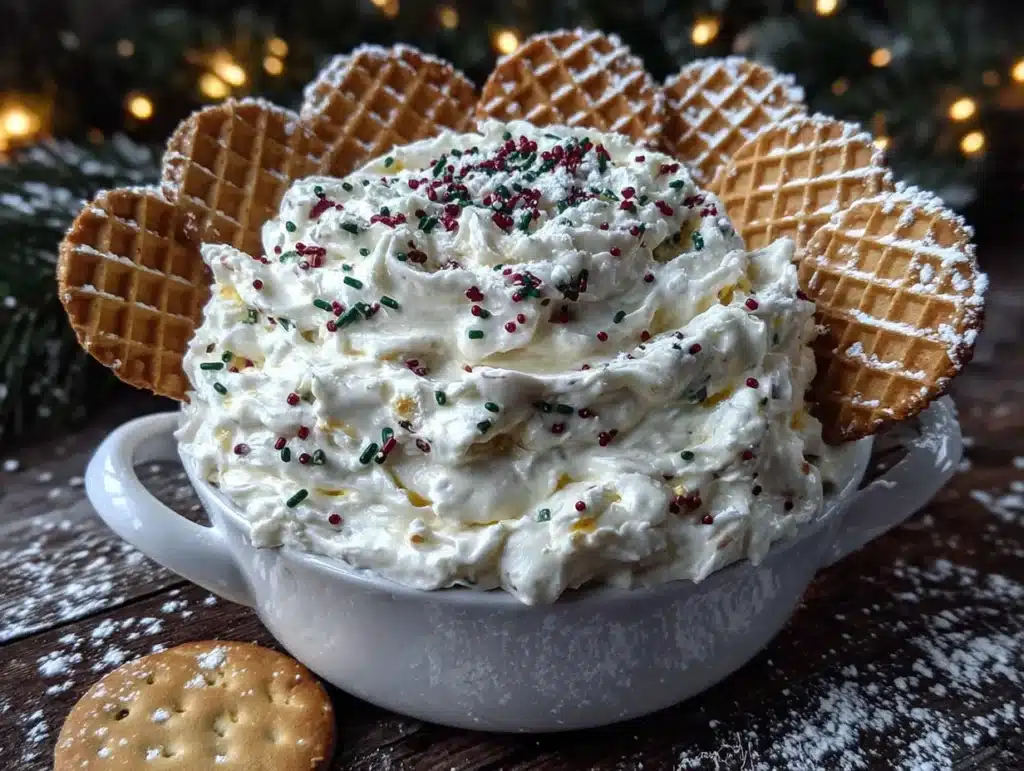
And that’s the thing about this dip, you know? It looks like something that took hours to put together. The green swirl, the red sprinkles on top, the way the vanilla wafers just disappear into it. But here’s the secret—it takes maybe ten minutes of actual work. I’m not joking. I’ve made this while holding a toddler on my hip, and it still turned out beautiful. Honestly, if you’ve ever stared at a box of Little Debbie Christmas Tree Cakes and thought, “I wish I could make that into a dip,” then we’re about to become best friends.
Maybe you’ve been there—standing in the grocery store aisle, trying to decide if you have time for one more holiday recipe, knowing full well you’re already running late. This is that recipe. The one that saves you without making you feel like you cheated. I keep making it because it’s the only thing I’ve ever brought to a party that made people actually stop mid-conversation to ask what it was. And then they ask for the recipe, and I get to smile and say, “You’re not going to believe how easy this is.” Let me tell you, that feeling never gets old.
Why You’ll Love This Recipe
Let’s be real for a second—the holidays are wonderful, but they’re also a lot. Between the shopping, the wrapping, the decorating, and the endless list of things to bake, who has time for complicated recipes? That’s exactly why this Easy Christmas Tree Cake Dip with Vanilla Wafers exists. It’s the shortcut that doesn’t taste like one.
- Five Minutes of Prep: I’m not exaggerating. If you can open a package and stir ingredients together, you can make this dip. It comes together faster than you can preheat an oven.
- Three Ingredients: That’s it. You probably already have most of them in your pantry right now. No special trips to the store for obscure extracts or hard-to-find decorations.
- Perfect for Last-Minute Guests: Someone just texted that they’re stopping by in twenty minutes? No problem. This dip will be ready before they knock on the door.
- Kid-Friendly Fun: My niece, who is seven, made this all by herself last week. She was so proud, and honestly, it tasted exactly like mine. That’s the kind of recipe this is.
- Holiday Magic Without the Stress: It looks festive and special. The green color, the sprinkles, the vanilla wafers standing up like little trees around the edge. But there’s no stress, no complicated techniques, no mess.
What makes this different from every other holiday dessert out there? It’s the texture, honestly. The cream cheese and marshmallow fluff create this light, airy, almost mousse-like consistency that’s completely addictive. And the crushed Christmas tree cakes folded in? They add little pockets of sweetness that make every bite different. It’s not just another dip—it’s the one that disappears first at every single party I’ve brought it to.
This recipe connects with something deeper, too. It’s about making the holidays feel special without making yourself crazy. It’s about showing up with something that looks like you spent hours on it, when really, you spent the afternoon watching your favorite movie. That’s the kind of holiday win we all need, right?
What Ingredients You Will Need
This recipe uses simple, everyday ingredients to create something that tastes way more complicated than it is. The magic happens when these few items come together, so let’s talk about each one.
- 8 ounces cream cheese, softened — This is the base of the dip, giving it that rich, creamy texture. Make sure it’s at room temperature, or you’ll end up with lumps. I usually take it out of the fridge about an hour before I start. If you’re in a hurry, you can microwave it for about 10-15 seconds, but watch it carefully. I’ve nuked cream cheese into a weird, grainy mess before, and it’s not pretty. (Philadelphia is my go-to brand, but any block-style cream cheese works fine.)
- 7 ounces marshmallow fluff — One standard jar. This is what gives the dip that light, airy sweetness. Don’t substitute with melted marshmallows—it’s not the same texture. The fluff is key here. I’ve tried making this with homemade marshmallow cream, and honestly, the store-bought stuff works better. It’s more stable and stays fluffy longer.
- 1 box Little Debbie Christmas Tree Cakes (10 cakes) — These are the stars of the show. You’ll crush most of them for the dip and save a few for decoration. The green icing and the yellow cake inside create that unmistakable Christmas tree cake flavor. If you can’t find these (they’re seasonal, after all), you can try using other frosted snack cakes, but the flavor won’t be quite the same. I’ve seen people use the Valentine’s Day versions in February, and that works too, just with different colors.
- Green food coloring — Optional, but recommended. The Christmas tree cakes already have some green icing, but adding a drop or two of green food coloring gives the dip that vibrant, festive look. I use gel food coloring because it’s more concentrated and doesn’t thin out the dip. A little goes a long way—start with one drop and add more if needed.
- Red sprinkles — For topping. These add that pop of color that makes the dip look like a Christmas decoration. Any red sprinkles work, but I love the little round jimmies or the sanding sugar for a sparkly finish. You could also use crushed red candy canes if you want a hint of peppermint.
- Vanilla wafers — For dipping. The classic choice, and honestly, the best. They’re sturdy enough to scoop up the dip without breaking, and their mild vanilla flavor lets the Christmas tree cake taste shine. You can also use graham crackers, pretzels, or even apple slices. But vanilla wafers? They’re perfect. I like the Nilla brand, but store brands work just as well.
One thing I’ve learned the hard way—don’t skimp on the cream cheese. The reduced-fat or whipped versions have more water in them, which can make the dip runny. Stick with the full-fat block cream cheese for the best texture. Trust me on this one. I tried to make it “healthier” once, and it turned into a soupy mess that looked more like a sad milkshake than a festive dip.
Equipment Needed
You don’t need much to make this dip, which is part of the beauty. Here’s what you’ll want to have on hand.
- Electric hand mixer or stand mixer — You can mix this by hand with a spatula, but the texture is much better if you use a mixer. The hand mixer gets the cream cheese and marshmallow fluff perfectly smooth and fluffy. I’ve made this with just a whisk before, and my arm was sore for two days. Learn from my mistakes.
- Large mixing bowl — Any medium-to-large bowl works. I use my glass mixing bowl because it’s easy to see when everything is combined.
- Rubber spatula — For scraping down the sides of the bowl and folding in the crushed cake pieces. A good spatula is worth its weight in gold here.
- Ziploc bag or food processor — For crushing the Christmas tree cakes. You can also just crumble them with your hands, but a bag and a rolling pin make it faster and more consistent. I’ve tried both methods, and the bag-and-rolling-pin approach is oddly satisfying. Plus, it’s a great way to get out some holiday frustration.
- Serving platter or shallow bowl — Something wide and shallow works best for arranging the vanilla wafers around the edge. I use a white platter because it makes the green dip really pop. A pie plate works great too.
- Measuring cups and spoons — Even though this recipe is simple, having measuring tools handy helps. Though honestly, I usually just eyeball the sprinkles because who has time to measure sprinkles?
Preparation Method
Alright, let’s get to the good part. This is so simple, you’re going to laugh. But follow the steps, and you’ll end up with a dip that looks like it came from a bakery.
- Soften the cream cheese. Take your cream cheese out of the fridge about an hour before you start. You want it to be soft enough that when you press it with your finger, it leaves an indent. If you forgot (I forget all the time), unwrap it and microwave it on low power for about 10 seconds. Check it, then do another 5 seconds if needed. Be careful—you don’t want it melted, just softened.
- Crush the Christmas tree cakes. Set aside 2-3 of the cakes for decoration. Unwrap the remaining 7-8 cakes and place them in a ziploc bag. Seal the bag, squeezing out as much air as you can. Then use a rolling pin or even your hands to crush them into small pieces. You want a mix of fine crumbs and slightly larger chunks. Don’t pulverize them into dust—you want some texture. I like to leave a few pea-sized pieces for little pockets of sweetness in the dip.
- Beat the cream cheese. Place the softened cream cheese in your mixing bowl. Beat it with your hand mixer on medium speed until it’s smooth and creamy, about 1-2 minutes. Scrape down the sides of the bowl with your spatula halfway through. You don’t want any lumps, because they’ll be noticeable in the final dip.
- Add the marshmallow fluff. Scoop the entire jar of marshmallow fluff into the bowl with the cream cheese. Beat on low speed at first so the fluff doesn’t fly everywhere (learned that one the messy way). Then increase to medium speed and beat until the mixture is smooth, light, and fluffy. This takes about 2-3 minutes. The mixture should look like a thick, creamy cloud.
- Add the green food coloring. If you’re using food coloring, add one drop of green gel coloring and mix it in. Check the color. If you want it more vibrant, add another drop. I usually end up using 2-3 drops for that bright, Christmasy green. Mix until the color is evenly distributed. You should see no streaks.
- Fold in the crushed cakes. Add the crushed Christmas tree cake pieces to the bowl. Use your rubber spatula to gently fold them into the cream cheese mixture. Fold just until they’re evenly distributed. Don’t overmix, or the cake pieces will break down too much and you’ll lose that lovely texture. You want to see little specks of yellow cake and green icing throughout the green dip.
- Transfer to serving dish. Spoon the dip into your serving platter or shallow bowl. Use the back of your spatula to spread it into an even layer. You can make it smooth on top or leave some swirls and peaks for a more rustic look. I like to create a slight well in the center, which gives the vanilla wafers a nice place to nestle.
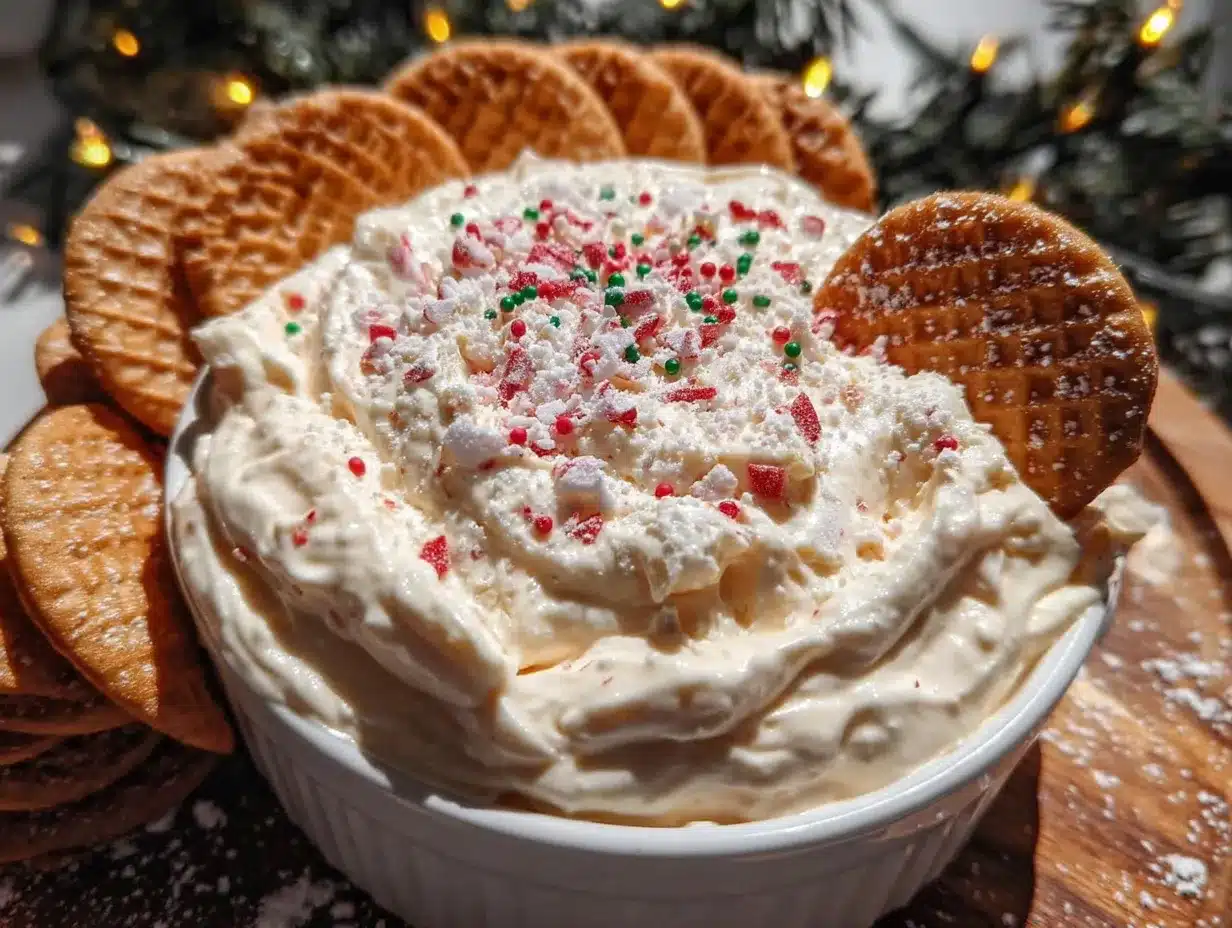
- Decorate. Take the 2-3 Christmas tree cakes you set aside earlier. Cut them into small pieces or crumble them over the top of the dip. Then sprinkle the red sprinkles generously over everything. You want it to look festive and inviting. I go heavy on the sprinkles because they add such a nice crunch and pop of color.
- Arrange the vanilla wafers. Stand vanilla wafers around the edge of the dip, sticking them into the dip at a slight angle. You can also place some flat on the platter around the dip. The goal is to make it look like a wreath or a tree skirt. I usually use about 20-30 wafers, depending on the size of my platter.
- Serve immediately or chill. You can serve this dip right away, or you can cover it and refrigerate it for up to an hour before serving. If you chill it, let it sit at room temperature for about 10 minutes before serving so it softens slightly. The flavors actually meld together beautifully after about 30 minutes in the fridge.
And that’s it. Seriously. Ten steps, most of which take less than a minute each. You’re done. Now go enjoy that well-deserved glass of eggnog.
Cooking Tips & Techniques
I’ve made this dip more times than I care to count, and I’ve learned a few things along the way. Let me save you some trouble.
Don’t overmix the cream cheese. I know I said to beat it until smooth, but there’s a fine line. If you beat it too long, it can become thin and lose its structure. Just get it smooth and move on. I once got distracted by a phone call and overbeat my cream cheese until it looked almost like whipped cream. The dip was still tasty, but it was runny and didn’t hold its shape on the platter.
Room temperature ingredients matter. I know, I know, nobody has time to wait for cream cheese to come to room temperature. But trust me, it makes a difference. Cold cream cheese doesn’t blend well with marshmallow fluff, and you’ll end up with little white lumps. If you’re in a rush, cut the cream cheese into small cubes before softening. They’ll warm up faster.
Crush the cakes strategically. Don’t just dump them in a bag and go crazy. Take a moment to think about texture. I like to crush most of the cakes into fine crumbs, but leave a few in slightly larger pieces. That way, every bite has a mix of smooth dip and little chewy cake bits. It’s the textural contrast that makes this dip so addictive.
Test your food coloring. Gel food coloring is more concentrated than liquid, so start with a tiny amount. I use a toothpick to add just a smidge. You can always add more, but you can’t take it away. And nobody wants a dip that looks like radioactive sludge. Trust me, I’ve been there. My first attempt looked like something from a science experiment gone wrong.
Make it ahead of time. This dip actually gets better after about 30 minutes in the fridge. The flavors meld together, and the texture firms up slightly. You can make it a day ahead, but wait to add the sprinkles and arrange the vanilla wafers until just before serving. Otherwise, the wafers get soft and the sprinkles bleed their color into the dip.
Use a piping bag for a fancy look. If you want to get really fancy, you can pipe the dip onto the platter in a decorative pattern. I’ve done a swirl that looks like a Christmas tree, and it was a huge hit. Just spoon the dip into a piping bag fitted with a large star tip and pipe away. It takes an extra two minutes and looks like you spent hours on it.
Variations & Adaptations
One of the best things about this recipe is how easy it is to change up. Here are some variations I’ve tried and loved.
Peppermint Twist: Crush a few candy canes and fold them into the dip along with the Christmas tree cakes. The peppermint adds a cool, refreshing note that pairs beautifully with the sweet marshmallow fluff. I made this version for a Christmas brunch, and it was gone in fifteen minutes. Just make sure to crush the candy canes into very fine pieces so you don’t get any sharp edges.
Chocolate Lover’s Version: Swap the vanilla wafers for chocolate wafers or chocolate graham crackers. You can also melt some white chocolate and drizzle it over the top of the dip for an extra layer of richness. I tried this once when I was out of vanilla wafers, and honestly, it might be even better. The chocolate and green dip together look very festive too.
Dairy-Free Adaptation: Use dairy-free cream cheese (I like the Kite Hill brand) and make sure your marshmallow fluff is dairy-free (most brands are). The texture will be slightly different—a bit less firm—but it still tastes amazing. I made this for a friend with a dairy allergy, and she couldn’t tell the difference.
Gluten-Free Option: This dip is naturally gluten-free if you use gluten-free vanilla wafers. There are several good brands available now. Just check the labels on your Christmas tree cakes, as some versions may contain wheat. I’ve found that the gluten-free vanilla wafers actually hold up better for dipping because they’re a bit sturdier.
Different Flavors: You can use other seasonal snack cakes throughout the year. Valentine’s Day cakes make a pink version. Halloween ones make an orange dip. I’ve even used the gingerbread-flavored cakes that show up around December, and they were incredible. The base recipe stays the same; just swap out the cake flavor and adjust the food coloring.
Serving & Storage Suggestions
This dip is best served at room temperature, so if you’ve chilled it, let it sit out for about 10-15 minutes before serving. The texture is softer and more scoopable that way. I like to set it out on a platter with a small spreader or butter knife so people can easily scoop it onto their wafers.
For presentation, I arrange the vanilla wafers in a circle around the edge of the dip, standing up at a slight angle. It looks like a wreath or a tree skirt. Then I put a small bowl of extra wafers next to the platter for refills. You can also add some fresh rosemary sprigs around the platter for a festive touch—just make sure people know not to eat them.
This dip pairs beautifully with other holiday treats. I love serving it alongside a plate of sugar cookies, some hot cocoa, or even a cheese board. The sweetness of the dip contrasts nicely with salty snacks like pretzels or crackers. And of course, it’s perfect with a cup of coffee or a glass of cold milk.
Storage: Cover the dip tightly with plastic wrap or transfer it to an airtight container. It will keep in the refrigerator for up to 3 days. The texture will firm up as it chills, so let it come to room temperature before serving again. I don’t recommend freezing this dip—the texture becomes grainy and watery when thawed.
Reheating: You don’t really need to reheat this dip, but if you prefer it softer, let it sit at room temperature for about 20 minutes. Don’t microwave it, or the marshmallow fluff will melt and the dip will become runny. I learned this the hard way when I tried to soften a refrigerated batch quickly. It turned into a soupy mess that looked more like a melted milkshake than a dip.
One thing I love about this recipe is that the flavors actually improve after a few hours in the fridge. The Christmas tree cake pieces soften slightly and meld with the cream cheese and marshmallow fluff. So if you can make it a few hours ahead of time, do it. Just add the sprinkles and wafers right before serving.
Nutritional Information & Benefits
Let’s be honest—this is a treat, not a health food. But here’s what you need to know if you’re keeping track.
Per serving (about 1/4 cup of dip, without wafers):
- Calories: 180-200
- Fat: 10g
- Carbohydrates: 22g
- Sugar: 16g
- Protein: 2g
This recipe contains dairy (cream cheese) and may contain gluten depending on the wafers you use. It also contains soy (often in the marshmallow fluff and snack cakes). If you have allergies, always check the labels on your specific brands.
On the plus side, the cream cheese does provide a small amount of calcium and protein. And the marshmallow fluff is fat-free, if that makes you feel better about it. But honestly? This is a dessert. It’s meant to be enjoyed in moderation, especially during the holidays when we’re all indulging a little more than usual.
I like to think of this dip as a way to make the holidays special without spending hours in the kitchen. It’s about connection and celebration, not about counting calories. So go ahead, have a second scoop. You deserve it.
Conclusion
This Easy Christmas Tree Cake Dip with Vanilla Wafers is the kind of recipe that makes you look like a holiday hero without any of the work. It’s festive, it’s delicious, and it comes together in less time than it takes to wrap a present. Honestly, what more could you ask for?
I love this recipe because it captures everything I want from a holiday dessert—nostalgia, sweetness, and a little bit of magic. Every time I make it, I think about that Christmas Eve party where Jenna finally admitted she was wrong about dips. And every time, I smile. This dip has a way of bringing people together, of making them pause and smile and reach for just one more wafer.
I encourage you to make this your own. Add your favorite sprinkles, try different wafers, experiment with flavors. The base recipe is so forgiving that you really can’t go wrong. And when you bring it to your next holiday gathering, watch how fast it disappears. That’s the real magic.
If you make this recipe, I’d love to hear about it. Leave a comment below and tell me how it turned out. Did you add your own twist? Did your family love it? Did someone at your party say, “You’re not going to believe how easy this is”? Because that’s the highest compliment, honestly. Happy holidays, and happy dipping!
Frequently Asked Questions
Can I make this dip ahead of time?
Yes! You can make the dip up to 24 hours in advance. Just keep it covered in the refrigerator and add the sprinkles and vanilla wafers right before serving. The wafers will get soft if they sit in the dip too long.
Can I use homemade marshmallow cream instead of store-bought fluff?
You can, but the texture will be different. Store-bought marshmallow fluff is more stable and creates a lighter, fluffier dip. Homemade marshmallow cream tends to be denser and can make the dip heavier. I’ve tried both, and I always go back to the jarred stuff.
What can I use instead of vanilla wafers for dipping?
So many options! Graham crackers, pretzels, shortbread cookies, animal crackers, apple slices, or even pretzel sticks all work great. For a gluten-free option, use rice crackers or gluten-free pretzels.
How do I make this dip less sweet?
You can reduce the sweetness by using less marshmallow fluff or by adding a pinch of salt to balance the flavors. Some people also like to add a teaspoon of vanilla extract or a squeeze of lemon juice to cut through the sweetness. I’ve done the lemon juice trick, and it works surprisingly well.
Can I freeze leftover dip?
I don’t recommend freezing this dip. The texture changes significantly when thawed—it becomes grainy and watery. It’s best to make only what you’ll eat within 3 days. If you have leftovers, store them in the fridge and enjoy them within that time frame.
Pin This Recipe!
Easy Christmas Tree Cake Dip with Vanilla Wafers
- Total Time: 10 minutes
- Yield: 8 servings 1x
Description
A festive, no-bake dessert dip made with cream cheese, marshmallow fluff, and crushed Little Debbie Christmas Tree Cakes, served with vanilla wafers. Ready in just 10 minutes, it’s perfect for holiday parties and last-minute guests.
Ingredients
- 8 ounces cream cheese, softened
- 7 ounces marshmallow fluff (1 standard jar)
- 1 box Little Debbie Christmas Tree Cakes (10 cakes)
- Green food coloring (optional, gel recommended)
- Red sprinkles (for topping)
- Vanilla wafers (for dipping)
Instructions
- Soften the cream cheese: Take the cream cheese out of the fridge about an hour before starting, or microwave on low power for 10-15 seconds until softened but not melted.
- Crush the Christmas tree cakes: Set aside 2-3 cakes for decoration. Place the remaining 7-8 cakes in a ziploc bag, seal, and crush with a rolling pin into a mix of fine crumbs and slightly larger chunks.
- Beat the cream cheese: In a large mixing bowl, beat the softened cream cheese with an electric hand mixer on medium speed until smooth and creamy, about 1-2 minutes. Scrape down the sides halfway through.
- Add the marshmallow fluff: Add the entire jar of marshmallow fluff to the bowl. Beat on low speed initially to prevent splattering, then increase to medium speed and beat until smooth, light, and fluffy, about 2-3 minutes.
- Add green food coloring: If using, add 1 drop of green gel food coloring and mix. Add more drops (up to 2-3 total) until desired vibrant green color is achieved, mixing until no streaks remain.
- Fold in crushed cakes: Add the crushed Christmas tree cake pieces to the bowl. Gently fold with a rubber spatula until evenly distributed. Do not overmix.
- Transfer to serving dish: Spoon the dip onto a serving platter or shallow bowl. Spread into an even layer with the back of a spatula, creating slight swirls or a well in the center if desired.
- Decorate: Cut or crumble the reserved 2-3 Christmas tree cakes over the top. Sprinkle generously with red sprinkles.
- Arrange vanilla wafers: Stand vanilla wafers around the edge of the dip at a slight angle, and place some flat on the platter around the dip. Use about 20-30 wafers depending on platter size.
- Serve immediately or chill: Serve right away, or cover and refrigerate for up to 1 hour. If chilled, let sit at room temperature for 10 minutes before serving to soften slightly.
Notes
Don’t overmix the cream cheese to avoid thinning. Room temperature ingredients blend better. Crush cakes strategically for texture contrast. Use gel food coloring for vibrant color without thinning. Make ahead up to 24 hours, but add sprinkles and wafers just before serving. For a fancy look, pipe the dip with a star tip. Store covered in the refrigerator for up to 3 days; do not freeze.
- Prep Time: 10 minutes
- Cook Time: 0 minutes
- Category: Dessert
- Cuisine: American
Nutrition
- Serving Size: 1/4 cup dip (without
- Calories: 190
- Sugar: 16
- Sodium: 120
- Fat: 10
- Saturated Fat: 6
- Carbohydrates: 22
- Protein: 2
Keywords: Christmas tree cake dip, holiday dip, easy dessert dip, no-bake dessert, Christmas dessert, vanilla wafer dip, marshmallow fluff dip