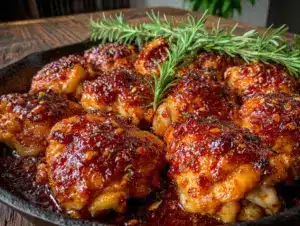
I wasn’t expecting cooking advice from a plumber, but there I was, standing in my kitchen with a leaky faucet, listening to Marco describe exactly how to make honey garlic chicken thighs in twenty minutes flat. He was on his knees under the sink, wrench in hand, and somehow between rattling off pipe sizes, he just started talking about dinner. “My wife works late Tuesdays,” he said, voice echoing from under the cabinet. “I got thirty minutes to feed three kids. This chicken thing, it saves me every time.” I honestly thought he was exaggerating. I mean, a plumber with three kids making restaurant-quality chicken on a Tuesday? But the way he talked about that sticky, golden glaze had me convinced. I scribbled his directions on the back of a takeout menu—the only paper I could find—and promised to try it. That was six months ago, and I haven’t stopped making it since. Maybe you’ve been there, standing in front of an open fridge at 5:45 PM with absolutely no plan for dinner. This recipe is the answer to that exact moment. It’s the kind of meal that makes you feel like you’ve got it all together, even when you’re pretty sure you don’t.
Why You’ll Love This Recipe
Let me tell you why this quick honey garlic chicken thighs recipe has become my absolute weeknight hero. I’ve tested it more times than I can count, tweaked the sauce ratio, adjusted the heat, and even messed up the garlic-to-honey balance once (too much garlic—my kids let me know). This version is the one. It’s the Goldilocks of chicken dinners.
- Quick & Easy: From fridge to table in 20 minutes flat. No marinating, no complicated techniques, no waiting around. Perfect for those nights when you walk in the door and everyone is already asking what’s for dinner.
- Simple Ingredients: You probably have everything in your kitchen right now. Chicken thighs, honey, soy sauce, garlic, a few pantry staples. No specialty store trips required.
- Perfect for Weeknights: This is the definition of a busy family dinner. One pan, minimal cleanup, and it goes with almost any side you have on hand.
- Crowd-Pleaser: My kids devour these. My picky neighbor’s kids devour these. Even my husband, who claims he doesn’t like “sweet meat,” asks for seconds.
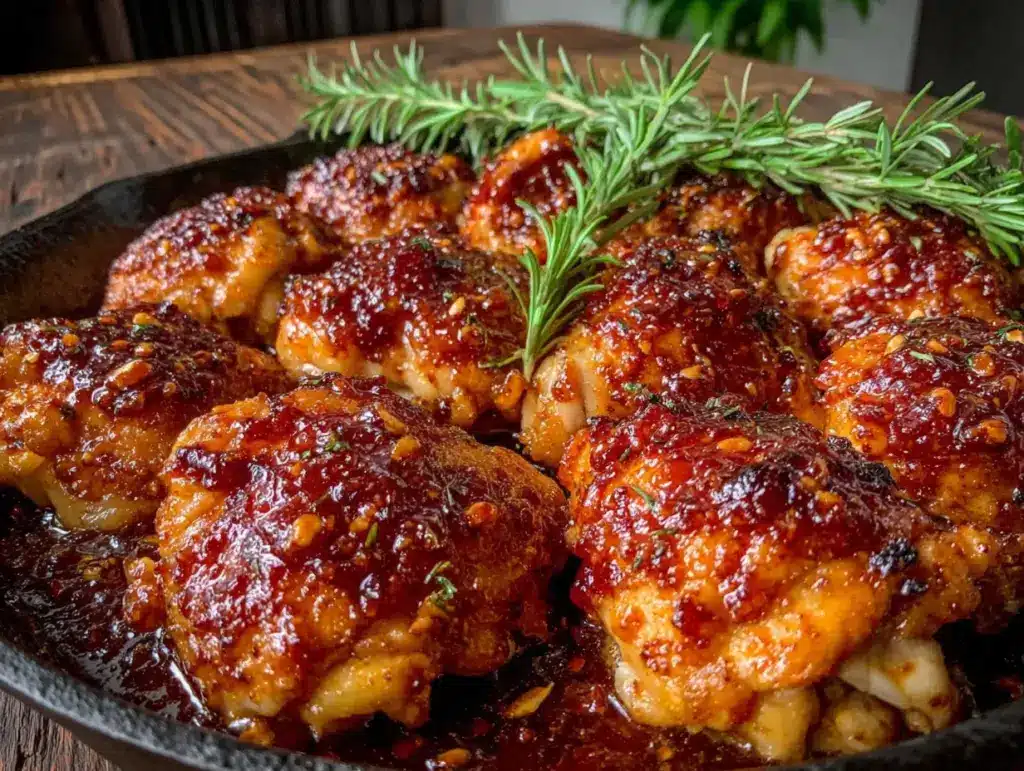
- Unbelievably Delicious: The sauce reduces into this sticky, glossy glaze that coats each thigh perfectly. It’s sweet, savory, a little garlicky, and completely addictive. I’m not kidding when I say you’ll want to lick the pan.
What makes this different from every other honey garlic chicken recipe out there? It’s the technique. Most recipes tell you to simmer the sauce forever or use a complicated reduction. This one uses a simple trick—cooking the chicken first, then adding the sauce at the end and letting it bubble up fast. The result is a glaze that sticks to the chicken instead of pooling in the pan. It’s a game-changer, honestly.
What Ingredients You Will Need
This recipe relies on simple, everyday ingredients to deliver big flavor without any fuss. Most of these are pantry staples, which is exactly what you want on a busy weeknight. Here’s what you’ll need:
- Boneless, skinless chicken thighs (about 1.5 pounds or 680g) — I prefer thighs over breasts here because they stay juicy and tender even with the quick cooking time. Look for thighs that are similar in size so they cook evenly.
- Honey (⅓ cup or 113g) — Use a good-quality honey for the best flavor. I like a mild wildflower honey, but clover or orange blossom works beautifully too. Avoid honey that’s crystallized—it won’t dissolve as smoothly into the sauce.
- Low-sodium soy sauce (¼ cup or 60ml) — This provides the salty balance to the sweet honey. Low-sodium is important here so the sauce doesn’t become overly salty as it reduces. You can use tamari or coconut aminos for a gluten-free option.
- Garlic (4 to 5 cloves, minced) — Fresh garlic is non-negotiable for this recipe. Pre-minced jarred garlic just doesn’t have the same punch. Trust me on this one. I’ve tried both, and fresh makes a noticeable difference.
- Rice vinegar (2 tablespoons or 30ml) — Adds a subtle tang that brightens the whole dish. Apple cider vinegar works in a pinch, but rice vinegar is milder and lets the honey shine.
- Sesame oil (1 tablespoon or 15ml) — Just a touch for that nutty, aromatic finish. It’s optional but highly recommended. Toasted sesame oil is what you want—the dark kind, not the light cooking oil.
- Cornstarch (1 tablespoon or 8g) — Mixed with 2 tablespoons of water to make a slurry. This thickens the sauce at the end so it clings to the chicken beautifully.
- Vegetable oil (2 tablespoons or 30ml) — For searing the chicken. Use a neutral oil with a high smoke point, like avocado or canola oil.
- Salt and pepper — To season the chicken before cooking. Don’t skip this step—it builds the foundation of flavor.
- Optional garnish: Sliced green onions, sesame seeds, and a pinch of red pepper flakes for a little heat.
I recommend using a brand like Kikkoman for soy sauce and Nielsen-Massey for vanilla extract (wait, wrong recipe—but you get the idea). For honey, local farmers’ market honey is always my first choice. It tends to be less processed and has a more complex flavor.
Equipment Needed
You don’t need a fancy kitchen to make this recipe work. Here’s what you’ll need:
- Large skillet or frying pan (12-inch or 30cm) — A non-stick skillet works best for easy cleanup, but a well-seasoned cast iron skillet or stainless steel pan works great too. Just make sure it’s large enough to hold the chicken in a single layer without crowding.
- Tongs — For flipping the chicken without piercing it and losing those precious juices. I’ve used a spatula in a pinch, but tongs are much better.
- Small bowl — For mixing the sauce ingredients together before cooking. This makes the process smoother and less chaotic.
- Measuring cups and spoons — I know, obvious, but having them ready before you start cooking saves so much time.
- Sharp knife and cutting board — For mincing the garlic and chopping any garnishes.
- Whisk or fork — For stirring the cornstarch slurry until smooth. A fork works just fine if you don’t have a small whisk.
If you don’t have a large skillet, you can use a Dutch oven or even a large saucepan. Just be careful about the heat distribution—thinner pans might need more attention to prevent burning. I personally prefer using my cast iron skillet for this recipe because it holds heat so well and gives the chicken a beautiful sear.
Preparation Method
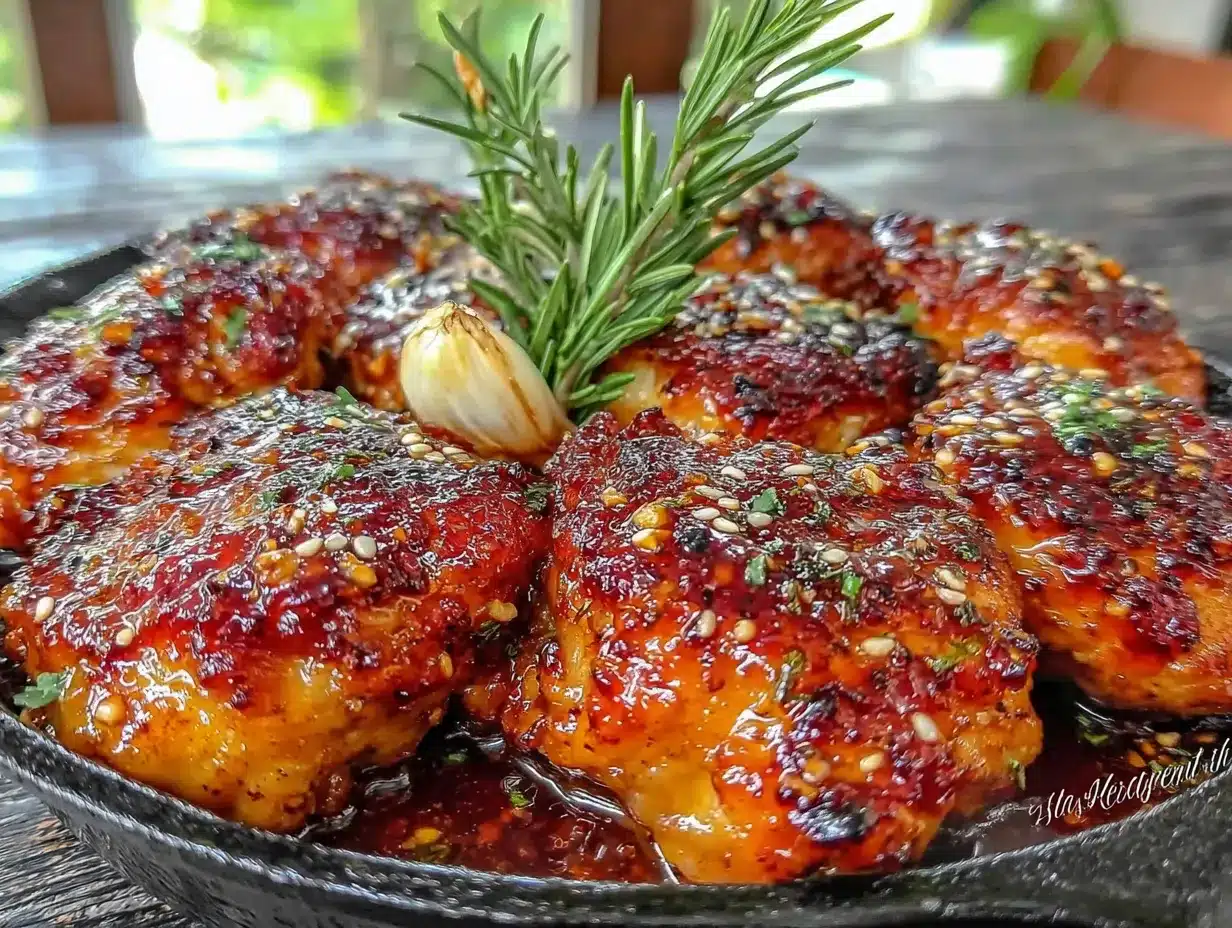
Alright, let’s get cooking. This whole process takes about 20 minutes from start to finish, so I like to have everything prepped and ready before I turn on the stove. Trust me, it makes a difference.
- Prep the chicken (2 minutes): Pat the chicken thighs dry with paper towels. This is crucial for getting a good sear—wet chicken steams instead of browns. Season both sides generously with salt and pepper. Set aside while you make the sauce.
- Make the sauce (2 minutes): In a small bowl, whisk together the honey, low-sodium soy sauce, minced garlic, rice vinegar, and sesame oil. Set aside. In a separate tiny bowl, mix the cornstarch with 2 tablespoons of water to create a slurry. Stir until completely smooth—no lumps allowed. Set both bowls near the stove.
- Heat the pan (1 minute): Place your large skillet over medium-high heat and add the vegetable oil. Let it heat until the oil shimmers—about 60 seconds. You want it hot enough that the chicken sizzles immediately when it hits the pan.
- Sear the chicken (8 to 10 minutes): Carefully place the chicken thighs in the hot skillet in a single layer. Don’t overcrowd the pan—work in batches if needed. Let them cook undisturbed for 4 to 5 minutes until the bottom is golden brown and crispy. Flip each thigh using tongs and cook for another 4 to 5 minutes on the other side. The chicken should be cooked through (internal temperature of 165°F or 74°C) and beautifully browned. Remove the chicken from the skillet and set aside on a plate.
- Make the glaze (2 minutes): Reduce the heat to medium-low. Pour the honey garlic sauce into the same skillet—don’t wipe it out! Those browned bits from the chicken are pure flavor. Let the sauce bubble gently for about 1 minute, scraping up any browned bits with a wooden spoon.
- Thicken the sauce (1 minute): Give the cornstarch slurry a quick stir (it settles fast) and pour it into the bubbling sauce. Stir constantly for about 30 to 60 seconds until the sauce thickens and becomes glossy. You’ll see it transform from watery to syrupy—that’s your cue.
- Return the chicken (2 minutes): Place the seared chicken thighs back into the skillet, turning each piece to coat it completely in the glaze. Let everything simmer together for about 1 to 2 minutes so the flavors meld. The sauce should be thick enough to cling to the chicken like a sticky, beautiful coat.
- Garnish and serve (1 minute): Transfer the chicken to a serving platter. Spoon any remaining glaze from the pan over the top. Sprinkle with sliced green onions, sesame seeds, and a pinch of red pepper flakes if you like a little heat. Serve immediately.
One thing I learned the hard way—don’t walk away during the glazing step. The sauce can go from perfectly sticky to burnt in about 30 seconds if you’re not paying attention. I may or may not have learned this while trying to answer a text message. The result was not pretty. So keep your eyes on the pan, and you’ll be golden.
Cooking Tips & Techniques
Over the dozens of times I’ve made this recipe, I’ve picked up a few tricks that make a real difference. Here are the ones worth knowing:
Pat those thighs dry. I cannot stress this enough. Moisture is the enemy of a good sear. If your chicken is wet, it will steam instead of brown, and you’ll miss out on that gorgeous golden crust. Take an extra 30 seconds to really dry them with paper towels.
Don’t crowd the pan. If you’re cooking for a crowd, work in batches. When the pan is too full, the temperature drops, and the chicken releases moisture instead of browning. I’ve made this mistake more times than I’d like to admit. It’s worth the extra few minutes to cook in two batches.
Use a meat thermometer. Chicken thighs are forgiving, but they’re best at 165°F (74°C). If you don’t have a thermometer, cut into the thickest part of a thigh—the juices should run clear, and there should be no pinkness. But honestly, a $10 instant-read thermometer is one of the best investments you can make for your kitchen.
Watch the garlic. Garlic burns fast. That’s why we add it to the sauce instead of sautéing it directly in the pan. If you sauté minced garlic in hot oil for too long, it turns bitter and acrid. The sauce method keeps it flavorful without the risk.
Taste and adjust. Before you add the cornstarch slurry, taste the sauce. Is it sweet enough? Salty enough? Need more garlic? This is your chance to adjust. I sometimes add an extra splash of soy sauce or a pinch of red pepper flakes at this stage depending on my mood.
Let the sauce bubble. Don’t be shy about letting the sauce simmer and reduce before adding the chicken back. The thicker the glaze, the better it coats the chicken. A watery sauce just slides right off.
Variations & Adaptations
This recipe is wonderfully adaptable. Here are a few ways I’ve changed it up depending on what I have on hand or who I’m cooking for:
Spicy Honey Garlic Chicken: Add 1 to 2 teaspoons of sriracha or gochujang to the sauce for a spicy kick. I love this version when I’m cooking just for myself. The heat balances the sweetness beautifully. You can also add red pepper flakes at the end for a milder heat.
Gluten-Free Version: Swap the soy sauce for tamari or coconut aminos. Make sure your cornstarch is certified gluten-free (most are, but it’s worth checking). Everything else in the recipe is naturally gluten-free, so this is an easy adaptation.
Chicken Breast Option: If you prefer chicken breasts, use boneless, skinless breasts and pound them to an even thickness (about ½ inch or 1.25cm) before cooking. Reduce the cooking time slightly—breasts cook faster than thighs and can dry out if overcooked. Check for doneness at 160°F (71°C) and let them rest—carryover cooking will bring them to 165°F.
Baked Version: For a hands-off approach, sear the chicken as directed, then transfer everything (chicken and sauce) to a baking dish. Bake at 400°F (200°C) for 10 to 12 minutes until the sauce is bubbly and the chicken is cooked through. This is great for when you’re making a larger batch.
Extra Veggie Meal: Add broccoli florets, bell pepper slices, or snap peas to the pan after removing the chicken. Sauté for 2 to 3 minutes, then add the sauce and proceed as directed. It turns this into a one-pan meal with built-in vegetables. I do this all the time when I’m feeling too lazy to make a separate side dish.
I once made a version with lime juice instead of rice vinegar, and it was surprisingly good. Not better, just different—bright and citrusy. If you’re feeling adventurous, give it a try.
Serving & Storage Suggestions
This honey garlic chicken is incredibly versatile when it comes to serving. Here’s how I like to enjoy it:
Serving Temperature: Serve the chicken hot, straight from the pan. The glaze is at its stickiest and most flavorful when freshly made. If you let it sit too long, the sauce can thicken further and become less glossy.
What to Serve With It: Steamed jasmine rice or brown rice is my go-to—it soaks up all that extra glaze beautifully. For a low-carb option, try cauliflower rice or a simple side of steamed broccoli. I also love serving it with a crisp cucumber salad or sautéed green beans. The freshness of the vegetables balances the richness of the chicken. If you’re in the mood for noodles, toss some ramen or udon noodles in the leftover pan sauce—trust me, it’s incredible.
Storage Instructions: Store leftovers in an airtight container in the refrigerator for up to 4 days. The flavors actually meld and deepen overnight, so leftovers can taste even better the next day. I often make a double batch just for this reason.
Reheating Tips: The best way to reheat is in a skillet over medium heat with a splash of water or chicken broth to loosen the sauce. Stir frequently until heated through—about 3 to 4 minutes. You can also use the microwave, but the sauce might not be as glossy. If microwaving, cover the dish and heat in 30-second intervals, stirring between each.
Freezer Instructions: This recipe freezes surprisingly well. Let the chicken cool completely, then transfer to a freezer-safe container or bag. Freeze for up to 3 months. Thaw overnight in the refrigerator, then reheat in a skillet as directed above. The sauce might separate slightly after freezing, but a good stir brings it back together.
Make-Ahead Note: You can prep the sauce and slice the green onions up to 2 days in advance. Store the sauce in the refrigerator and the green onions in a sealed container with a paper towel. When you’re ready to cook, all you have to do is sear the chicken and add the sauce. Dinner in 15 minutes flat.
Nutritional Information & Benefits
Here’s an approximate nutritional breakdown for one serving (based on 4 servings, using boneless skinless chicken thighs):
| Nutrient | Amount per Serving |
|---|---|
| Calories | 385 |
| Protein | 28g |
| Fat | 18g |
| Saturated Fat | 4g |
| Carbohydrates | 28g |
| Fiber | 0g |
| Sugar | 24g |
| Sodium | 720mg |
Chicken thighs are a great source of protein, iron, and B vitamins, which support energy metabolism and overall health. Honey provides natural sweetness along with antioxidants and antibacterial properties. Garlic is well-known for its immune-boosting benefits, and sesame oil adds healthy fats that support heart health.
This recipe is naturally dairy-free and can easily be made gluten-free with a simple soy sauce swap. If you’re watching your sugar intake, you can reduce the honey to ¼ cup or use a sugar-free honey alternative, though the texture and flavor will change slightly.
I personally love that this meal feels indulgent—like a treat—but is made with real, whole ingredients. It’s the kind of dinner that satisfies a craving without leaving you feeling heavy or guilty.
Conclusion
This quick honey garlic chicken thighs recipe has honestly become a staple in my kitchen, and I think it deserves a spot in yours too. It’s fast enough for a frantic Tuesday night, delicious enough to impress guests, and simple enough that you can practically make it with your eyes closed. The sticky, sweet-savory glaze, the tender juicy chicken, the minimal cleanup—what’s not to love?
I hope you give this recipe a try and make it your own. Maybe you’ll add extra garlic like I sometimes do, or throw in some red pepper flakes for heat, or serve it over noodles instead of rice. Whatever you do, I’d love to hear about it. Drop a comment below and let me know how it turned out, or share your own twist on the recipe. And if you snap a photo, tag me—I always love seeing your creations.
Until next time, happy cooking. And remember—dinner doesn’t have to be complicated to be unforgettable.
Frequently Asked Questions
Can I use chicken breasts instead of thighs?
Absolutely. Just pound the breasts to an even thickness (about ½ inch) so they cook evenly, and reduce the cooking time slightly since breasts cook faster. Check for doneness at 160°F and let them rest to reach 165°F.
How do I prevent the sauce from burning?
Keep the heat at medium-low when adding the sauce, and don’t walk away. Stir constantly once you add the cornstarch slurry. The sauce can go from perfect to burnt in about 30 seconds if you’re not paying attention.
Can I make this recipe ahead of time?
Yes! The sauce can be made up to 2 days in advance and stored in the refrigerator. When you’re ready to cook, simply sear the chicken and add the pre-made sauce. Leftovers also keep well for up to 4 days in the fridge.
Is this recipe gluten-free?
It can be! Simply swap the soy sauce for tamari or coconut aminos, and make sure your cornstarch is certified gluten-free. All other ingredients are naturally gluten-free.
Can I freeze the cooked chicken?
Yes, this recipe freezes beautifully. Let the chicken cool completely, then store in a freezer-safe container for up to 3 months. Thaw overnight in the refrigerator and reheat in a skillet with a splash of water to revive the sauce.
Pin This Recipe!
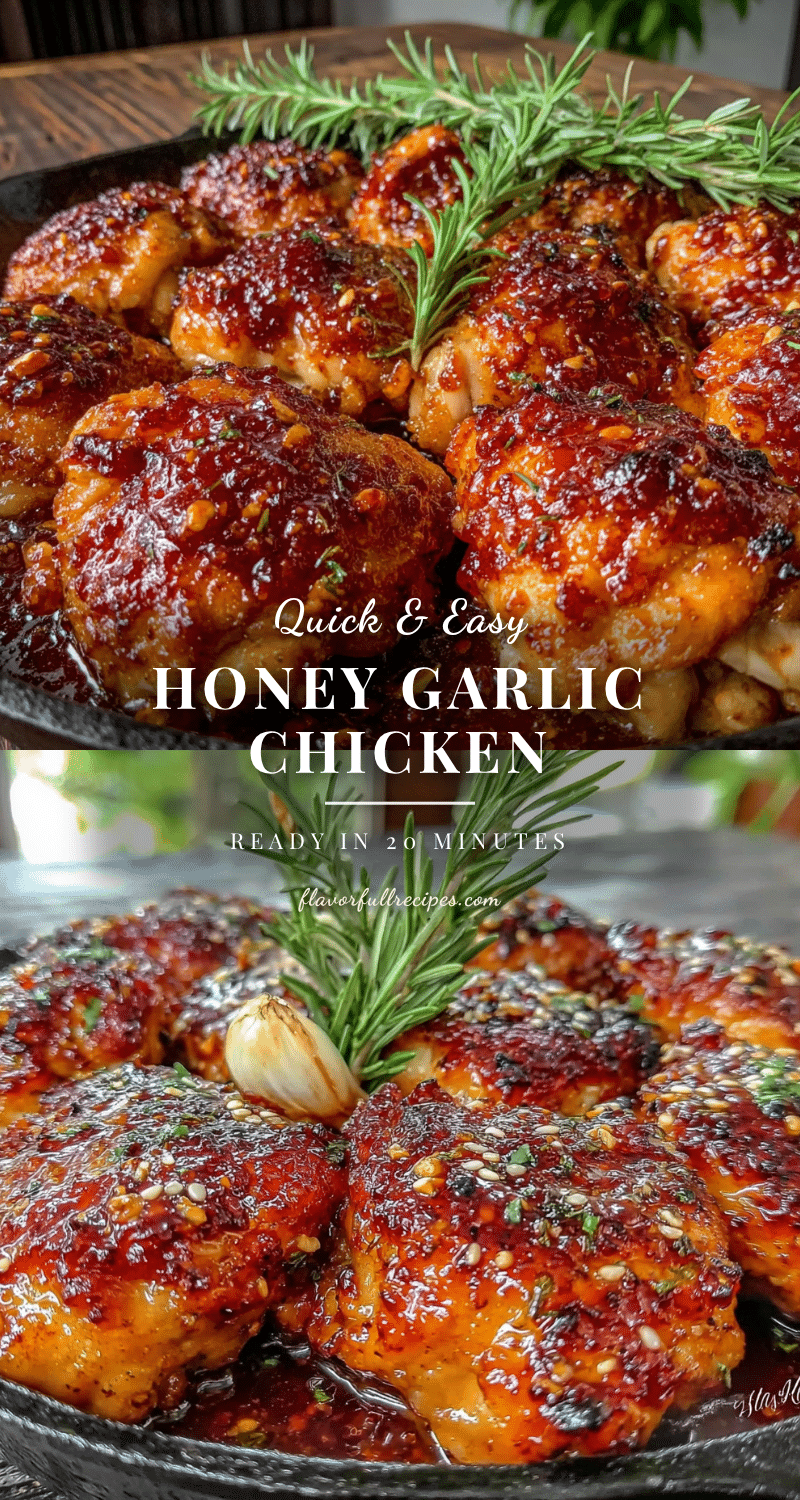

Quick Honey Garlic Chicken Thighs in 20 Minutes
- Total Time: 20 minutes
- Yield: 4 servings 1x
Description
A quick and easy weeknight dinner featuring juicy chicken thighs coated in a sticky, sweet-savory honey garlic glaze. Ready in just 20 minutes with simple pantry ingredients.
Ingredients
- 1.5 pounds (680g) boneless, skinless chicken thighs
- 1/3 cup (113g) honey
- 1/4 cup (60ml) low-sodium soy sauce
- 4 to 5 cloves garlic, minced
- 2 tablespoons (30ml) rice vinegar
- 1 tablespoon (15ml) sesame oil
- 1 tablespoon (8g) cornstarch
- 2 tablespoons (30ml) water (for slurry)
- 2 tablespoons (30ml) vegetable oil
- Salt and pepper to taste
- Optional garnish: sliced green onions, sesame seeds, red pepper flakes
Instructions
- Pat the chicken thighs dry with paper towels and season both sides generously with salt and pepper.
- In a small bowl, whisk together honey, low-sodium soy sauce, minced garlic, rice vinegar, and sesame oil. In another small bowl, mix cornstarch with 2 tablespoons of water to create a slurry.
- Heat a large skillet over medium-high heat and add vegetable oil. Let it heat until shimmering.
- Place chicken thighs in the skillet in a single layer. Cook undisturbed for 4 to 5 minutes until golden brown. Flip and cook another 4 to 5 minutes until cooked through (internal temperature 165°F/74°C). Remove chicken and set aside.
- Reduce heat to medium-low. Pour the honey garlic sauce into the skillet, scraping up browned bits. Let bubble for about 1 minute.
- Stir the cornstarch slurry and pour into the sauce. Stir constantly for 30 to 60 seconds until thickened and glossy.
- Return chicken to the skillet, turning to coat in the glaze. Simmer for 1 to 2 minutes.
- Transfer to a platter, spoon remaining glaze over top, and garnish with green onions, sesame seeds, and red pepper flakes if desired. Serve immediately.
Notes
Pat chicken thighs dry for best sear. Don’t crowd the pan. Watch the garlic to avoid burning. Taste sauce before adding slurry and adjust seasoning. Keep heat at medium-low when adding sauce to prevent burning.
- Prep Time: 5 minutes
- Cook Time: 15 minutes
- Category: Main Course
- Cuisine: Asian
Nutrition
- Serving Size: 1 serving (about 2 t
- Calories: 385
- Sugar: 24
- Sodium: 720
- Fat: 18
- Saturated Fat: 4
- Carbohydrates: 28
- Protein: 28
Keywords: honey garlic chicken, quick chicken thighs, weeknight dinner, easy chicken recipe, sticky chicken