
I was elbow-deep in a pile of vintage linens at a dusty estate sale last spring when the woman running it—a tiny, no-nonsense lady named Margie with flour dusted on her sleeve—started talking about dinner. I wasn’t looking for cooking advice, honestly. I was looking for a cake stand. But there she was, sorting through a box of mismatched spatulas, telling me about the one dish she made every single Tuesday for forty-two years. “It’s the garlic butter chicken and rice,” she said, not asking if I wanted the recipe. “One pan. No fuss. Your family will think you slaved all day.” She scribbled it on the back of a receipt from 1987, and I stood there, holding a chipped casserole dish, completely captivated. Maybe you’ve been there—you go looking for one thing and end up with a story, a new recipe, and a weirdly strong attachment to a stranger’s Tuesday night routine. I tried it that very week, and let me tell you, Margie wasn’t wrong. This easy one-pan garlic butter chicken and rice has become my go-to for those nights when I’m tired, hungry, and need something on the table without a meltdown. It’s the kind of recipe that makes you wonder why you ever bothered with complicated dinners in the first place.
Why You’ll Love This Recipe
Let’s face it—weeknights are a battlefield. You’re tired, the clock is ticking, and everyone is hungry now. This easy one-pan garlic butter chicken and rice is your secret weapon. It’s not just another dinner; it’s the dinner that saves your sanity. I’ve tested this recipe more times than I can count, tweaking the garlic-to-butter ratio and the rice-to-liquid balance until it was absolutely foolproof. Here’s why it works:
- Quick & Easy: From fridge to table in under 45 minutes. No marinating, no complicated steps, just straightforward cooking that respects your time.
- Simple Ingredients: You probably have most of this in your kitchen right now. Chicken thighs, rice, garlic, butter, a few pantry staples. No fancy trips to a specialty store.
- Perfect for Busy Weeknights: This is the definition of a weeknight hero. Minimal prep, one pan to wash, and dinner that feels like a hug.
- Crowd-Pleaser: My kids devour this. My picky neighbor who “doesn’t like rice” asked for seconds. It’s that good.
- Unbelievably Delicious: The garlic butter sauce seeps into every grain of rice, and the chicken gets that golden, crispy skin that makes you close your eyes after the first bite.
What makes this different from every other chicken and rice recipe out there? It’s the technique. You sear the chicken first to build that deep, savory flavor, then let the rice cook gently in the same pan, soaking up all those browned bits and garlicky juices. No cream-of-something soup, no pre-cooked rice, no fuss. Just pure, honest comfort food that tastes like you spent hours in the kitchen when you really didn’t.
This is the recipe I turn to when I’ve had a long day and need something that feels special without the stress. It’s comfort food, simplified. And honestly, it’s the kind of meal that makes a regular Tuesday feel a little bit like Sunday.
What Ingredients You Will Need
This recipe uses simple, honest ingredients to build big flavor. Nothing complicated here—just good staples that work together beautifully. I’ve tested a few different brands and techniques, and I’ll share what I’ve learned so you get perfect results every time.
- Chicken Thighs (bone-in, skin-on): 4 to 6 thighs (about 1.5 to 2 pounds). I really prefer thighs here—they stay juicy and flavorful, and the skin gets wonderfully crispy. If you use boneless skinless, reduce the cooking time by about 10 minutes and expect a slightly less rich result. I’ve tried both, and honestly, the bone-in version is worth the extra few minutes.
- Unsalted Butter: 4 tablespoons (half a stick). I use unsalted so I can control the salt level. Kerrygold is my go-to for its rich flavor, but any good-quality butter works.
- Garlic: 6 to 8 cloves, minced. Don’t skimp here. This is garlic butter chicken and rice, after all. Fresh garlic makes a real difference—the pre-minced stuff in a jar just doesn’t have the same punch. I mince mine by hand, and it takes maybe two minutes.
- Long-Grain White Rice: 1 ½ cups. Basmati or jasmine are my favorites for their separate, fluffy grains. Avoid short-grain or sticky rice here—you want the rice to stay distinct, not clump together.
- Chicken Broth: 3 cups. Low-sodium is best so you can season to your taste. I like Swanson’s or homemade if I have it. The broth is where a lot of the flavor comes from, so use a good one.
- Yellow Onion: 1 medium, finely diced. About 1 cup. It melts into the rice and adds a subtle sweetness that balances the garlic.
- Dried Thyme: 1 teaspoon. It’s earthy and pairs beautifully with garlic and butter. If you have fresh, use 1 tablespoon, chopped.
- Paprika: 1 teaspoon. I use sweet paprika for color and a mild, smoky warmth. It’s not spicy, just flavorful.
- Salt and Black Pepper: To taste. I start with 1 teaspoon of salt and ½ teaspoon of pepper, then adjust at the end.
- Fresh Parsley: For garnish. Optional, but it adds a pop of color and freshness that cuts through the richness.
- Optional Add-ins: A squeeze of lemon juice at the end brightens everything up. Sometimes I toss in a cup of frozen peas in the last 5 minutes for a pop of green and sweetness.
Ingredient Selection Tips: When buying chicken thighs, look for ones with even thickness and pale yellow skin. Avoid any that look bruised or have an off smell. For the rice, I’ve found that rinsing it until the water runs clear (about 3 to 4 rinses) removes excess starch and prevents gummy rice. Trust me on this one—it’s a small step that makes a big difference.
Equipment Needed
You don’t need a fancy kitchen for this recipe. Just a few basics that you probably already own. Here’s what you’ll need:
- Large, Heavy-Bottomed Skillet or Dutch Oven: A 12-inch skillet with a tight-fitting lid is ideal. I use my trusty cast-iron skillet for this—it holds heat beautifully and gives the chicken an amazing crust. A stainless steel or enameled Dutch oven works great too. Avoid nonstick if you can; you won’t get the same browning on the chicken.
- Sharp Knife and Cutting Board: For mincing garlic and dicing the onion. A good chef’s knife makes this task quick and painless.
- Measuring Cups and Spoons: For precise measurements. I’ve learned the hard way that eyeballing rice and liquid can lead to disaster.
- Wooden Spoon or Silicone Spatula: For stirring and scraping up those delicious browned bits from the bottom of the pan.
- Tongs: For flipping the chicken without piercing the skin and losing those precious juices.
Budget-Friendly Alternatives: If you don’t have a heavy-bottomed skillet, any large pan will do—just keep a closer eye on the heat to prevent burning. A regular pot lid or even aluminum foil can substitute for a tight-fitting lid if needed. I’ve made this in a cheap nonstick pan before, and while the chicken didn’t brown as well, it still tasted great. Don’t let equipment hold you back.
Preparation Method
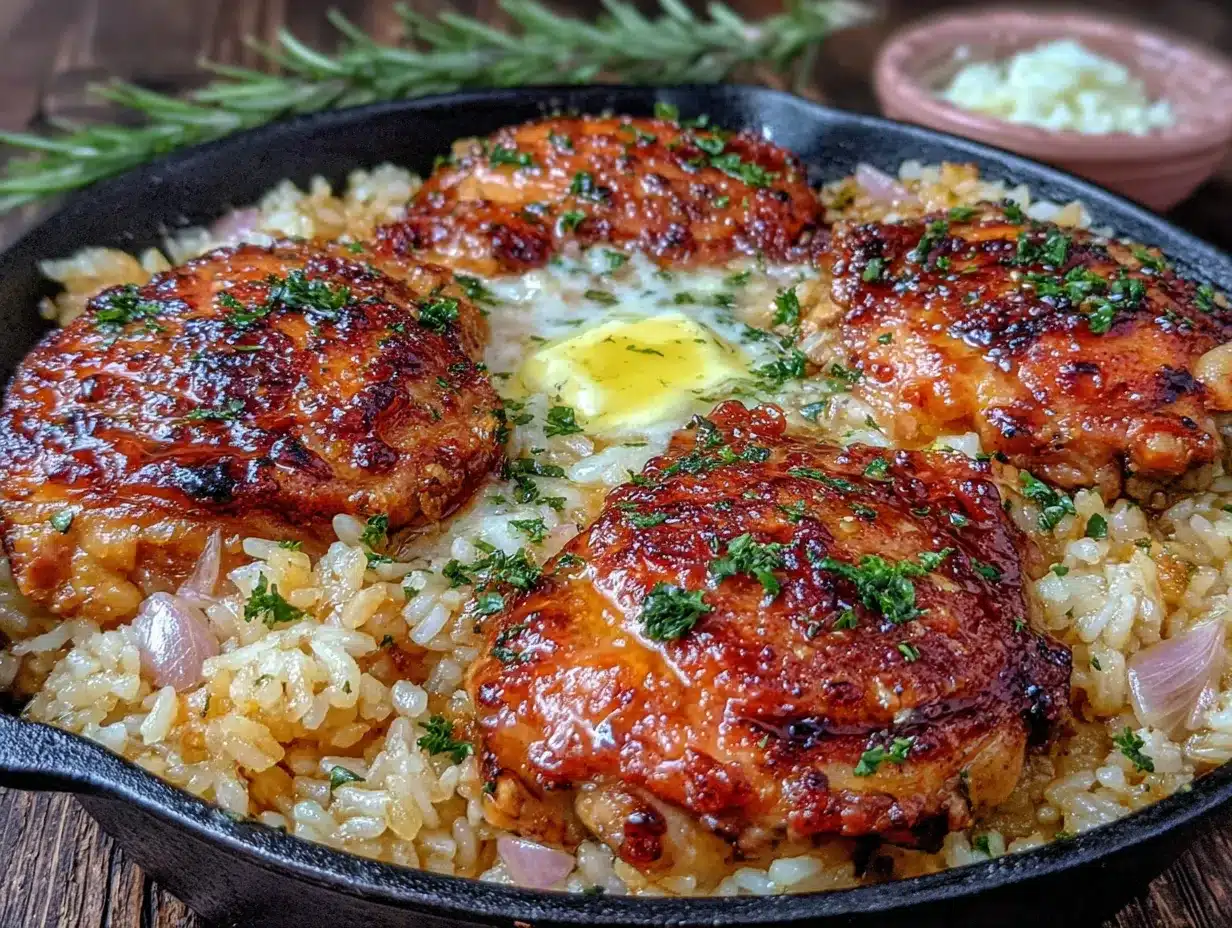
Alright, let’s get cooking. This easy one-pan garlic butter chicken and rice comes together in a few simple steps. I’ll walk you through each one with the little tricks I’ve picked up along the way.
- Prep Your Ingredients First: This is the most important step, honestly. Mince your garlic, dice your onion, and rinse your rice until the water runs clear. Pat the chicken thighs dry with paper towels—this is crucial for getting that golden, crispy skin. Season them generously on both sides with salt, pepper, and paprika. Set everything within arm’s reach. Trust me, once you start cooking, it moves fast.
- Sear the Chicken: Place your skillet over medium-high heat and add 2 tablespoons of the butter. Let it melt and foam. Once it’s sizzling (but not browning), place the chicken thighs skin-side down in a single layer. Don’t crowd the pan—work in batches if needed. Let them cook undisturbed for 5 to 7 minutes. You’ll know they’re ready when the skin is deep golden brown and releases easily from the pan. Flip and cook for another 4 minutes on the other side. The chicken won’t be cooked through yet, and that’s okay. Transfer the thighs to a plate and set them aside.
- Sauté the Aromatics: Reduce the heat to medium. Add the remaining 2 tablespoons of butter to the pan. Once it melts, add the diced onion and cook for 3 to 4 minutes, stirring occasionally, until it’s soft and translucent. Scrape up any browned bits from the bottom of the pan—that’s pure flavor. Add the minced garlic and dried thyme, and cook for just 30 seconds until fragrant. Don’t let the garlic burn, or it’ll turn bitter.
- Toast the Rice: Add the rinsed and drained rice to the pan. Stir it into the onion-garlic mixture and let it toast for about 2 minutes, stirring constantly. You’ll hear it start to crackle and smell a nutty aroma. This step is key—it helps the rice stay separate and absorb all that flavor instead of turning mushy.
- Add the Liquid: Pour in the chicken broth and stir everything together. Bring it to a gentle boil. Taste the liquid and adjust the salt and pepper if needed—remember, the rice will absorb this, so it should be well-seasoned. Nestle the seared chicken thighs back into the pan, skin-side up, on top of the rice. Don’t submerge them completely; let the skin stay above the liquid so it stays crispy.
- Simmer and Cook: Reduce the heat to low, cover the pan with a tight-fitting lid, and let it simmer gently for 20 to 25 minutes. Do not lift the lid during this time! I know it’s tempting, but every time you lift the lid, you let out steam and mess with the cooking time. Set a timer and walk away. The rice needs that steady steam to cook evenly.
- Rest and Fluff: After 20 minutes, check the chicken—it should register 165°F on an instant-read thermometer. The rice should be tender and have absorbed all the liquid. If the rice is still a bit firm, replace the lid and let it cook for another 5 minutes. Once done, turn off the heat and let it rest, covered, for 5 minutes. This allows the rice to finish steaming and the flavors to meld. Then, remove the chicken, fluff the rice with a fork, and garnish with fresh parsley.
- Serve Immediately: Spoon the rice onto plates, top with a chicken thigh, and drizzle any remaining pan juices over the top. A squeeze of lemon juice right before serving brightens everything up beautifully.
Sensory Cues: When you sear the chicken, listen for a steady sizzle—if it’s too loud, the heat is too high; if it’s silent, the pan isn’t hot enough. The rice should smell nutty and fragrant as it toasts. When you lift the lid at the end, you should see steam rising and the rice should look fluffy, not wet. The chicken skin should be crackling-crisp, not soggy.
Cooking Tips & Techniques
I’ve made this easy one-pan garlic butter chicken and rice more times than I can count, and I’ve definitely had my share of mistakes. Here’s what I’ve learned so you don’t have to make the same ones.
Don’t Skip the Searing: I know it’s tempting to just throw everything in the pan and call it a day, but that golden-brown skin is where the magic starts. It adds depth and richness to the entire dish. One time I was in a hurry and skipped this step—the chicken was pale, the rice was bland, and everyone noticed. Never again.
Resist the Urge to Stir: Once you’ve added the broth and covered the pan, leave it alone. Stirring releases starch and turns the rice gummy. I learned this the hard way when I made a beautiful, creamy risotto-like mess that was definitely not what I was going for. Let the steam do its job.
Check Your Heat: If your rice is burning on the bottom but still hard on top, your heat is too high. The liquid should be at a gentle simmer, not a rolling boil. I keep my burner on the lowest setting once I cover the pan. Patience is key here.
Use a Timer: It’s easy to get distracted—I’ve definitely let the chicken sear a little too long while answering a text. Set timers for each step. Your future self will thank you.
Multitasking Strategy: While the chicken is searing, rinse your rice and measure your broth. While the rice is simmering, wash the few dishes you’ve used. This recipe is designed to be efficient—use that time wisely and you’ll have dinner on the table with almost no cleanup.
Variations & Adaptations
This recipe is wonderfully flexible. Over the years, I’ve tried a few different twists, and they’ve all been delicious in their own way.
- Lemon Herb Version: Add the zest of one lemon and a tablespoon of fresh rosemary along with the garlic. Squeeze the lemon juice over everything before serving. It brightens the dish and makes it feel lighter, perfect for spring.
- Spicy Kick: Add ½ teaspoon of red pepper flakes along with the garlic, or use a pinch of cayenne pepper in the seasoning. My husband loves this version—it adds warmth without overwhelming the garlic butter flavor.
- Vegetable Loaded: Toss in a cup of frozen peas and carrots in the last 5 minutes of cooking. You can also add a handful of chopped spinach right before serving, stirring until it wilts. It’s an easy way to sneak in extra veggies without extra effort.
- Dairy-Free Adaptation: Substitute the butter with a high-quality olive oil or a plant-based butter. The flavor will be slightly different, but still delicious. I’ve used vegan butter from Miyoko’s and it worked beautifully.
- Different Protein: Boneless, skinless chicken breasts work if you reduce the searing time to 3 minutes per side and the simmering time to 15 to 18 minutes. Just be careful not to overcook them—dry chicken breast is no fun. I’ve also made this with turkey thighs, and it was fantastic.
Serving & Storage Suggestions
This dish is best served hot, straight from the pan. The contrast between the crispy chicken skin and the tender, buttery rice is absolutely perfect. I like to serve it with a simple side salad dressed with lemon vinaigrette—the acidity cuts through the richness beautifully. Steamed green beans or roasted asparagus also pair wonderfully.
Storage: Leftovers keep well in an airtight container in the refrigerator for up to 4 days. The rice will absorb some moisture overnight, so don’t expect it to be quite as fluffy as day one, but the flavor actually gets better. I’ve been known to sneak a cold spoonful straight from the fridge—don’t judge.
Reheating: The best way to reheat is in a skillet over medium-low heat with a splash of chicken broth or water. Cover and let it steam for 5 to 7 minutes. The microwave works in a pinch, but it tends to dry out the chicken. If you’re in a hurry, microwave in 30-second bursts, stirring the rice between each.
Freezing: This recipe freezes surprisingly well. Let it cool completely, then transfer to a freezer-safe container. It will keep for up to 3 months. Thaw overnight in the refrigerator and reheat as directed. The chicken skin won’t be as crispy after freezing, but the flavor is still spot-on.
Nutritional Information & Benefits
Here’s an approximate nutritional breakdown per serving (based on 4 servings with bone-in chicken thighs):
- Calories: 520
- Protein: 32g
- Fat: 22g
- Carbohydrates: 45g
- Fiber: 1g
- Sugar: 2g
- Sodium: 680mg
This dish offers a good balance of protein from the chicken and energy from the rice. Garlic is known for its anti-inflammatory properties and may support immune health. Chicken thighs provide iron and B vitamins, which help with energy production. While this isn’t a low-calorie meal, it’s a satisfying, nutrient-dense option that keeps you full and happy.
For those watching their sodium, use low-sodium broth and go easy on the added salt. You can also swap white rice for brown rice—just increase the liquid to 3 ½ cups and the cooking time to 40 to 45 minutes. If you need a gluten-free option, this recipe is naturally gluten-free as written. Just double-check your broth label to be sure.
Frequently Asked Questions
Can I use chicken breasts instead of thighs?
Absolutely. Use boneless, skinless chicken breasts and reduce the searing time to 3 minutes per side. The simmering time will be about 15 to 18 minutes. Check the internal temperature—165°F is your target. Just be careful not to overcook, as breasts dry out faster than thighs.
Why is my rice mushy?
Mushy rice usually comes from too much liquid or stirring during cooking. Make sure you rinse your rice thoroughly to remove excess starch, and resist the urge to lift the lid while it simmers. If you’re using a different type of rice, adjust the liquid accordingly—brown rice needs more, jasmine needs about the same.
Can I make this in a slow cooker?
You can, but you’ll lose the crispy skin and the seared flavor. If you want to try it, sear the chicken first, then transfer everything to a slow cooker and cook on low for 4 to 5 hours. The rice will be softer and more porridge-like. I prefer the stovetop version for texture, but the slow cooker works in a pinch.
How do I get the chicken skin extra crispy?
Pat the chicken very dry with paper towels before seasoning. Use a hot pan and don’t move the chicken while it sears—let it develop a deep golden crust. If the skin isn’t crispy enough after simmering, you can pop the chicken under the broiler for 2 to 3 minutes before serving. Keep a close eye on it so it doesn’t burn.
Can I add vegetables to this dish?
Yes! Frozen peas, diced carrots, or green beans work well. Add them in the last 5 to 10 minutes of cooking so they don’t turn to mush. You can also stir in a handful of fresh spinach right before serving—it wilts beautifully into the rice.
Conclusion
This easy one-pan garlic butter chicken and rice is more than just a recipe—it’s a weeknight lifesaver. It’s the meal I turn to when I’m tired, hungry, and need something that feels like a warm hug without the hassle. Margie’s scribbled receipt has become a staple in my kitchen, and I hope it becomes one in yours too.
Don’t be afraid to make it your own. Add your favorite herbs, swap in different vegetables, or play with the spice level. The beauty of this dish is its simplicity—it’s a canvas for your creativity. And honestly, the best recipes are the ones that evolve with you.
I’d love to hear how yours turns out. Did you add a twist? Did your family love it? Drop a comment below and share your version. And if you’re looking for another easy weeknight meal, you might enjoy my creamy tuscan chicken or this one pot lemon herb pasta—they’re both lifesavers on busy nights.
Happy cooking, friend. You’ve got this.
Pin This Recipe!


Easy One-Pan Garlic Butter Chicken and Rice Recipe
- Total Time: 45 minutes
- Yield: 4 servings 1x
Description
This easy one-pan garlic butter chicken and rice is a weeknight lifesaver. Juicy, golden-brown chicken thighs and fluffy, garlicky rice cook together in one pan for a comforting, no-fuss dinner that tastes like you spent hours in the kitchen.
Ingredients
- 4 to 6 bone-in, skin-on chicken thighs (about 1.5 to 2 pounds)
- 4 tablespoons unsalted butter, divided
- 6 to 8 cloves garlic, minced
- 1 ½ cups long-grain white rice (basmati or jasmine), rinsed until water runs clear
- 3 cups low-sodium chicken broth
- 1 medium yellow onion, finely diced (about 1 cup)
- 1 teaspoon dried thyme
- 1 teaspoon sweet paprika
- Salt and black pepper to taste (start with 1 teaspoon salt and ½ teaspoon pepper)
- Fresh parsley for garnish (optional)
- Optional: squeeze of lemon juice, 1 cup frozen peas
Instructions
- Prep your ingredients: Mince garlic, dice onion, rinse rice until water runs clear. Pat chicken thighs dry with paper towels and season generously on both sides with salt, pepper, and paprika.
- Sear the chicken: Place a large, heavy-bottomed skillet or Dutch oven over medium-high heat. Add 2 tablespoons butter. Once melted and foaming, place chicken thighs skin-side down in a single layer. Cook undisturbed for 5-7 minutes until deep golden brown. Flip and cook 4 more minutes. Transfer to a plate (chicken will not be fully cooked).
- Sauté aromatics: Reduce heat to medium. Add remaining 2 tablespoons butter. Add diced onion and cook 3-4 minutes until soft and translucent, scraping up browned bits. Add minced garlic and dried thyme; cook 30 seconds until fragrant.
- Toast the rice: Add rinsed and drained rice to the pan. Stir and cook for about 2 minutes until nutty and fragrant.
- Add liquid: Pour in chicken broth and stir. Bring to a gentle boil. Taste and adjust salt and pepper. Nestle seared chicken thighs skin-side up on top of the rice (skin above liquid).
- Simmer and cook: Reduce heat to low, cover with a tight-fitting lid, and simmer gently for 20-25 minutes. Do not lift the lid during this time.
- Rest and fluff: Check that chicken reaches 165°F internally and rice is tender. If rice is still firm, cook 5 more minutes. Turn off heat and let rest covered for 5 minutes. Remove chicken, fluff rice with a fork, and garnish with fresh parsley.
- Serve immediately: Spoon rice onto plates, top with a chicken thigh, and drizzle with pan juices. Add a squeeze of lemon if desired.
Notes
For extra crispy chicken skin, pat the chicken very dry before searing. If skin isn’t crispy enough after simmering, broil for 2-3 minutes before serving. Rinsing the rice until the water runs clear prevents gummy rice. Do not lift the lid while the rice simmers. Leftovers keep in the refrigerator for up to 4 days. To reheat, use a skillet over medium-low heat with a splash of broth. Freezes well for up to 3 months.
- Prep Time: 15 minutes
- Cook Time: 30 minutes
- Category: Main Course
- Cuisine: American
Nutrition
- Serving Size: 1 chicken thigh with
- Calories: 520
- Sugar: 2
- Sodium: 680
- Fat: 22
- Saturated Fat: 10
- Carbohydrates: 45
- Fiber: 1
- Protein: 32
Keywords: one-pan chicken and rice, garlic butter chicken, easy weeknight dinner, one pot meal, chicken thighs and rice