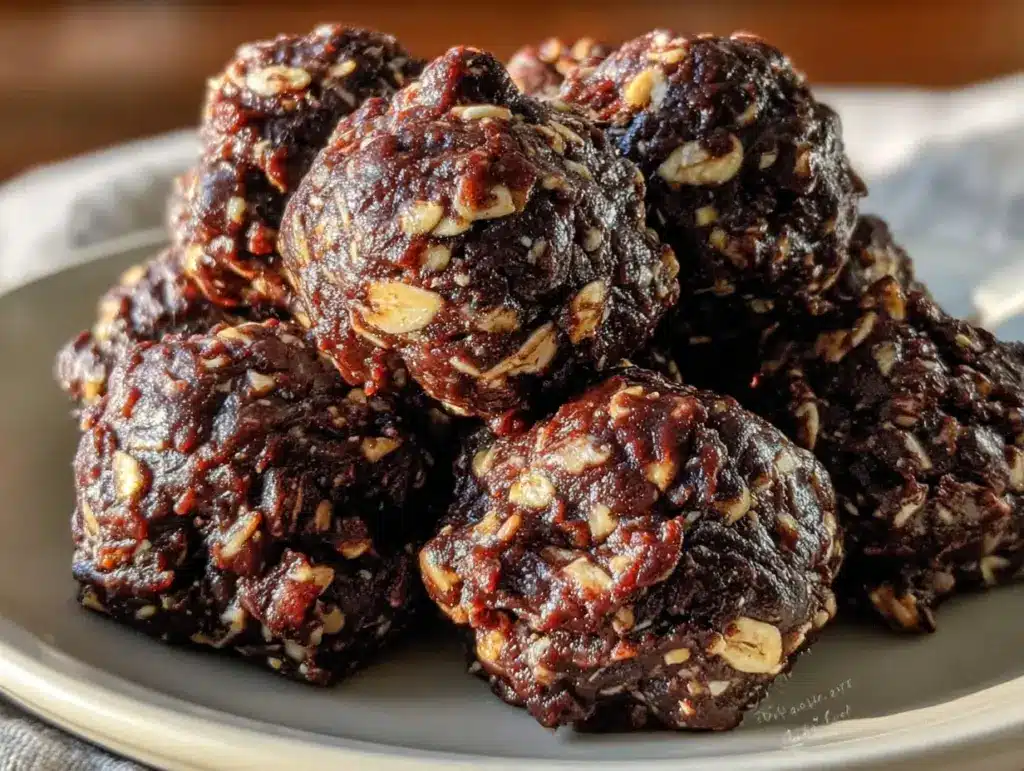
My husband, who usually only asks for seconds of steak or pasta, asked for these energy bites three days in a row without any prompting from me. That’s not something that happens in our house, trust me. He’s not the grab-a-snack type unless it’s something truly good, and honestly, I was just trying to use up the last of the oats in the pantry. I didn’t expect much—just another healthy snack that would sit in the fridge until I forced myself to eat them. But the first time he reached past the leftover chili for one of these little guys, I knew I had stumbled onto something real.
The funny thing is, I almost didn’t mix them up at all. I was tired, the kitchen was a mess, and the idea of washing another bowl felt like too much. But I wanted something sweet, and there was a half-empty jar of peanut butter staring at me from the counter. So I threw everything together in one bowl, rolled them into balls, and stuck them in the fridge. An hour later, my husband walked by, grabbed one, and then stood there eating three more in silence. That’s when I knew—this wasn’t just a snack. It was a keeper.
These Easy No-Bake Chocolate Peanut Butter Energy Bites are exactly what you need when you want something satisfying but don’t want to turn on the oven. They’re rich, chewy, and just sweet enough to feel like a treat without going overboard. And the best part? They come together in five minutes flat. No baking, no fuss, no complicated steps. Just simple ingredients and a bowl.
Why You’ll Love This Recipe
Let me tell you why these energy bites have become a staple in my kitchen. I’ve tested a lot of no-bake snack recipes over the years, and most of them fall into one of two camps: too dry or too sticky. These are neither. They hit that perfect sweet spot where they’re firm enough to hold their shape but soft enough to be satisfying.
- Quick & Easy: From start to finish, you’re looking at about five minutes of active time. No baking, no cooking, no waiting for anything to cool. Just mix, roll, and chill.
- Simple Ingredients: You probably already have everything you need in your pantry right now. Oats, peanut butter, chocolate chips, honey, and a few extras. No fancy grocery runs required.
- Perfect for Busy Days: These are my go-to for hectic mornings, afternoon slumps, or post-workout refueling. They travel well, too—just toss a few in a baggie and go.
- Crowd-Pleaser: I’ve brought these to potlucks, playdates, and even work meetings. They disappear fast. Kids love them, adults love them, and nobody guesses they’re actually pretty good for you.
- Unbelievably Delicious: The texture is spot-on—chewy from the oats, creamy from the peanut butter, with little bursts of melty chocolate in every bite. It’s comfort food you can feel good about.
What makes this recipe different from all the other energy bite recipes out there? It’s the ratio. I spent a few batches getting it just right—not too dry, not too sticky, not so sweet that you feel guilty after one. The secret is letting the mixture rest for a few minutes before rolling, which gives the oats time to absorb the moisture. It makes a huge difference. Trust me, I learned that one the hard way after a batch that crumbled apart in my hands.
These bites are the kind of snack that makes you close your eyes after the first bite. They’re simple, sure, but sometimes simple is exactly what you need.
What Ingredients You Will Need
This recipe uses basic pantry staples to create something that feels way more indulgent than it actually is. Here’s what you’ll need:
- Rolled Oats (old-fashioned oats): 1 ½ cups (135g). I prefer rolled oats over quick oats here—they give the bites a better texture and hold up better in the fridge. Quick oats work in a pinch, but the texture will be softer and less chewy.
- Creamy Peanut Butter: ½ cup (130g). Use a natural peanut butter that’s well-stirred, but avoid the super-runny kind that separates. I like Jif or Skippy for consistent results, but any brand you enjoy will work. Just make sure it’s at room temperature for easier mixing.
- Honey: ⅓ cup (110g). This is your sweetener and binder. Maple syrup works too, but the bites will be a bit softer and less firm. If you’re vegan, use agave or maple syrup—just note the texture difference.
- Mini Chocolate Chips: ⅓ cup (60g). I use semi-sweet mini chips because they distribute evenly and melt slightly in your mouth. Dark chocolate chips are great if you want less sweetness. Milk chocolate works too, but the bites will be sweeter overall.
- Ground Flaxseed: 2 tablespoons (14g). This is optional but highly recommended. It adds fiber, healthy fats, and helps bind the mixture together. You can skip it or substitute with chia seeds if you prefer.
- Vanilla Extract: 1 teaspoon. Pure vanilla extract adds warmth and depth. Imitation vanilla works fine if that’s what you have.
- Salt: ¼ teaspoon. A small pinch of salt balances the sweetness and brings out the peanut butter flavor. Don’t skip it—it makes a difference.
Optional Add-Ins: If you want to mix things up, try adding 2 tablespoons of shredded coconut, a handful of chopped nuts, or a tablespoon of cocoa powder for extra chocolate flavor. I’ve done all three at different times, and they all work beautifully.
Ingredient Tip: If your peanut butter is too stiff or dry, microwave it for 10-15 seconds before mixing. It makes everything come together much more easily. I learned this trick after struggling through a batch with cold peanut butter—never again.
Equipment Needed
You don’t need much for this recipe, which is part of the beauty. Here’s what you’ll need:
- Large Mixing Bowl: Any medium-to-large bowl will do. I use a glass or ceramic bowl because they’re easy to clean, but metal works fine too.
- Spatula or Wooden Spoon: For mixing everything together. A rubber spatula is my favorite because it scrapes the sides clean, but a sturdy spoon works just as well.
- Measuring Cups and Spoons: Standard set for dry and wet ingredients. A ½ cup measure for the peanut butter and a ⅓ cup for the honey are the most important.
- Baking Sheet or Plate: For holding the rolled bites while they chill. Line it with parchment paper or wax paper for easy cleanup.
- Small Cookie Scoop (optional): If you want evenly sized bites, a 1-tablespoon cookie scoop is a game-changer. I use one every time now because it makes the process faster and the bites look uniform. But your hands work just fine.
- Refrigerator: You’ll need space to chill the bites for at least 30 minutes. They firm up nicely in the fridge.
Budget-Friendly Tip: Don’t have a cookie scoop? Just use a tablespoon to portion the mixture, then roll it between your palms. It takes a little longer but costs nothing extra.
Preparation Method
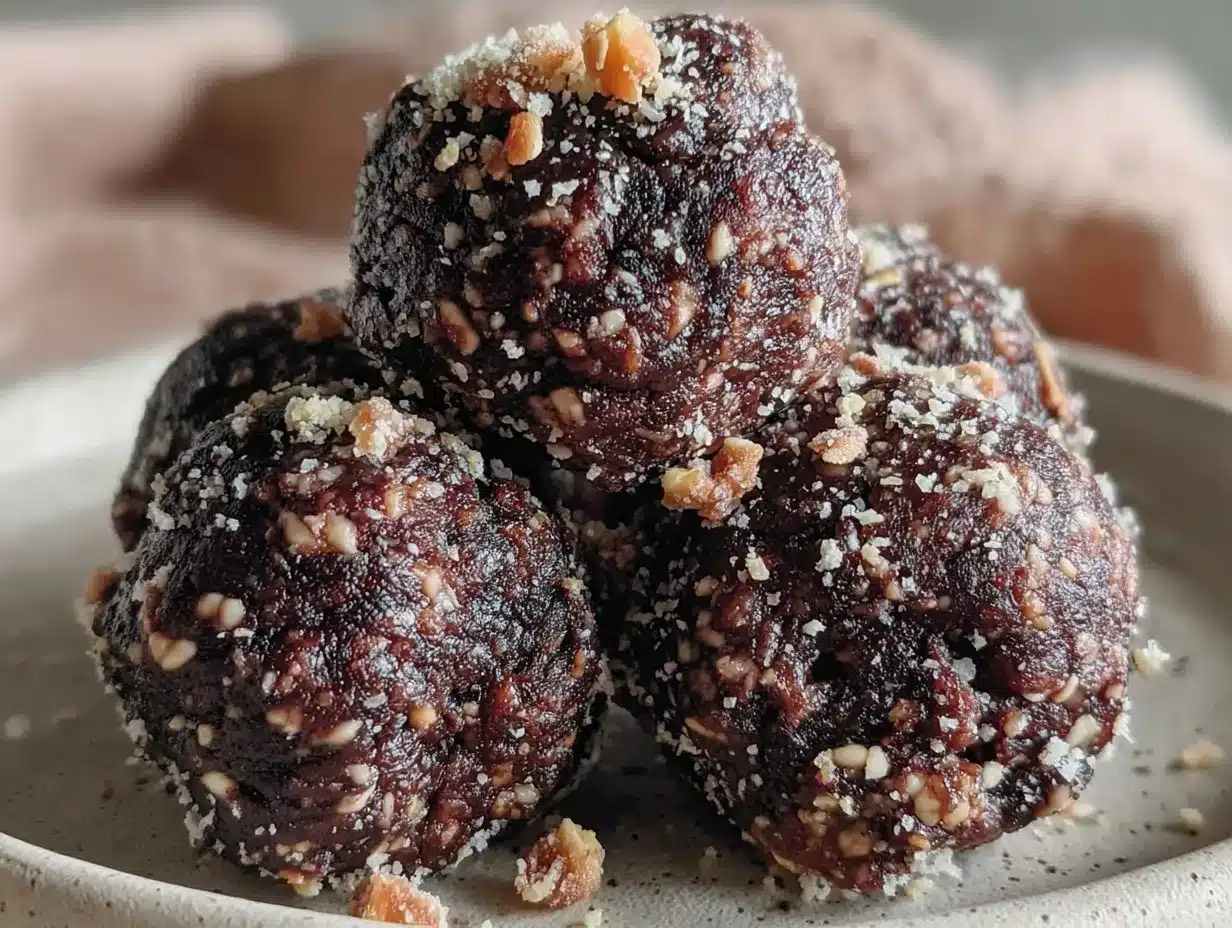
Making these energy bites is almost too easy. Here’s how to do it step by step:
- Combine the dry ingredients. In your large mixing bowl, add the rolled oats, ground flaxseed, and salt. Stir them together with your spatula or spoon until evenly distributed. This takes about 30 seconds. If you’re adding any optional dry ingredients like shredded coconut or cocoa powder, add them now.
- Add the wet ingredients. Spoon the peanut butter into the bowl, then drizzle the honey over the top. Add the vanilla extract. Don’t stir yet—just let everything sit together for a moment.
- Mix until combined. Start stirring everything together with your spatula. At first, it might look like the peanut butter isn’t incorporating, but keep going. Press the mixture against the sides of the bowl to help it come together. After about a minute, you should have a thick, cohesive dough. If it seems too dry, add a teaspoon of honey or water. If it’s too sticky, add a tablespoon of oats.
- Fold in the chocolate chips. Once the base is fully mixed, add the mini chocolate chips. Fold them in gently until they’re evenly distributed throughout the dough. You don’t want them all clumped in one spot.
- Let the mixture rest. This is the step most people skip, but it makes a difference. Let the mixture sit at room temperature for 5-10 minutes. This gives the oats time to absorb the moisture, which makes the bites easier to roll and gives them a better texture. I usually wash the dishes while I wait.
- Roll into balls. Line a baking sheet or plate with parchment paper. Using your hands or a small cookie scoop, portion out about 1 tablespoon of the mixture (roughly 20g). Roll it between your palms to form a smooth ball. Place it on the prepared sheet. Repeat with the remaining mixture. You should get about 18-20 bites, depending on how big you roll them.
- Chill for at least 30 minutes. Place the baking sheet in the refrigerator and let the bites firm up. They’ll be a little soft right after rolling, but they’ll hold their shape beautifully after chilling. If you’re in a hurry, you can pop them in the freezer for 15 minutes instead.
- Store and enjoy. Once chilled, transfer the energy bites to an airtight container. They’ll keep in the fridge for up to two weeks—if they last that long.
Sensory Cues: When you’re mixing, the dough should feel slightly sticky but not wet. If you press it between your fingers, it should hold together without crumbling. The chocolate chips should be visible but not falling out. After chilling, the bites should feel firm but still have a little give when you squeeze them.
Pro Tip: If your hands get sticky while rolling, lightly dampen them with water. It helps the mixture slide off your palms without sticking. I keep a small bowl of water nearby when I make these.
Cooking Tips & Techniques
I’ve made these energy bites more times than I can count, and I’ve definitely made my share of mistakes. Here’s what I’ve learned along the way:
Don’t skip the rest time. I know it’s tempting to start rolling right away, but letting the mixture sit for 5-10 minutes makes a huge difference. The oats absorb the moisture, the flavors meld together, and the dough becomes much easier to work with. My first batch was a crumbly mess because I rushed this step.
Use room-temperature peanut butter. Cold peanut butter is stiff and hard to mix. If yours has been sitting in the fridge, microwave it for 10-15 seconds until it’s soft and stirrable. This alone will save you a lot of elbow grease.
Adjust the sweetness to your taste. Some people like their energy bites sweeter than others. If you prefer a less sweet snack, reduce the honey to ¼ cup. If you want them sweeter, add an extra tablespoon. The same goes for the chocolate chips—use more or less depending on your mood.
Watch out for sticky mixtures. If your dough is too sticky to roll, it’s usually because the peanut butter was too runny or you added too much honey. Fix it by adding more oats, one tablespoon at a time, until the texture feels right. Conversely, if the dough is too dry and crumbly, add a teaspoon of honey or a splash of milk.
Make a double batch. These disappear fast in my house, so I usually double the recipe. They freeze beautifully, so having extra on hand is never a bad idea. Just roll them, freeze them on a baking sheet, then transfer to a freezer bag.
Timing tip: I like to make these while I’m waiting for something else to cook—like slow cooker lasagna soup or a batch of one-bowl banana bread. That way, I’m not standing around doing nothing, and I end up with a snack ready to go.
Variations & Adaptations
One of the best things about this recipe is how flexible it is. Here are some ways to change it up:
- Vegan Version: Replace the honey with maple syrup or agave nectar. Use dairy-free chocolate chips. Everything else is already plant-based. The texture will be slightly softer, but they’ll still be delicious.
- Gluten-Free Option: Use certified gluten-free rolled oats. That’s literally the only change. The recipe is naturally gluten-free otherwise.
- Nut-Free Version: Swap the peanut butter for sunflower seed butter or tahini. Sunflower seed butter works best because it has a similar consistency. Note that the flavor will change, but it’s still really tasty. If you use tahini, add an extra tablespoon of honey to balance the bitterness.
- Extra Protein: Add 2 tablespoons of vanilla or chocolate protein powder. You may need to add a teaspoon of honey or milk to compensate for the dryness. I’ve done this with a chocolate peanut butter protein powder, and it was incredible.
- Seasonal Twist: In the fall, I sometimes add a teaspoon of pumpkin pie spice and swap the chocolate chips for white chocolate chips. It gives them a cozy, spiced flavor that’s perfect for cooler weather. In summer, I’ll add dried cherries or chopped dried apricots for a fruity twist.
- Crunchy Version: Add 2 tablespoons of chopped peanuts or almonds for extra crunch. I love the texture contrast between the soft bites and the crunchy nuts.
Personal Favorite Variation: My go-to twist is adding a tablespoon of cocoa powder and using dark chocolate chips. It makes them taste like a healthier version of a chocolate truffle. I’ve also experimented with adding a pinch of cinnamon, which pairs surprisingly well with the peanut butter and chocolate.
Serving & Storage Suggestions
These energy bites are best served chilled, straight from the fridge. The cold temperature firms them up and gives them that satisfying, chewy texture. I like to grab one or two as a quick breakfast on busy mornings, a post-lunch pick-me-up, or a pre-workout snack.
How to Serve: Arrange them on a small plate or in a bowl for a party or gathering. They’re great for brunch spreads, picnic baskets, or lunchboxes. I’ve even tucked a few into my husband’s lunch bag when he’s had a long day ahead. Pair them with a glass of cold milk, a cup of coffee, or a smoothie for a balanced snack.
Storage Instructions: Store the energy bites in an airtight container in the refrigerator. They’ll stay fresh for up to two weeks. I use a glass container with a tight-fitting lid, but any container works. If you stack them, place a piece of parchment paper between layers to prevent sticking.
Freezer Instructions: These freeze beautifully. Place the rolled bites on a baking sheet and freeze for 1-2 hours until solid. Transfer them to a freezer-safe bag or container. They’ll keep for up to three months. To thaw, just leave them in the fridge overnight or let them sit at room temperature for 10-15 minutes. I love having a stash in the freezer for those days when I need a quick snack but don’t feel like making anything.
Reheating: You don’t really need to reheat these, but if you want a softer texture, let them sit at room temperature for 5-10 minutes before eating. Some people like them slightly warm—just pop one in the microwave for 5-10 seconds, but be careful not to melt the chocolate chips.
Flavor Development: The flavors actually get better after a day or two in the fridge. The oats soften further, the peanut butter and honey meld together, and the chocolate chips become more evenly distributed. Honestly, they’re even better on day two than they are on day one.
Nutritional Information & Benefits
These energy bites are a great balance of healthy fats, protein, and complex carbohydrates. Here’s the estimated nutritional breakdown for one bite (based on 20 bites per batch):
- Calories: ~120
- Protein: 4g
- Fat: 6g
- Carbohydrates: 14g
- Fiber: 2g
- Sugar: 8g
Health Benefits: The oats provide slow-release energy and fiber, which helps keep you full longer. Peanut butter adds protein and healthy monounsaturated fats, which are great for heart health. The flaxseed is a fantastic source of omega-3 fatty acids and fiber. And the dark chocolate? Well, it’s packed with antioxidants. So yes, these are actually good for you.
Dietary Considerations: This recipe is naturally vegetarian and can easily be made vegan and gluten-free. It’s also free of refined sugar if you use natural peanut butter and a good-quality honey or maple syrup. Just be aware that peanut butter is a common allergen, so adjust accordingly if needed.
Personal Wellness Note: I love that I can grab one of these on my way out the door and feel satisfied without reaching for something processed. They’re not a meal replacement, but they’re a whole lot better than a granola bar from the store. Plus, knowing exactly what’s in them gives me peace of mind.
Conclusion
These Easy No-Bake Chocolate Peanut Butter Energy Bites are the kind of recipe that proves you don’t need complicated techniques or fancy ingredients to make something truly satisfying. They’re quick, they’re forgiving, and they taste like a treat even though they’re packed with good-for-you stuff. Whether you’re making them for yourself, your family, or a gathering, they always deliver.
What I love most about this recipe is how adaptable it is. You can tweak it to fit your tastes, your dietary needs, or whatever you have in the pantry. That’s the beauty of a simple base recipe—it becomes yours. So go ahead, make a batch, and see where your creativity takes you. Maybe you’ll discover your own favorite variation.
If you give these a try, I’d love to hear how they turn out. Leave a comment below and let me know what twists you added or how they worked for your family. And if you’re looking for another easy make-ahead snack, check out these freezer breakfast burritos—they’re perfect for busy mornings too. Happy snacking!
Frequently Asked Questions
Can I use quick oats instead of rolled oats?
Yes, you can. Quick oats will work, but the texture will be softer and less chewy. Rolled oats give the bites a better, more satisfying texture. If you only have quick oats, reduce the honey slightly since they absorb moisture faster.
How long do these energy bites last?
Stored in an airtight container in the refrigerator, they’ll stay fresh for up to two weeks. In the freezer, they’ll keep for up to three months. Just make sure they’re well-sealed to prevent them from drying out.
Can I make these without peanut butter?
Absolutely. Swap the peanut butter for almond butter, cashew butter, or sunflower seed butter. Each will change the flavor slightly, but they all work well. If using sunflower seed butter, note that it can react with baking soda if you ever bake with it, but that’s not an issue here.
Why are my energy bites too dry or too sticky?
If they’re too dry, add a teaspoon of honey or a splash of milk. If they’re too sticky, add more oats, one tablespoon at a time. The consistency should be slightly sticky but hold together when pressed. Letting the mixture rest for 5-10 minutes before rolling also helps.
Can I double this recipe?
Yes, this recipe doubles beautifully. Just use a larger bowl and adjust the chilling time if needed. I often make a double batch and freeze half for later. They’re perfect for meal prep.
Pin This Recipe!

Easy No-Bake Chocolate Peanut Butter Energy Bites: Best 5-Minute Recipe
- Total Time: 35 minutes (includes chilling)
- Yield: 18-20 bites 1x
Description
These no-bake energy bites are rich, chewy, and just sweet enough to feel like a treat without going overboard. They come together in five minutes flat with simple pantry ingredients.
Ingredients
- 1 ½ cups (135g) rolled oats (old-fashioned oats)
- ½ cup (130g) creamy peanut butter (room temperature)
- ⅓ cup (110g) honey
- ⅓ cup (60g) mini chocolate chips (semi-sweet)
- 2 tablespoons (14g) ground flaxseed (optional)
- 1 teaspoon vanilla extract
- ¼ teaspoon salt
Instructions
- Combine the dry ingredients: In a large mixing bowl, add the rolled oats, ground flaxseed, and salt. Stir together until evenly distributed.
- Add the wet ingredients: Spoon the peanut butter into the bowl, then drizzle the honey over the top. Add the vanilla extract. Do not stir yet.
- Mix until combined: Stir everything together with a spatula, pressing the mixture against the sides of the bowl. After about a minute, you should have a thick, cohesive dough. If too dry, add a teaspoon of honey or water; if too sticky, add a tablespoon of oats.
- Fold in the chocolate chips: Add the mini chocolate chips and fold gently until evenly distributed.
- Let the mixture rest: Let the mixture sit at room temperature for 5-10 minutes to allow the oats to absorb moisture.
- Roll into balls: Line a baking sheet or plate with parchment paper. Using your hands or a small cookie scoop, portion out about 1 tablespoon (20g) of the mixture and roll into smooth balls. Place on the prepared sheet. You should get about 18-20 bites.
- Chill for at least 30 minutes: Place the baking sheet in the refrigerator to firm up. For a quicker option, freeze for 15 minutes.
- Store and enjoy: Once chilled, transfer to an airtight container. Store in the refrigerator for up to two weeks.
Notes
Let the mixture rest for 5-10 minutes before rolling to improve texture. Use room-temperature peanut butter for easier mixing. If hands get sticky, lightly dampen them with water. For a vegan version, replace honey with maple syrup or agave and use dairy-free chocolate chips. For a nut-free version, use sunflower seed butter. These freeze well for up to three months.
- Prep Time: 5 minutes
- Cook Time: 0 minutes
- Category: Snack
- Cuisine: American
Nutrition
- Serving Size: 1 bite
- Calories: 120
- Sugar: 8
- Sodium: 60
- Fat: 6
- Saturated Fat: 1.5
- Carbohydrates: 14
- Fiber: 2
- Protein: 4
Keywords: no-bake energy bites, chocolate peanut butter energy bites, healthy snack, 5-minute recipe, easy snack, gluten-free option, vegan option