That first whiff of black cocoa powder—the kind that smells like Oreo crumbs and dark chocolate dreams—still takes me straight to my friend Jenna’s kitchen three Octobers ago. She had this tiny, cramped apartment with flickering fairy lights strung across the ceiling, and we were supposed to be planning a Halloween party menu. Instead, we got completely sidetracked by a bag of black cocoa she’d ordered on a whim. She pulled out a beat-up muffin tin, and I grabbed a whisk, and we just started throwing things together. No recipe, no plan, just the vague idea that we wanted something spooky-looking that actually tasted incredible—not just another box of artificially colored sugar bombs.
The first batch came out looking like charcoal briquettes. Honestly, they were a little scary. But the flavor? That was something else entirely. Deep, rich, almost fudgy, with this mysterious darkness that felt perfect for Halloween. We frosted them with a quick cream cheese mixture, and I remember standing over the counter, eating one still warm, thinking, “This is it. This is the Halloween cupcake I’ve been looking for my whole adult life.” (And yes, I’ve made a lot of Halloween cupcakes over the years—some of them were black cocoa ghost cupcakes that didn’t quite hit the mark.)
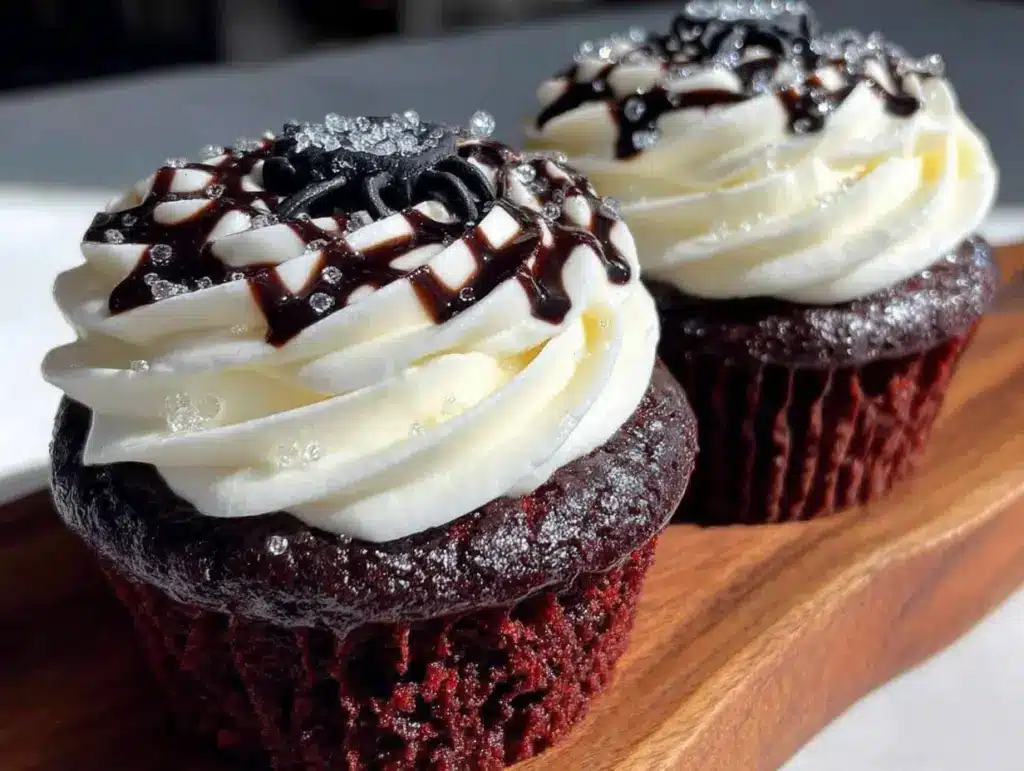
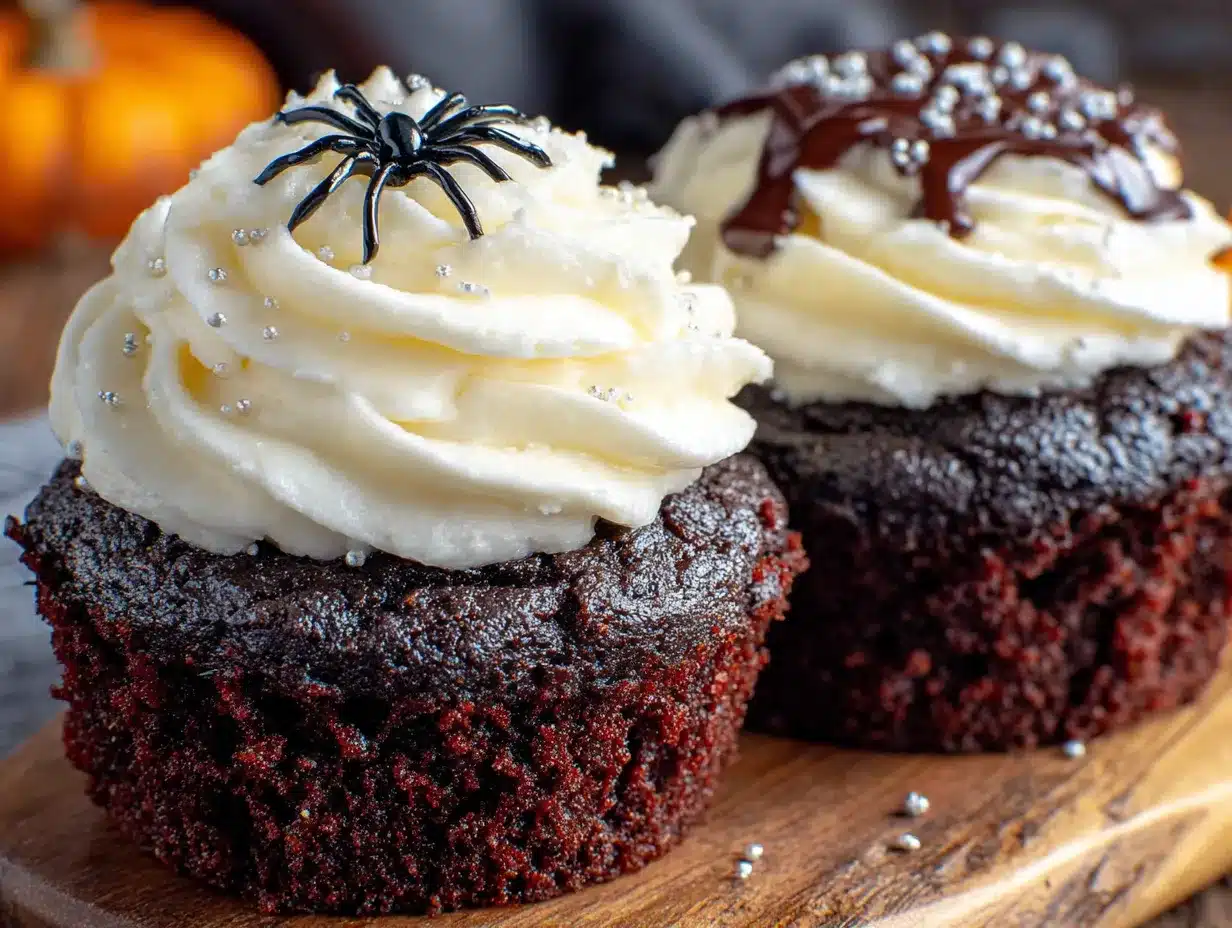
These Perfect Black Velvet Halloween Cupcakes with Cream Cheese Frosting are the result of that happy accident and years of tweaking. They’re not just a gimmick—they’re genuinely the best chocolate cupcake I’ve ever made, dressed up in its spookiest black velvet. The color comes naturally from black cocoa, not a drop of food coloring, which means they taste as good as they look. And that tangy, silky cream cheese frosting? It’s the perfect contrast to the dark, almost smoky chocolate. This is the recipe that convinced me you don’t need neon green icing or plastic spiders to make a Halloween dessert that feels special. Sometimes, all you need is a little darkness.
Why You’ll Love This Recipe
I’ve tested this recipe more times than I care to admit. I’ve made it with different cocoa powders, different fats, different mixing methods. I’ve burned a batch, underbaked a batch, and once accidentally used salted butter instead of unsalted (which, surprisingly, wasn’t terrible). Through all of that trial and error, this version emerged as the clear winner. Here’s why it works:
- Naturally Dark Color : No artificial food coloring needed. Black cocoa powder gives these cupcakes their dramatic, almost gothic black velvet color. It’s the same stuff used in Oreos, and it’s magic.
- Incredibly Moist and Tender : The combination of buttermilk, oil, and a touch of vinegar creates a crumb that stays soft for days. I’ve had these cupcakes sit out overnight (accidentally, of course) and they were still delicious the next morning.
- Perfect Cream Cheese Frosting : This isn’t your run-of-the-mill frosting. It’s tangy, creamy, and not too sweet—the ideal partner for the deep, dark cupcake. I’ve had people tell me they’d eat this frosting with a spoon, and honestly? I get it.
- Simple Ingredients : You probably already have most of these in your pantry. No fancy extracts or hard-to-find specialty items. The only “special” ingredient is black cocoa powder, and you can find it online or at well-stocked baking stores.
- Perfect for Halloween Parties : These cupcakes are showstoppers. They look dramatic and spooky on a dessert table, but they’re approachable enough for a kid’s school party. I’ve brought them to both adult Halloween gatherings and family-friendly events, and they disappear every single time.
What really sets these apart is the texture. They’re not dry or crumbly like some black velvet recipes I’ve tried. They’re almost fudgy, with a tight, velvety crumb that feels luxurious. And the frosting? It’s the kind that makes you close your eyes after the first bite. I’m not exaggerating. I’ve seen it happen.
What Ingredients You Will Need
This recipe uses simple, everyday ingredients to create something that feels special. The magic really comes from the black cocoa powder—it’s the star of the show here. Let me walk you through each ingredient and why it matters.
For the Cupcakes
- 1 ½ cups (190g) all-purpose flour : Spoon and level it—don’t scoop directly from the bag. Too much flour makes dry cupcakes, and nobody wants that.
- ½ cup (50g) black cocoa powder : This is the key ingredient. Dutch-processed black cocoa has a deep, dark color and a mild, almost Oreo-like flavor. I prefer the brand “Rodelle” for its consistent color and smooth taste. (Regular cocoa powder will NOT give you the same dark color, so don’t substitute.)
- 1 cup (200g) granulated sugar : I’ve tried this with brown sugar, and it changes the flavor profile. Stick with white sugar for the cleanest chocolate taste.
- 1 teaspoon baking soda : This helps the cupcakes rise and gives them a tender crumb. Make sure it’s fresh—old baking soda won’t do the job.
- ½ teaspoon salt : Just a pinch to balance the sweetness and enhance the chocolate flavor.
- 1 large egg, room temperature : Room temperature eggs incorporate better into the batter. If you forget to take it out early, place it in a bowl of warm water for 5 minutes.
- ½ cup (120ml) buttermilk, room temperature : Buttermilk adds tanginess and helps activate the baking soda. If you don’t have buttermilk, you can make a quick substitute: add ½ tablespoon of lemon juice or white vinegar to ½ cup of milk and let it sit for 5 minutes.
- ½ cup (120ml) vegetable oil : Oil keeps these cupcakes incredibly moist. You can use canola or melted coconut oil if you prefer.
- 1 teaspoon vanilla extract : Pure vanilla extract is best, but imitation works in a pinch. It adds warmth and depth to the chocolate.
- 1 tablespoon white vinegar : This reacts with the baking soda to create lift and tenderness. Don’t skip it—it’s a classic red velvet technique that works beautifully here.
- ½ cup (120ml) hot coffee or hot water : Hot liquid helps bloom the cocoa powder, intensifying the chocolate flavor. Use coffee for a deeper, more complex taste, or hot water if you want a milder chocolate flavor. I’ve used both, and honestly, coffee is my go-to.
For the Cream Cheese Frosting
- 8 oz (226g) cream cheese, softened : Full-fat cream cheese is non-negotiable here. Low-fat versions have too much water and will make your frosting runny. Let it sit on the counter for at least 30 minutes before using.
- ½ cup (113g) unsalted butter, softened : Use unsalted so you can control the salt level. If you only have salted butter, skip the pinch of salt in the frosting.
- 3 cups (360g) powdered sugar : Sift it if you want a super smooth frosting. I usually don’t bother, but it does make a difference in texture.
- 1 teaspoon vanilla extract : Again, pure vanilla is best. It rounds out the tanginess of the cream cheese.
- Pinch of salt : Just a tiny bit to balance the sweetness.
For Decoration (Optional)
- Black sprinkles, edible glitter, or candy eyes : These are totally optional but add a fun, spooky touch. I like using black sanding sugar for a subtle shimmer.
Equipment Needed
You don’t need a ton of fancy equipment for these cupcakes. Here’s what you’ll need:
- Muffin tin : A standard 12-cup muffin tin works perfectly. I’ve used both non-stick and dark metal pans, and they both work fine—just keep an eye on baking time if you use dark metal, as they tend to brown faster.
- Paper liners : Black or Halloween-themed liners make these cupcakes extra festive. I’ve used white liners before, and they get stained by the black cocoa, so dark liners are your friend.
- Mixing bowls : One large and one medium bowl. Nothing fancy—I use the same set I’ve had for years.
- Whisk : For mixing dry ingredients and the wet ingredients. A fork works in a pinch, but a whisk is better.
- Rubber spatula : For folding the batter together and scraping the bowl clean. I’m partial to silicone spatulas—they’re heat-resistant and easy to clean.
- Electric mixer : A hand mixer or stand mixer both work for the frosting. You can make the frosting by hand, but it takes some serious elbow grease to get it smooth.
- Cooling rack : Essential for cooling the cupcakes evenly. If you don’t have one, you can use a wire rack from your oven, or even just a clean dish towel on the counter.
- Piping bag and tip : For piping the frosting. A star tip (like a 1M) gives a beautiful swirl. If you don’t have a piping bag, you can use a zip-top bag with the corner snipped off, or just spread the frosting with a knife.
I’ve made these cupcakes with a cheap muffin tin from the grocery store and a hand mixer that’s older than I am. They still turned out amazing. Don’t let fancy equipment hold you back—these are forgiving cupcakes.
Preparation Method
Alright, let’s get baking. I’ll walk you through every step, including the little tricks I’ve learned along the way.
Step 1: Preheat and Prep
Preheat your oven to 350°F (175°C). Line your muffin tin with 12 paper liners. I like to use black or orange liners for Halloween, but any liner works. If you’re worried about sticking, give the liners a quick spray with non-stick cooking spray. (I’ve forgotten to do this before, and the cupcakes stuck to the liners—not the end of the world, but annoying.)
Step 2: Mix the Dry Ingredients
In a large bowl, whisk together the flour, black cocoa powder, sugar, baking soda, and salt. Make sure there are no lumps of cocoa powder—black cocoa can be stubborn. I usually whisk for a good 30 seconds to make sure everything is evenly distributed. Set this bowl aside.
Step 3: Mix the Wet Ingredients
In a separate medium bowl, whisk together the egg, buttermilk, vegetable oil, vanilla extract, and white vinegar. Whisk until everything is smooth and well combined. The mixture will look a little weird—thin and slightly separated—but that’s normal. Don’t worry about it.
Step 4: Combine Wet and Dry
Pour the wet ingredients into the dry ingredients and stir gently with a rubber spatula. Mix until just combined—about 10-15 strokes. A few small lumps are totally fine. Overmixing will make the cupcakes tough, so be gentle. The batter will be thick and dark, almost like brownie batter.
Step 5: Add the Hot Liquid
Slowly pour in the hot coffee (or hot water) while stirring gently. The batter will thin out significantly—this is exactly what you want. It should be smooth, pourable, and about the consistency of heavy cream. Don’t panic if it looks too thin; it’s supposed to be that way. The hot liquid blooms the cocoa and creates that tender, velvety crumb.
Step 6: Fill the Liners
Divide the batter evenly among the 12 liners. I use a cookie scoop or a ¼-cup measure for consistent sizes. Fill each liner about ⅔ full. If you overfill them, they’ll dome too much and might spill over. Trust me—I’ve learned this the hard way. (One time, I filled them too full, and the cupcakes looked like little black volcanoes. They still tasted good, but they weren’t pretty.)
Step 7: Bake
Bake for 16-20 minutes, or until a toothpick inserted into the center of a cupcake comes out clean or with just a few moist crumbs. The tops should spring back when lightly touched. Start checking at 16 minutes—every oven is different, and you don’t want to overbake them. My oven runs hot, so mine are usually done at 17 minutes exactly.
Step 8: Cool Completely
Let the cupcakes cool in the pan for 5 minutes, then transfer them to a wire rack to cool completely. This is crucial. If you frost them while they’re still warm, the frosting will melt and slide right off. I’ve made this mistake before—it’s a sad, goopy mess. Be patient. Let them cool for at least 30 minutes, or even an hour if you have the time.
Step 9: Make the Frosting
While the cupcakes are cooling, make the frosting. In a large bowl, beat the softened cream cheese and butter together with an electric mixer on medium speed until smooth and creamy—about 2 minutes. Scrape down the sides of the bowl. Add the vanilla extract and salt, then beat again until combined. Gradually add the powdered sugar, 1 cup at a time, beating on low speed after each addition. Once all the sugar is added, increase the speed to medium-high and beat for 2-3 minutes until the frosting is light, fluffy, and smooth. If it’s too thick, add a splash of milk. If it’s too thin, add more powdered sugar.
Step 10: Frost and Decorate
Once the cupcakes are completely cool, pipe or spread the frosting onto each cupcake. I like to use a star tip for a dramatic swirl, but a simple knife spread works too. Top with black sprinkles, edible glitter, or candy eyes if you’re feeling festive. I’ve also used candy corn Rice Krispie treats crumbled on top for a fun texture contrast—it’s weirdly delicious.
Cooking Tips & Techniques
I’ve made enough mistakes with this recipe to fill a small notebook. Here are the lessons I’ve learned so you don’t have to repeat them.
Don’t Overmix the Batter. This is the number one mistake people make with black velvet cupcakes. The batter is thin, and it’s tempting to keep stirring to make sure everything is incorporated. But overmixing develops gluten, which makes the cupcakes tough and rubbery. Mix until you don’t see any more streaks of flour, then stop. A few lumps are fine—they’ll bake out.
Use Room Temperature Ingredients. Cold eggs and cold buttermilk don’t emulsify properly, which can lead to a dense, uneven crumb. Take your egg and buttermilk out of the fridge about 30 minutes before you start baking. If you forget (which I do, constantly), place the egg in a bowl of warm water for 5 minutes and microwave the buttermilk for 10-15 seconds until it’s no longer cold.
Bloom the Cocoa Properly. The hot coffee or hot water isn’t just for thinning the batter—it actually helps release the flavor compounds in the black cocoa powder. Don’t skip this step. I’ve made a batch without hot liquid (out of laziness), and the cupcakes were noticeably less flavorful. The coffee also adds a subtle depth that complements the chocolate without making it taste like coffee.
Check Your Baking Soda. Baking soda loses its potency over time. If your cupcakes don’t rise properly or have a weird, metallic taste, your baking soda might be old. To test it, drop a teaspoon of baking soda into a small bowl of vinegar. If it fizzes vigorously, it’s good. If it barely bubbles, get a new box.
Don’t Overbake. These cupcakes go from perfectly moist to dry in about 60 seconds. Start checking at 16 minutes. The toothpick test is your friend—it should come out clean or with just a few moist crumbs. If it comes out completely dry, you’ve overbaked them. I’ve done this, and the cupcakes were still edible, but they weren’t as good.
Let the Frosting Come to Room Temperature. If your cream cheese frosting is too cold, it will be stiff and hard to pipe. If it’s too warm, it will be runny. The sweet spot is when the cream cheese and butter are softened but still cool to the touch. If your frosting gets too warm, pop it in the fridge for 10 minutes, then beat it again.
Variations & Adaptations
One of the best things about this recipe is how adaptable it is. I’ve played around with it quite a bit, and here are some of my favorite variations.
Gluten-Free Version : Substitute the all-purpose flour with a 1:1 gluten-free baking flour blend. I’ve used Bob’s Red Mill 1:1 Baking Flour with great results. The texture is slightly more delicate, but the flavor is still amazing. Just be careful not to overmix the batter—gluten-free flours can get gummy if overworked.
Dairy-Free Version : Use a dairy-free cream cheese alternative (like Kite Hill or Violife) and substitute the buttermilk with a mixture of dairy-free milk and 1 teaspoon of lemon juice. Use vegan butter for the frosting. The texture will be slightly different, but it still works beautifully. I’ve made this version for a friend with dairy allergies, and she couldn’t tell the difference.
Spicy Chocolate Version : Add ½ teaspoon of cayenne pepper and ½ teaspoon of cinnamon to the dry ingredients. The heat from the cayenne pairs beautifully with the dark chocolate flavor, and the cinnamon adds warmth. This is my personal favorite variation—it’s unexpected and so good.
Mini Cupcakes : Use a mini muffin tin and reduce the baking time to 8-10 minutes. These are perfect for Halloween parties where you want people to try a little bit of everything. I’ve made these for a spooky Halloween charcuterie board, and they were a huge hit.
Black Velvet Cake : Pour the batter into two 8-inch round cake pans and bake for 25-30 minutes. Double the frosting recipe, and you have a stunning black velvet layer cake. I’ve done this for Halloween birthdays, and it’s always a showstopper.
Peppermint Twist : Add ½ teaspoon of peppermint extract to the frosting for a cool, refreshing twist. Top with crushed candy canes for a Christmas-themed version. I tried this on a whim last December, and it was surprisingly good.
Serving & Storage Suggestions
These cupcakes are best served at room temperature. If you’ve refrigerated them, let them sit on the counter for about 30 minutes before serving. The cream cheese frosting softens slightly, and the cupcake becomes more tender.
For a Halloween party, arrange them on a black or orange cake stand. I like to add some spooky glowing green Halloween punch nearby for a complete spooky spread. They also pair beautifully with a hot cup of coffee or a glass of cold milk.
Storage: Store leftover cupcakes in an airtight container in the refrigerator for up to 5 days. The cream cheese frosting needs to be refrigerated, but the cupcakes themselves stay moist. If you’re storing them for more than a day, I recommend placing a paper towel at the bottom of the container to absorb any excess moisture.
Freezing: You can freeze the unfrosted cupcakes for up to 3 months. Wrap each cupcake individually in plastic wrap, then place them in a freezer-safe bag. When you’re ready to serve, let them thaw at room temperature for about an hour, then frost them. I’ve done this for Halloween parties where I wanted to prep ahead, and it works perfectly. The frosted cupcakes can also be frozen, but the texture of the frosting might change slightly.
Reheating: If you want a warm cupcake (which I highly recommend), microwave an unfrosted cupcake for 10-15 seconds. Don’t microwave the frosting—it will melt. Frost after warming.
Flavor Development: These cupcakes actually taste better the next day. The flavors meld together, and the texture becomes even more tender. If you can resist eating them right away, let them sit overnight. I’ve done this, and it’s worth the wait.
Nutritional Information & Benefits
Let’s be real—these are cupcakes, not health food. But they’re made with real ingredients, and there are a few surprising benefits to some of the components.
| Nutrient | Per Cupcake (with frosting) |
|---|---|
| Calories | ~380 |
| Total Fat | 22g |
| Saturated Fat | 10g |
| Cholesterol | 55mg |
| Sodium | 280mg |
| Total Carbohydrates | 44g |
| Dietary Fiber | 2g |
| Sugars | 32g |
| Protein | 4g |
Black cocoa powder is actually rich in antioxidants—more so than regular cocoa powder because of the Dutch processing. It also contains iron, magnesium, and zinc. The cream cheese adds a small amount of calcium and protein. Of course, this is all balanced by the sugar and butter, so enjoy these in moderation. I like to think of them as a treat that makes you feel good, not just in the moment, but because you know exactly what went into them.
Dietary Considerations: This recipe contains gluten, dairy, and eggs. For gluten-free and dairy-free adaptations, see the Variations section above. These cupcakes are not suitable for vegans, but I’m working on a vegan version that I’ll share soon.
I personally believe that food should be enjoyed without guilt. These cupcakes are a celebration—of Halloween, of creativity, of the joy of baking. Eat one, enjoy it, and don’t stress about the numbers.
Conclusion
These Perfect Black Velvet Halloween Cupcakes with Cream Cheese Frosting are more than just a Halloween dessert. They’re the kind of recipe that makes you feel like a baking rockstar, even if you’ve never made a cupcake from scratch before. The deep, dark color is dramatic and spooky, but the flavor is approachable and comforting—a perfect balance for any Halloween gathering.
I’ve made these cupcakes for costume parties, for trick-or-treaters, and for quiet nights in with a scary movie. Every single time, they’ve been the highlight of the evening. There’s something about that first bite—the way the tender, almost fudgy cake gives way to the tangy, creamy frosting—that just feels right. It’s comfort food with a dark edge, and I love that about them.
I encourage you to make these your own. Try the spicy chocolate variation, or add some peppermint extract to the frosting. Top them with candy eyes or edible glitter. Make them for a Halloween party, or make them just because it’s Tuesday and you want something delicious. The beauty of this recipe is that it’s forgiving, adaptable, and always impressive.
I’d love to hear how yours turn out! Leave a comment below and let me know if you tried any variations, or share a photo of your spooky creations. And if you’re looking for more Halloween inspiration, check out my easy no-bake dirt cups with gummy worms for a quick, no-oven-required treat. Happy Halloween, and happy baking!
Frequently Asked Questions
Can I use regular cocoa powder instead of black cocoa?
You can, but the cupcakes won’t have that dramatic black color. Regular cocoa powder will give you a dark brown cupcake, which is still delicious, but not as visually striking. If you’re going for the spooky black velvet look, stick with black cocoa powder.
Why did my cupcakes turn out dry?
Dry cupcakes are usually a result of overbaking or overmixing. Make sure you’re checking the cupcakes at 16 minutes, and stop mixing as soon as the batter comes together. Also, make sure you’re measuring your flour correctly—spoon it into the measuring cup and level it off, don’t scoop directly from the bag.
Can I make the frosting ahead of time?
Absolutely! You can make the frosting up to 3 days in advance. Store it in an airtight container in the refrigerator. When you’re ready to use it, let it sit at room temperature for about 30 minutes, then beat it with an electric mixer until it’s smooth and creamy again.
How do I get the frosting to look so smooth?
The key is to make sure your cream cheese and butter are properly softened. If they’re too cold, the frosting will be lumpy. If they’re too warm, the frosting will be runny. Also, sifting your powdered sugar helps eliminate lumps. If you still have lumps, beat the frosting for an extra 2-3 minutes—that usually does the trick.
Can I use this recipe to make a cake instead of cupcakes?
Yes! Pour the batter into two greased and floured 8-inch round cake pans. Bake at 350°F (175°C) for 25-30 minutes. Let the cakes cool completely before frosting. Double the frosting recipe for a layer cake. This makes a stunning Halloween birthday cake or party centerpiece.
Pin This Recipe!
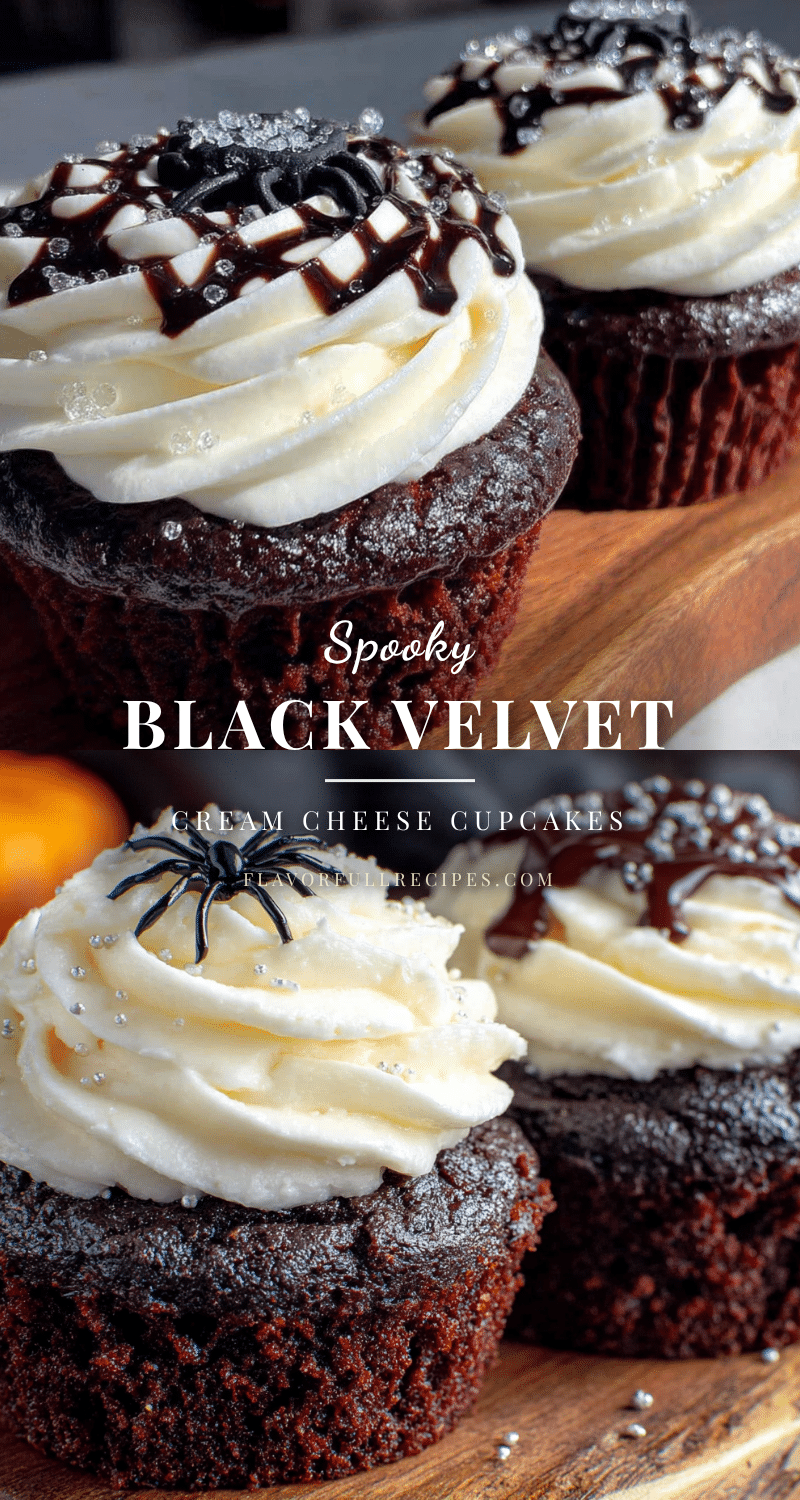
Perfect Black Velvet Halloween Cupcakes with Cream Cheese Frosting
- Total Time: 1 hour 10 minutes
- Yield: 12 cupcakes 1x
Description
These naturally dark black velvet cupcakes are incredibly moist and tender, topped with a tangy, silky cream cheese frosting. Made with black cocoa powder (no artificial coloring), they’re the perfect spooky yet delicious Halloween treat.
Ingredients
- 1 ½ cups (190g) all-purpose flour
- ½ cup (50g) black cocoa powder
- 1 cup (200g) granulated sugar
- 1 teaspoon baking soda
- ½ teaspoon salt
- 1 large egg, room temperature
- ½ cup (120ml) buttermilk, room temperature
- ½ cup (120ml) vegetable oil
- 1 teaspoon vanilla extract
- 1 tablespoon white vinegar
- ½ cup (120ml) hot coffee or hot water
- 8 oz (226g) cream cheese, softened
- ½ cup (113g) unsalted butter, softened
- 3 cups (360g) powdered sugar
- 1 teaspoon vanilla extract
- Pinch of salt
- Black sprinkles, edible glitter, or candy eyes (optional)
Instructions
- Preheat oven to 350°F (175°C). Line a 12-cup muffin tin with paper liners.
- In a large bowl, whisk together flour, black cocoa powder, sugar, baking soda, and salt until no lumps remain.
- In a separate medium bowl, whisk together egg, buttermilk, vegetable oil, vanilla extract, and white vinegar until smooth.
- Pour wet ingredients into dry ingredients and stir gently with a rubber spatula until just combined (10-15 strokes). A few lumps are fine.
- Slowly pour in hot coffee (or hot water) while stirring gently until batter is smooth and pourable (consistency of heavy cream).
- Divide batter evenly among the 12 liners, filling each about ⅔ full.
- Bake for 16-20 minutes, or until a toothpick inserted into the center comes out clean or with a few moist crumbs. Start checking at 16 minutes.
- Let cupcakes cool in the pan for 5 minutes, then transfer to a wire rack to cool completely (at least 30 minutes).
- For frosting: In a large bowl, beat softened cream cheese and butter with an electric mixer on medium speed until smooth and creamy (about 2 minutes). Add vanilla extract and salt; beat until combined. Gradually add powdered sugar, 1 cup at a time, beating on low after each addition. Increase speed to medium-high and beat for 2-3 minutes until light, fluffy, and smooth.
- Once cupcakes are completely cool, pipe or spread frosting onto each cupcake. Decorate with black sprinkles, edible glitter, or candy eyes if desired.
Notes
Use room temperature ingredients for best results. Don’t overmix the batter. Bloom the cocoa with hot liquid for deeper flavor. Check baking soda freshness. Store frosted cupcakes in the refrigerator for up to 5 days. Unfrosted cupcakes can be frozen for up to 3 months.
- Prep Time: 20 minutes
- Cook Time: 18 minutes
- Category: Dessert
- Cuisine: American
Nutrition
- Serving Size: 1 cupcake
- Calories: 380
- Sugar: 32
- Sodium: 280
- Fat: 22
- Saturated Fat: 10
- Carbohydrates: 44
- Fiber: 2
- Protein: 4
Keywords: black velvet cupcakes, Halloween cupcakes, black cocoa cupcakes, cream cheese frosting, Halloween dessert, black velvet, spooky cupcakes