I ruined red velvet cookies four times before I made one that actually tasted good.
Not like, oh these are fine good. I mean the kind where you take a bite, stop, and just stare at the cookie for a second because you can’t believe you made it yourself. The first batch came out flat and greasy. The second was cakey in a dry way that felt like a lie. The third looked beautiful but tasted like nothing except sugar. And the fourth? I forgot the cocoa powder entirely. That one was just a red cookie. A sad, red, flavorless cookie.
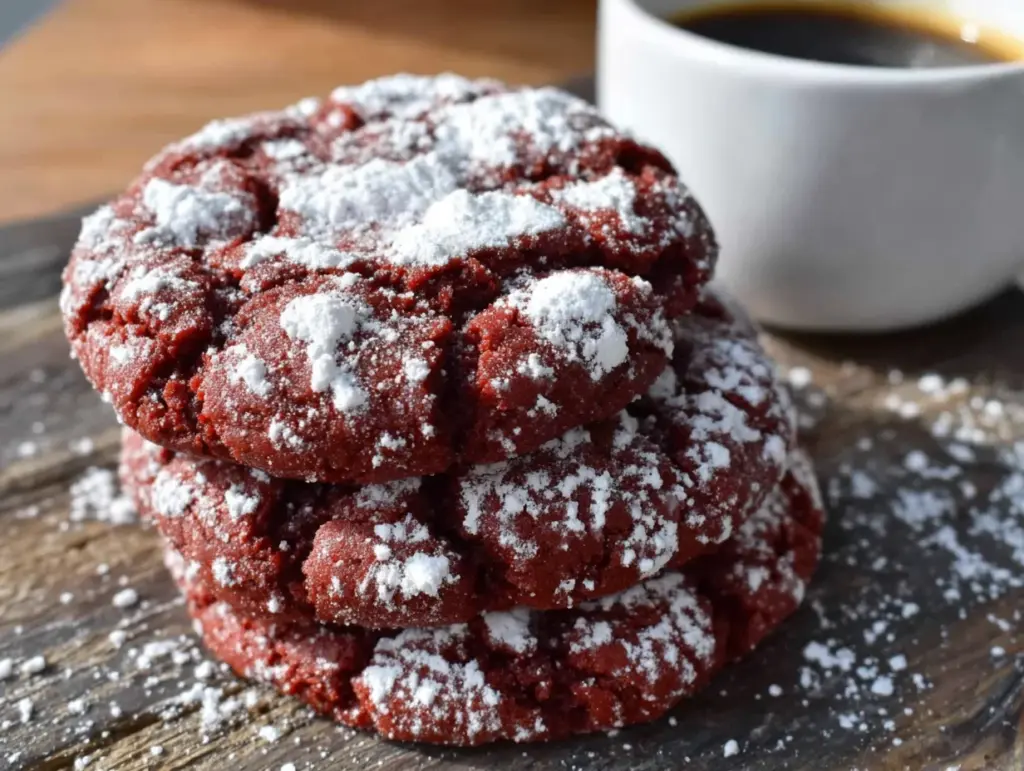
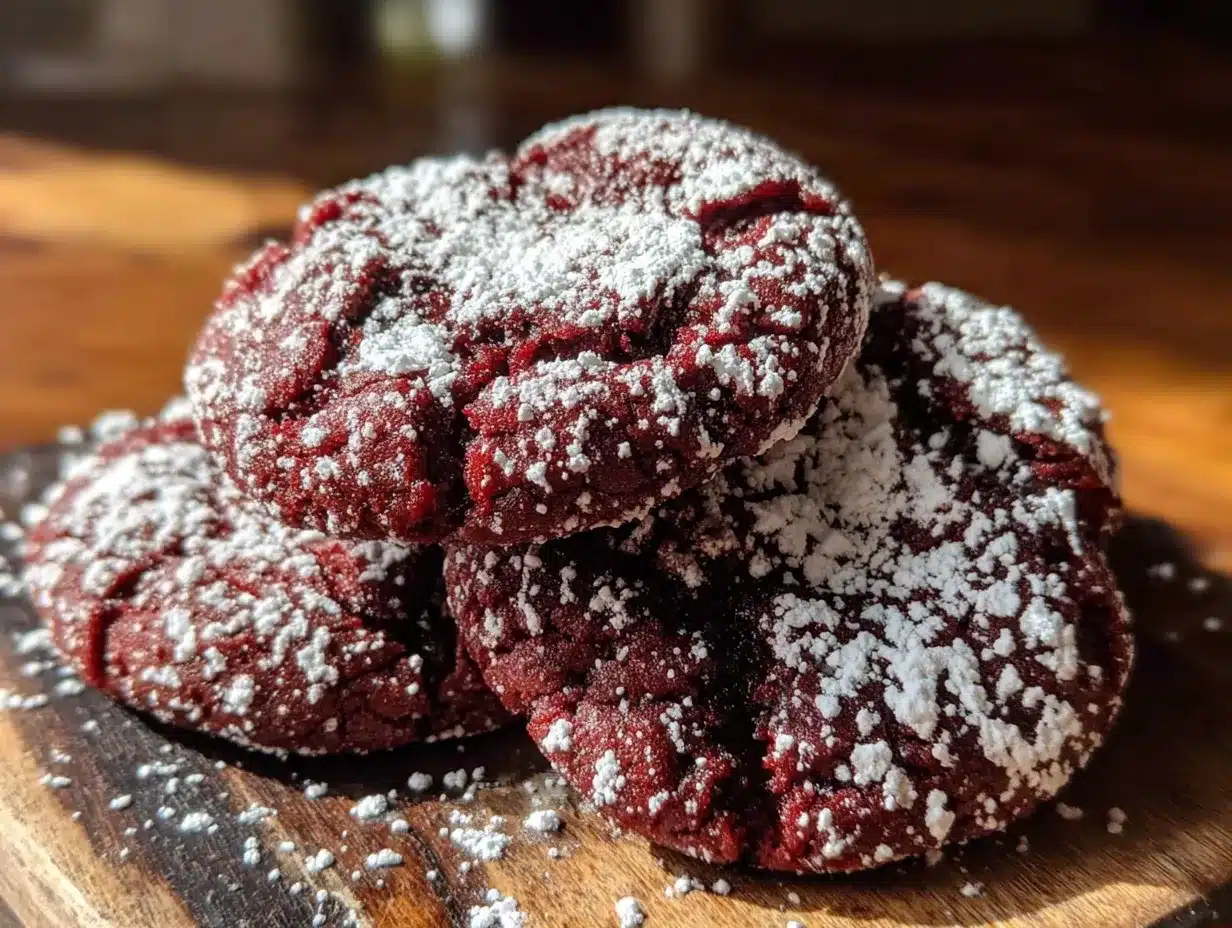
But that fifth batch (because I am stubborn and also out of butter at that point) finally worked. The edges were soft, the center was tender, and the crinkle on top was exactly that dusty, snowy crackle you see in bakery windows and immediately want to eat. I sat on my kitchen floor eating three of them in a row (don’t judge, you would too) and realized I had finally cracked the code.
These soft baked red velvet crinkle cookies are the result of that failure streak. They are not complicated. They do not require a stand mixer or a chill time that takes all day. They come together in one bowl, roll in powdered sugar, and bake into these gorgeous little domes of chocolate-meets-vanilla with that signature red velvet tang.
The first time I brought them to a friend’s holiday gathering, someone asked if I bought them from a bakery. I said no, I just burned a lot of butter first. They laughed. I was only half joking.
Why You Will Love This Recipe
Let me tell you why these cookies deserve a permanent spot in your baking rotation. I have tested this recipe about seven times now (my neighbors are very happy, my waistline is not), and every single time, people ask for the recipe before the plate is empty.
- One Bowl, Zero Fuss : No stand mixer needed. No chilling required. You mix everything in one bowl, roll, and bake. That is it.
- Soft Baked Perfection : These cookies stay tender for days. The edges are set but the center stays soft and almost fudgy. No crunchy edges here.
- That Signature Crinkle : The powdered sugar crackles as the cookies spread in the oven, creating that gorgeous contrast between bright red dough and snowy white top.
- Perfect for Any Occasion : Valentine’s Day, Christmas, birthday parties, or just a random Tuesday when you need a little color in your life. They fit everywhere.
- Simple Pantry Ingredients : Nothing weird. Butter, sugar, flour, cocoa, eggs, vanilla, and red food coloring. That is the whole list.
What makes this recipe different from the other red velvet cookie recipes out there? It is the ratio. Most recipes use too much flour, which makes the cookies puffy and dry. Or they use too much butter, which makes them spread into greasy puddles. I landed on a balance that gives you a cookie that holds its shape, cracks beautifully, and stays soft for days without turning into a brick.
Honestly, this is the kind of cookie you make when you want to impress people without breaking a sweat. It looks fancy. It tastes like a bakery treat. But you made it in your kitchen with one bowl and a whisk. That is the kind of magic I live for.
What Ingredients You Will Need
This recipe uses simple, everyday ingredients to create something that looks and tastes special. No fancy extracts or hard-to-find items. Just good basics that work together.
- Unsalted butter, ½ cup (1 stick), softened to room temperature. I use Land O Lakes most of the time, but any brand works. Just make sure it is softened, not melted.
- Granulated sugar, 1 cup. Regular white sugar. It gives the cookies structure and sweetness without making them taste like candy.
- Large egg, 1, at room temperature. Cold eggs can seize the butter, so let it sit out for 20 minutes first.
- Vanilla extract, 1 teaspoon. Pure vanilla is better, but imitation works fine here since the cocoa and red velvet flavor are strong.
- Buttermilk, 2 tablespoons, at room temperature. This is the secret to that tender crumb and the slight tang that makes red velvet taste like red velvet. If you do not have buttermilk, add ½ teaspoon of white vinegar to regular milk and let it sit for 5 minutes.
- All-purpose flour, 1 ½ cups. Spoon and level it. Scooping directly from the bag packs in too much flour and makes dry cookies.
- Unsweetened cocoa powder, ¼ cup. Not Dutch-process. Natural cocoa gives that classic red velvet flavor. I use Hershey’s because it is reliable and cheap.
- Baking soda, ½ teaspoon. Helps the cookies spread just enough and gives them lift.
- Salt, ¼ teaspoon. Balances sweetness and brings out the chocolate.
- Red food coloring, 1 to 2 tablespoons. I use gel food coloring because liquid drops require too much and can mess with the dough texture. Start with 1 tablespoon and add more if you want a deeper red. My personal favorite is Americolor Super Red.
- White vinegar, 1 teaspoon. This reacts with the baking soda and buttermilk to create that tender texture. Do not skip it.
- Powdered sugar, about ½ cup, for rolling. You will use more than you think. The thicker the coating, the better the crinkle.
A quick note on the food coloring: if you prefer natural coloring, you can use beet powder or natural red food dye, but the color will be more of a rusty red than a bright crimson. Still pretty, just different. I have tried both, and honestly, the gel coloring gives that classic bakery look that people expect from red velvet.
Equipment Needed
You do not need a lot of fancy tools for these cookies. That is part of the appeal.
- Large mixing bowl – Any bowl big enough to hold the dough. I use a ceramic one because it feels nice, but metal or glass works fine.
- Hand mixer or whisk – A hand mixer makes creaming the butter and sugar easier, but you can do it by hand with some elbow grease.
- Rubber spatula – For scraping the bowl and folding everything together.
- Measuring cups and spoons – Accurate measurements matter in baking. Use dry measuring cups for flour and sugar, liquid measuring cups for buttermilk.
- Cookie scoop (optional but helpful) – A 1.5-tablespoon scoop makes uniform cookies. If you do not have one, use two spoons.
- Baking sheet – A light-colored, rimmed baking sheet works best. Dark sheets can cause the bottoms to brown too fast.
- Parchment paper or silicone baking mat – Parchment paper is cheap and makes cleanup easy. Silicone mats work great too.
- Cooling rack – Lets air circulate under the cookies so they do not steam and get soggy.
If you do not have a hand mixer, a wooden spoon and some patience will get the job done. I have made these cookies by hand before, and they turned out just as good. It just takes a little longer to cream the butter and sugar.
Preparation Method
Preheat your oven to 350°F (175°C). Line a baking sheet with parchment paper and set it aside.
- Cream the butter and sugar. In a large mixing bowl, beat the softened butter and granulated sugar together until light and fluffy, about 2 to 3 minutes with a hand mixer on medium speed. Scrape the sides of the bowl halfway through. The mixture should look pale and slightly increased in volume.
- Add the egg and vanilla. Crack in the egg and add the vanilla extract. Beat on medium speed until fully combined, about 30 seconds. The mixture might look a little curdled at this point, and that is okay. It will come back together when you add the dry ingredients.
- Mix in the buttermilk, vinegar, and food coloring. Add the buttermilk, white vinegar, and red food coloring. Beat on low speed until the color is evenly distributed. If you are using gel food coloring, this is where the dough starts looking like actual red velvet. Scrape the bowl again.
- Combine the dry ingredients. In a separate small bowl, whisk together the flour, cocoa powder, baking soda, and salt. This ensures the baking soda and salt are evenly distributed so you do not get a pocket of salt in one cookie (speaking from experience, it is awful).
- Add the dry ingredients to the wet. Gradually add the flour mixture to the wet ingredients, mixing on low speed or folding with a spatula. Mix just until no streaks of flour remain. Overmixing at this stage will make the cookies tough. Stop as soon as it comes together.
- Chill the dough (optional but recommended). The dough will be quite soft and sticky. If you have time, cover the bowl and refrigerate for 30 minutes. This makes the dough easier to handle and helps the cookies keep their shape. If you are in a hurry, you can skip this step, but the cookies will spread a little more.
- Roll the dough balls. Scoop out about 1.5 tablespoons of dough per cookie. Roll each portion into a smooth ball between your palms. The dough will be slightly tacky, so work quickly.
- Coat generously in powdered sugar. Place the powdered sugar in a shallow bowl. Roll each dough ball in the powdered sugar until completely coated. Do not be shy here. A thick, even coating is what creates that beautiful crinkle effect. I usually roll each ball twice, pressing gently to make sure the sugar sticks.
- Place on the baking sheet. Arrange the coated dough balls on the prepared baking sheet, spacing them about 2 inches apart. They will spread, so do not crowd them.
- Bake. Bake at 350°F (175°C) for 10 to 12 minutes. The cookies should look puffed, cracked, and set around the edges, but the centers will still look slightly soft and underdone. That is exactly what you want. Do not overbake, or they will lose that soft texture.
- Cool on the baking sheet. Let the cookies rest on the hot baking sheet for 5 minutes. This allows them to finish setting up without drying out. Then transfer them to a wire cooling rack to cool completely.
One thing I learned the hard way: do not skip the 5-minute rest on the baking sheet. The first time I tried to move them immediately, they basically fell apart in my hands. They are fragile right out of the oven, but they firm up beautifully as they cool.
Cooking Tips & Techniques
I have made these cookies enough times to know exactly where things can go wrong. Here is what I learned so you do not have to repeat my mistakes.
Use room temperature ingredients. Cold butter does not cream properly with sugar, and cold egg can make the butter seize. Let everything sit out for 20 to 30 minutes before you start. It makes a real difference in the texture.
Do not overmix the dough. Once you add the flour, mix just until it disappears. Overmixing develops gluten, which makes cookies tough and cakey instead of soft and tender. You want a soft, almost fudgy texture, not a fluffy muffin top.
Roll the dough balls twice in powdered sugar. I know it feels wasteful, but trust me on this. The first layer of sugar melts into the dough as it bakes, and the second layer creates that crackled, snowy crust. If you only do one layer, the crinkle will be faint and the cookies will look more like red blobs than bakery-style crinkle cookies.
Watch the bake time closely. Ovens vary wildly. My oven runs hot, so I check at 9 minutes. Yours might need a full 12. The key is to pull them when the edges are set but the center still looks a little soft. They will continue to cook on the hot baking sheet after you pull them out.
If your cookies spread too much, the dough was too warm or the butter was too soft. Pop the dough in the fridge for 15 to 20 minutes before rolling. That usually fixes the problem.
If your cookies are too puffy and do not crinkle, you probably added too much flour. Next time, spoon the flour into your measuring cup and level it off instead of scooping directly from the bag.
Variations & Adaptations
One of the best things about this recipe is how easy it is to change up. Here are some variations I have tried and loved.
White Chocolate Chunk Version : Fold in ½ cup of roughly chopped white chocolate or white chocolate chips before rolling. The sweetness of white chocolate pairs perfectly with the mild cocoa and tangy buttermilk. I made this for a Valentine’s Day party and they disappeared in minutes.
Gluten-Free Adaptation : Substitute the all-purpose flour with a 1-to-1 gluten-free baking flour blend that contains xanthan gum. I have tested this with Bob’s Red Mill 1-to-1 Baking Flour, and the texture was impressively close to the original. Just make sure your blend has a binder, or add ½ teaspoon of xanthan gum separately.
Vegan Version : Use vegan butter (I like Miyoko’s), a flax egg (1 tablespoon ground flaxseed mixed with 3 tablespoons water, let sit for 5 minutes), and plant-based milk with ½ teaspoon vinegar instead of buttermilk. The texture will be slightly less tender, but they still taste fantastic. I have made these for a vegan friend twice, and she asked for the recipe both times.
Peppermint Red Velvet : Add ½ teaspoon of peppermint extract along with the vanilla. It gives the cookies a cool, festive twist that works beautifully for Christmas. Top with crushed candy canes if you are feeling extra fancy. This is one of my favorite holiday variations, and it pairs wonderfully with a batch of peppermint bark chocolate chip cookies for a holiday cookie platter.
Extra Chocolatey : Increase the cocoa powder to ⅓ cup and add ¼ cup of mini chocolate chips. This makes the cookies darker and richer, with a more pronounced chocolate flavor. It is less traditional for red velvet, but it is delicious if you are a chocolate lover.
Serving & Storage Suggestions
These cookies are best served at room temperature, straight from the cooling rack. The texture is soft and tender, and the powdered sugar coating gives them a delicate sweetness that does not overwhelm.
For a beautiful presentation, arrange them on a white platter or a wooden board. The red and white contrast is striking. I like to serve them alongside a glass of cold milk, a hot cup of coffee, or a cozy mug of hot chocolate. They also make a great addition to a dessert table next to other treats like soft batch chocolate chip cookies for a cookie platter that has something for everyone.
Storage: Store the cookies in an airtight container at room temperature for up to 5 days. Place a slice of bread in the container to keep them soft if your kitchen is dry. The bread absorbs excess air and releases moisture, keeping the cookies tender. Replace the bread every other day.
Freezing: These cookies freeze beautifully. You can freeze the baked cookies in a freezer-safe bag or container for up to 3 months. Thaw at room temperature for about 30 minutes before serving. Alternatively, freeze the unbaked dough balls (before rolling in powdered sugar) on a baking sheet until solid, then transfer to a freezer bag. When you are ready to bake, roll the frozen dough balls in powdered sugar and add 1 to 2 minutes to the bake time. This is my favorite trick for having fresh cookies on demand.
Reheating: If you want that just-baked warmth, pop a cookie in the microwave for 10 to 15 seconds. It softens the center and makes the chocolate flavor more pronounced. Do not overheat, or the powdered sugar will melt and get sticky.
The flavors actually develop and deepen after a day or two. The cocoa and buttermilk tang mellow together, and the texture becomes even softer. These cookies are one of those rare treats that taste better on day two.
Nutritional Information & Benefits
Let me be real with you: these are cookies. They are a treat. But that does not mean they cannot fit into a balanced lifestyle.
Per cookie (based on 24 cookies), here is the approximate nutritional breakdown:
- Calories: 135
- Fat: 5g
- Carbohydrates: 21g
- Protein: 2g
- Sugar: 14g
- Fiber: 0.5g
The cocoa powder provides a small amount of antioxidants called flavonoids, which are linked to heart health. The buttermilk adds a touch of calcium and probiotics. And the butter, while not a health food, does contain fat-soluble vitamins like A and E.
If you are watching your sugar intake, you can reduce the granulated sugar to ¾ cup without significantly affecting the texture, though the cookies will be slightly less sweet. I have tested this, and they still taste great.
For those with dietary restrictions, this recipe contains gluten, dairy, and eggs. The gluten-free and vegan variations above work well for alternative diets. I have also made these with coconut sugar instead of granulated sugar, and while the color was a bit darker and the flavor had a slight caramel note, they were still delicious.
These cookies are not a health food, but they are a joy food. And sometimes, that is exactly what you need.
Conclusion
These soft baked red velvet crinkle cookies are the kind of recipe that makes you look like a baking hero without requiring you to actually be one. They are simple enough for a beginner, reliable enough for a busy week, and beautiful enough to bring to any gathering.
I love that they come together in one bowl, that there is no chilling required (unless you want it), and that they turn out perfect almost every time. Even my failed batches taught me something, and that fifth batch taught me that persistence in the kitchen pays off in cookies.
If you make these, I would love to hear how they turned out. Did you add white chocolate? Did you try the peppermint version? Did you eat three in a row while sitting on your kitchen floor? No judgment here. Leave a comment below and let me know. And if you share them on social media, tag me so I can see your beautiful crinkles.
Go ahead and preheat that oven. You have cookies to bake.
Frequently Asked Questions
Why did my cookies not crinkle?
The most common reason is not enough powdered sugar coating. Roll the dough balls generously and press the sugar into the dough so it sticks. Another reason could be that the dough was too warm, which causes the cookies to spread before the sugar has a chance to crack. Chilling the dough for 20 to 30 minutes helps.
Can I use natural food coloring instead of gel?
Yes, but the color will be less vibrant. Liquid food coloring requires more drops to achieve a red color, which can add extra moisture to the dough and affect the texture. Gel coloring gives you a deeper color with less liquid, so I recommend it for the best results.
Can I make the dough ahead of time?
Absolutely. You can refrigerate the dough for up to 3 days before baking. Just let it sit at room temperature for 10 to 15 minutes to soften slightly before rolling in powdered sugar. You can also freeze the dough balls for up to 3 months.
Why did my cookies turn out cakey instead of soft?
You likely overmixed the dough after adding the flour, or you used too much flour. Spoon and level your flour instead of scooping directly from the bag. Mix the dough just until the flour disappears, and no more.
Can I use Dutch-process cocoa powder?
You can, but the flavor will be slightly different. Dutch-process cocoa is less acidic and has a milder chocolate flavor. Natural cocoa gives red velvet its classic tangy, slightly sharp chocolate taste. If you use Dutch-process, you might want to add an extra teaspoon of vinegar to maintain the right acidity for the baking soda reaction.
Pin This Recipe!
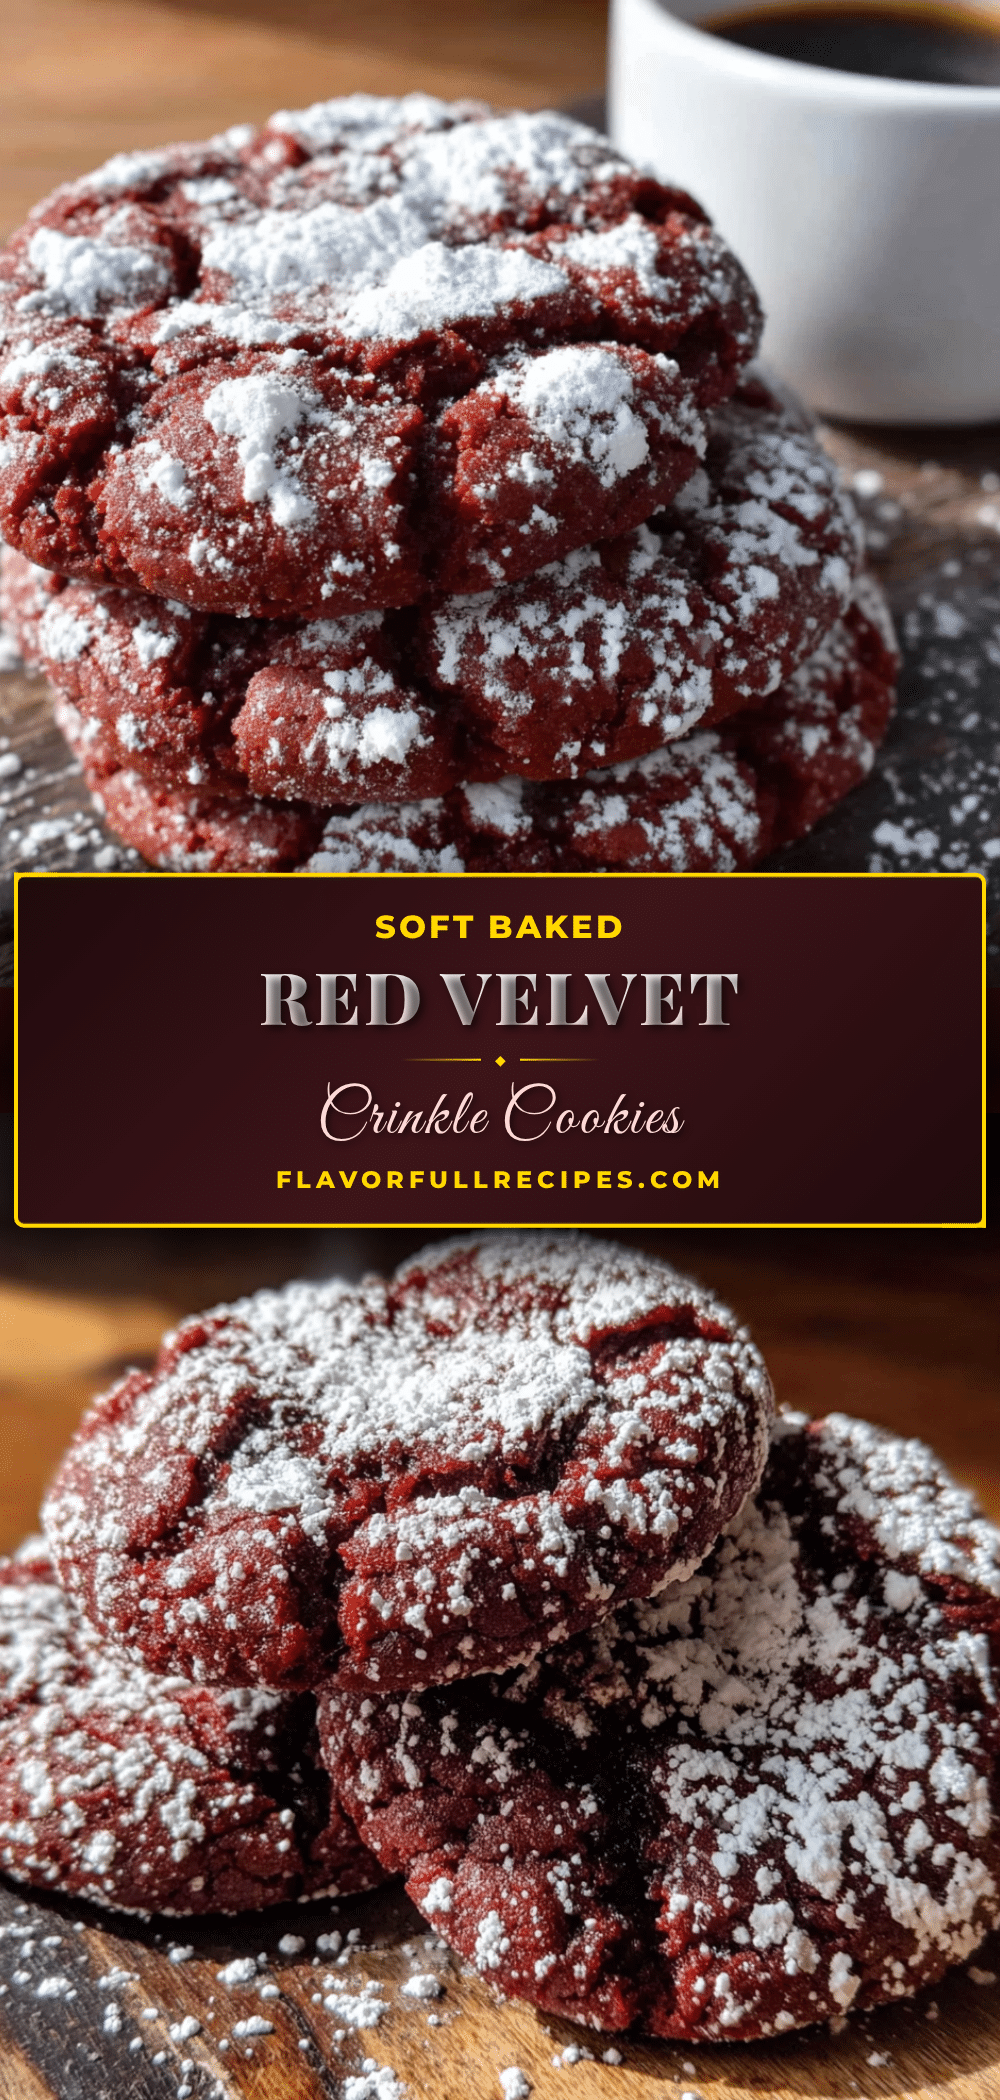

Soft Baked Red Velvet Crinkle Cookies: Easy & Perfect
- Total Time: 27 minutes
- Yield: 24 servings 1x
Description
These soft baked red velvet crinkle cookies are easy to make with one bowl, no chilling required, and feature a tender, fudgy center with a beautiful powdered sugar crinkle. Perfect for any occasion, they taste like a bakery treat but are made with simple pantry ingredients.
Ingredients
- ½ cup (1 stick) unsalted butter, softened to room temperature
- 1 cup granulated sugar
- 1 large egg, at room temperature
- 1 teaspoon vanilla extract
- 2 tablespoons buttermilk, at room temperature
- 1½ cups all-purpose flour, spooned and leveled
- ¼ cup unsweetened cocoa powder (natural, not Dutch-process)
- ½ teaspoon baking soda
- ¼ teaspoon salt
- 1 to 2 tablespoons red gel food coloring
- 1 teaspoon white vinegar
- ½ cup powdered sugar (for rolling)
Instructions
- Preheat oven to 350°F (175°C). Line a baking sheet with parchment paper.
- In a large mixing bowl, beat softened butter and granulated sugar together until light and fluffy, about 2-3 minutes with a hand mixer on medium speed. Scrape sides halfway through.
- Add egg and vanilla extract. Beat on medium speed until fully combined, about 30 seconds.
- Mix in buttermilk, white vinegar, and red food coloring on low speed until evenly distributed. Scrape bowl.
- In a separate small bowl, whisk together flour, cocoa powder, baking soda, and salt.
- Gradually add dry ingredients to wet ingredients, mixing on low speed or folding with a spatula until just combined. Do not overmix.
- Optional: Cover bowl and refrigerate dough for 30 minutes for easier handling.
- Scoop about 1.5 tablespoons of dough per cookie. Roll into smooth balls.
- Place powdered sugar in a shallow bowl. Roll each dough ball generously in powdered sugar until completely coated. Roll twice for best crinkle.
- Place coated dough balls on prepared baking sheet, spacing 2 inches apart.
- Bake at 350°F (175°C) for 10-12 minutes. Cookies should look puffed, cracked, and set around edges but centers still soft.
- Let cookies rest on baking sheet for 5 minutes, then transfer to a wire cooling rack to cool completely.
Notes
Use room temperature ingredients for best texture. Do not overmix dough. Roll dough balls twice in powdered sugar for a beautiful crinkle. Watch bake time closely; pull cookies when edges are set but centers still soft. If cookies spread too much, chill dough for 15-20 minutes before rolling. For gluten-free, use a 1-to-1 gluten-free flour blend with xanthan gum. For vegan, use vegan butter, flax egg, and plant-based milk with vinegar.
- Prep Time: 15 minutes
- Cook Time: 12 minutes
- Category: Dessert
- Cuisine: American
Nutrition
- Serving Size: 1 cookie
- Calories: 135
- Sugar: 14
- Sodium: 85
- Fat: 5
- Saturated Fat: 3
- Carbohydrates: 21
- Fiber: 0.5
- Protein: 2
Keywords: red velvet cookies, crinkle cookies, soft baked cookies, easy cookie recipe, one bowl cookies, red velvet dessert, holiday cookies