Standing in my kitchen at 6:47 AM, staring into the fridge like it owed me money, when my youngest walked in holding a lunchbox with last week’s sad, crusty sandwich still inside. That’s when it hit me — I needed something faster, easier, and honestly, something my kids would actually eat instead of trading for fruit snacks. I grabbed the last of the flour tortillas, a block of cheddar, and some deli turkey that was about to hit its expiration date. No recipe. No plan. Just desperation and a mom who couldn’t face another morning battle over lunch.
I rolled them up tight — turkey, cheese, a smear of cream cheese because why not — and sliced them into these perfect little spirals. My daughter grabbed one before I could even pack it. Then another. Then she asked if I could make “the circle sandwiches” every day. And just like that, the Easy Turkey & Cheese Pinwheel Lunchboxes were born out of pure, sleep-deprived necessity. No fancy ingredients. No complicated steps. Just a tired mom trying to get out the door on time.
These pinwheels have become our lunchbox hero. They’re the kind of thing you make once and immediately wonder why you’ve been wrestling with sandwiches all these years. They hold up perfectly in a lunchbox, they’re completely customizable, and they take maybe ten minutes from start to finish. Honestly, if I can pull these together on a Tuesday morning when I haven’t had coffee yet, anyone can.
Why You’ll Love This Recipe
Let me tell you why these pinwheels have completely changed our lunch game. I’ve tested this recipe about a dozen times — different tortillas, different fillings, different ways of rolling — and this version is the one that works every single time.
- Quick & Easy : We’re talking 10 minutes, maybe 15 if you’re moving slow. Perfect for those mornings when you hit snooze one too many times.
- Simple Ingredients : You probably have everything in your fridge right now. Tortillas, turkey, cheese, and something creamy to hold it together.
- Perfect for Lunchboxes : These hold up way better than sandwiches. No soggy bread, no sad, wilted lettuce. They stay fresh and pretty all morning.
- Crowd-Pleaser : I’ve packed these for school lunches, picnics, road trips, and even playdates. Kids devour them. Adults sneak them when nobody’s looking.
- Unbelievably Customizable : You can switch up the fillings based on what you have or what your kids will actually eat. More on that later.
What makes these different from other pinwheel recipes? It’s the cream cheese spread. Most recipes just layer turkey and cheese and hope for the best. But that thin layer of cream cheese acts like glue — it holds everything together, adds moisture without making things soggy, and gives the pinwheels that perfect, tight spiral shape. I learned this trick after one too many pinwheels that unrolled themselves in a lunchbox. Never again.
This is the kind of recipe that makes you feel like you’ve got your life together, even when you absolutely don’t. It’s comfort food for busy parents — simple, satisfying, and secretly kind of genius.
What Ingredients You Will Need
This recipe uses simple, everyday ingredients that you probably already have in your kitchen. No special trips to fancy grocery stores. No obscure items you’ll use once and forget about. Just straightforward stuff that works.
- Large flour tortillas (burrito size, about 10 inches) — These roll up the easiest and give you nice, big pinwheels. I prefer Mission or Guerrero brand for flexibility. Corn tortillas won’t work here — they crack when you roll them.
- 8 ounces cream cheese, softened to room temperature — This is the secret weapon. It acts as the glue that holds everything together. Make sure it’s really soft, or you’ll end up with lumpy pinwheels. Philadelphia is my go-to, but any block-style cream cheese works fine.
- 1/2 pound deli turkey breast, thinly sliced — Get the good stuff from the deli counter if you can. Pre-packaged works in a pinch, but freshly sliced turkey has better texture and flavor. I like oven-roasted or honey turkey best.
- 4 slices provolone cheese (or your favorite cheese) — Provolone melts just enough to bind everything without getting messy. You can use cheddar, Swiss, mozzarella, or even pepper jack if you want some heat.
- 1/4 cup mayonnaise (optional, but recommended) — Mix this into the cream cheese for extra creaminess and a little tang. Some people skip it, but I think it makes a difference.
- 1/2 teaspoon garlic powder — Just a little something to wake up the flavors. Don’t skip this — it makes the cream cheese spread taste way more interesting.
- 1/4 teaspoon black pepper — Fresh ground if you have it, but regular works too.
- Lettuce leaves (optional) — Romaine or butter lettuce adds a nice crunch. Just make sure to pat them completely dry, or your pinwheels will get soggy.
- Ranch dressing or honey mustard (for dipping, totally optional but highly recommended)
Ingredient Selection Tips: Look for tortillas that are soft and pliable, not dry or stiff. If your tortillas seem a little stiff, microwave them for 10 seconds to make them more flexible. For the turkey, ask the deli counter to slice it thin — not paper thin, but thin enough that it doesn’t create a thick, chewy layer. And please, please use full-fat cream cheese. Low-fat versions have more water and can make your pinwheels soggy. I learned that one the hard way.
Equipment Needed
You don’t need fancy equipment for these pinwheels. Here’s what you’ll actually use:
- A sharp knife — This is non-negotiable. A dull knife will squish your pinwheels and make them look messy. I use my favorite chef’s knife, but a good serrated knife works too.
- A cutting board — Any size works, but bigger is better so you have room to roll.
- A small mixing bowl — For the cream cheese spread. Nothing fancy needed.
- A rubber spatula — For spreading the cream cheese mixture evenly. A butter knife works in a pinch, but a spatula gives you better control.
- Plastic wrap or parchment paper — For wrapping the rolled tortillas before you chill them. This helps them hold their shape.
- A baking sheet or large plate — To hold the wrapped rolls in the fridge.
If you don’t have a good knife, this is the recipe that will make you want one. I used a cheap knife for years and wondered why my pinwheels always looked sad. A sharp knife makes all the difference. You can find decent ones for under $20 — totally worth it.
Preparation Method
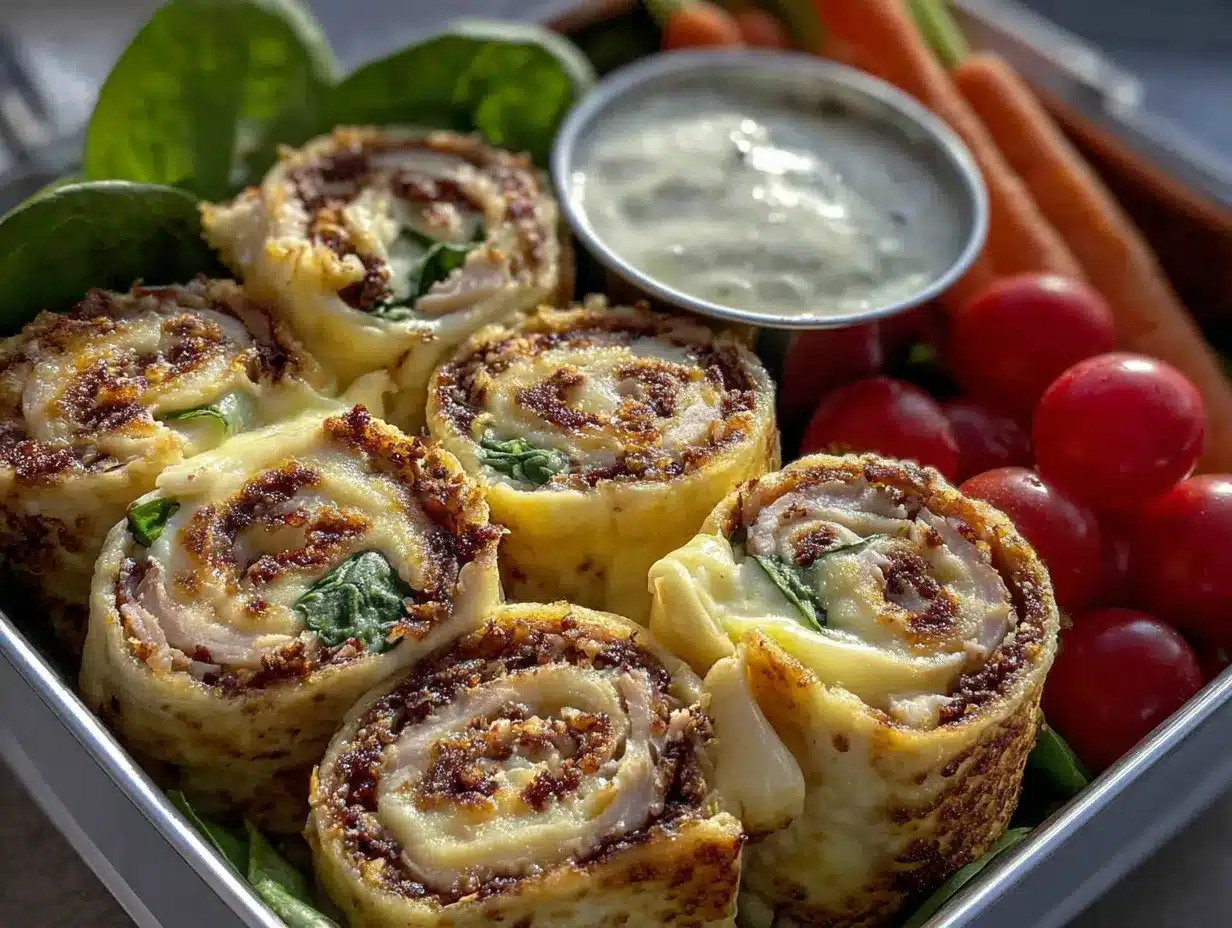
Alright, let’s make these pinwheels. I promise this is easier than making a sandwich once you get the hang of it.
- Soften the cream cheese. Take your cream cheese out of the fridge about 30 minutes before you start. If you forgot (which I do constantly), microwave it for 10-15 seconds. You want it soft but not melted. Trust me on this — cold cream cheese will tear your tortillas.
- Make the spread. In your small bowl, mix the softened cream cheese with the mayonnaise (if using), garlic powder, and black pepper. Stir until it’s completely smooth and combined. Taste it — you want it creamy and slightly tangy with just a hint of garlic. Adjust the seasoning if needed.
- Prep your tortillas. Lay one tortilla flat on your cutting board. If it seems stiff, microwave it for 10 seconds to make it more pliable. You want it flexible enough to roll tightly without cracking.
- Spread the cream cheese mixture. Using your rubber spatula, spread a thin, even layer of the cream cheese mixture all the way to the edges of the tortilla. Don’t go too thick — you want just enough to hold everything together. About 2-3 tablespoons per tortilla is perfect.
- Layer the turkey. Place 2-3 slices of turkey evenly over the cream cheese. Overlap them slightly so there are no bare spots. You want every bite to have turkey in it.
- Add the cheese. Lay one slice of provolone (or your chosen cheese) on top of the turkey. If your cheese slice is square, position it so the corners hang off the edges slightly — this gives you cheese in every bite.
- Optional lettuce layer. If you’re using lettuce, place a few leaves on top of the cheese. Make sure they’re completely dry — wet lettuce is the enemy of good pinwheels.
- Roll it up tight. Starting from one edge, roll the tortilla as tightly as you can without tearing it. Use your fingers to keep everything snug as you roll. Think of it like rolling a sleeping bag — firm and even pressure. When you reach the end, place the seam side down.
- Wrap and chill. Wrap each rolled tortilla tightly in plastic wrap or parchment paper. Twist the ends like a candy wrapper to keep it snug. Place them on a baking sheet or plate and refrigerate for at least 30 minutes. This step is crucial — the chilling sets the cream cheese and makes slicing so much easier. If you skip it, your pinwheels will fall apart.
- Slice and serve. When you’re ready to pack lunches, unwrap the rolls and place them on your cutting board. Using your sharpest knife, slice each roll into 1-inch rounds. A gentle sawing motion works better than pressing straight down. You should get about 6-8 pinwheels per tortilla.
Sensory Cues: When you roll, you should feel the tortilla stretch slightly but not tear. The cream cheese should feel smooth and cool, not sticky. When you slice, you should see clean, tight spirals with no gaps between layers. If your pinwheels look loose or messy, your cream cheese wasn’t soft enough, or you didn’t roll tight enough. It takes practice — my first batch looked like a disaster.
Cooking Tips & Techniques
After making these pinwheels approximately one million times (okay, maybe fifty), I’ve learned a few things the hard way. Here’s what I wish someone had told me:
Don’t overfill. I know it’s tempting to pile on the turkey and cheese, but less is genuinely more here. Too much filling makes the pinwheels bulge and fall apart. Think thin, even layers.
Room temperature cream cheese is not optional. I cannot stress this enough. Cold cream cheese creates lumpy, uneven spreads that tear your tortillas. Set it out ahead of time. If you forget, nuke it for 10 seconds. Your future self will thank you.
Chill time is non-negotiable. I know you’re in a hurry. I get it. But those 30 minutes in the fridge are what transform a messy roll into beautiful, sliceable pinwheels. If you absolutely cannot wait, pop them in the freezer for 10 minutes instead. That works in a pinch.
Use a serrated knife for cleaner cuts. I discovered this by accident when my chef’s knife was dirty. A serrated bread knife actually cuts through the tortilla cleaner without squishing it. The sawing motion does the work for you.
Wipe your knife between cuts. The cream cheese builds up on the blade and makes subsequent cuts messier. A quick wipe with a damp paper towel between each slice keeps things clean.
Make them the night before. Honestly, these taste better the next day. The flavors meld together, the cream cheese sets perfectly, and you save yourself morning chaos. Roll them up, wrap them tight, and slice them in the morning. That’s my pro move.
One mistake I made early on: I used low-fat cream cheese because I was trying to be healthy. Big mistake. The extra water content made my pinwheels soggy and the cream cheese never set properly. Full-fat is the way to go here.
Variations & Adaptations
This recipe is basically a blank canvas. Here are some of my favorite variations:
The Veggie Lover: Skip the turkey and load up on thinly sliced cucumbers, bell peppers, shredded carrots, and spinach. The cream cheese spread keeps everything together beautifully. My vegetarian friends go crazy for this version.
The Spicy Southwest: Swap the provolone for pepper jack cheese, add some sliced jalapeños, and spread a layer of black bean dip under the cream cheese. It’s like a fiesta in a lunchbox. I made these for a road trip and they disappeared before we hit the highway.
The Italian Job: Use salami or pepperoni instead of turkey, swap provolone for mozzarella, and add a thin layer of pesto under the cream cheese. These taste like mini Italian subs. My husband requests these for his work lunches constantly.
The Breakfast Pinwheel: Spread the cream cheese mixture, add scrambled eggs, crumbled bacon, and shredded cheddar. Roll and slice like usual. These are amazing for brunch or breakfast-for-lunch days. I’ve also made these for easy Halloween party snacks and they were a hit.
Gluten-Free Option: Use gluten-free tortillas. They’re a little more fragile, so be extra gentle when rolling. Corn tortillas won’t work — they crack. Look for large gluten-free flour tortillas specifically.
Dairy-Free Option: Use dairy-free cream cheese (Kite Hill makes a good one) and your favorite dairy-free cheese slices. The texture is slightly different, but the flavor is still great.
Low-Carb Option: Use low-carb tortillas or large lettuce leaves. Lettuce wraps are trickier to roll but work beautifully if you’re watching carbs. Just use toothpicks to hold them together.
Serving & Storage Suggestions
These pinwheels are best served cold or at room temperature. They’re perfect straight from the fridge, which makes them ideal for packed lunches.
Serving Ideas: Arrange the pinwheels on a platter with the cut sides facing up so everyone can see those beautiful spirals. Serve with ranch dressing, honey mustard, or even a simple Greek yogurt dip on the side. They’re great for parties, picnics, and game day snacks too.
Storage Instructions: Keep assembled but unsliced pinwheels wrapped tightly in plastic wrap in the refrigerator for up to 3 days. Once sliced, they’re best eaten within 24 hours — the edges start to dry out after that. If you’re meal prepping for the week, I recommend rolling and storing whole, then slicing each morning.
Freezer Tips: You can freeze whole, uncut pinwheels! Wrap them tightly in plastic wrap, then foil, and freeze for up to 2 months. Thaw overnight in the refrigerator before slicing. Don’t freeze them after slicing — the texture gets weird.
Reheating: Honestly, these are meant to be eaten cold. But if you want them warm, pop them in the microwave for 10-15 seconds. The cheese gets melty and the tortilla softens. Just don’t overdo it or they’ll fall apart.
Flavor Development: Here’s a secret — these taste better after they’ve sat in the fridge for a few hours. The flavors meld together, the cream cheese sets perfectly, and everything just comes together. If you can make them the night before, do it.
Nutritional Information & Benefits
Here’s the approximate nutritional breakdown for one pinwheel (based on 8 pinwheels per tortilla):
| Nutrient | Amount Per Pinwheel |
|---|---|
| Calories | 95 |
| Protein | 6g |
| Carbohydrates | 8g |
| Fat | 5g |
| Saturated Fat | 2.5g |
| Fiber | 1g |
| Sodium | 280mg |
Health Benefits: Turkey is a fantastic lean protein source — it’s packed with B vitamins and selenium, which support your immune system. Cream cheese adds calcium for strong bones, and the whole wheat tortillas (if you use them) provide fiber for steady energy. These pinwheels are a balanced lunch option that won’t leave you crashing mid-afternoon.
Dietary Considerations: This recipe is easily adaptable for gluten-free, dairy-free, and low-carb diets. It’s naturally nut-free and egg-free, making it a safe option for school lunchboxes with allergy restrictions. Always check your specific ingredient labels if you’re cooking for someone with allergies.
My Personal Take: I love that these pinwheels feel indulgent but are actually pretty reasonable nutritionally. They’re satisfying without being heavy, and the portion control is built right in. Plus, my kids eat turkey without complaint when it’s rolled up in a cute spiral. That’s a win in my book.
Conclusion
These Easy Turkey & Cheese Pinwheel Lunchboxes have genuinely changed our mornings. What started as a desperate, last-minute experiment has become the lunchbox staple we rely on week after week. They’re fast, they’re flexible, and they actually make packing lunches feel easy instead of like another chore.
I love that this recipe works for so many different situations — school lunches, work lunches, road trips, picnics, and even party platters. You can dress them up or keep them simple, and they always deliver. The cream cheese trick is the kind of small detail that makes a huge difference, and I’m honestly a little proud of figuring it out through trial and error.
Try these pinwheels and make them your own. Add your favorite fillings, experiment with different cheeses, and find your perfect combination. I’d love to hear what variations you come up with — drop a comment below and tell me how they turned out. And if you’re looking for more easy lunch ideas, check out these turkey taco meal prep bowls or these Greek chickpea salad jars for more inspiration.
Happy rolling, friends. Your lunchboxes are about to get a whole lot more interesting.
Frequently Asked Questions
Can I make these pinwheels the night before?
Absolutely! In fact, I recommend it. Make them the night before, wrap them tightly, and slice them in the morning. They actually taste better after the flavors have had time to meld together in the fridge.
Why are my pinwheels falling apart?
This usually happens for one of three reasons: your cream cheese wasn’t soft enough to spread evenly, you didn’t roll tight enough, or you skipped the chilling step. Make sure your cream cheese is at room temperature, roll firmly, and refrigerate for at least 30 minutes before slicing.
Can I use low-fat cream cheese?
I don’t recommend it. Low-fat cream cheese has more water content, which makes your pinwheels soggy and prevents the cream cheese from setting properly. Full-fat cream cheese gives you the best texture and flavor.
How long do these pinwheels last in the fridge?
Whole, unsliced pinwheels last up to 3 days in the refrigerator. Once sliced, they’re best within 24 hours. If you’re meal prepping, keep them whole and slice each morning for the best results.
Can I freeze these pinwheels?
Yes! Freeze whole, uncut pinwheels wrapped tightly in plastic wrap and foil for up to 2 months. Thaw overnight in the refrigerator before slicing. Don’t freeze them after slicing — the texture won’t be as good.
Pin This Recipe!


Easy Turkey & Cheese Pinwheel Lunchboxes: Best Bento Idea
- Total Time: 40 minutes (includes 30 minutes chilling)
- Yield: 4 servings (about 24-32 pinwheels) 1x
Description
These easy turkey and cheese pinwheel lunchboxes are the perfect bento idea for busy mornings. Made with simple ingredients like flour tortillas, cream cheese, deli turkey, and provolone, they come together in just 10 minutes and hold up beautifully in lunchboxes.
Ingredients
- 4 large flour tortillas (burrito size, about 10 inches)
- 8 ounces cream cheese, softened to room temperature
- 1/2 pound deli turkey breast, thinly sliced
- 4 slices provolone cheese (or your favorite cheese)
- 1/4 cup mayonnaise (optional, but recommended)
- 1/2 teaspoon garlic powder
- 1/4 teaspoon black pepper
- Lettuce leaves (optional, for crunch)
- Ranch dressing or honey mustard (for dipping, optional)
Instructions
- Soften the cream cheese: Take your cream cheese out of the fridge about 30 minutes before you start. If you forgot, microwave it for 10-15 seconds. You want it soft but not melted.
- Make the spread: In a small bowl, mix the softened cream cheese with the mayonnaise (if using), garlic powder, and black pepper. Stir until completely smooth and combined. Taste and adjust seasoning if needed.
- Prep your tortillas: Lay one tortilla flat on your cutting board. If it seems stiff, microwave it for 10 seconds to make it more pliable.
- Spread the cream cheese mixture: Using a rubber spatula, spread a thin, even layer of the cream cheese mixture all the way to the edges of the tortilla. About 2-3 tablespoons per tortilla is perfect.
- Layer the turkey: Place 2-3 slices of turkey evenly over the cream cheese. Overlap them slightly so there are no bare spots.
- Add the cheese: Lay one slice of provolone (or your chosen cheese) on top of the turkey. If your cheese slice is square, position it so the corners hang off the edges slightly.
- Optional lettuce layer: If using lettuce, place a few leaves on top of the cheese. Make sure they are completely dry.
- Roll it up tight: Starting from one edge, roll the tortilla as tightly as you can without tearing it. Use your fingers to keep everything snug as you roll. When you reach the end, place the seam side down.
- Wrap and chill: Wrap each rolled tortilla tightly in plastic wrap or parchment paper. Twist the ends like a candy wrapper to keep it snug. Place them on a baking sheet or plate and refrigerate for at least 30 minutes.
- Slice and serve: When ready to pack lunches, unwrap the rolls and place them on your cutting board. Using your sharpest knife, slice each roll into 1-inch rounds. A gentle sawing motion works better than pressing straight down. You should get about 6-8 pinwheels per tortilla.
Notes
Don’t overfill the tortillas. Room temperature cream cheese is essential for smooth spreading. Chilling for at least 30 minutes is non-negotiable for clean slices. Use a serrated knife for cleaner cuts. Wipe the knife between cuts to prevent cream cheese buildup. Make them the night before for best flavor. Full-fat cream cheese is recommended; low-fat can make pinwheels soggy.
- Prep Time: 10 minutes
- Cook Time: 0 minutes
- Category: Lunch
- Cuisine: American
Nutrition
- Serving Size: 1 pinwheel
- Calories: 95
- Sugar: 1
- Sodium: 280
- Fat: 5
- Saturated Fat: 2.5
- Carbohydrates: 8
- Fiber: 1
- Protein: 6
Keywords: turkey pinwheels, cheese pinwheels, lunchbox ideas, bento box, easy lunch, kid-friendly lunch, no-cook lunch, meal prep