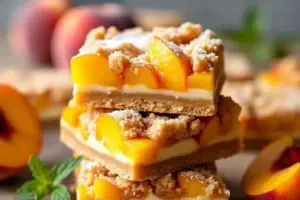
Imagine biting into a luscious dessert that combines the buttery crunch of a cookie base, the velvety richness of pistachio cream, and the creamy decadence of whipped topping. These Pistachio Dream Cookie Bars are a feast for the senses and the ultimate crowd-pleaser for any celebration. Whether you’re hosting a cozy gathering or a lively party, this dessert is bound to steal the spotlight.
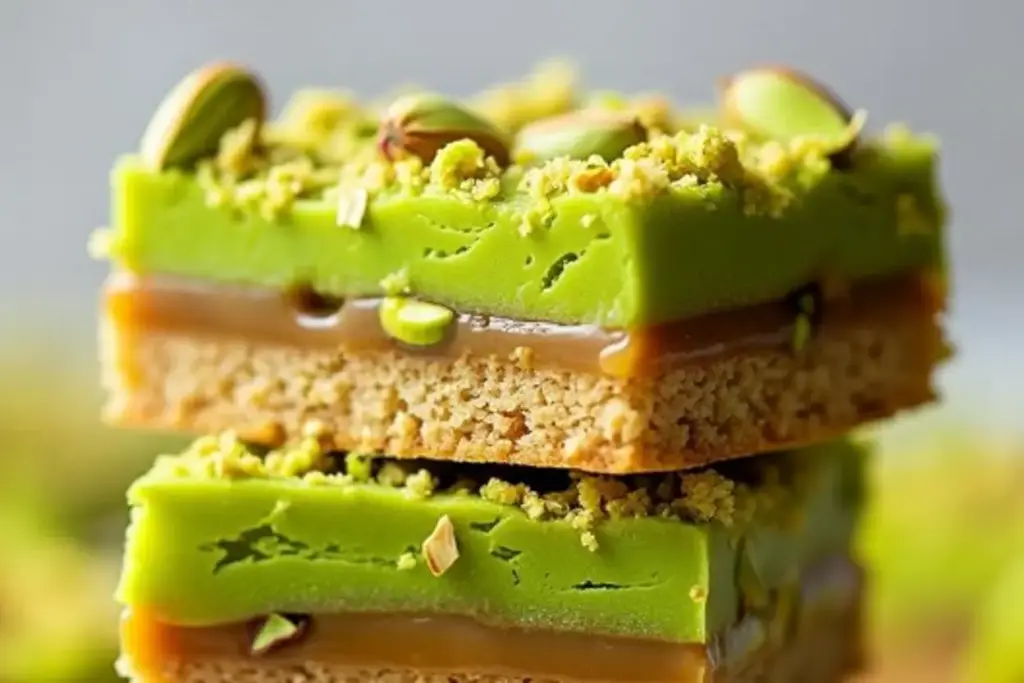
With layers of vibrant green pistachio pudding and dreamy cream cheese filling, these bars are as visually stunning as they are delicious. Trust me, once you serve these beauties, the compliments won’t stop rolling in! But here’s the best part—these bars are surprisingly simple to make, even for those who aren’t pastry pros.
The Story Behind Pistachio Dream Cookie Bars
Pistachio desserts have long held a special place in my heart. Growing up, pistachio ice cream was my dad’s favorite treat, and we’d always have a tub in the freezer. This recipe takes that nostalgic flavor and transforms it into a layered masterpiece that’s perfect for sharing.
The inspiration for these cookie bars came from classic pudding desserts, but I wanted to add a personal twist. The cookie base provides a sturdy, buttery foundation that complements the creamy pistachio layers beautifully. And honestly, who doesn’t love a dessert that combines textures and flavors so effortlessly?
Pistachio Dream Cookie Bars also have a hint of elegance, making them ideal for special occasions like baby showers, birthdays, or even holiday dinners. Plus, their bright green hue is perfect for spring and St. Patrick’s Day celebrations! If you’re looking for a dessert that’s both nostalgic and show-stopping, this recipe is for you.
Ingredient Breakdown
Let’s dive into the ingredients that make these Pistachio Dream Cookie Bars so irresistible. Each component plays a crucial role in creating the perfect balance of flavors and textures.
- Cookie Base: The foundation of this dessert is a simple mixture of graham cracker crumbs and melted butter. For a slightly sweeter twist, you can use crushed shortbread cookies or even vanilla wafers.
- Cream Cheese Layer: Cream cheese, powdered sugar, and a splash of vanilla extract create the rich and tangy middle layer. Make sure your cream cheese is softened for easy mixing.
- Pistachio Pudding: Instant pistachio pudding is the star of the show! Its vibrant green color and nutty-sweet flavor set this dessert apart. If you prefer a homemade pudding, go for it—but the instant mix is quick and reliable.
- Whipped Topping: A layer of whipped topping (like Cool Whip) adds a light, airy finish. If you’re feeling fancy, you can whip your own cream for an extra touch of luxury.
- Pistachios: Roughly chopped pistachios sprinkled on top provide a satisfying crunch and an extra pop of flavor.
If you’re looking for substitutions, try almond pudding instead of pistachio for a nutty variation. For a gluten-free version, use crushed gluten-free cookies for the base. And if you’re avoiding dairy, there are plant-based cream cheese and whipped topping options available!
Equipment Needed
You don’t need a fancy setup for this recipe—just a few basic kitchen tools will do:
- Mixing Bowls: You’ll need bowls for mixing the different layers.
- 9×13 Baking Dish: This size is perfect for building the layers.
- Hand Mixer or Stand Mixer: To ensure your cream cheese layer is smooth and fluffy.
- Rubber Spatula: For spreading each layer evenly.
- Measuring Cups and Spoons: Precision matters when creating layered desserts!
If you don’t have a hand mixer, don’t sweat it. A sturdy whisk and some elbow grease will work just fine. For budget-friendly options, check out local thrift stores for gently used baking dishes and mixers.
Preparation Method
- Prepare the Cookie Base: Combine 2 cups (200g) of graham cracker crumbs with 1/2 cup (113g) of melted butter. Press the mixture firmly into the bottom of a 9×13 baking dish. Chill in the refrigerator while you prepare the next layer.
- Make the Cream Cheese Layer: Beat 8oz (226g) of softened cream cheese with 1 cup (120g) of powdered sugar and 1 teaspoon of vanilla extract until smooth. Spread this mixture evenly over the chilled cookie base.
- Prepare the Pistachio Pudding: Whisk together 2 packets (3.4oz each) of instant pistachio pudding with 3 cups (720ml) of cold milk. Let it set for 5 minutes, then spread it over the cream cheese layer.
- Add the Whipped Topping: Spread 8oz (226g) of whipped topping over the pudding layer. Smooth it out with a spatula for a clean finish.
- Top with Pistachios: Sprinkle 1/2 cup (60g) of chopped pistachios over the whipped topping for a crunchy garnish.
- Chill and Serve: Refrigerate the bars for at least 4 hours, or overnight, to allow the layers to set. Slice into squares and serve chilled.
Pro tip: Use parchment paper in your baking dish for easy removal and clean slicing!
Cooking Tips & Techniques
Here are a few tips to make sure your Pistachio Dream Cookie Bars turn out perfectly:
- Softened Cream Cheese: Take your cream cheese out of the fridge at least 30 minutes before mixing to avoid lumps.
- Cookie Base Tips: Press the base firmly into the dish using the bottom of a glass or measuring cup for a smooth, even surface.
- Pudding Consistency: Make sure your pudding thickens before spreading it over the cream cheese layer. If it’s too runny, the layers won’t hold.
- Chill Time: Don’t rush the chilling process—overnight is ideal for the best texture and flavor.
- Clean Cuts: Use a sharp knife and wipe it clean between cuts for neat squares.
Trust me, I’ve learned these lessons the hard way—especially the importance of chilling. Patience really pays off here!
Variations & Adaptations
Looking to customize your cookie bars? Here are some fun ideas:
- Chocolate Pistachio Bars: Add a layer of melted chocolate between the cream cheese and pudding layers for a decadent twist.
- Holiday Version: Use red and green sprinkles on top for a festive touch during Christmas.
- Nut-Free Option: Skip the pistachios and use crushed pretzels or shredded coconut for a crunchy topping instead.
- Fruit Layer: Add a layer of sliced strawberries or raspberries on top of the pudding for a fruity burst.
Personally, I love the chocolate variation—it’s perfect for chocoholics like me!
Serving & Storage Suggestions
Here’s how to serve and store your Pistachio Dream Cookie Bars:
- Serving: Serve the bars chilled for the best texture. Pair them with a cup of coffee or a glass of cold milk for a delightful combination.
- Storage: Cover the dish tightly with plastic wrap and store in the refrigerator for up to 4 days.
- Freezing: You can freeze the bars for up to 2 months. Wrap them individually for easy grab-and-go treats.
- Reheating: Simply thaw frozen bars in the fridge overnight—no reheating is needed!
Fun fact: The flavors intensify after a day in the fridge, making them even tastier!
Nutritional Information & Benefits
Here’s a quick rundown of the nutritional values for a serving of Pistachio Dream Cookie Bars (approx. 1 square):
- Calories: 250
- Fat: 15g
- Sugar: 12g
- Protein: 3g
Pistachios are packed with healthy fats and protein, making them a heart-friendly addition to this dessert. Keep in mind, though, that these bars are a treat—not an everyday snack!
Conclusion
If you’re looking for a dessert that’s both visually stunning and downright delicious, these Pistachio Dream Cookie Bars are the answer. With their creamy layers and nutty crunch, they’re guaranteed to be the star of any party. Plus, they’re easy enough to whip up without breaking a sweat!
I love this recipe because it’s versatile and always brings a smile to people’s faces. What’s not to love about a dessert that’s equal parts beautiful and tasty? Try making them and let me know how they turned out. Don’t forget to share your own variations in the comments below—I’d love to hear your ideas!
So go ahead, grab your mixing bowls, and start layering! You’ve got a show-stopping dessert waiting to happen.
FAQs
Can I use homemade pistachio pudding instead of instant?
Yes, you can use homemade pistachio pudding for a more authentic flavor. Just ensure it’s thick enough to hold the layers.
Can I make these bars ahead of time?
Absolutely! In fact, they taste even better after chilling overnight as the flavors meld together.
Can I substitute Cool Whip with whipped cream?
Yes, fresh whipped cream works beautifully. Just make sure to stabilize it with a bit of powdered sugar.
What’s the best way to slice these bars neatly?
Chill the bars thoroughly and use a sharp knife. Wipe the blade clean between cuts for perfect squares.
Are these bars gluten-free?
They can be! Use gluten-free cookies for the base and ensure all other ingredients are gluten-free.