It was just past ten on a Tuesday night, and the only thing I wanted was a single warm cookie. Not a batch of two dozen, not something I’d have to freeze or give away to neighbors. Just one. Maybe two. I’d spent the evening testing a heavy cream sauce for a Cajun chicken alfredo that needed a lot of salt adjustments, and my kitchen smelled like garlic and paprika. Not cookie vibes at all. But that craving hit anyway. The kind of craving that sits in your chest and won’t leave until you do something about it. So I pulled out a single stick of butter and decided to brown it. Because if I was going to have a cookie at ten o’clock on a weeknight, it was going to be worth it.
This small batch brown butter chocolate chip cookies recipe came from that exact moment. I didn’t want a project. I didn’t want to wash my stand mixer. I wanted something that tasted like it came from a bakery window but only made enough for one person to feel perfectly satisfied. The brown butter adds this nutty, almost toffee-like depth that regular cookies just can’t touch (honestly, it’s a game changer). And the ratio of dough to chocolate is so important here. I didn’t want a cookie that was mostly dough with a few chips. I wanted every single bite to have chocolate in it. So I packed them in.
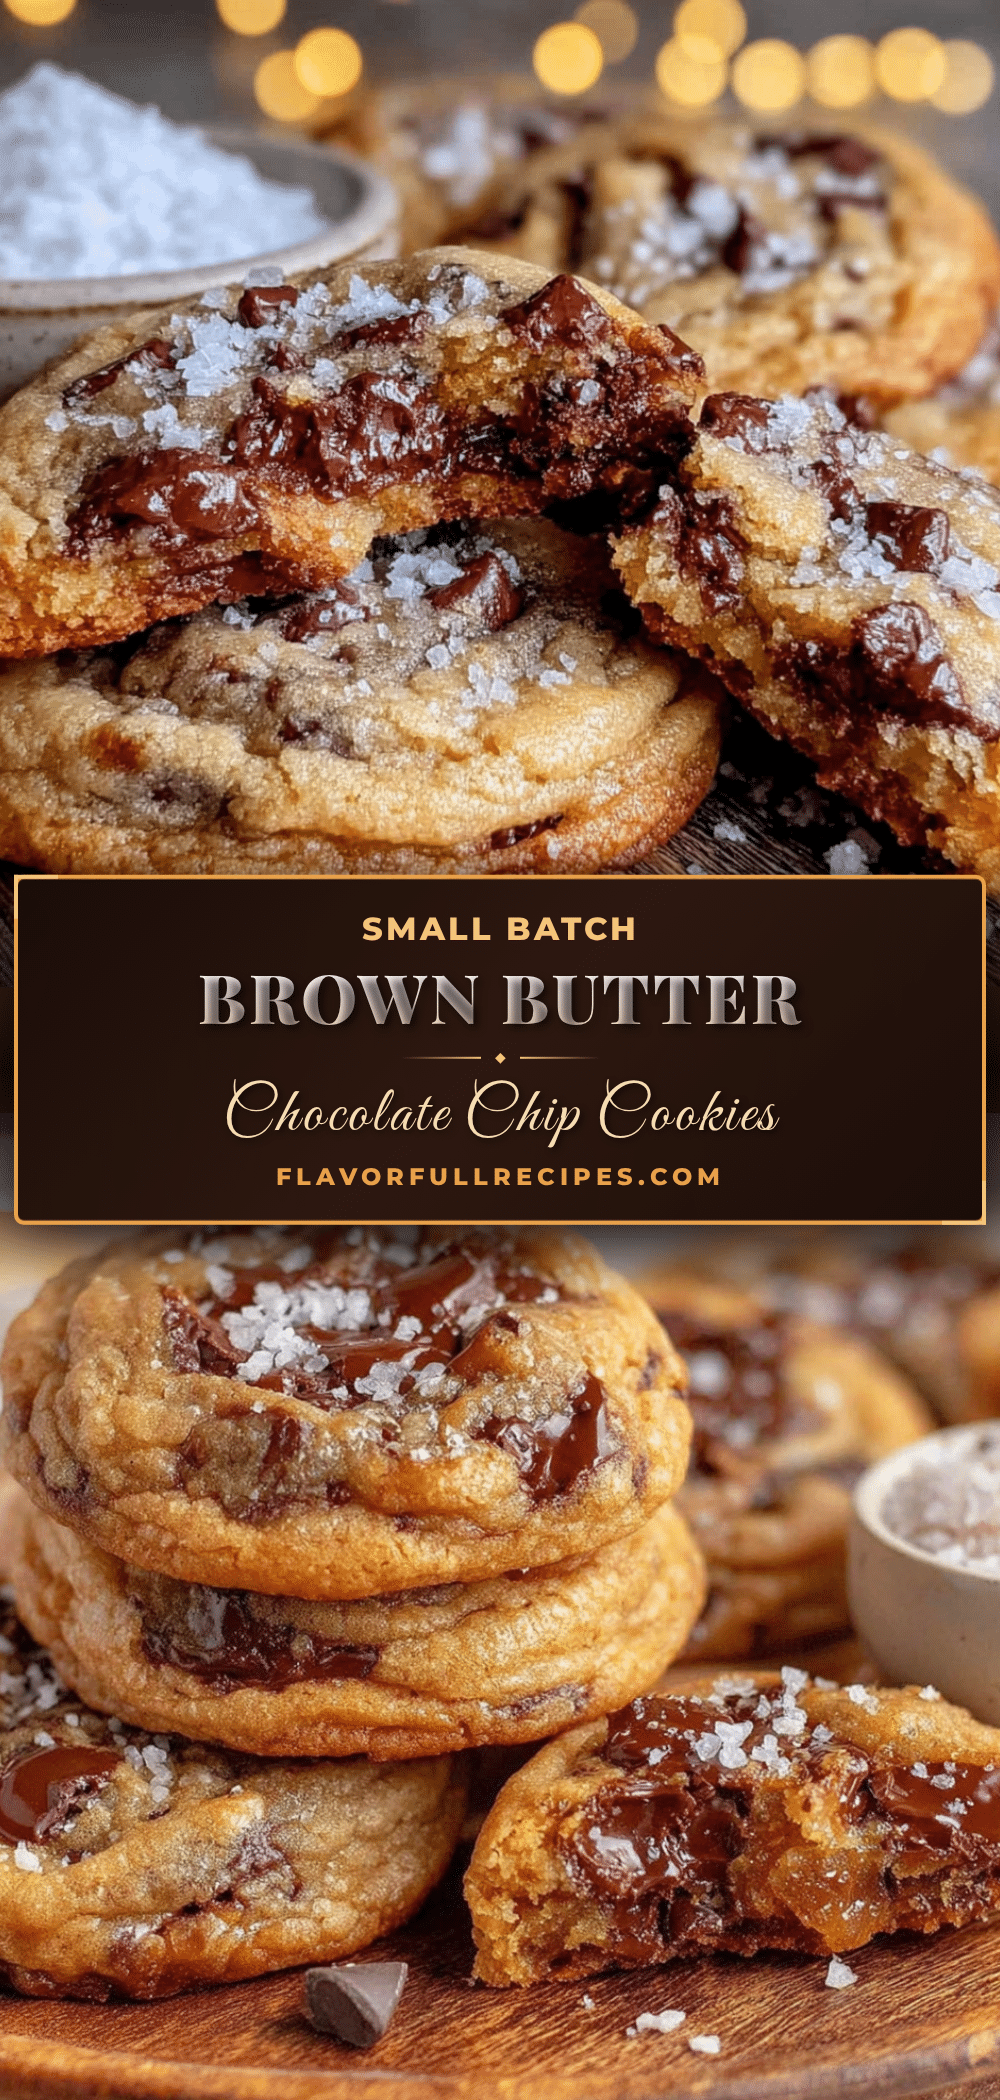
What I love about this recipe is how uncomplicated it is. You don’t need a mixer. You don’t need to chill the dough for hours. You just need a skillet, a bowl, and about twenty minutes of your time. The result is a cookie that’s crispy around the edges, soft and chewy in the middle, and full of that deep, buttery flavor that only browning can give you. It’s the kind of cookie that makes you close your eyes after the first bite. And honestly, that’s exactly what I needed that night.
Why You’ll Love This Recipe
I’ve tested this recipe about seven times to get it just right. The first batch was too flat. The second was too cakey. The third had the right texture but the brown butter flavor was barely there. But the fourth batch? That was the one. Here is why I think you will love this version too.
- Small Batch, Zero Waste: This recipe makes exactly 6 to 8 cookies. No leftovers sitting around begging to be eaten. Perfect for when you want a treat without committing to a full batch.
- Simple Ingredients: You probably have everything in your kitchen right now. Butter, sugar, an egg, flour, chocolate chips. No weird extracts or specialty flours.
- No Mixer Required: Everything comes together in one bowl with a whisk and a spatula. Less cleanup means more time eating cookies.
- Brown Butter Magic: That nutty, caramelized flavor takes these cookies from good to absolutely unforgettable. It’s a simple technique that makes a huge difference.
- Quick Enough for a Weeknight: From start to finish, you’re looking at about 25 minutes. No chilling required. Just mix, scoop, and bake.
- Perfect Texture: Crispy edges with a soft, chewy center. The kind of cookie that stays soft for days (if they last that long).
What sets this recipe apart is the way the brown butter interacts with the sugars. The toasty notes from the butter pair perfectly with the caramel undertones of brown sugar, and the little bit of milk in the dough keeps everything tender. I’ve made a lot of cookies in my life, and this small batch version is the one I keep coming back to. It just works.
What Ingredients You Will Need
This recipe uses simple, everyday ingredients, but each one plays an important role in creating that perfect cookie texture and flavor. Here is what you need and why it matters.
- Unsalted butter, 5 tablespoons (70g): You will brown this butter, so starting with unsalted gives you full control over the salt level. I prefer using a European-style butter like Kerrygold for browning because it has a lower water content and higher fat content, which means richer flavor and better browning. But any unsalted butter works fine.
- All-purpose flour, ¾ cup (96g): Standard all-purpose flour gives these cookies the perfect structure. Not too cakey, not too flat. Spoon and level your flour for accuracy. Scooping directly from the bag can pack in too much flour and make your cookies dry.
- Granulated sugar, 3 tablespoons (38g): This adds sweetness and helps create those crispy edges. The granulated sugar also aids in spreading during baking.
- Light brown sugar, ¼ cup packed (50g): Brown sugar brings moisture and that deep, molasses-like flavor that pairs so well with brown butter. Pack it firmly into your measuring cup for the right measurement.
- Large egg yolk, 1: Using just the yolk instead of the whole egg gives you a richer, more tender cookie. The yolk adds fat and emulsifiers that keep the dough soft. Save the egg white for breakfast or add it to a peanut butter banana overnight oats recipe.
- Whole milk, 1 tablespoon: This replaces the moisture you would normally get from the egg white. It keeps the dough from being too dry without adding extra protein that could make the cookies tough.
- Vanilla extract, ½ teaspoon: Use real vanilla extract, not imitation. It rounds out the flavors and makes the brown butter taste even nuttier. I like Nielsen-Massey for everyday baking.
- Baking soda, ¼ teaspoon: This helps the cookies spread just enough and gives them that slight lift. Make sure your baking soda is fresh. If it’s been sitting in your cabinet for over a year, it might not work as well.
- Salt, ¼ teaspoon: Salt balances the sweetness and enhances the brown butter flavor. I use fine sea salt for the dough and sometimes sprinkle a little flaky sea salt on top before baking.
- Semi-sweet chocolate chips, ½ cup (85g): Semi-sweet is my go-to because it’s not too sweet and not too bitter. But you can use dark chocolate chips, milk chocolate chips, or even chopped chocolate bars. I personally love using a mix of chips and chopped chocolate for different melt textures. Guittard or Ghirardelli are my preferred brands.
Optional Add-Ins
- Flaky sea salt for topping: A sprinkle right before baking adds a wonderful salty crunch that contrasts with the sweet, buttery cookie.
- Chopped nuts: About ¼ cup of toasted pecans or walnuts adds great texture. I’ve done this a few times and it works beautifully.
Equipment Needed

You do not need fancy equipment for this recipe. Here is what you will need.
- Small saucepan or skillet: For browning the butter. A light-colored pan is ideal because it lets you see the butter change color. I use a stainless steel saucepan, but any small pan works.
- Mixing bowl: A medium-sized bowl is perfect. Glass or stainless steel works best because they don’t retain heat.
- Whisk: For mixing the sugars and butter together. A balloon whisk is my favorite for this.
- Rubber spatula: For folding in the chocolate chips and scraping down the bowl.
- Baking sheet: A standard half-sheet pan works great. No need to line it with parchment if you have a non-stick surface, but parchment makes cleanup easier.
- Cookie scoop or spoon: A 1.5-tablespoon cookie scoop gives you evenly sized cookies. If you don’t have one, just use a regular spoon and eyeball it.
- Cooling rack: Optional but helpful for letting the cookies cool evenly without soggy bottoms.
I have made these cookies with a cheap baking sheet from the grocery store and they turned out fine. The browning of the butter is the most important step, so focus on that. If you have a kitchen scale, I recommend using it for the flour and butter. It’s more accurate and gives you consistent results every time.
Preparation Method
This recipe moves quickly, so having everything measured and ready before you start is a good idea. Here is how to make these perfect small batch brown butter chocolate chip cookies.
Step 1: Brown the Butter
Place the 5 tablespoons of unsalted butter in a small saucepan over medium heat. Let it melt completely, then continue cooking, swirling the pan occasionally. The butter will start to foam and bubble. After a few minutes, you will see brown specks forming at the bottom of the pan. The butter will smell nutty and toasty. This usually takes about 4 to 5 minutes. Once it reaches a deep amber color and smells fragrant, remove it from the heat immediately. Pour the browned butter into a heatproof mixing bowl, making sure to scrape all those brown bits into the bowl. That is where all the flavor is. Let it cool for about 5 minutes.
Step 2: Mix the Sugars and Butter
Add the 3 tablespoons of granulated sugar and ¼ cup packed light brown sugar to the warm browned butter. Whisk them together until the mixture is smooth and well combined. It should look like a thick paste. The warm butter will help dissolve some of the sugar, which gives the cookies a better texture. Let this mixture sit for about 2 minutes to cool slightly.
Step 3: Add the Egg Yolk, Milk, and Vanilla
Add the egg yolk, 1 tablespoon of whole milk, and ½ teaspoon of vanilla extract to the bowl. Whisk vigorously until everything is fully incorporated and the mixture looks smooth and slightly thickened. It might look a little separated at first, but keep whisking and it will come together.
Step 4: Combine the Dry Ingredients
In a separate small bowl, whisk together ¾ cup of all-purpose flour, ¼ teaspoon of baking soda, and ¼ teaspoon of salt. Make sure the baking soda is evenly distributed so your cookies rise evenly.
Step 5: Mix the Dough
Pour the dry ingredients into the wet ingredients. Use a rubber spatula to fold everything together until just combined. Do not overmix. A few streaks of flour are okay. Overmixing will develop the gluten and make your cookies tough. Fold in the ½ cup of semi-sweet chocolate chips. The dough will be thick and slightly sticky. That is exactly what you want.
Step 6: Scoop and Bake
Preheat your oven to 350°F (175°C). Line a baking sheet with parchment paper. Scoop the dough into 6 to 8 equal portions, using about 1.5 tablespoons of dough per cookie. Place them about 2 inches apart on the baking sheet. If you want, sprinkle a little flaky sea salt on top of each dough ball. Bake for 10 to 12 minutes, or until the edges are golden brown and the centers look slightly underdone. The cookies will continue to set as they cool. Remove from the oven and let them cool on the baking sheet for 5 minutes before transferring to a cooling rack.
Cooking Tips & Techniques
I have made a lot of mistakes with small batch cookies. Here are the things I learned so you don’t have to make them yourself.
Watch the butter carefully. Brown butter goes from perfect to burnt very quickly. Once you see those brown specks form and smell that nutty aroma, pull it off the heat. I have a habit of walking away from the stove, and I have burned butter more times than I want to admit. Set a timer if you need to.
Let the butter cool before adding the egg yolk. If the butter is too hot, it will cook the egg yolk and you will end up with scrambled eggs in your cookie dough. Let it sit for at least 5 minutes. The bowl should feel warm but not hot to the touch.
Do not skip the milk. I tried making these cookies without the milk once because I thought it wouldn’t matter. The dough was dry and crumbly, and the cookies came out dense. That tablespoon of milk makes a real difference in keeping the dough soft and workable.
Use a cookie scoop for even baking. Uneven cookie sizes mean some will be done before others. A scoop gives you uniform cookies that bake at the same rate. If you don’t have one, use a measuring spoon to portion the dough.
Underbake them slightly. The best cookies come out of the oven looking a little underdone in the middle. They will continue to bake on the hot baking sheet while they cool. If you wait until they look fully baked in the oven, they will be overbaked and crunchy all the way through.
Let them cool on the pan. Transferring cookies too early can cause them to fall apart. Give them at least 5 minutes on the baking sheet to set up before moving them to a rack.
Variations & Adaptations
This small batch recipe is easy to adapt. Here are some variations I have tried and loved.
Gluten-Free Version: Substitute the all-purpose flour with a 1-to-1 gluten-free baking flour blend. I have used King Arthur Measure for Measure and it worked perfectly. The cookies were slightly more delicate but still delicious.
Double Chocolate Chip: Replace 1 tablespoon of the flour with 1 tablespoon of unsweetened cocoa powder. Use dark chocolate chips instead of semi-sweet. The brown butter and chocolate combination is incredible.
Brown Butter Toffee: Add ¼ cup of chopped toffee bits along with the chocolate chips. The toffee gets all melty and crunchy in the oven. This is my personal favorite variation for fall.
Vegan Adaptation: Use vegan butter (I like Miyoko’s for browning) and substitute the egg yolk with 1 tablespoon of aquafaba (the liquid from a can of chickpeas) mixed with ½ teaspoon of cornstarch. Use plant-based milk instead of whole milk. The texture is slightly different but still very good.
Nutty Addition: Fold in ¼ cup of toasted and chopped pecans or walnuts along with the chocolate chips. Toast the nuts first in a dry skillet for about 3 minutes to bring out their flavor.
Sea Salt Finish: This is not really a variation, but it is worth mentioning. A sprinkle of flaky sea salt right before baking makes these cookies taste like they came from a fancy bakery. Maldon is my go-to for this.
Serving & Storage Suggestions
These cookies are best served warm, straight from the oven. The chocolate is still melty and the edges are perfectly crisp. But they are also excellent at room temperature the next day.
Serving Ideas: Serve them with a cold glass of milk, a hot cup of coffee, or a scoop of vanilla ice cream for an extra treat. They also pair beautifully with a pumpkin spice latte in the fall. For a dessert platter, arrange them alongside fresh berries and a dollop of whipped cream.
Storage: Store leftover cookies in an airtight container at room temperature for up to 3 days. Place a slice of bread in the container to keep them soft. The bread absorbs excess air and releases moisture. Replace the bread slice every day if the cookies last that long.
Freezing: You can freeze the baked cookies for up to 2 months. Wrap them individually in plastic wrap and place them in a freezer bag. Thaw at room temperature for about 30 minutes. You can also freeze the raw dough. Scoop the dough into balls, place them on a baking sheet, and freeze until solid. Transfer the frozen dough balls to a freezer bag. Bake from frozen, adding 2 to 3 minutes to the baking time.
Reheating: Pop a cookie in the microwave for about 10 seconds to get that fresh-from-the-oven texture. Or reheat them in a 300°F oven for 5 minutes if you want the edges to crisp up again.
Nutritional Information & Benefits
Here is the estimated nutritional information for one cookie (based on 8 cookies per batch). These values are approximate and will vary based on specific ingredients used.
| Nutrient | Amount Per Cookie |
|---|---|
| Calories | 210 |
| Total Fat | 12g |
| Saturated Fat | 7g |
| Cholesterol | 45mg |
| Sodium | 115mg |
| Total Carbohydrates | 25g |
| Dietary Fiber | 1g |
| Sugars | 16g |
| Protein | 3g |
These cookies are a treat, but they do have some redeeming qualities. The brown butter provides a small amount of vitamin A and healthy fats. Dark chocolate contains antioxidants and can help satisfy a sweet craving with a smaller portion. The small batch format naturally helps with portion control. You get just enough to feel satisfied without having a whole container of cookies staring at you. This recipe is not gluten-free or dairy-free in its standard form, but the adaptations above make it work for different dietary needs.
Conclusion
These perfect small batch brown butter chocolate chip cookies are exactly what you need when a cookie craving hits but you don’t want to commit to a full batch. They come together quickly, use simple ingredients, and deliver that deep, nutty brown butter flavor that makes every bite feel special. The texture is spot on. Crispy edges, soft centers, and plenty of melted chocolate in every cookie.
I love this recipe because it feels like a little secret. Not everyone knows how easy it is to brown butter, and not everyone realizes you can make just six cookies without any fuss. But now you do. And you can make them whenever you want. Customize them with your favorite mix-ins, add a sprinkle of sea salt, or keep them classic. However you make them, they will be worth it.
I would love to hear how these turn out for you. Leave a comment below and let me know if you tried any variations. Did you add toffee bits? Did you go the double chocolate route? Share a photo if you made them. Happy baking, friend.
Frequently Asked Questions
Can I use salted butter instead of unsalted?
Yes, you can. Just reduce the added salt in the dough to a pinch or omit it entirely. The brown butter will still work the same way. Keep in mind that salted butter can vary in salt content between brands, so taste the dough if you are unsure.
Why did my cookies turn out flat?
Flat cookies usually happen for a few reasons. The butter might have been too warm when you mixed the dough, causing it to spread too much in the oven. Or your baking soda might be old and not active enough. Make sure your butter has cooled slightly after browning, and check that your baking soda is fresh.
Can I double this recipe?
Absolutely. Double all the ingredients and proceed the same way. You will need a larger pan for browning the butter, and you might need to bake the cookies in two batches. The baking time stays about the same.
Do I really need to let the cookies cool on the baking sheet?
Yes, this step is important. The cookies are very soft when they come out of the oven, and they need time to set up. Moving them too early can cause them to break apart. Five minutes on the pan is usually enough.
Can I make the dough ahead of time?
Yes, you can refrigerate the dough for up to 48 hours. Cover the bowl tightly with plastic wrap. The dough will be firmer when cold, so let it sit at room temperature for about 10 minutes before scooping and baking. Chilling the dough can actually improve the flavor as the ingredients have time to meld together.
Pin This Recipe!

Perfect Small Batch Brown Butter Chocolate Chip Cookies
- Total Time: 25 minutes
- Yield: 6-8 cookies 1x
Description
These small batch brown butter chocolate chip cookies are crispy around the edges, soft and chewy in the middle, and full of deep, nutty brown butter flavor. Made with simple ingredients and no mixer required, they come together in about 25 minutes for a perfect weeknight treat.
Ingredients
- 5 tablespoons (70g) unsalted butter
- 3/4 cup (96g) all-purpose flour
- 3 tablespoons (38g) granulated sugar
- 1/4 cup packed (50g) light brown sugar
- 1 large egg yolk
- 1 tablespoon whole milk
- 1/2 teaspoon vanilla extract
- 1/4 teaspoon baking soda
- 1/4 teaspoon salt
- 1/2 cup (85g) semi-sweet chocolate chips
- Flaky sea salt for topping (optional)
- 1/4 cup chopped toasted pecans or walnuts (optional)
Instructions
- Brown the butter: Place 5 tablespoons unsalted butter in a small saucepan over medium heat. Melt completely, then continue cooking, swirling occasionally, until butter foams, turns deep amber, and smells nutty (about 4-5 minutes). Immediately remove from heat and pour into a heatproof mixing bowl, scraping all brown bits. Let cool 5 minutes.
- Mix the sugars and butter: Add 3 tablespoons granulated sugar and 1/4 cup packed light brown sugar to the warm browned butter. Whisk until smooth and well combined. Let sit 2 minutes to cool slightly.
- Add the egg yolk, milk, and vanilla: Add egg yolk, 1 tablespoon whole milk, and 1/2 teaspoon vanilla extract. Whisk vigorously until smooth and slightly thickened.
- Combine the dry ingredients: In a separate small bowl, whisk together 3/4 cup all-purpose flour, 1/4 teaspoon baking soda, and 1/4 teaspoon salt.
- Mix the dough: Pour dry ingredients into wet ingredients. Fold with a rubber spatula until just combined (a few streaks of flour are okay). Fold in 1/2 cup semi-sweet chocolate chips. Dough will be thick and slightly sticky.
- Scoop and bake: Preheat oven to 350°F (175°C). Line a baking sheet with parchment paper. Scoop dough into 6-8 equal portions (about 1.5 tablespoons each), placing 2 inches apart. Sprinkle with flaky sea salt if desired. Bake 10-12 minutes until edges are golden and centers look slightly underdone. Cool on baking sheet 5 minutes, then transfer to a cooling rack.
Notes
Watch the butter carefully as it browns; it goes from perfect to burnt quickly. Let the butter cool before adding the egg yolk to avoid scrambling. Underbake slightly for best texture. Let cookies cool on the baking sheet for 5 minutes before transferring.
- Prep Time: 10 minutes
- Cook Time: 12 minutes
- Category: Dessert
- Cuisine: American
Nutrition
- Serving Size: 1 cookie
- Calories: 210
- Sugar: 16
- Sodium: 115
- Fat: 12
- Saturated Fat: 7
- Carbohydrates: 25
- Fiber: 1
- Protein: 3
Keywords: small batch cookies, brown butter chocolate chip cookies, easy cookie recipe, no mixer cookies, weeknight dessert