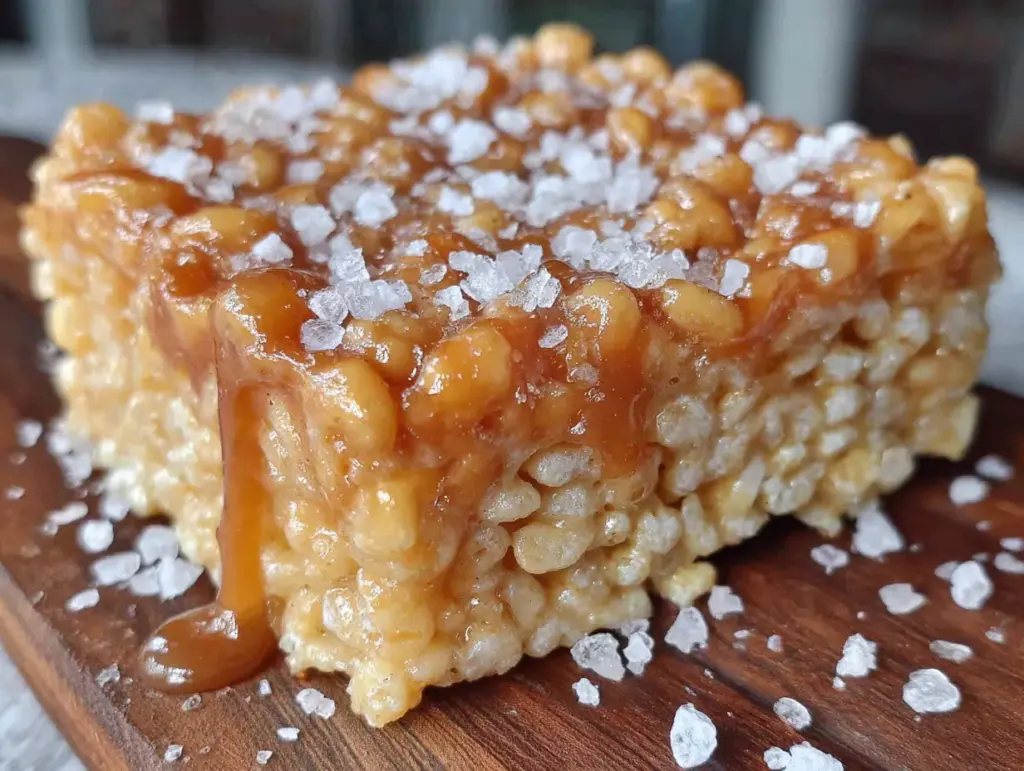
The can of pumpkin puree sat on my counter for three days, staring at me every time I walked past. I’d bought it for a pie I never got around to making, and now it felt like a challenge. My kid had a friend over, and they were hungry in that specific way where nothing sounds good but everything sounds like a snack. I opened the pantry, and there they were—the big box of Rice Krispies cereal I’d bought for a baking project that also never happened. Marshmallows were in the cabinet. Butter, obviously. And then I saw the bag of soft caramel candies I’d picked up on a whim at the checkout. That’s when the idea hit me—why not make the classic treat but give it a fall makeover? These Perfect Salted Caramel Pumpkin Rice Krispie Treats were born out of pure pantry desperation, and honestly? They turned out way better than the pie would have.
I started melting butter and marshmallows, and the smell alone got everyone wandering into the kitchen. The pumpkin puree swirled in like an afterthought, and the caramel melted into everything, turning the whole pot a gorgeous golden color. I’ll be honest—I wasn’t sure the texture would hold. Pumpkin adds moisture, and Rice Krispie treats are supposed to be sturdy, right? But I crossed my fingers, pressed them into the pan, and sprinkled flaky sea salt on top. The first bite was that kind of quiet moment where you just stare at the food in your hand. It was chewy, slightly soft, with ribbons of caramel and that salty finish that keeps you reaching for another square. My kid’s friend asked for the recipe before she left. That’s how you know it’s a keeper.
These Perfect Salted Caramel Pumpkin Rice Krispie Treats aren’t just another fall dessert. They’re the thing you make when you need a quick win—something that looks impressive but takes fifteen minutes of actual work. They’ve got that nostalgic crunch we all love, but with a warm, spiced twist that makes them feel special. If you’re looking for an easy way to bring fall flavors into your kitchen without turning on the oven for an hour, this is it. Trust me on this one.
Why You’ll Love This Recipe
I’ve made a lot of Rice Krispie treats in my life—birthday parties, bake sales, late-night cravings. But these Pumpkin Rice Krispie Treats are the version I keep coming back to. Here’s why they’re different.
- Quick & Easy : From start to finish, you’re looking at about 20 minutes. That’s it. No complicated steps, no fancy equipment, just a pot and a spatula.
- Simple Ingredients : Everything on the list is either in your pantry already or easy to find at any grocery store. No hunting down obscure baking supplies.
- Perfect for Fall Gatherings : These are made for Halloween parties, Thanksgiving dessert tables, or cozy movie nights when you want something sweet without the fuss.
- Crowd-Pleaser : Kids love the familiar crunch, and adults appreciate the sophisticated caramel and sea salt finish. It’s the rare dessert that makes everyone happy.
- Unbelievably Delicious : The pumpkin doesn’t overpower—it adds a subtle earthiness that balances the sweet caramel and salty top. The texture is chewy with just the right amount of give.
What makes this recipe different from the dozens of other pumpkin desserts out there? It’s the caramel. Instead of just adding pumpkin spice and calling it a day, I melt soft caramels right into the marshmallow mixture. That creates pockets of gooey sweetness throughout the treats, and when you sprinkle flaky sea salt on top? The contrast is next-level. I’ve tested this recipe four times to get the marshmallow-to-pumpkin ratio perfect, because too much pumpkin makes them fall apart, and too little defeats the purpose. This version holds its shape beautifully while still tasting like autumn in every bite.
This is the kind of dessert that makes you close your eyes after the first bite. It’s comfort food reimagined—familiar enough to feel like home, but special enough to impress anyone who tries it. Whether you’re making these for a school event or just because it’s Tuesday and you deserve a treat, they deliver every single time.
What Ingredients You Will Need
This recipe uses simple, wholesome ingredients to deliver bold fall flavor and that classic chewy texture we all crave. Most of these are pantry staples, and the ones that aren’t are worth picking up for the season.
For the Treats
- 6 tablespoons unsalted butter (use salted butter if that’s what you have, just reduce the added salt later)
- 1 (10 oz) bag mini marshmallows (regular size works too, but mini melt faster and more evenly)
- 1/3 cup pumpkin puree (not pumpkin pie filling—make sure it’s 100% pure pumpkin)
- 1 teaspoon pumpkin pie spice (or mix 1/2 teaspoon cinnamon, 1/4 teaspoon nutmeg, 1/4 teaspoon ginger)
- 1/2 teaspoon vanilla extract (pure vanilla adds depth, but imitation works in a pinch)
- 6 cups Rice Krispies cereal (or any crispy rice cereal—store brands work fine)
- 1 cup soft caramel candies, unwrapped (I recommend Kraft Caramels for consistent melting)
- 2 tablespoons heavy cream or whole milk (helps the caramels melt smoothly)
For the Topping
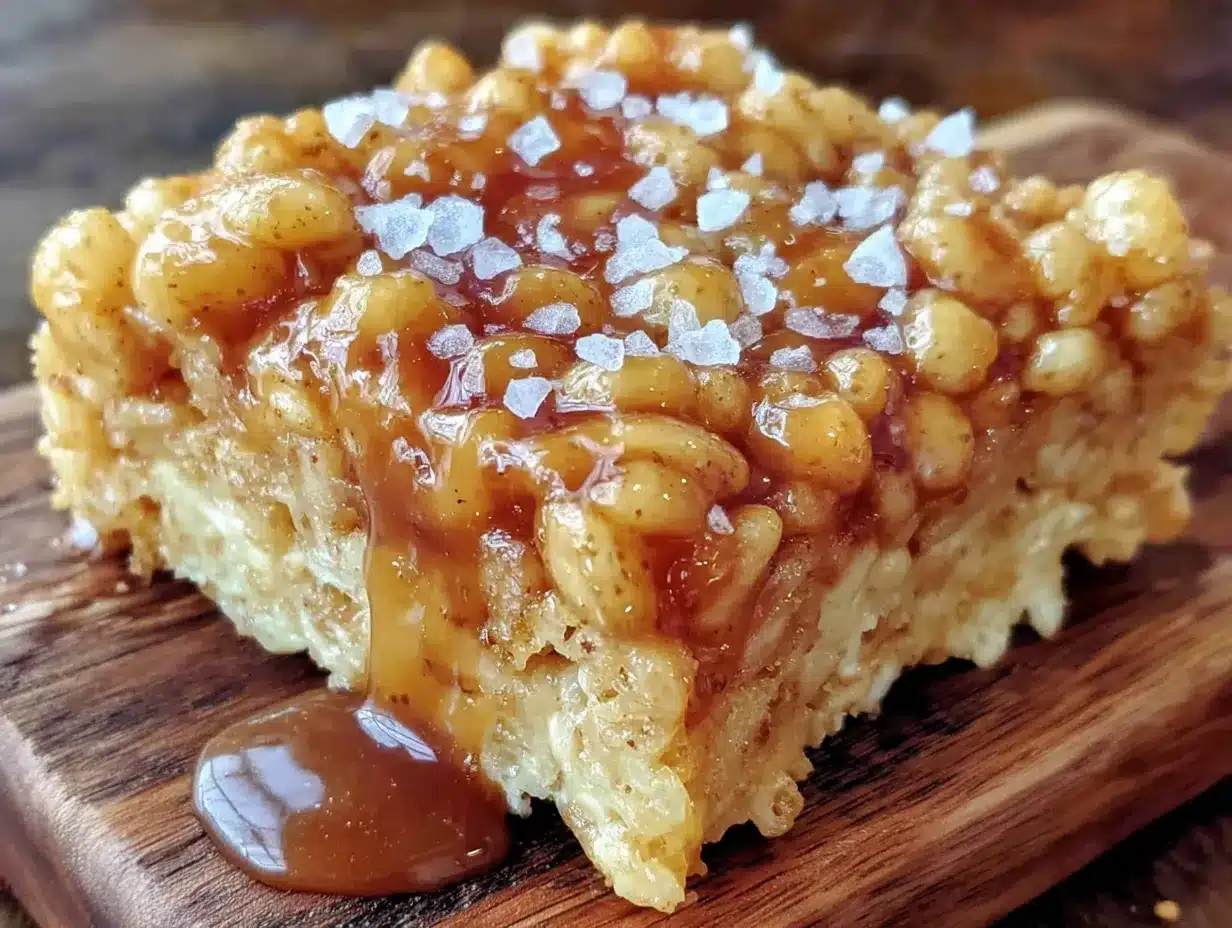
- 1/2 cup soft caramel candies, unwrapped (for the drizzle)
- 1 tablespoon heavy cream or whole milk
- 1 teaspoon flaky sea salt (Maldon is my favorite—it’s delicate and crunchy)
Ingredient Tips : When choosing pumpkin puree, look for brands like Libby’s or 365 Organic. They have a consistent thickness that works well here. If your pumpkin puree looks watery, blot it with a paper towel before adding it to the marshmallow mixture. That extra step prevents soggy treats. For the caramels, unwrapping them is the most tedious part of this recipe, so do it while the butter melts to save time. And don’t skip the flaky sea salt—it’s what makes these Salted Caramel Pumpkin Rice Krispie Treats truly unforgettable. Regular table salt is too fine and will just dissolve; you want those visible crystals that crunch between your teeth.
If you’re looking for another fall dessert that uses simple ingredients, check out my Best Homemade Apple Dapple Cake with Warm Caramel. It’s another no-fuss recipe that delivers big flavor.
Equipment Needed
- Large pot or Dutch oven (at least 5 quarts—you need room to stir everything together)
- Rubber spatula or wooden spoon (silicone spatulas work best for scraping every bit of marshmallow)
- 9×13-inch baking pan (for thicker treats, use a 9×9-inch pan and adjust cooking time slightly)
- Parchment paper or aluminum foil (for lining the pan—makes removal so much easier)
- Small microwave-safe bowl (for melting the caramel drizzle)
- Measuring cups and spoons
- Sharp knife (for cutting clean squares)
I’ve made these treats in a cheap nonstick pot and a heavy-bottomed Dutch oven, and honestly, the Dutch oven wins every time. The heat distributes more evenly, so the marshmallows don’t scorch on the bottom. If you don’t have one, just stir constantly and keep the heat on medium-low. For the pan, glass or metal both work—just line it well with parchment paper that hangs over the edges. That little overhang becomes handles that lift the whole block out for easy cutting. A tip I learned the hard way: spray your spatula with nonstick cooking spray before pressing the mixture into the pan. It saves you from a sticky mess.
Preparation Method
- Prepare your pan. Line a 9×13-inch baking pan with parchment paper, leaving about 2 inches of overhang on two opposite sides. Lightly spray the parchment with nonstick cooking spray. This step ensures your treats come out cleanly without sticking.
- Melt the butter. In a large pot over medium-low heat, melt 6 tablespoons of unsalted butter. Swirl the pot occasionally so it melts evenly. Don’t rush this—high heat will burn the butter and ruin the flavor. You want it fully melted but not bubbling aggressively.
- Add the marshmallows. Dump the entire 10-ounce bag of mini marshmallows into the melted butter. Stir constantly with your rubber spatula until the marshmallows are about 75% melted. This takes about 2-3 minutes. The mixture will look glossy and smooth.
- Incorporate the pumpkin and spices. Reduce the heat to low. Add 1/3 cup pumpkin puree, 1 teaspoon pumpkin pie spice, and 1/2 teaspoon vanilla extract. Stir vigorously until everything is fully combined. The mixture will turn a warm orange color. Don’t worry if it looks a little looser than traditional marshmallow mixture—that’s the pumpkin doing its thing.
- Melt the caramels into the mixture. Add 1 cup of unwrapped soft caramel candies and 2 tablespoons of heavy cream directly to the pot. Stir continuously until the caramels are completely melted and incorporated. This takes about 2-3 minutes. The mixture will become thick and stretchy. Keep scraping the bottom of the pot to prevent scorching.
- Fold in the cereal. Remove the pot from heat. Add 6 cups of Rice Krispies cereal all at once. Fold gently with your spatula, using a cutting motion rather than stirring, to coat the cereal evenly without crushing it. Work from the bottom up to incorporate all the marshmallow mixture. This step should take about 1 minute—don’t overmix or the treats will be dense.
- Press into the pan. Transfer the mixture to your prepared pan. Spray your spatula with nonstick cooking spray, then press the mixture evenly into the pan. Work quickly—the mixture sets as it cools. Press firmly but gently to create an even layer. Don’t press too hard or the treats will be tough.
- Make the caramel drizzle. In a small microwave-safe bowl, combine 1/2 cup unwrapped soft caramel candies and 1 tablespoon heavy cream. Microwave in 20-second intervals, stirring between each, until smooth and pourable. This usually takes about 40-60 seconds total.
- Finish with salt. Drizzle the melted caramel evenly over the pressed treats. Immediately sprinkle 1 teaspoon of flaky sea salt over the top. The salt sticks best while the caramel is still warm. Let the treats cool completely at room temperature—about 30 minutes—before cutting.
- Cut and serve. Using the parchment overhang, lift the entire block of treats out of the pan. Place on a cutting board. Use a sharp knife to cut into squares. For clean cuts, wipe the knife clean between each slice. Aim for 12 large squares or 24 smaller ones.
Sensory cues : When you fold the cereal in, you should hear a gentle crackling sound—that’s the cereal staying crisp. The mixture should look evenly coated, with visible streaks of caramel throughout. When pressed into the pan, the top should feel tacky but not sticky. The finished treats should hold their shape when lifted, with a slight give when you press the center.
If you’re in the mood for another quick dessert that comes together in minutes, try my Easy Honey Garlic Meatballs. They’re perfect for when you want something savory-sweet instead.
Cooking Tips & Techniques
After testing this recipe multiple times, I’ve learned a few things that make the difference between good treats and unforgettable ones. Here’s what I wish I knew from the start.
Don’t rush the melting process. Low and slow is the golden rule here. If you crank up the heat to speed things along, the marshmallows will seize up and turn rubbery. I learned this the hard way when I was in a hurry for a school bake sale and ended up with a pot of sticky cement. Keep the heat on medium-low and be patient. The caramel needs gentle heat to melt smoothly, too.
Blot your pumpkin puree. Pumpkin contains a lot of water, and excess moisture is the enemy of crispy Rice Krispie treats. Before adding the puree to the marshmallow mixture, spread it on a paper towel and pat it dry. This simple step prevents soggy, deflated treats. I skipped this once and ended up with treats that collapsed under their own weight. Never again.
Work quickly when pressing. The marshmallow mixture sets fast, especially with the caramel in it. Have your pan lined and your spatula sprayed before you start. If the mixture becomes too stiff to press, microwave it for 10 seconds to soften it slightly. But don’t overdo it—you want it to hold its shape.
Use a wet knife for cutting. Run your knife under hot water and wipe it dry between cuts. The heat helps the blade glide through the sticky caramel without dragging. This gives you clean, professional-looking squares instead of ragged edges. For the best results, let the treats cool completely—at least 30 minutes—before cutting.
Timing strategy : Unwrap your caramels while the butter melts. That way, you’re not scrambling with sticky wrappers when the marshmallows are ready. I usually set up a little assembly line: caramels unwrapped in one bowl, pumpkin measured in another, cereal pre-measured. It makes the whole process feel effortless.
Variations & Adaptations
One of the best things about this recipe is how flexible it is. I’ve tried several variations, and each one brings something new to the table.
Gluten-Free Version : Rice Krispies are naturally gluten-free, but check the label—some store brands use malt flavoring that contains gluten. Look for certified gluten-free crispy rice cereal, like Erewhon or One Degree Organics. Everything else in the recipe is gluten-free, so this swap is simple and safe for celiac guests.
Vegan Adaptation : Use vegan butter (I like Miyoko’s or Earth Balance) and vegan marshmallows (Dandies are my go-to—they melt beautifully). Swap the heavy cream for full-fat coconut cream or oat milk. For the caramels, look for vegan soft caramels—Cocomels are a great option. The texture will be slightly different, but the flavor is still amazing.
Extra Pumpkin Flavor : If you’re a pumpkin fanatic like me, add an extra tablespoon of pumpkin puree and increase the pumpkin pie spice to 1 1/2 teaspoons. You can also stir in 1/4 cup of pumpkin seeds (pepitas) along with the cereal for a crunchy, nutty contrast. I tried this for a fall potluck, and it was the first dish to disappear.
Chocolate Lover’s Twist : Melt 1/2 cup of dark chocolate chips with the caramel drizzle for a chocolate-caramel-pumpkin combo that’s absolutely decadent. Drizzle both over the top and swirl them together with a toothpick. It looks fancy but takes zero extra effort.
Spiced-Up Version : Add 1/4 teaspoon of cayenne pepper or chipotle powder to the marshmallow mixture for a sweet-heat kick. The spice plays beautifully with the caramel and pumpkin. I made this for a Halloween party, and people couldn’t stop eating them.
If you enjoy fall-inspired treats, you’ll love my Homemade Honeycrisp Apple Fritter Bread with Easy Vanilla Icing. It’s another seasonal favorite that uses simple ingredients to create something special.
Serving & Storage Suggestions
These Salted Caramel Pumpkin Rice Krispie Treats are best served at room temperature, straight from the pan. The texture is perfectly chewy with just the right amount of give, and the caramel drizzle stays soft and luscious. If you’ve refrigerated them, let them sit out for 10-15 minutes before serving—cold treats lose that wonderful marshmallow softness.
For presentation, cut them into clean squares and arrange them on a wooden board or white platter. The orange-gold color pops beautifully against neutral backgrounds. Sprinkle a little extra flaky sea salt on top right before serving for that fresh, crunchy finish. These treats are perfect for Halloween parties, Thanksgiving dessert tables, or casual fall gatherings with friends.
Pair them with a warm beverage like spiced apple cider, pumpkin chai latte, or a simple cup of coffee. The saltiness in the treats balances the sweetness of the drinks, creating a perfect flavor harmony. For a dessert board, arrange them alongside apple slices, caramel dip, and cinnamon cookies. They’re also fantastic crumbled over vanilla ice cream for an easy sundae.
Storage : Keep the treats in an airtight container at room temperature for up to 4 days. Layer them with parchment paper between each layer to prevent sticking. Do not refrigerate—the cold air dries them out and makes the caramel harden. If you need to store them longer, freeze them for up to 2 months. Wrap each square individually in plastic wrap, then place them in a freezer-safe bag. Thaw at room temperature for about 30 minutes before serving.
Flavor development : These treats actually taste better the next day. The flavors meld together overnight, and the pumpkin spice becomes more pronounced. The texture stays chewy, and the caramel softens into the marshmallow base. I often make them a day ahead for parties, and nobody ever complains.
Nutritional Information & Benefits
Here’s the estimated nutritional breakdown for one large square (based on 12 servings):
| Nutrient | Amount Per Serving |
|---|---|
| Calories | 285 |
| Total Fat | 12g |
| Saturated Fat | 7g |
| Cholesterol | 25mg |
| Sodium | 310mg |
| Total Carbohydrates | 44g |
| Dietary Fiber | 1g |
| Sugars | 28g |
| Protein | 2g |
| Vitamin A | 15% DV |
| Calcium | 4% DV |
| Iron | 6% DV |
The pumpkin puree in these treats provides a good dose of Vitamin A, which supports eye health and immune function. It also adds fiber, which helps balance the sugar content. The flaky sea salt adds trace minerals like magnesium and potassium, though the main benefit here is flavor. These treats are not health food, but they’re made with real ingredients—no artificial flavors or preservatives.
For dietary considerations, this recipe contains dairy and gluten (from the cereal). Use the vegan and gluten-free swaps mentioned earlier if needed. The treats are nut-free, making them safe for school events where nut allergies are a concern. They’re also egg-free, which is great for those with egg allergies or dietary restrictions.
I believe in balance—these treats are for celebrating fall, not for daily consumption. Enjoy them at parties, holidays, or special weekends, and savor every single bite. Life’s too short to skip dessert.
Conclusion
These Perfect Salted Caramel Pumpkin Rice Krispie Treats are everything I want in a fall dessert—quick, easy, and packed with warm, cozy flavor. They take about 20 minutes from start to finish, use ingredients you probably already have, and deliver that nostalgic crunch we all love with a grown-up twist. The caramel ribbons and flaky sea salt take them from basic to brilliant without any complicated techniques.
What I love most about this recipe is how adaptable it is. You can make it vegan, gluten-free, extra spicy, or chocolate-drizzled—it always works. It’s the kind of recipe you’ll come back to year after year, because it never fails to impress. Whether you’re making them for a Halloween party, a Thanksgiving dessert table, or just because you need a little fall magic in your life, these treats deliver.
I’d love to hear how yours turn out. Did you add chocolate? Swap the caramel for something else? Make them for a party? Drop a comment below and let me know—I read every single one. And if you share them on social media, tag me so I can see your beautiful creations. Happy fall baking, friends!
Frequently Asked Questions
Can I use pumpkin pie filling instead of pumpkin puree?
No, don’t do that. Pumpkin pie filling is pre-sweetened and spiced, and it contains thickeners that will make your treats gummy. Stick with 100% pure pumpkin puree for the best texture and flavor.
Why did my treats turn out soggy?
Too much moisture is usually the culprit. Make sure you blot your pumpkin puree with a paper towel before adding it, and don’t overcook the marshmallow mixture. Also, let the treats cool completely before cutting—cutting them warm releases steam that softens the cereal.
Can I make these ahead of time?
Absolutely. These treats actually taste better the next day because the flavors meld together. Store them in an airtight container at room temperature for up to 4 days. You can also freeze them for up to 2 months—just wrap each square individually.
How do I prevent the caramel from sticking to the knife?
Run your knife under hot water and wipe it dry between cuts. The heat helps the blade glide through the sticky caramel without dragging. For the cleanest cuts, let the treats cool completely first.
Can I use store-bought caramel sauce instead of melting caramels?
You can, but the texture will be different. Melted caramels create thick, chewy ribbons that hold their shape. Store-bought sauce is thinner and will soak into the treats, making them softer. If you use sauce, reduce the amount to about 1/4 cup and drizzle it on top after pressing.
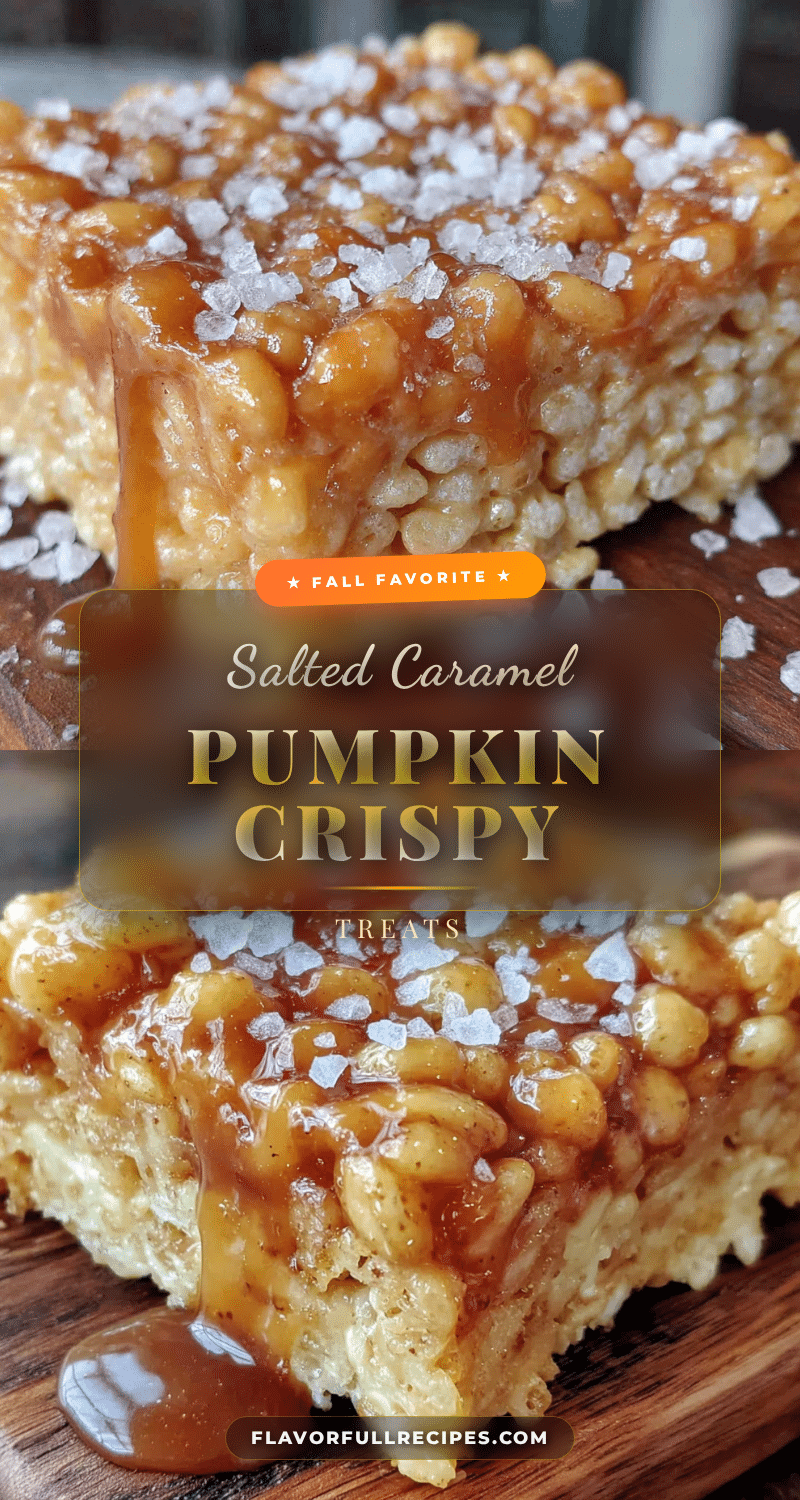
Pin This Recipe!
Perfect Salted Caramel Pumpkin Rice Krispie Treats
- Total Time: 20 minutes
- Yield: 12 servings 1x
Description
These quick and easy no-bake treats combine the nostalgic crunch of Rice Krispies with warm pumpkin spice, gooey caramel, and a flaky sea salt finish. Perfect for fall gatherings, they come together in just 20 minutes with simple pantry ingredients.
Ingredients
- 6 tablespoons unsalted butter
- 1 (10 oz) bag mini marshmallows
- 1/3 cup pumpkin puree
- 1 teaspoon pumpkin pie spice
- 1/2 teaspoon vanilla extract
- 6 cups Rice Krispies cereal
- 1 cup soft caramel candies, unwrapped
- 2 tablespoons heavy cream or whole milk
- 1/2 cup soft caramel candies, unwrapped (for topping)
- 1 tablespoon heavy cream or whole milk (for topping)
- 1 teaspoon flaky sea salt
Instructions
- Line a 9×13-inch baking pan with parchment paper, leaving about 2 inches of overhang on two opposite sides. Lightly spray the parchment with nonstick cooking spray.
- In a large pot over medium-low heat, melt 6 tablespoons of unsalted butter.
- Add the entire 10-ounce bag of mini marshmallows to the melted butter. Stir constantly until the marshmallows are about 75% melted (2-3 minutes).
- Reduce heat to low. Add 1/3 cup pumpkin puree, 1 teaspoon pumpkin pie spice, and 1/2 teaspoon vanilla extract. Stir until fully combined.
- Add 1 cup of unwrapped soft caramel candies and 2 tablespoons of heavy cream to the pot. Stir continuously until the caramels are completely melted and incorporated (2-3 minutes).
- Remove the pot from heat. Add 6 cups of Rice Krispies cereal all at once. Fold gently with a spatula until the cereal is evenly coated.
- Transfer the mixture to the prepared pan. Spray the spatula with nonstick cooking spray, then press the mixture evenly into the pan.
- In a small microwave-safe bowl, combine 1/2 cup unwrapped soft caramel candies and 1 tablespoon heavy cream. Microwave in 20-second intervals, stirring between each, until smooth and pourable (40-60 seconds total).
- Drizzle the melted caramel evenly over the pressed treats. Immediately sprinkle 1 teaspoon of flaky sea salt over the top. Let cool completely at room temperature (about 30 minutes).
- Using the parchment overhang, lift the entire block of treats out of the pan. Place on a cutting board and cut into squares with a sharp knife.
Notes
Blot pumpkin puree with a paper towel before adding to prevent soggy treats. Unwrap caramels while butter melts to save time. Use a wet knife for clean cuts. Treats taste even better the next day.
- Prep Time: 10 minutes
- Cook Time: 10 minutes
- Category: Dessert
- Cuisine: American
Nutrition
- Serving Size: 1 large square
- Calories: 285
- Sugar: 28
- Sodium: 310
- Fat: 12
- Saturated Fat: 7
- Carbohydrates: 44
- Fiber: 1
- Protein: 2
Keywords: pumpkin rice krispie treats, salted caramel, fall dessert, no-bake, easy recipe