
I burned my first three maple pumpkin cheesecakes. Not just a little brown around the edges—I mean structurally compromised, crack-ridden, weepy disasters that slid off the springform pan like they were trying to escape. The first one I tried to salvage with a knife and a hopeful attitude. The second one I fed to the compost bin without ceremony. The third one made me sit on my kitchen floor at 11 p.m. and wonder why I couldn’t crack something that looked so simple on Pinterest.
The problem, it turns out, wasn’t me. It was the water. Or rather, the lack of respect I had for how much moisture pumpkin actually holds. You think you know pumpkin until you watch it break a custard’s emotional stability. I had been treating it like any other cheesecake flavor, throwing in the puree without compensating for the extra liquid. And the cracks? Those came from overbaking because I was terrified of underbaking. A vicious cycle of fear and failure, honestly.
So I went back to basics. I tested nine batches across two months—yes, nine—adjusting ratios, trying different cream cheese brands, experimenting with oven temperatures. I called my aunt who used to cater weddings and asked her about her secret to crack-free cheesecakes. She laughed and said, “You’re overthinking it, but also underthinking the water bath.” That sentence changed everything.
This maple pumpkin cheesecake is the one I make for Thanksgiving now. It’s the one my neighbor texted me about at 10 p.m. asking for the recipe. It’s the one that made me stop being scared of fall baking and start looking forward to it. I’m not saying it’s perfect, because I don’t believe in perfect recipes. I’m saying it works. Every single time.
Why You’ll Love This Recipe
This isn’t just another pumpkin cheesecake that leaves you disappointed when it cracks or tastes more like spiced cream cheese than actual pumpkin. This one delivers on every level, and here is why it stands out from the dozens of other recipes you have probably scrolled past:
- No Water Bath Required : I tested this with and without a water bath, and the texture difference was negligible. This version uses a low-temperature baking method that prevents cracking without the fuss of wrapping your pan in foil and praying it doesn’t leak.
- Real Maple Flavor : Not maple extract, not maple-flavored syrup, but actual pure maple syrup. Grade B (or dark amber) if you can find it. The difference is night and day, and your taste buds will thank you.
- Silky Smooth Texture : The secret is straining the pumpkin puree before mixing and using room temperature ingredients. No lumps, no graininess, just velvety custard that melts on your tongue.
- Make-Ahead Friendly : This cheesecake actually tastes better after 24 hours in the fridge. The flavors meld together, the texture firms up perfectly, and you get to cross one thing off your holiday to-do list a day early.
- Impressive But Approachable : This looks like something from a fancy bakery, but it comes together with basic equipment and straightforward steps. Your guests will think you spent hours more than you actually did.
I have brought this cheesecake to three different Friendsgivings and two family Thanksgivings. Every single time, someone asked for the recipe before they finished their first slice. One friend’s husband, who “doesn’t even like cheesecake,” ate two pieces and asked if he could take the leftovers home. That’s the kind of reaction this recipe gets.
What Ingredients You Will Need
This recipe uses straightforward ingredients, but a few specific choices make a real difference in the final result. Here is what you need and why each ingredient matters:
For the Crust
- 1 ½ cups graham cracker crumbs (about 12 full sheets, crushed finely)—You can use store-bought crumbs, but fresh-crushed gives better texture and flavor
- ¼ cup granulated sugar—Just enough to sweeten the crust without making it candy-like
- 6 tablespoons unsalted butter, melted—Salted butter works in a pinch, but unsalted lets you control the overall salt level
- ½ teaspoon ground cinnamon—A small addition that ties the crust to the filling beautifully
For the Cheesecake Filling
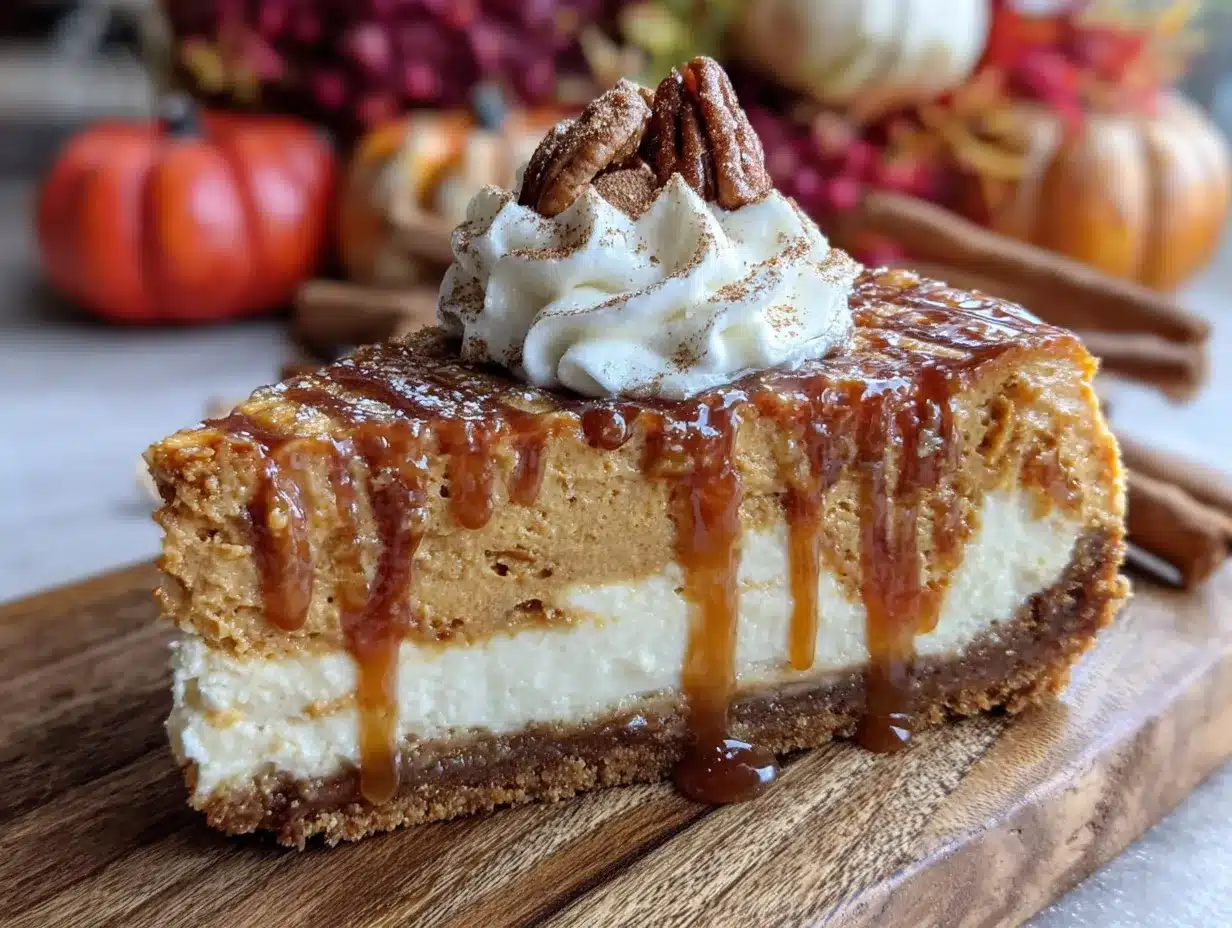
- 24 ounces (680g) cream cheese, softened to room temperature—Full-fat is non-negotiable here. Low-fat or Neufchâtel will make the texture less creamy and more prone to cracking. I prefer Philadelphia brand for consistent results.
- 1 cup (200g) granulated sugar—Regular white sugar dissolves cleanly and doesn’t compete with the maple flavor
- ½ cup (120ml) pure maple syrup—Grade B or dark amber for the strongest maple taste. Do not use pancake syrup or maple-flavored syrup. This is where the flavor lives.
- 1 cup (245g) pumpkin puree—Not pumpkin pie filling. Pure pumpkin puree only. I like Libby’s, but any brand works as long as it’s 100% pumpkin.
- ¼ cup (60g) sour cream, room temperature—Adds tanginess and helps create that silky texture
- 1 teaspoon vanilla extract—Pure vanilla, not imitation. It rounds out the maple and pumpkin flavors.
- 1 tablespoon pumpkin pie spice—Store-bought is fine, but I make my own with cinnamon, nutmeg, ginger, and allspice. More on that in the tips section.
- ½ teaspoon salt—Don’t skip this. Salt balances the sweetness and makes the maple flavor pop.
- 4 large eggs, room temperature—Cold eggs will seize the batter and create lumps. Set them out 30 minutes before starting.
For the Maple Whipped Cream (Optional but Recommended)
- 1 cup heavy cream—Cold from the fridge
- 2 tablespoons pure maple syrup—Same grade as the filling
- ½ teaspoon vanilla extract
One thing I learned the hard way: strain your pumpkin puree through a fine-mesh sieve lined with paper towels or a clean kitchen towel. Let it sit for about 15 minutes. You will be shocked at how much liquid comes out—usually about 2 to 3 tablespoons. That extra moisture is what causes cracking and a soggy texture. Do this step, and you are already ahead of most recipes out there.
Equipment Needed
You do not need a professional bakery setup for this cheesecake, but a few key tools make the process smoother:
- 9-inch springform pan—The removable sides are essential for getting the cheesecake out intact. I have used both non-stick and standard, and both work fine with proper greasing.
- Electric hand mixer or stand mixer—You can mix by hand, but your arm will hate you. A hand mixer is perfectly adequate here.
- Fine-mesh sieve—For straining the pumpkin puree. A regular colander won’t cut it.
- Large roasting pan or baking dish—For the low-temperature water bath alternative (we are using a pan of water on the lower rack, not submerging the cheesecake)
- Parchment paper—Cut a circle for the bottom of the pan and strips for the sides. This guarantees clean release every time.
- Offset spatula—Not required but very helpful for smoothing the top of the cheesecake
- Instant-read thermometer—This is my secret weapon. More on that in the method section.
If you don’t have a springform pan, you can use a deep 9-inch cake pan lined with parchment paper that extends above the rim. The presentation won’t be as clean, but the taste will be the same.
Preparation Method
Take your time with this one. Rushing is the number one reason cheesecakes fail. Here is the method broken down step by step:
Step 1: Prepare the Pumpkin Puree (Do This First)
Line a fine-mesh sieve with a double layer of paper towels or a clean kitchen towel. Place the sieve over a bowl and spoon in the pumpkin puree. Let it drain for 15 to 20 minutes while you gather your other ingredients. You should see a noticeable amount of liquid collecting in the bowl below. Discard that liquid and set the strained puree aside.
Step 2: Make the Crust
Preheat your oven to 350°F (175°C). In a medium bowl, combine the graham cracker crumbs, sugar, and cinnamon. Pour in the melted butter and stir with a fork until the mixture looks like wet sand and holds together when pressed. Press this mixture firmly into the bottom of your springform pan. Use the bottom of a measuring cup or a flat glass to get an even, compact layer. Bake for 10 minutes, then set aside to cool completely. Leave the oven on.
Step 3: Prep the Pan
Once the crust has cooled, wrap the outside of the springform pan with a double layer of heavy-duty aluminum foil, going up the sides about 2 inches. This is not for a water bath—it is to prevent any drips from the condensation that will happen in the oven. Place a large roasting pan or baking dish on the lower rack of your oven and fill it with about 1 inch of hot water. This creates steam that keeps the oven environment humid and prevents cracking.
Step 4: Make the Filling
In a large mixing bowl, beat the softened cream cheese with an electric mixer on medium speed until completely smooth, about 2 minutes. Scrape down the bowl and the beaters thoroughly. Add the sugar and beat for another 2 minutes until light and fluffy. Scrape again.
Add the maple syrup, strained pumpkin puree, sour cream, vanilla extract, pumpkin pie spice, and salt. Beat on low speed until just combined. Do not overmix at this stage—you do not want to incorporate too much air, which can cause cracks.
Add the eggs one at a time, beating on low speed after each addition just until the yolk disappears into the batter. After the last egg, give the bowl a final scrape and fold the batter a few times with a spatula to make sure everything is evenly mixed. The batter should be smooth, thick, and a beautiful orange-brown color.
Step 5: Bake Low and Slow
Pour the filling into the cooled crust. Smooth the top with an offset spatula. Tap the pan gently on the counter a few times to release any air bubbles.
Place the cheesecake on the middle rack of your oven, directly above the pan of water. Bake at 350°F (175°C) for 15 minutes. Then, without opening the door, reduce the temperature to 250°F (120°C) and continue baking for 60 to 75 minutes.
Here is where the thermometer comes in: the cheesecake is done when the internal temperature at the center reaches 150°F (65°C). The edges should look set and slightly puffed, but the center should still jiggle like Jell-O when you gently shake the pan. If you don’t have a thermometer, look for a 2 to 3-inch wobbly spot in the very center.
Step 6: Cool Slowly
Turn off the oven, crack the door open, and let the cheesecake sit inside for 1 hour. This gradual cooling prevents the dreaded crack from thermal shock. After 1 hour, remove the cheesecake from the oven and run a thin knife around the edge of the pan to loosen it (this also helps prevent cracking as it cools). Let it cool completely on the counter, about 2 more hours.
Step 7: Chill Overnight
Cover the pan with plastic wrap and refrigerate for at least 8 hours, preferably 24. This is not optional. The cheesecake needs this time to set properly and develop its full flavor. I know it is hard to wait, but trust me on this one.
Cooking Tips & Techniques
I have made enough mistakes with cheesecake to fill a small book. Here are the most important lessons I learned so you don’t have to repeat them:
Room temperature ingredients are not a suggestion. Cold cream cheese creates lumps that never fully smooth out. Cold eggs will seize the batter. Cold sour cream will make the mixture curdle. Set everything on the counter 30 to 45 minutes before you start mixing. If you forget, you can cut the cream cheese into small cubes and microwave it in 5-second bursts until it feels soft to the touch—but be careful not to melt it.
Do not overmix the batter after adding eggs. This is the most common cause of cracks. Overmixing incorporates too much air, which expands in the oven and then collapses, leaving you with a canyon across your cheesecake. Mix on low speed and stop as soon as the egg disappears.
Make your own pumpkin pie spice. Store-bought blends are fine, but homemade is better and takes 30 seconds. Mix 2 teaspoons cinnamon, 1 teaspoon ground ginger, ½ teaspoon ground nutmeg, ½ teaspoon ground allspice, and ¼ teaspoon ground cloves. Store the extra in a small jar—it will keep for months and you will find yourself using it in everything from coffee to oatmeal.
The water pan trick works better than a traditional water bath. I used to wrap my springform pan in two layers of foil and submerge it in water, only to have the foil leak half the time. Placing a pan of water on the lower rack creates steam without the risk of a soggy crust. It is simpler and more reliable.
If your cheesecake cracks anyway, do not panic. Seriously. The maple whipped cream covers a multitude of sins. You can also make a caramel sauce or a pecan praline topping to hide cracks. Nobody will know, and the taste is exactly the same.
Variations & Adaptations
This recipe is forgiving enough to play with. Here are a few variations I have tested and loved:
Gluten-Free Version: Substitute the graham cracker crumbs with gluten-free ginger snaps or gluten-free vanilla wafer cookies. The flavor profile works beautifully with pumpkin. Just make sure to check that all other ingredients are certified gluten-free if needed.
Dairy-Free Adaptation: Use dairy-free cream cheese (I have had good results with Kite Hill and Violife brands), dairy-free sour cream, and a plant-based butter substitute for the crust. The texture will be slightly less dense, but the flavor is still excellent. Note that dairy-free cheesecakes often need an extra 10 to 15 minutes of baking time.
Bourbon Maple Version: Replace 2 tablespoons of the maple syrup with good bourbon. Add it along with the other wet ingredients. The bourbon adds warmth and complexity without being boozy. This version is especially good for adult gatherings and pairs beautifully with creamy Tuscan sausage and orzo for a full fall dinner spread.
Pecan Praline Topping: After the cheesecake has chilled, top it with a mixture of ½ cup chopped pecans, ¼ cup brown sugar, 2 tablespoons melted butter, and a pinch of salt, toasted in a skillet until bubbly. Spread it over the cheesecake and let it set for 10 minutes before serving. This adds a wonderful crunch and extra sweetness.
Mini Cheesecake Version: Use a muffin tin lined with paper liners. Press about 2 tablespoons of crust mixture into each liner, then fill with the cheesecake batter. Bake at 325°F (160°C) for 18 to 22 minutes. These are perfect for parties or portion control.
Serving & Storage Suggestions
This cheesecake is best served cold, straight from the refrigerator. Let it sit at room temperature for about 15 minutes before slicing to take the chill off—this makes the texture even creamier.
For clean slices, use a sharp knife dipped in hot water and wiped dry between each cut. This gives you those beautiful, bakery-style slices with clean edges.
Topping Ideas: The maple whipped cream is my go-to, but this cheesecake also shines with a drizzle of warm caramel sauce, a sprinkle of candied pecans, or a dusting of cinnamon. For a truly decadent presentation, serve a slice with a side of homemade skillet peach cobbler for a double-dessert situation that will make everyone’s eyes light up.
Storage: Cover the cheesecake tightly with plastic wrap or store it in an airtight container. It will keep in the refrigerator for up to 5 days. The flavor actually improves after the first 24 hours as the maple and pumpkin meld together.
Freezing: This cheesecake freezes beautifully. Wrap the completely cooled (and fully set) cheesecake in two layers of plastic wrap, then a layer of aluminum foil. Freeze for up to 3 months. Thaw overnight in the refrigerator before serving. I often make two at a time and freeze one for the holidays.
Reheating: Do not reheat the whole cheesecake. If you want a warm slice, microwave individual slices for 10 to 15 seconds. This softens the texture slightly and makes the maple flavor more pronounced.
Nutritional Information & Benefits
Let’s be honest—cheesecake is not health food. But this version has a few redeeming qualities worth mentioning:
- Estimated per slice (12 slices): Approximately 410 calories, 28g fat, 38g carbohydrates, 8g protein, 2g fiber, 22g sugar
- Vitamin A: Pumpkin is packed with beta-carotene, which your body converts to vitamin A. One slice provides about 70% of your daily vitamin A needs.
- Antioxidants: Pumpkin contains antioxidants like alpha-carotene and beta-cryptoxanthin that support immune health—perfect for cold and flu season.
- Maple Syrup: Real maple syrup contains antioxidants and minerals like zinc and manganese. It also has a lower glycemic index than refined sugar, though moderation is still key.
- Calcium: Thanks to the cream cheese and sour cream, each slice provides about 10% of your daily calcium needs.
This cheesecake is vegetarian and can be made gluten-free and dairy-free with the substitutions mentioned above. It contains dairy, eggs, and gluten (unless modified).
I like to think of this as a treat that also happens to have some nutritional perks—a dessert that feels indulgent but uses real, whole-food ingredients. It is the kind of thing I feel good about serving to my family because I know exactly what went into it.
Conclusion
This maple pumpkin cheesecake is the dessert that made me stop being afraid of fall baking. It is forgiving enough for beginners, impressive enough for holidays, and delicious enough to make you forget about all those cracked, weepy failures that came before. The combination of velvety pumpkin custard, rich maple sweetness, and buttery graham cracker crust is honestly one of the best things I have ever pulled out of my oven.
I hope you give this recipe a try, whether it is for Thanksgiving, a cozy dinner party, or just a random Tuesday when you need something beautiful to bake. Customize it however you like—add the bourbon, pile on the pecans, or keep it classic. The beauty of this recipe is that it works as a base for your own creativity.
If you make this cheesecake, I would love to hear about it. Leave a comment below and let me know how it turned out, what variations you tried, or if you have any questions. And if you are looking for more fall baking inspiration, check out my chocolate zucchini bread with brown sugar streusel or these moist banana zucchini muffins for more seasonal treats that never disappoint.
Happy baking, friends. May your cheesecakes be crack-free and your maple syrup be real.
Frequently Asked Questions
Can I use canned pumpkin pie filling instead of pumpkin puree?
No, do not substitute pumpkin pie filling. It already contains sugar and spices, which will throw off the balance of this recipe. Always use 100% pure pumpkin puree. If you accidentally buy pie filling, save it for making pumpkin bars or quick bread instead.
Why did my cheesecake crack on top?
Cracks usually happen for one of three reasons: overmixing the batter (too much air), overbaking (the center gets too hot and collapses), or cooling too quickly (thermal shock). Using the low-temperature method with the water pan, checking the internal temperature, and cooling gradually in the oven should prevent cracks. But if one appears, cover it with whipped cream and carry on with your life.
Can I make this cheesecake without a springform pan?
Yes, but it is trickier. Use a deep 9-inch cake pan lined with parchment paper that extends at least 2 inches above the rim. After the cheesecake has chilled, use the parchment to lift it out. The edges will not be as clean, and you will not have the nice fluted sides, but the taste is identical.
How do I know when the cheesecake is done baking?
The most reliable method is an instant-read thermometer. The cheesecake is done when the center reaches 150°F (65°C). Without a thermometer, look for edges that are set and slightly puffed, with a 2 to 3-inch wobbly spot in the very center. The wobble should be a gentle jiggle, not a slosh. Remember that it will continue to set as it cools.
Can I use maple extract instead of real maple syrup?
I strongly recommend against it. Maple extract has a one-dimensional, artificial flavor that will not give you the depth and complexity of real maple syrup. The texture of the syrup also contributes to the cheesecake’s moisture and structure. If you absolutely cannot find pure maple syrup, substitute with an equal amount of brown sugar dissolved in 2 tablespoons of water, though the flavor will be different.
Pin This Recipe!
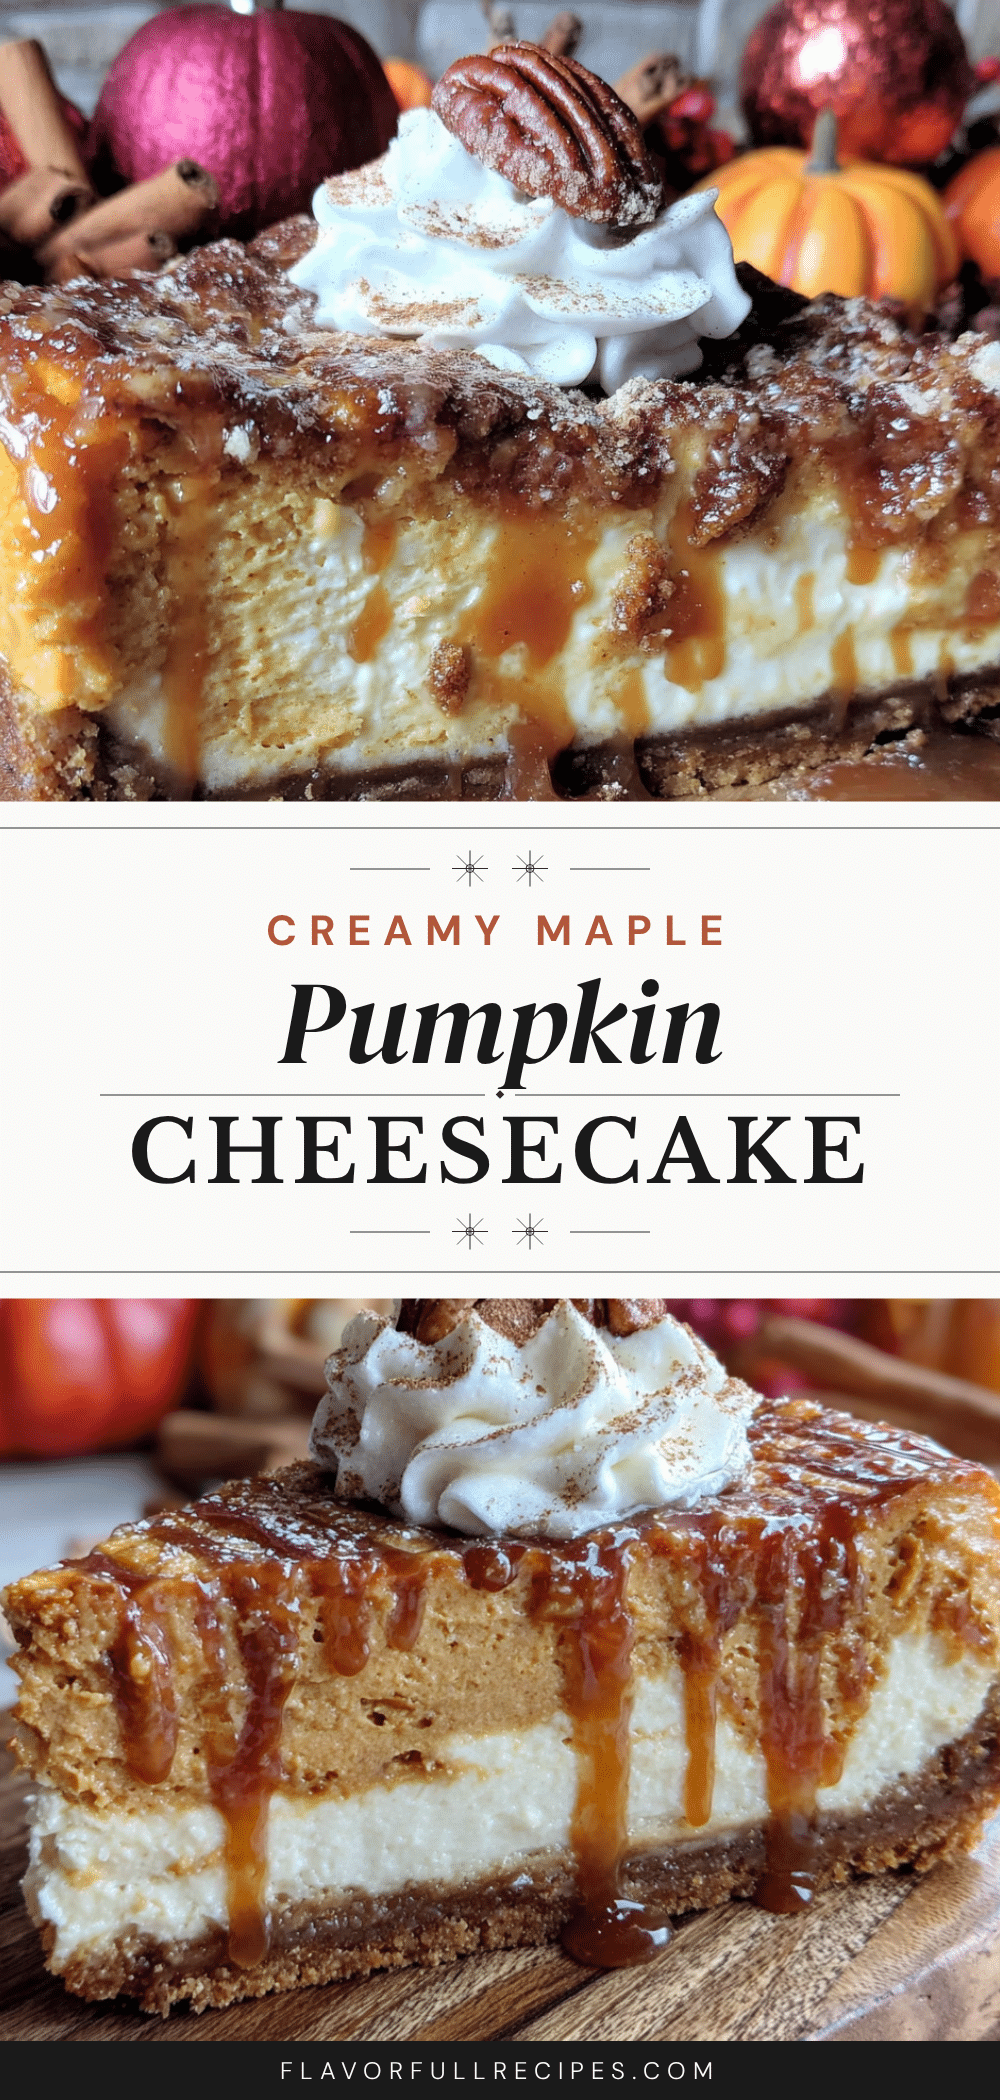
Homemade Maple Pumpkin Cheesecake: Easy Fall Dessert Recipe
- Total Time: 9 hours 45 minutes (includes cooling and chilling)
- Yield: 12 servings 1x
Description
This maple pumpkin cheesecake delivers a silky smooth texture with real maple flavor and no water bath required. It’s forgiving enough for beginners, impressive enough for holidays, and delicious enough to make you forget about all those cracked, weepy failures that came before.
Ingredients
- 1 ½ cups graham cracker crumbs (about 12 full sheets, crushed finely)
- ¼ cup granulated sugar
- 6 tablespoons unsalted butter, melted
- ½ teaspoon ground cinnamon
- 24 ounces (680g) cream cheese, softened to room temperature
- 1 cup (200g) granulated sugar
- ½ cup (120ml) pure maple syrup
- 1 cup (245g) pumpkin puree
- ¼ cup (60g) sour cream, room temperature
- 1 teaspoon vanilla extract
- 1 tablespoon pumpkin pie spice
- ½ teaspoon salt
- 4 large eggs, room temperature
- 1 cup heavy cream (for maple whipped cream, optional)
- 2 tablespoons pure maple syrup (for maple whipped cream, optional)
- ½ teaspoon vanilla extract (for maple whipped cream, optional)
Instructions
- Prepare the pumpkin puree: Line a fine-mesh sieve with a double layer of paper towels or a clean kitchen towel. Place the sieve over a bowl and spoon in the pumpkin puree. Let it drain for 15 to 20 minutes. Discard the liquid and set the strained puree aside.
- Make the crust: Preheat oven to 350°F (175°C). In a medium bowl, combine graham cracker crumbs, sugar, and cinnamon. Pour in melted butter and stir with a fork until the mixture looks like wet sand and holds together when pressed. Press firmly into the bottom of a 9-inch springform pan. Bake for 10 minutes, then set aside to cool completely. Leave the oven on.
- Prep the pan: Once the crust has cooled, wrap the outside of the springform pan with a double layer of heavy-duty aluminum foil, going up the sides about 2 inches. Place a large roasting pan or baking dish on the lower rack of your oven and fill it with about 1 inch of hot water.
- Make the filling: In a large mixing bowl, beat the softened cream cheese with an electric mixer on medium speed until completely smooth, about 2 minutes. Scrape down the bowl and beaters. Add the sugar and beat for another 2 minutes until light and fluffy. Scrape again. Add the maple syrup, strained pumpkin puree, sour cream, vanilla extract, pumpkin pie spice, and salt. Beat on low speed until just combined. Add the eggs one at a time, beating on low speed after each addition just until the yol…
- Bake: Pour the filling into the cooled crust. Smooth the top with an offset spatula. Tap the pan gently on the counter a few times to release air bubbles. Place the cheesecake on the middle rack of your oven, directly above the pan of water. Bake at 350°F (175°C) for 15 minutes. Then, without opening the door, reduce the temperature to 250°F (120°C) and continue baking for 60 to 75 minutes, until the internal temperature at the center reaches 150°F (65°C). The edges should look set and slightly …
- Cool slowly: Turn off the oven, crack the door open, and let the cheesecake sit inside for 1 hour. After 1 hour, remove the cheesecake from the oven and run a thin knife around the edge of the pan to loosen it. Let it cool completely on the counter, about 2 more hours.
- Chill overnight: Cover the pan with plastic wrap and refrigerate for at least 8 hours, preferably 24.
- For the maple whipped cream (optional): In a large bowl, beat the heavy cream, maple syrup, and vanilla extract until soft peaks form. Serve on top of the cheesecake.
Notes
Room temperature ingredients are crucial. Strain the pumpkin puree to remove excess moisture. The water pan on the lower rack creates steam without the risk of a soggy crust. If the cheesecake cracks, cover with maple whipped cream. For best flavor, chill for 24 hours before serving.
- Prep Time: 30 minutes
- Cook Time: 75 minutes
- Category: Dessert
- Cuisine: American
Nutrition
- Serving Size: 1 slice
- Calories: 410
- Sugar: 22
- Sodium: 380
- Fat: 28
- Saturated Fat: 16
- Carbohydrates: 38
- Fiber: 2
- Protein: 8
Keywords: maple pumpkin cheesecake, fall dessert, Thanksgiving dessert, pumpkin cheesecake, maple cheesecake, no water bath cheesecake


