It’s the last week of October, and my kitchen counter is covered in a half-crushed bag of clementines, a bunch of bananas that are just this side of too ripe, and a container of blackberries I bought on a whim. The kids have been buzzing about the school Halloween party for days, and I promised to bring a snack. Not candy—there will be plenty of that later. I wanted something that felt festive but wouldn’t send anyone crashing from a sugar high before the costume parade even started. That’s when I remembered the pumpkin-shaped veggie platters I’d seen floating around, and I thought, why not do that with fruit? A Healthy Halloween Fruit Tray Pumpkin Display was born right there, in the middle of my chaotic Tuesday afternoon, and honestly, it was the easiest party trick I’ve ever pulled off.
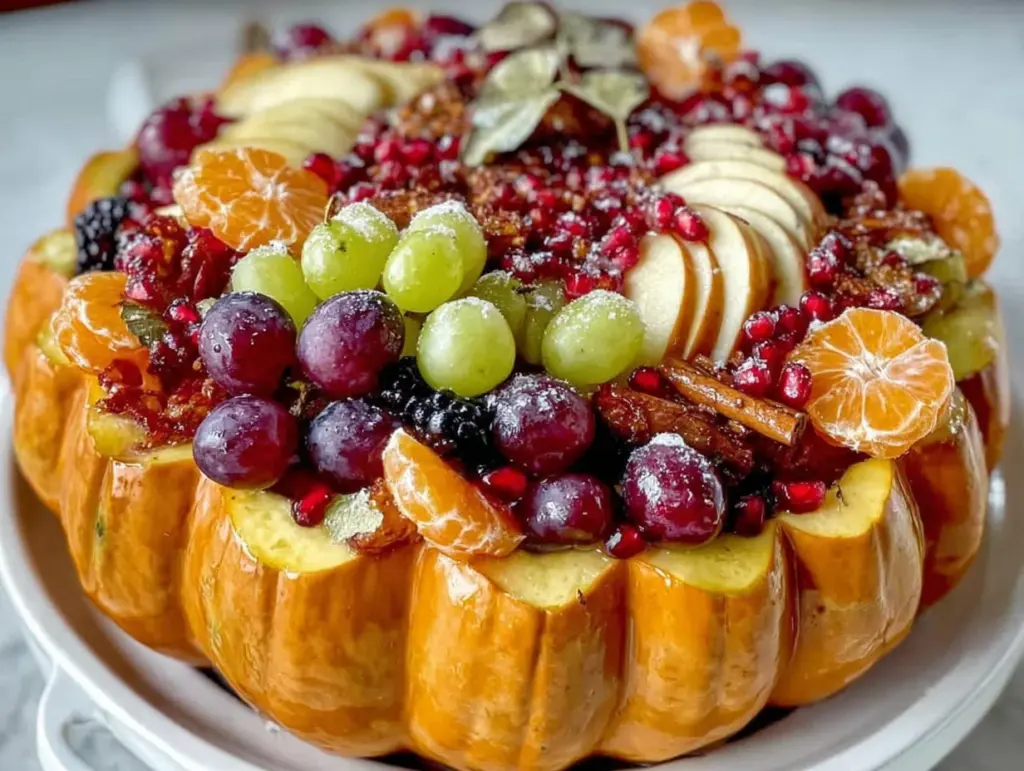
This isn’t just a fruit platter arranged in a circle. It’s a literal pumpkin shape, built from your favorite fruits, that sits on a platter and looks like it belongs at a fall festival. The orange base comes from cantaloupe or honeydew carved into a pumpkin form, and then you fill the inside with a colorful mix of berries, grapes, and citrus segments. It’s a showstopper that takes about twenty minutes to assemble, and it’s the kind of thing that makes people stop and take a picture before they even grab a grape. I’ve made this for Halloween parties, classroom celebrations, and even a fall-themed brunch, and it never fails to get the same reaction: “Wait, that’s all fruit?”
What I love most about this Healthy Halloween Fruit Tray Pumpkin Display is that it solves the eternal Halloween dilemma. You want to participate in the fun, but you also don’t want to be the parent who shows up with another bag of mini chocolate bars. This tray feels indulgent and celebratory, but it’s packed with vitamins and natural sweetness. It’s the perfect middle ground, and it makes the kids feel like they’re getting a treat. Honestly, I think the adults love it even more. There’s something deeply satisfying about seeing a whole pumpkin made of fruit, knowing you can eat the whole thing without a single regret.
Why You’ll Love This Recipe
I’ve tested this Healthy Halloween Fruit Tray Pumpkin Display at three different parties now, and I’ve learned a few things along the way. First, it’s incredibly forgiving. You don’t need to be a professional fruit carver to make it look good. Second, it’s a total crowd-pleaser. Kids love the novelty, and adults appreciate the healthy option among all the sugary treats. And third, it’s surprisingly quick to put together once you get the hang of it.
- Quick & Easy: From start to finish, this tray comes together in under 20 minutes. The hardest part is carving the pumpkin shape from the melon, and even that is simpler than you think.
- Simple Ingredients: You only need a few types of fruit. No fancy grocery trips or exotic produce required. Everything is probably already in your fridge or local market.
- Perfect for Halloween Parties: This is the ultimate healthy Halloween snack. It fits right in with the spooky theme without adding to the sugar overload. It’s also great for classroom parties where nut-free and healthy options are often requested.
- Crowd-Pleaser: I’ve watched kids who “don’t like fruit” go back for seconds when it’s shaped like a pumpkin. The presentation does all the heavy lifting.
- Unbelievably Delicious: The combination of sweet melon, tart berries, and juicy citrus is a flavor bomb. It’s refreshing and satisfying, especially when you’ve been snacking on heavier party food.
What sets this Healthy Halloween Fruit Tray Pumpkin Display apart from a regular fruit platter is the visual impact. It’s not just fruit thrown on a plate. It’s a centerpiece. It’s conversation starter. It’s the thing people will remember from your party. And honestly, it makes you look like a kitchen wizard, even though it’s one of the simplest things you’ll ever make. I’ve had friends text me the next day asking for the “recipe,” and I love telling them it’s less of a recipe and more of a clever arrangement.
What Ingredients You Will Need
This Healthy Halloween Fruit Tray Pumpkin Display uses simple, wholesome ingredients that you can find at any grocery store. The beauty of this recipe is its flexibility—you can swap fruits based on what’s in season or what your family prefers. The key is to create a good color contrast so the pumpkin shape really pops.
- 1 large cantaloupe or orange-fleshed honeydew melon: This will be the base of your pumpkin. Look for a melon that is firm and symmetrical, with a nice orange color. A cantaloupe works perfectly because its natural orange hue mimics a pumpkin. (I prefer cantaloupe for its sweetness and color, but honeydew works if you want a lighter green pumpkin look.)
- 1 small seedless watermelon (optional): If you want a larger display, you can use a small watermelon as the base instead of cantaloupe. The green rind adds a nice contrast, but the red flesh inside might not look as pumpkin-like. I stick with cantaloupe for the classic look.
- 1 pint fresh strawberries, hulled and halved: The bright red adds a gorgeous pop of color against the orange melon. Make sure they are ripe but still firm so they hold their shape.
- 1 pint fresh blueberries: These little blue gems look like tiny jewels scattered around the pumpkin. They also add a nice antioxidant boost.
- 1 pint fresh blackberries: The deep purple-black color creates a beautiful contrast with the orange. Blackberries are also great for adding texture.
- 1 cup red or green seedless grapes: Grapes are a classic party fruit. I like to use a mix of red and green for variety, but either works. They add a nice crunch.
- 2-3 clementines or mandarin oranges, peeled and separated into segments: These little orange slices add more orange color and a burst of citrus flavor. They also help fill in gaps around the pumpkin.
- 1-2 kiwis, peeled and sliced (optional): The bright green kiwi slices add a fun, unexpected color. They look great arranged around the base of the pumpkin.
- 1 small piece of celery or a green apple slice: This will be the pumpkin stem. A small piece of celery with leaves attached looks perfect. You can also use a green apple slice cut into a stem shape.
- Fresh mint leaves (optional, for garnish): A few sprigs of mint around the base add a fresh, professional touch. They also smell amazing.
For the base of the display, you’ll need a large round platter or a wooden cutting board. A white platter makes the colors pop the most. If you’re serving this at a party, consider using a rimmed platter to catch any juice that might drip from the fruit. I learned that the hard way when I used a flat board and ended up with a sticky counter.
Equipment Needed
You don’t need any fancy gadgets for this Healthy Halloween Fruit Tray Pumpkin Display, which is part of its charm. Here’s what you’ll need:
- Large round platter or wooden cutting board: This is your canvas. A 12- to 14-inch platter works best for a standard-sized pumpkin. A white platter is ideal because it contrasts well with the fruit colors.
- Sharp chef’s knife: You’ll need this to cut the melon. A sharp knife makes clean cuts and prevents the melon from getting mushy.
- Cutting board: A sturdy cutting board for prepping all your fruit. Make sure it’s large enough to hold the melon.
- Melon baller or small spoon: This is optional but helpful for scooping out the melon seeds. A regular spoon works just fine too.
- Small paring knife: Useful for carving the pumpkin face or any decorative details. If you’re keeping it simple, you can skip this.
- Paper towels: To pat the fruit dry. Wet fruit can make the platter slippery and cause the fruit to slide around.
- Toothpicks (optional): If you want to secure the stem or any decorative elements, toothpicks are handy. Just remember to warn your guests they are there!
I’ve made this tray with just a knife and a cutting board, and it turned out perfectly. The melon baller is nice to have, but it’s not necessary. If you don’t have a large platter, you can use a baking sheet lined with parchment paper. It’s not as pretty, but it works in a pinch. I once used a large pizza pan, and nobody noticed the difference.
Preparation Method
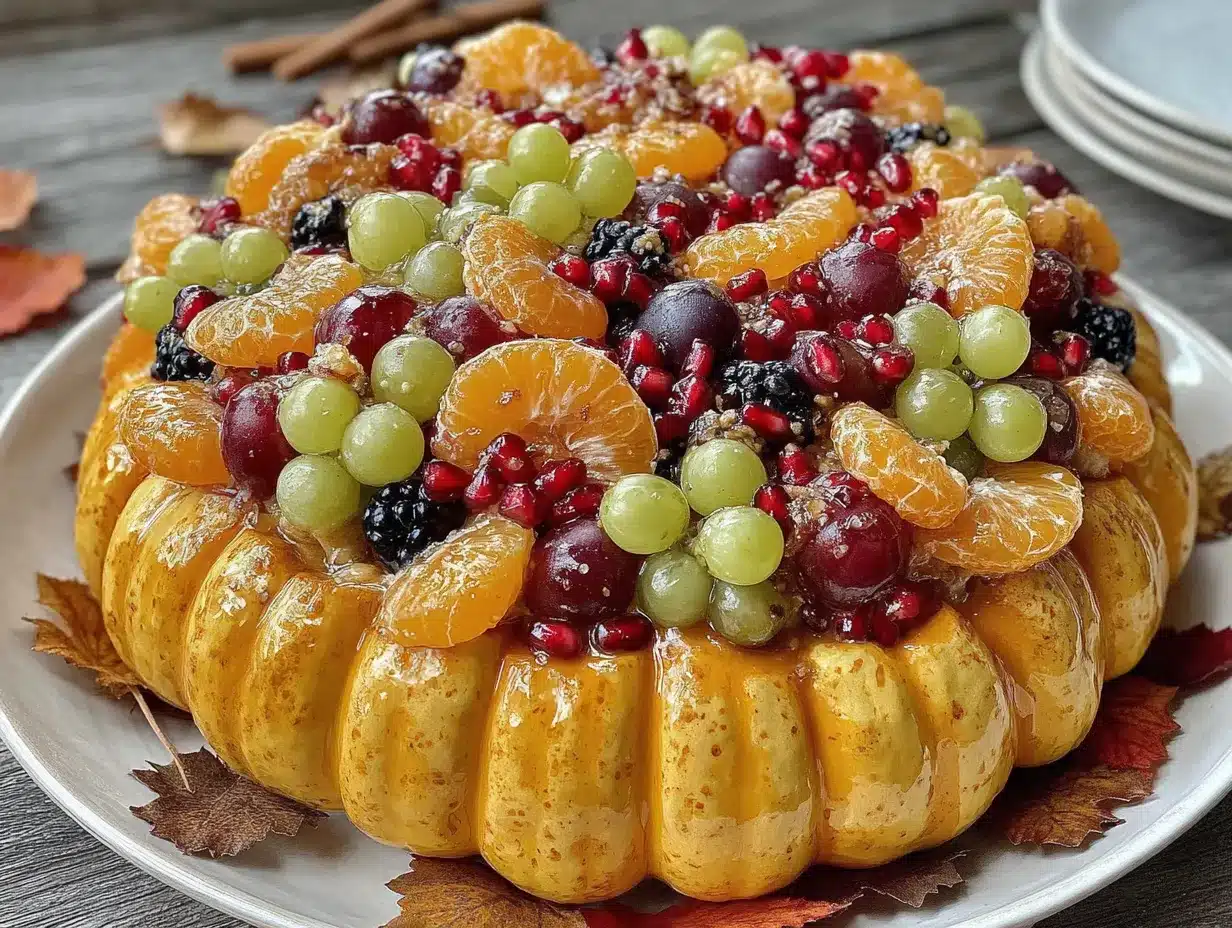
Making this Healthy Halloween Fruit Tray Pumpkin Display is all about the assembly. It’s less like cooking and more like edible art. But don’t worry—it’s much easier than it looks. Here’s how to do it, step by step.
- Prepare the melon pumpkin: Wash your cantaloupe thoroughly. Using a sharp chef’s knife, carefully cut a thin slice off the bottom of the melon so it sits flat on your platter. This is crucial for stability. Then, cut a slice off the top of the melon, about an inch from the stem end. This will be the “lid” of your pumpkin. Scoop out the seeds and stringy pulp from the center of the melon using a spoon or melon baller. You want a clean cavity to fill with fruit. Pat the inside dry with a paper towel.
- Carve the pumpkin face (optional but fun): If you want a jack-o’-lantern look, use a small paring knife to cut a classic face into the side of the melon. Cut triangles for eyes and a jagged mouth. Be careful not to cut too deep—you just want to go through the rind. If you’re serving this for a younger crowd or a more elegant party, you can skip the face and leave the melon smooth. I’ve done both, and the face always gets a laugh.
- Create the stem: Take your piece of celery or green apple slice and insert it into the top of the melon where you made the lid cut. If it’s not staying put, use a toothpick to secure it. A celery stalk with a few leaves attached looks just like a pumpkin stem. It’s a small detail that makes the display feel complete.
- Arrange the base fruits: Place your melon pumpkin in the center of your platter. Now, start arranging the other fruits around it. I like to create a ring of green grapes or kiwi slices right around the base of the melon. This creates a “vine” or “leaf” effect and anchors the pumpkin to the platter. Then, scatter the strawberries, blueberries, blackberries, and clementine segments around the pumpkin in a colorful, organic pattern. Don’t overthink it—just make it look abundant and inviting.
- Fill the melon cavity: Now, take your remaining fruit and fill the hollowed-out center of the melon. I like to layer the fruits for visual interest. Start with a layer of blueberries at the bottom, then add some strawberry halves, then some grape clusters. Top it off with a few blackberries and clementine segments. The goal is to make it look overflowing and generous. Don’t be afraid to pile it high.
- Add the finishing touches: Garnish the platter with fresh mint leaves scattered around the base. If you have any extra fruit, tuck it into any bare spots. Step back and look at your creation. Does it look balanced? Does it need more color? Adjust as needed. The beauty of this display is that it’s forgiving—you can always add more fruit to fill a gap.
- Serve immediately or refrigerate: This is best served within an hour of assembly. If you need to make it ahead, you can prep all the fruit and carve the melon up to a day in advance. Store the cut fruit in separate airtight containers in the fridge. Assemble the tray no more than 2-3 hours before serving to keep everything looking fresh. The melon will start to weep juice after a while, so don’t assemble it too early.
One thing I learned from my first attempt: don’t overstuff the melon cavity. If you pack it too tight, the fruit on the bottom gets squished and releases juice, which can make the whole thing a little soggy. Leave some breathing room. And if you’re using a cantaloupe with a very thin rind, be gentle when carving the face—it can crack if you press too hard. I speak from experience.
Cooking Tips & Techniques
I’ve made this Healthy Halloween Fruit Tray Pumpkin Display about a half-dozen times now, and I’ve picked up a few tricks that make the process smoother. Here are my best tips for success.
Choose the right melon: The melon is the star of the show, so pick a good one. Look for a cantaloupe that feels heavy for its size and has a sweet, fruity smell at the stem end. Avoid melons with soft spots or bruises. A firm melon is easier to carve and holds its shape better. If you can only find honeydew, you can still make this—it will just be a green pumpkin instead of an orange one. It still looks festive, especially if you use a lot of orange fruits like clementines and cantaloupe balls around it.
Pat your fruit dry: This is a small step that makes a big difference. After you wash and cut your fruit, pat it dry with paper towels. Excess moisture can make the platter slippery and cause the fruit to slide around. It also can make the melon rind sweat, which isn’t a great look. Dry fruit also holds its color better and doesn’t get that sad, weepy appearance as quickly.
Use a toothpick for the face: If you’re carving a jack-o’-lantern face, use a toothpick to lightly score the design into the rind before you cut. This gives you a guide and helps prevent mistakes. I once freehanded a face and ended up with one eye significantly larger than the other. It looked… quirky. The toothpick trick keeps things symmetrical.
Keep it chilled: Fruit tastes best when it’s cold and crisp. If you’re serving this at a party, keep the platter in the fridge until the last minute. You can also set the platter on a bed of ice in a larger serving dish to keep it cool for longer. Just make sure the ice doesn’t touch the fruit directly, or it can make it waterlogged.
Make it a dip destination: This fruit tray pairs beautifully with a simple dip. A yogurt-based dip with a touch of honey and cinnamon, or a chocolate hummus, takes it to the next level. Place a small bowl of dip in the center of the melon cavity, surrounded by the fruit. It adds a creamy element that contrasts nicely with the fresh fruit. I’ve also served it with a side of peanut butter dip, and it was a huge hit with the kids.
Don’t stress perfection: This is the most important tip. Your pumpkin doesn’t have to be perfectly round. Your fruit arrangement doesn’t have to be symmetrical. The charm of this display is that it looks handmade and abundant. Imperfections make it look real and approachable. Trust me, nobody is going to notice that one strawberry is slightly lopsided. They’re going to be too busy grabbing a handful of blueberries.
Variations & Adaptations
One of the best things about this Healthy Halloween Fruit Tray Pumpkin Display is how easy it is to adapt. I’ve tried several variations, and they all turned out great. Here are some ideas to make it your own.
Dietary adaptations: This recipe is naturally gluten-free, vegan, dairy-free, and nut-free. It’s perfect for parties with multiple dietary restrictions. If you’re serving a crowd with allergies, this is a safe bet. Just make sure any dips you add are also compliant.
Seasonal fruit swaps: In the fall, you can add sliced apples and pears to the mix. They add a nice crunch and a more autumnal flavor. Just toss them in a little lemon juice to prevent browning. In the summer, swap in fresh peaches, nectarines, and plums. The colors will be different, but the effect is still beautiful.
Spooky additions: For a more Halloween-themed tray, add some “eyeballs” made from mozzarella balls with black olive slices, or “fingers” made from carrot sticks with an almond sliver for a nail. You can also add some gummy worms crawling out of the melon cavity for a fun, slightly mischievous touch. I did this for a party, and the kids went wild for it.
Mini pumpkin version: If you’re serving a smaller crowd, use a personal-sized melon like a sugar baby watermelon or a small cantaloupe. You can also make individual pumpkin cups by hollowing out small oranges or clementines and filling them with mixed berries. These are perfect for lunchboxes or party favors.
Dip variations: The dip can really change the flavor profile. A sweet cream cheese dip (mix cream cheese with a little powdered sugar and vanilla) is decadent. A simple honey-lime dressing (honey, lime juice, and a pinch of salt) is bright and tangy. Or keep it super simple with a bowl of Greek yogurt and a drizzle of maple syrup. I’ve even used a store-bought caramel dip in a pinch, and it was delicious.
Personal variation: My favorite version of this tray includes a layer of dark chocolate chips sprinkled over the fruit. It adds a little bit of indulgence without going overboard. I also like to add a few pomegranate seeds for a jewel-like pop of color. They look like little rubies scattered among the fruit. It’s a small touch, but it makes the whole display feel more special.
Serving & Storage Suggestions
This Healthy Halloween Fruit Tray Pumpkin Display is best served cold, right out of the fridge. The fruit is crisp, the flavors are bright, and the presentation is at its peak. Here are some tips for serving and storing.
Serving temperature: Serve the tray chilled. If you’re taking it to a party, transport it in the fridge or in a cooler bag. Once it’s on the table, it will be fine for about an hour at room temperature. After that, the fruit starts to soften and the melon can become a bit weepy. If the party is outside on a warm day, try to keep the platter in the shade or on a bed of ice.
Presentation tips: Place the tray at eye level so people can see the pumpkin shape. If you’re serving it on a buffet table, put it in the center where it can be the focal point. You can also surround it with other Halloween-themed snacks like the spooky Halloween charcuterie board for a complete spread. The contrast between the healthy fruit and the indulgent charcuterie is a great conversation starter.
Complementary dishes: This fruit tray pairs wonderfully with other fall treats. A batch of candy corn Rice Krispie treats adds a sweet, crunchy element. For a spooky drink, the glowing green Halloween punch is a perfect match. If you’re looking for a savory option to balance the sweetness, the mummy jalapeño popper pigs in a blanket are a hit. And for a truly festive dessert table, the black cocoa ghost cupcakes complete the spooky theme beautifully.
Storage instructions: This tray is best assembled and served fresh. However, you can store leftovers. Remove the fruit from the melon cavity and store it in an airtight container in the fridge for up to 2 days. The melon pumpkin itself can be wrapped in plastic wrap and stored for a day, but it will start to lose its shape and freshness. The cut fruit will keep for a day or two, but the berries might get a little soft. Use leftovers for smoothies or a fruit salad.
Reheating: You don’t reheat this! It’s a cold dish. If the fruit has been sitting out and has warmed up, you can pop it back in the fridge for 30 minutes to chill it again. The texture won’t be as perfect as fresh, but it will still be tasty.
Flavor development: Fruit doesn’t really “develop” flavor like a stew or a sauce. It’s best when it’s fresh. That said, if you let the fruit sit in a bit of citrus juice (like lime or lemon), it can lightly macerate and become even more flavorful. Just don’t let it sit too long, or it will get mushy.
Nutritional Information & Benefits
This Healthy Halloween Fruit Tray Pumpkin Display is packed with nutrients. It’s a great way to get a serving of fruit in a fun, festive way. Here’s a rough estimate of the nutritional value per serving (based on a 1-cup serving of mixed fruit).
| Nutrient | Amount per serving |
|---|---|
| Calories | 80-100 |
| Total Fat | 0g |
| Sodium | 5mg |
| Total Carbohydrates | 20-25g |
| Dietary Fiber | 3-4g |
| Sugars | 15-18g (natural) |
| Protein | 1-2g |
| Vitamin C | 60-80% DV |
| Vitamin A | 40-60% DV |
Health benefits of key ingredients: Cantaloupe is rich in vitamin A and vitamin C, which are great for immune health and skin. Berries are packed with antioxidants that help fight inflammation. Grapes contain resveratrol, which is good for heart health. Clementines are an excellent source of vitamin C. This tray is basically a multivitamin in edible form.
Dietary considerations: This recipe is naturally vegan, gluten-free, dairy-free, and nut-free. It’s also free from added sugars—all the sweetness comes from the fruit itself. It’s a great option for parties where guests have dietary restrictions. It’s also a fantastic way to get kids to eat more fruit without a fight. The fun presentation does all the work.
Potential allergens: This recipe is free from the top allergens. However, if you add any dips or garnishes, be sure to check their labels for potential allergens. Cross-contamination is always a risk with pre-cut fruit from the store, so if allergies are a concern, wash and cut the fruit yourself.
Personal wellness perspective: I love this recipe because it proves that healthy food can be fun. You don’t have to sacrifice celebration for nutrition. This tray lets you participate in the Halloween festivities without the sugar crash. It’s a win-win, and that’s the kind of recipe I love to share.
Conclusion
This Healthy Halloween Fruit Tray Pumpkin Display has become a staple in my fall recipe rotation. It’s simple, beautiful, and genuinely good for you. Whether you’re hosting a Halloween party, sending a treat to a school celebration, or just want to make a regular Tuesday feel a little more festive, this tray delivers. It’s the kind of recipe that makes you feel like you’ve pulled off something magical, even though it’s just fruit arranged in a clever way.
I love that this recipe invites you to be creative. You can make it as simple or as elaborate as you want. You can carve a face or leave it plain. You can use whatever fruit is in season. It’s a forgiving recipe that rewards experimentation. So don’t be afraid to make it your own. Swap in your favorite fruits, add a dip, or throw in some spooky decorations. The only rule is to have fun with it.
I’d love to hear how your Healthy Halloween Fruit Tray Pumpkin Display turns out! Did you carve a face? What fruits did you use? Did the kids love it? Drop a comment below and let me know. And if you try a variation that you love, share it with the community. We’re all here to make healthy eating a little more fun, one fruit tray at a time. Happy Halloween, and happy snacking!
Frequently Asked Questions
Can I make this fruit tray the night before?
You can prep all the fruit the night before and store it in separate airtight containers in the fridge. However, I recommend assembling the tray no more than 2-3 hours before serving. The melon will start to release juice and the cut fruit can dry out if it sits too long. Assemble it fresh for the best presentation.
What if I can’t find a cantaloupe?
No problem! You can use a honeydew melon, a small seedless watermelon, or even a large pumpkin-shaped gourd (though you won’t eat the gourd itself). The honeydew will give you a green pumpkin, which still looks festive. Just make sure whatever you use is firm and stable on the platter.
How do I keep the fruit from turning brown?
Citrus fruits like apples and pears are the most prone to browning. If you include them, toss them in a little lemon or lime juice before adding them to the tray. The acidity prevents oxidation. Berries, melons, and grapes generally don’t brown, so you don’t need to worry about them.
Can I add a dip to this fruit tray?
Absolutely! A dip takes this tray to the next level. A yogurt-based dip with honey and cinnamon, a chocolate hummus, or a simple cream cheese dip all work beautifully. Place the dip in a small bowl in the center of the melon cavity, surrounded by the fruit. Just make sure the bowl is stable and won’t tip over.
Is this recipe safe for school parties?
Yes! This recipe is naturally free from the top allergens (peanuts, tree nuts, dairy, eggs, soy, wheat, and gluten). It’s a safe and healthy option for classroom celebrations. However, always check with the teacher or school about specific allergy policies, as individual guidelines can vary. And remember to wash all fruit thoroughly before cutting.
Pin This Recipe!
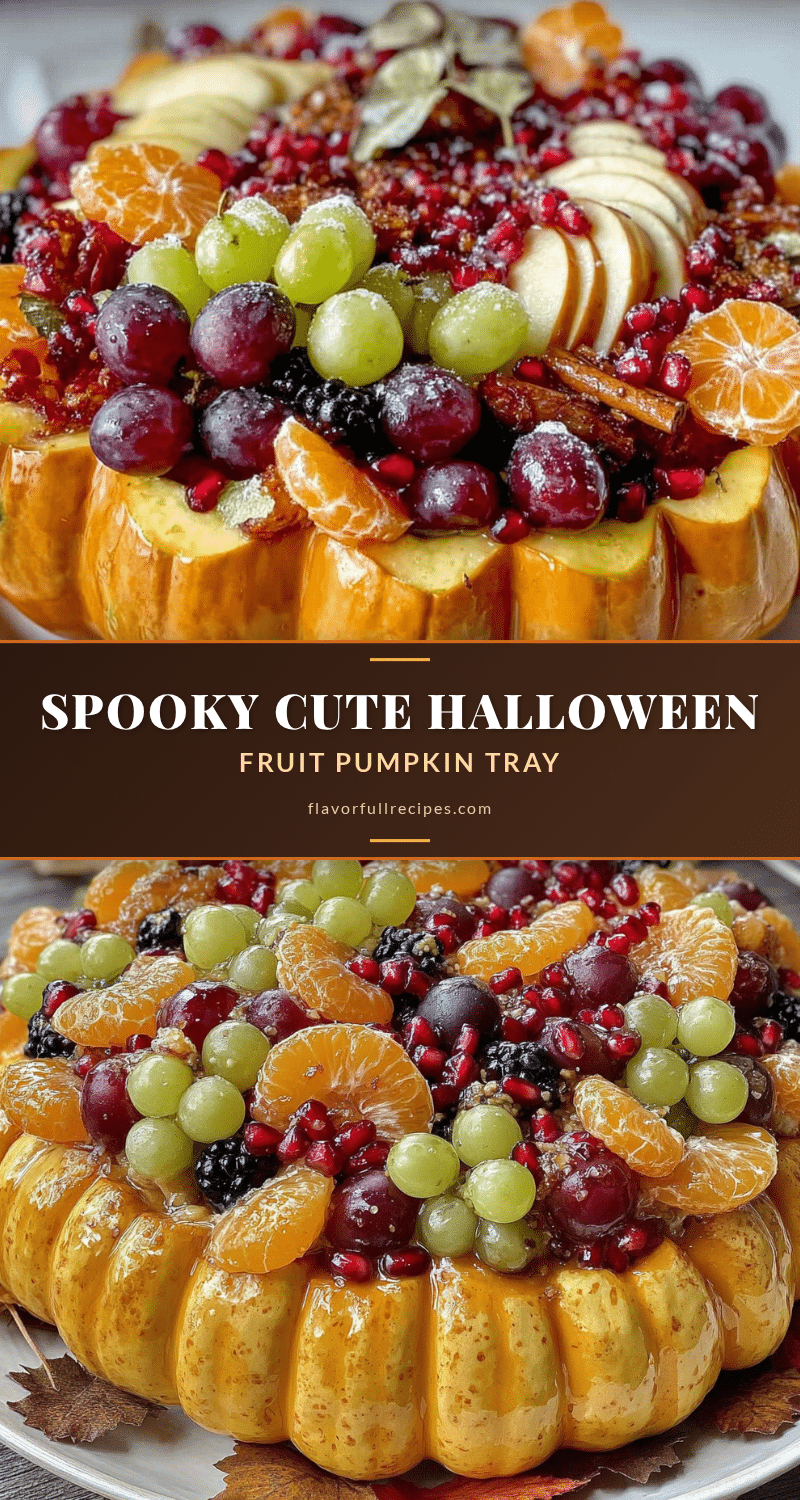
Healthy Halloween Fruit Tray: Easy Pumpkin Display
- Total Time: 20 minutes
- Yield: 8 servings 1x
Description
A festive and healthy Halloween snack featuring a cantaloupe carved into a pumpkin shape and filled with a colorful mix of berries, grapes, and citrus segments. This easy-to-assemble fruit tray is a crowd-pleaser that looks like a centerpiece.
Ingredients
- 1 large cantaloupe or orange-fleshed honeydew melon
- 1 small seedless watermelon (optional)
- 1 pint fresh strawberries, hulled and halved
- 1 pint fresh blueberries
- 1 pint fresh blackberries
- 1 cup red or green seedless grapes
- 2–3 clementines or mandarin oranges, peeled and separated into segments
- 1–2 kiwis, peeled and sliced (optional)
- 1 small piece of celery or a green apple slice (for stem)
- Fresh mint leaves (optional, for garnish)
Instructions
- Prepare the melon pumpkin: Wash the cantaloupe. Cut a thin slice off the bottom so it sits flat. Cut a slice off the top (about 1 inch from the stem end) to create a lid. Scoop out seeds and stringy pulp. Pat the inside dry.
- Carve the pumpkin face (optional): Use a small paring knife to cut a classic jack-o’-lantern face into the side of the melon. Cut triangles for eyes and a jagged mouth. Be careful not to cut too deep.
- Create the stem: Insert the piece of celery or green apple slice into the top of the melon where the lid was cut. Use a toothpick to secure if needed.
- Arrange the base fruits: Place the melon pumpkin in the center of a large round platter. Arrange a ring of green grapes or kiwi slices around the base. Scatter strawberries, blueberries, blackberries, and clementine segments around the pumpkin in a colorful pattern.
- Fill the melon cavity: Layer the remaining fruit inside the hollowed-out melon. Start with blueberries, then add strawberry halves, grape clusters, blackberries, and clementine segments. Pile it high for an overflowing look.
- Add finishing touches: Garnish with fresh mint leaves around the base. Adjust any bare spots with extra fruit.
- Serve immediately or refrigerate: Best served within an hour of assembly. If making ahead, prep fruit and carve melon up to a day in advance, but assemble no more than 2-3 hours before serving.
Notes
Choose a firm, symmetrical cantaloupe for best results. Pat fruit dry to prevent slipping. For a larger display, use a small watermelon as the base. The tray pairs well with a yogurt-based dip or chocolate hummus. Leftovers can be stored in an airtight container for up to 2 days.
- Prep Time: 20 minutes
- Cook Time: 0 minutes
- Category: Appetizer
- Cuisine: American
Nutrition
- Serving Size: 1 cup
- Calories: 90
- Sugar: 16
- Sodium: 5
- Carbohydrates: 22
- Fiber: 3
- Protein: 1
Keywords: Halloween fruit tray, pumpkin fruit display, healthy Halloween snack, fruit platter, fall fruit tray, easy Halloween recipe