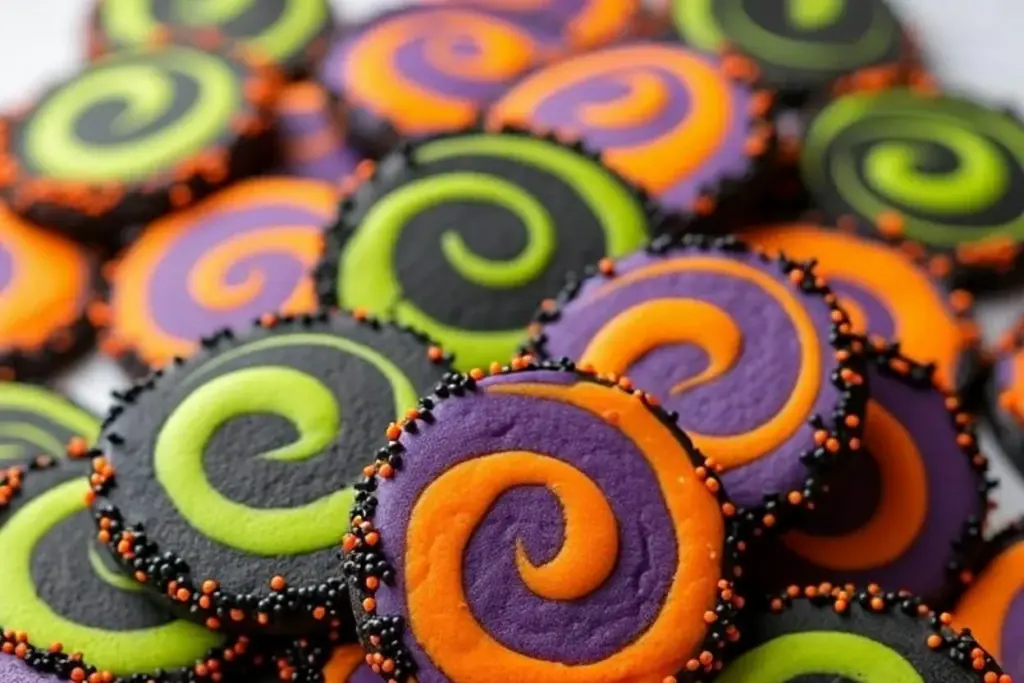
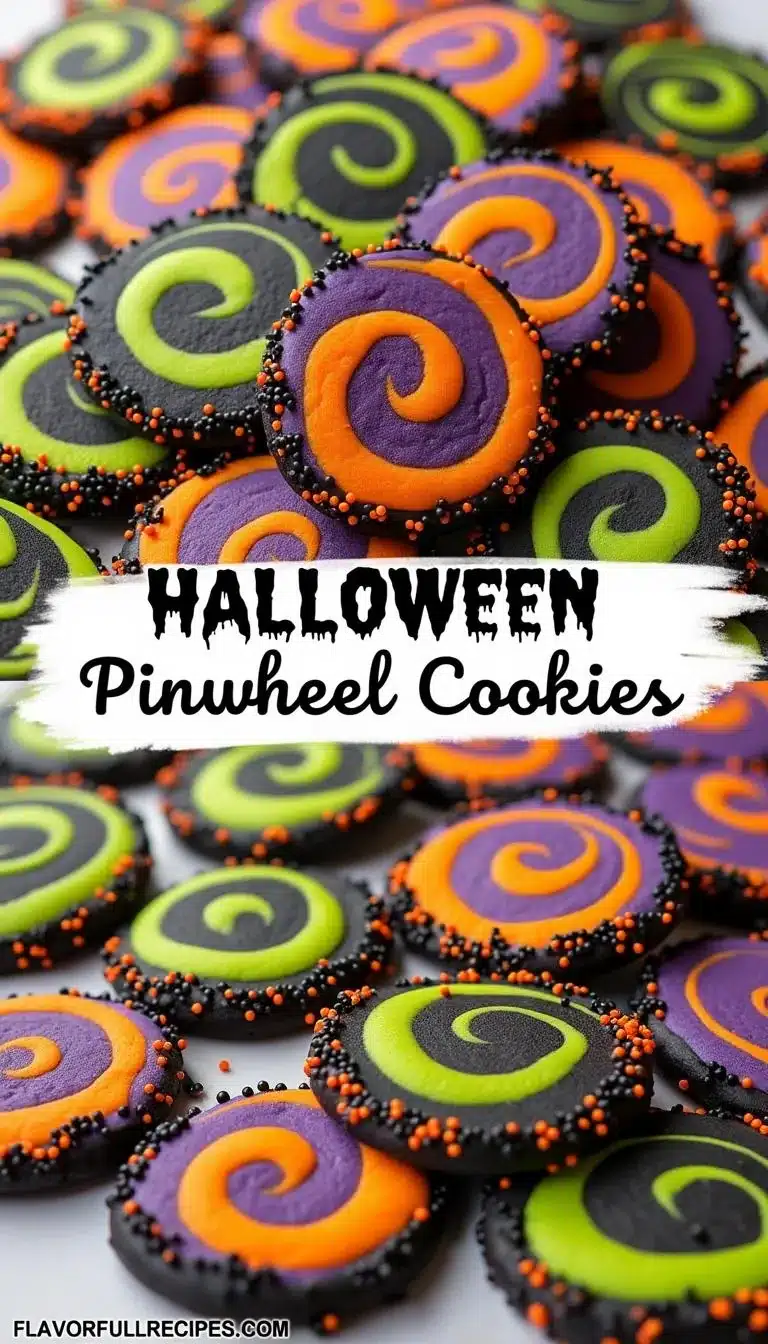
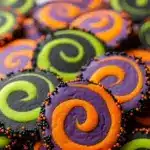
That moment when you slice into a log of chilled dough and reveal swirling ribbons of orange, purple, and black—pure Halloween magic! Honestly, these Halloween pinwheel sugar cookies are my secret weapon every year. The first time I made them, my kitchen looked like a candy store explosion, but the results were so worth it. Friends showed up early just for a taste, and kids (and adults) couldn’t stop smiling at those hypnotic spirals. If you love festive treats that look like you spent hours crafting them (but really, they’re pretty easy), you’re in the right place. And hey, nothing beats the combo of sugar cookie softness and eye-popping color!
So why do I keep coming back to these vibrant spiral biscuits every October? It’s simple—they deliver fun, flavor, and a pop of color that just screams Halloween. Whether you’re baking for a monster-movie night, school party, or just want to impress your family, these cookies always steal the show. And trust me, if you’re looking for a Pinterest-worthy treat that’s as enjoyable to make as it is to eat, this Halloween pinwheel sugar cookies recipe is the ticket. I’ve tested it more times than I can count, tweaking the rolling technique until those spirals are just right, and I’m excited to share all my tips.
From mixing the dough to slicing those perfectly patterned biscuits, you’ll feel like a cookie artist (even if you’ve never tried pinwheels before). Plus, you can customize the colors for your own spooky vibe. Ready to learn the easiest way to craft showstopper Halloween pinwheel sugar cookies at home? Grab your apron—let’s roll up some Halloween fun!
Why You’ll Love This Recipe
- Visually Stunning: Those vibrant spirals—orange, purple, and black—make these Halloween pinwheel sugar cookies look straight out of a bakery window. Perfect for your Halloween party table or a spooky movie night snack!
- Easy to Make: You don’t need fancy bakery skills here. Just a little patience and a few food coloring gels, and you’re good to go. I’ve tested this method so many times, and it’s reliable even for beginners.
- Customizable Colors & Flavors: Swap out colors, add a dash of vanilla or almond extract, or sprinkle with colored sugar for extra sparkle—these spiral biscuits can be tailored to match your mood or your party theme.
- Perfect for Parties: Kids love helping with the rolling and slicing, and adults are always wowed by the final look. These cookies are hands-down the most requested treat at my annual Halloween bash.
- Soft, Buttery Texture: They’re not just pretty—each bite delivers that classic sugar cookie taste with a hint of vanilla and a melt-in-your-mouth crumb.
What sets this Halloween pinwheel sugar cookies recipe apart? The trick is in the rolling technique and the chilling step. I blend the dough just until smooth, color each portion with gel food coloring (for boldness), then carefully stack and roll. It’s a little messy, but honestly, that’s part of the fun. The biggest surprise? These vibrant spiral biscuits are just as soft and delicious as they are striking—no dry, crumbly cookies here!
If you’ve ever struggled with pinwheel cookies cracking while slicing, I’ve got you covered. My chilling method keeps the colors sharp and the dough easy to work with. And if you want to impress your guests or get Pinterest likes, these cookies do the job—without the stress. Comfort food, festive flair, and easy enough for a busy weeknight baking session. What more can you ask for?
What Ingredients You Will Need
This Halloween pinwheel sugar cookies recipe relies on simple pantry staples, plus a splash of vibrant food coloring. Here’s everything you need for showstopper spiral biscuits every time:
- For the Dough:
- 2 ½ cups (315g) all-purpose flour (sifted for the softest texture)
- ¾ teaspoon baking powder (gives a gentle lift)
- ¼ teaspoon fine salt (balances sweetness)
- 1 cup (226g) unsalted butter, softened (room temperature is best)
- 1 cup (200g) granulated sugar
- 1 large egg (room temperature for easy mixing)
- 2 teaspoons vanilla extract (or almond extract for a twist)
- For Coloring & Decoration:
- Gel food coloring in orange, purple, and black (I always use gel for richer color—brands like Wilton or Americolor are my go-to)
- Optional: colored sanding sugar or Halloween sprinkles (for extra sparkle)
Ingredient Tips:
- If you want gluten-free Halloween pinwheel sugar cookies, swap in your favorite 1:1 gluten-free flour blend. (Bob’s Red Mill works well, just adjust liquid if needed.)
- Dairy-free? Use a plant-based butter alternative—just make sure it’s unsalted and suitable for baking.
- For a deeper vanilla flavor, try vanilla bean paste instead of extract.
- If you’re feeling extra fancy, add a dash of orange zest to the orange dough for a subtle citrus note.
- Can’t find purple gel coloring? Mix red and blue gels until you get your perfect spooky shade.
Most of these ingredients are probably in your pantry right now! I like to keep a stash of gel colors just for cookie projects like this. If you’re baking with kids, let them pick the color combos—it’s half the fun. And don’t stress if you don’t have sprinkles or sanding sugar; the spirals alone make these biscuits a showstopper.
Equipment Needed
Making Halloween pinwheel sugar cookies doesn’t require fancy gadgets, but having the right tools helps keep things smooth (and less messy!). Here’s what I use every time:
- Stand Mixer or Hand Mixer: For creaming butter and sugar—stand mixers make it hands-off, but hand mixers work just fine. (I’ve used both; if you’re using a hand mixer, scrape the bowl often.)
- Mixing Bowls: You’ll want a few—one for the base dough, and others for dividing and coloring.
- Measuring Cups & Spoons: Precise measuring matters for pinwheel cookies. I use metal cups for dry, glass for liquids.
- Plastic Wrap or Parchment Paper: For rolling and chilling the dough. Parchment makes it easier to roll out evenly and helps prevent sticking.
- Rolling Pin: Essential for getting those even dough layers. If you don’t have one, a clean glass bottle works in a pinch.
- Sharp Knife or Unflavored Dental Floss: For slicing the chilled dough log. Dental floss gives super clean slices—my little secret for perfect spirals!
- Baking Sheets: Lined with parchment for easy cleanup and even baking.
- Wire Cooling Rack: Helps the cookies cool quickly and evenly.
If you’re on a budget, don’t worry. I’ve rolled dough with a wine bottle, sliced with a butter knife, and used plastic grocery bags as makeshift wrap. Just be gentle with the dough, and the cookies will turn out great. Clean your rolling pin before switching colors to keep those spirals crisp!
Preparation Method
- Mix dry ingredients: In a medium bowl, whisk together 2 ½ cups (315g) all-purpose flour, ¾ teaspoon baking powder, and ¼ teaspoon fine salt. Set aside.
- Cream butter and sugar: In a large bowl (or stand mixer), beat 1 cup (226g) unsalted butter and 1 cup (200g) granulated sugar on medium speed for 2-3 minutes, until light and fluffy. The mixture should look pale and feel airy.
- Add egg and vanilla: Beat in 1 large egg and 2 teaspoons vanilla extract until well combined. Scrape down the sides of the bowl as needed.
- Combine wet and dry: Gradually mix in the dry ingredients, adding about one-third at a time. Stir just until a soft dough forms—don’t overmix, or the cookies can turn out tough.
- Divide and color dough: Divide the dough evenly into three bowls. Add orange gel coloring to one third, purple to another, and black to the last. Knead gently with a spatula or your hands until each portion is evenly colored. (Tip: Use gloves for less mess!)
- Roll out layers: Place each colored dough onto a separate sheet of parchment paper. Roll each into a rough rectangle about ¼ inch thick (6mm), roughly 9 x 6 inches (23 x 15 cm). If dough sticks, dust lightly with flour.
- Stack and trim: Carefully lift the purple dough and place it on top of the black dough. Then, place the orange layer on top. Trim edges with a knife to make an even rectangle (for sharp spirals).
- Roll up the dough: Starting from the long side, use the parchment to help roll the stack into a tight log. Roll slowly and evenly, pressing gently to keep air pockets out.
- Chill the log: Wrap the dough log tightly in plastic wrap. Chill in the refrigerator for at least 2 hours (or up to overnight). The firmer the log, the cleaner those spiral slices!
- Preheat oven: When ready to bake, heat oven to 350°F (175°C). Line baking sheets with parchment.
- Slice cookies: Unwrap the chilled dough log. Using a sharp knife or dental floss, slice into ¼ inch (6mm) thick rounds. If you want, sprinkle edges with colored sugar or sprinkles.
- Bake: Place cookies 2 inches apart on prepared sheets. Bake 9-11 minutes, until just set and edges look slightly golden. Don’t overbake—these spiral biscuits are best soft!
- Cool: Transfer cookies to a wire rack. Let them cool completely before serving (they firm up as they cool).
Troubleshooting: If dough cracks, let it warm up for a few minutes before rolling or slicing. If colors bleed, make sure dough is well chilled and use gel coloring, not liquid. For the cleanest spirals, always trim the rectangle and roll tightly.
Efficiency tip: Mix, color, and roll all doughs at once, then stack and chill. The chilling step is key—don’t skip it! If you’re short on time, freeze the log for 30 minutes instead of chilling overnight.
Cooking Tips & Techniques
I’ve made a lot of pinwheel cookies—trust me, these tricks make a big difference!
- Use gel food coloring: Liquid coloring can make dough sticky and dull. Gel colors deliver bold, vibrant spirals without messing up the texture.
- Roll dough between parchment: It prevents sticking and helps you transfer layers easily. If your dough gets too soft, pop it in the fridge for 10 minutes.
- Stack and trim: Don’t skip this! Trimming the stacked dough makes the spirals clean and even. Use a ruler if you want really sharp edges (I do—call me a cookie perfectionist).
- Chill, chill, chill: The colder your dough log, the sharper your spirals. I once tried slicing before chilling, thinking I’d save time—major fail. The colors smeared everywhere.
- Slice with dental floss: Sounds weird, but it’s the best tool for clean slices. Just slide it under and pull up!
- Watch your oven time: These spiral biscuits bake fast. Set a timer and pull them out when the edges are just set—they’ll keep cooking on the sheet for a minute after you pull them.
- Multitasking: While the dough chills, prep your sprinkles or set up your cooling racks. Keeps those hands busy and avoids kitchen chaos.
If you ever find your spirals coming out wonky, don’t sweat it—imperfect cookies taste just as good. I’ve learned that kids love the “monster” ones best anyway! The trick is keeping your layers even and stacking with care. If you’re making a double batch (I always do for parties), roll and chill each log separately for best results.
Variations & Adaptations
Halloween pinwheel sugar cookies are super flexible! Here are my favorite ways to switch things up:
- Gluten-Free: Use a 1:1 gluten-free flour blend and check baking time—sometimes they need an extra minute. The texture stays surprisingly soft!
- Flavor Twists: Add orange or lemon zest to the orange layer, or use almond extract instead of vanilla. You can even mix in a pinch of cinnamon for a warm, autumn note.
- Seasonal Colors: Switch colors for other holidays—red and green for Christmas, pastel for Easter, or even rainbow for birthdays. The spiral biscuit technique works year-round!
- Vegan-Friendly: Sub in plant-based butter and a flaxseed “egg” (1 tbsp flaxseed meal + 3 tbsp water). The cookies hold together, but let the dough chill extra long for best slicing.
- Nuts & Sprinkles: Roll the log in crushed nuts or colored sugar before slicing for extra crunch and color.
I once tried a peanut butter layer for a Halloween party—orange, purple, and peanut butter brown. It was a hit! Don’t be afraid to experiment. If allergies are a concern, skip nuts or use certified allergen-free sprinkles. The beauty of these cookies is how easily you can tailor them for any crowd or occasion.
Serving & Storage Suggestions
These Halloween pinwheel sugar cookies are best served fresh and at room temperature, where their soft crumb and vibrant swirls shine. I love stacking them on a black platter with orange napkins—total Pinterest vibes!
- Serving: Let cookies cool completely, then arrange in a spiraling circle or pile for a dramatic effect. Pair with hot cocoa, cider, or even a spooky punch for parties.
- Complementary Dishes: These spiral biscuits go great with caramel popcorn, chocolate bark, or a cheese board for grown-up Halloween gatherings.
- Storing: Store cookies in an airtight container at room temperature for up to 5 days. For longer storage, you can freeze the dough log before slicing, or freeze baked cookies for up to a month. Thaw on a wire rack for best texture.
- Reheating: If cookies get a bit firm, warm in a 300°F (150°C) oven for 2-3 minutes. They’ll soften right up and taste freshly baked!
- Flavor Development: The vanilla flavor deepens after a day or two, and the colors stay bold—perfect for making ahead.
Pro tip: If you’re prepping for a party, bake a batch a day early and store in a cool, dry place. They’ll be ready to wow your guests, and you’ll have one less thing to stress about!
Nutritional Information & Benefits
Here’s an estimate for each Halloween pinwheel sugar cookie (about 30 cookies per batch):
- Calories: ~110 kcal
- Fat: 5g
- Carbohydrates: 15g
- Sugar: 8g
- Protein: 1g
While these spiral biscuits are definitely a treat, the recipe uses real butter for flavor and texture, and you can easily adapt it for dietary needs (gluten-free, dairy-free, nut-free). The colors come from gel food coloring, which is more concentrated than liquid—so you use less. If you’re watching allergens, skip nuts and double-check your sprinkles. For me, the biggest wellness win is the joy these cookies bring—baking with family, sharing with friends, and making Halloween memories. That’s worth every sweet bite.
Conclusion
So there you have it—my go-to Halloween pinwheel sugar cookies recipe for vibrant spiral biscuits that never fail to impress. Whether you’re a seasoned cookie decorator or just want something festive and fun, these cookies deliver big flavor, stunning color, and lots of smiles. I love how easy it is to customize the colors (and even flavors), and how every batch turns out just a little different. That homemade magic is what makes these cookies special!
Give these a try for your next Halloween bash, school event, or cozy night in. Trust me, once you see those swirls, you’ll want to make them for every holiday. If you’ve got your own twist or family tradition, I’d love to hear about it—drop a comment below, share your photos, or tag me on Pinterest. Happy baking, and have a wonderfully wicked Halloween!
Frequently Asked Questions
Can I make the dough ahead of time?
Absolutely! You can prepare the dough and keep it wrapped in the fridge for up to 48 hours, or freeze the log for up to a month. Just thaw slightly before slicing.
Why do my pinwheels crack when I slice them?
If your dough is too cold or too dry, it can crack. Let the log sit at room temp for 5-10 minutes and slice gently with a sharp knife or dental floss.
Can I use liquid food coloring instead of gel?
Gel coloring is best for vibrant spirals and a smooth dough. Liquid coloring works, but the colors will be less bold and the dough may get sticky.
How do I keep the colors from blending together?
Be sure to chill the dough log thoroughly before slicing and avoid overhandling the dough. Trimming the edges before rolling also helps keep layers distinct.
Are these cookies suitable for kids with allergies?
Yes! Just use allergen-free flour for gluten sensitivity, plant-based butter for dairy allergies, and skip nuts or use safe sprinkles. Always check labels to be sure.
Halloween Pinwheel Sugar Cookies
- Total Time: 2 hours 40 minutes
- Yield: 30 cookies 1x
Description
These vibrant Halloween pinwheel sugar cookies feature hypnotic orange, purple, and black spirals in a soft, buttery sugar cookie base. Easy to make and endlessly customizable, they’re the perfect festive treat for parties, school events, or spooky movie nights.
Ingredients
- 2 1/2 cups (315g) all-purpose flour, sifted
- 3/4 teaspoon baking powder
- 1/4 teaspoon fine salt
- 1 cup (226g) unsalted butter, softened
- 1 cup (200g) granulated sugar
- 1 large egg, room temperature
- 2 teaspoons vanilla extract (or almond extract for a twist)
- Gel food coloring in orange, purple, and black
- Optional: colored sanding sugar or Halloween sprinkles
Instructions
- In a medium bowl, whisk together flour, baking powder, and salt. Set aside.
- In a large bowl or stand mixer, beat butter and sugar on medium speed for 2-3 minutes until light and fluffy.
- Beat in the egg and vanilla extract until well combined, scraping down the bowl as needed.
- Gradually mix in the dry ingredients, adding about one-third at a time. Stir just until a soft dough forms.
- Divide the dough evenly into three bowls. Add orange gel coloring to one, purple to another, and black to the last. Knead gently until each is evenly colored.
- Place each colored dough onto a separate sheet of parchment paper. Roll each into a rectangle about 1/4 inch thick (roughly 9 x 6 inches).
- Carefully stack the purple dough on top of the black, then the orange on top of the purple. Trim edges to make an even rectangle.
- Starting from the long side, use the parchment to roll the stack into a tight log. Roll slowly and evenly.
- Wrap the dough log tightly in plastic wrap. Chill in the refrigerator for at least 2 hours or up to overnight.
- Preheat oven to 350°F (175°C). Line baking sheets with parchment.
- Unwrap the chilled dough log. Slice into 1/4 inch thick rounds using a sharp knife or dental floss. Optionally, sprinkle edges with colored sugar or sprinkles.
- Place cookies 2 inches apart on prepared sheets. Bake 9-11 minutes, until just set and edges are slightly golden.
- Transfer cookies to a wire rack to cool completely before serving.
Notes
For best results, use gel food coloring for vibrant spirals and chill the dough thoroughly before slicing. If dough cracks while slicing, let it warm up for a few minutes. For gluten-free or vegan adaptations, use a 1:1 gluten-free flour blend or plant-based butter and a flaxseed egg. Store cookies in an airtight container at room temperature for up to 5 days or freeze for longer storage.
- Prep Time: 30 minutes
- Cook Time: 10 minutes
- Category: Dessert
- Cuisine: American
Nutrition
- Serving Size: 1 cookie
- Calories: 110
- Sugar: 8
- Sodium: 40
- Fat: 5
- Saturated Fat: 3
- Carbohydrates: 15
- Protein: 1
Keywords: Halloween cookies, pinwheel sugar cookies, spiral biscuits, festive cookies, easy Halloween treats, colorful cookies, party cookies, sugar cookie recipe, holiday baking, kid-friendly cookies