
“You haven’t really lived until you try Hatch chiles roasted just right,” my neighbor said, waving a smoky pepper like a trophy from last summer’s farmers market haul — and that was it. Somehow, those words stuck with me all winter, long past the last charred pepper was gone. It wasn’t just the idea of Hatch chiles; it was the way roasting them turns something simple into something wildly irresistible. I ended up making these flavorful roasted Hatch chile and cheese enchiladas that very weekend, and honestly, it felt like a celebration in every bite. The smell of the peppers blistering on the grill, the bubbling cheese melting into the soft tortillas, and that subtle kick of heat — it all feels like a warm hug on a plate.
What really clicked for me with this recipe is how it balances layers of smoky spice and creamy cheese without fuss. I’ve always been wary of enchiladas that get too heavy or too bland, but roasting the Hatch chiles first adds this deep, earthy flavor that’s hard to beat. Plus, the cheese melts into the roasted chile filling, making every bite gooey and packed with personality. Honestly, you don’t need a fancy kitchen gadget or hard-to-find ingredients to pull this off — just a little patience and a craving for good food.
Every time I make these enchiladas, it reminds me of those casual chats over a backyard grill, sharing stories and snacks that feel like they’ve been passed down rather than invented last week. And if you’ve ever enjoyed a dish like my creamy Hatch green chili chicken enchiladas, you’ll see how this one leans into simpler, yet equally bold flavors. There’s just something about Hatch chiles that makes enchiladas sing — maybe it’s the way they bring a touch of New Mexico sunshine right to your dinner table.
So if you’re the kind of cook who loves dishes with a little heat, a lot of comfort, and a story behind every bite, these roasted Hatch chile and cheese enchiladas might just become your new go-to. They’re not flashy, but they’re honest-to-goodness satisfying, and that’s the quiet promise I’m making here.
Why You’ll Love This Recipe
This recipe for flavorful roasted Hatch chile and cheese enchiladas has quickly become one of my favorites for several reasons that go beyond just taste. After a few rounds of tweaking and testing, I’m confident you’ll appreciate the way it fits into your kitchen routine and your flavor cravings.
- Quick & Easy: The whole enchilada assembly comes together in under 45 minutes, making it perfect for those busy weeknights when you want something comforting without spending hours in the kitchen.
- Simple Ingredients: You don’t need exotic staples here — Hatch chiles, cheese, tortillas, and some pantry basics are all it takes. If you’re ever in a pinch, frozen roasted Hatch chiles work almost as well as fresh.
- Perfect for Any Occasion: Whether it’s a casual family dinner or a small get-together, these enchiladas impress without stress. They’re also a great way to introduce friends to the magic of Hatch chiles.
- Crowd-Pleaser: Kids, adults, picky eaters, spice lovers — this dish tends to win over everyone. The cheese mellowing the heat makes it approachable but still packed with flavor.
- Unbelievably Delicious: That roasted depth from the Hatch chiles combined with creamy, melty cheese is a total comfort-food jackpot.
What makes this recipe stand out? It’s the roasting step — that smoky charred flavor sets it apart from your usual enchiladas. Plus, I like to blend the roasted chiles with a touch of sautéed onions and garlic to build a filling that’s both vibrant and silky. It’s not just about heat; it’s about layering flavors so every forkful feels like a little fiesta.
Honestly, it’s the kind of meal that makes you pause, close your eyes, and savor the moment — the kind of recipe that invites you to slow down and enjoy good food and company. If you want a taste of southwestern warmth without fuss, this is it.
What Ingredients You Will Need
This recipe uses straightforward, wholesome ingredients that work together to create bold flavor and satisfying texture without any fuss. Most of these might already be lurking in your pantry or fridge, and the Hatch chiles give it that special twist.
- Roasted Hatch chiles: 6-8 medium-sized, stems removed and seeds discarded (fresh or frozen roasted; fresh gives the best smoky flavor)
- Shredded cheese: 2 cups (about 200g) of a blend like Monterey Jack and sharp cheddar for creamy melt and tang
- Flour or corn tortillas: 10-12 small (6-inch) tortillas; flour tortillas are softer and more pliable, corn add authentic texture
- Onion: 1 medium, finely chopped (adds sweetness and depth)
- Garlic cloves: 2, minced (for aromatic punch)
- Olive oil or vegetable oil: 2 tablespoons, for sautéing
- Enchilada sauce: 2 cups (480ml), preferably homemade or a trusted brand; I like using a mild red chile sauce to complement the Hatch heat
- Sour cream or Mexican crema: ½ cup (120ml), optional for serving (adds cooling creaminess)
- Fresh cilantro: A handful, chopped for garnish (optional but recommended)
- Salt and pepper: To taste
- Ground cumin: ½ teaspoon, optional for a subtle smoky undertone
For substitutions: If you want a gluten-free version, corn tortillas are your friend. For dairy-free, swap cheese with plant-based alternatives, and use coconut yogurt or cashew cream instead of sour cream. When roasting Hatch chiles isn’t an option, canned green chiles can work, but the flavor won’t be quite the same.
Tip: I often get my Hatch chiles from a local farmers market when in season, but if you can’t find fresh, frozen roasted Hatch chiles from brands like Hatch Valley Foods do a decent job maintaining that smoky punch.
Equipment Needed
- Baking dish: A 9×13-inch (23×33 cm) casserole dish works perfectly for assembling and baking the enchiladas.
- Skillet or sauté pan: For roasting and sautéing the onion and garlic along with the Hatch chiles. A cast-iron skillet adds a nice sear.
- Grill pan or broiler: Optional, if you want to roast fresh Hatch chiles yourself at home. Otherwise, a gas stove flame will do the trick.
- Mixing bowls: Medium-sized for combining ingredients and filling tortillas.
- Sharp knife and cutting board: For prepping chiles, onions, and garnishes.
- Measuring cups and spoons: To keep your ingredient ratios on point.
- Aluminum foil: For covering the baking dish during part of the bake to keep enchiladas moist.
For roasting Hatch chiles, if you don’t have a grill or gas stove, a broiler works well too. Just watch carefully so they don’t burn to a crisp! One time I tried roasting indoors with a regular pan, and it took forever and got uneven, so sticking to direct flame or broiler is best. If you’re on a budget, a simple non-stick skillet and a sturdy baking dish will get you through just fine.
Preparation Method
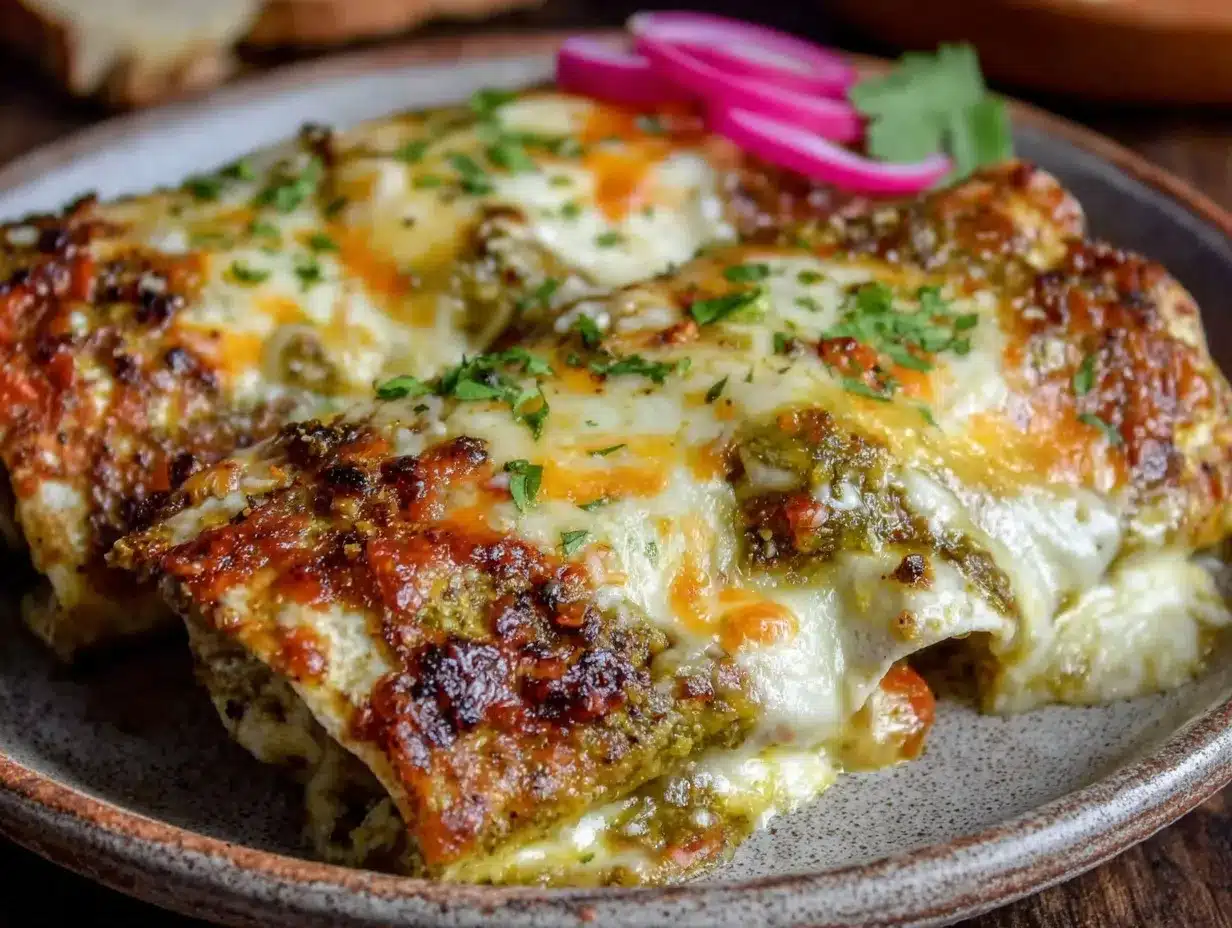
- Roast the Hatch chiles: If using fresh chiles, place them directly over a gas burner flame or under a broiler. Turn occasionally until the skin is blackened and blistered all over, about 8-10 minutes. Transfer to a bowl and cover with plastic wrap to steam for 10 minutes. This loosens the skin.
- Peel and seed: Once cooled, rub the skins off with your fingers or a paper towel (don’t worry about a little char left, that’s flavor). Slice open and remove stems and seeds. Chop the flesh roughly.
- Sauté aromatics: Heat 2 tablespoons of oil in a skillet over medium heat. Add the chopped onion and cook for 3-4 minutes until soft and translucent. Stir in minced garlic and cook for another minute until fragrant.
- Add the Hatch chiles: Toss the chopped roasted chiles into the skillet with cumin (if using), salt, and pepper. Cook for 2-3 minutes to meld flavors, stirring occasionally. Remove from heat and let cool slightly.
- Preheat oven: Set your oven to 375°F (190°C) to get it ready for baking.
- Assemble enchiladas: Pour about ½ cup (120ml) of enchilada sauce into the bottom of your baking dish and spread evenly. Warm tortillas slightly to make them pliable (a few seconds in the microwave or skillet works). Spoon a generous amount of the chile-onion mixture and shredded cheese onto each tortilla. Roll tightly and place seam side down in the baking dish.
- Top and bake: Pour remaining enchilada sauce over the rolled tortillas, making sure they’re all covered. Sprinkle with remaining shredded cheese. Cover with foil and bake for 20 minutes. Remove foil and bake an additional 10 minutes until cheese is bubbly and slightly browned.
- Garnish and serve: Let the enchiladas sit for 5 minutes after baking. Garnish with chopped cilantro and a dollop of sour cream or crema. Serve warm with your favorite sides.
Pro tip: When warming tortillas, don’t overdo it or they’ll crack when rolling. I like to warm stacks wrapped in a damp towel in the microwave for 30 seconds. Also, covering with foil locks in moisture so enchiladas don’t dry out — trust me, it makes all the difference.
Cooking Tips & Techniques
Roasting Hatch chiles is the heart of this recipe, so getting that smoky char right is key. Don’t rush the roasting process; the blistered skin adds a deep, almost sweet flavor that’s impossible to fake. If you’re new to roasting peppers, practice a few times on the stove or broiler to get the hang of it.
When removing skins, it’s okay if a little char sticks — that adds character. Just avoid rinsing them under water afterward, or you’ll wash away the flavorful oils.
For cheese, using a blend like Monterey Jack combined with sharp cheddar gives the best melt and flavor combo. I once tried just cheddar, and it got a bit greasy; the Jack smooths it out nicely.
Timing-wise, assembling the enchiladas right before baking keeps tortillas from getting soggy. If you want to prep ahead, assemble without sauce, cover tightly, and bake within 24 hours.
Multitasking tip: While the chiles roast, prep your onions and cheese. I often make a quick side salad or flavor-packed crockpot Korean beef bowls on the side for a full meal experience.
Variations & Adaptations
- Protein Boost: Add shredded chicken or ground beef sautéed with taco seasoning to the chile and cheese mixture for heartier enchiladas.
- Vegetarian Twist: Mix in sautéed mushrooms, zucchini, or black beans to bulk up the filling without losing that cheesy goodness.
- Spice Level: For a milder version, remove all seeds from the chiles and use mild cheese. If you want more heat, add diced jalapeños or a sprinkle of cayenne.
- Different Cooking Methods: Try making these enchiladas in an Instant Pot using the sauté and bake functions for a faster fix.
- Dairy-Free: Swap cheese for vegan cheese shreds and sour cream for cashew cream or coconut yogurt for creamy texture.
Personally, I once tried adding roasted corn and a sprinkle of cotija cheese on top before baking — it gave a nice pop of texture and a salty finish. Experimenting with sides like creamy roasted Hatch chili and corn chowder really rounds out the southwestern vibe.
Serving & Storage Suggestions
These enchiladas are best served hot from the oven, fresh and bubbling. Letting them rest for a few minutes helps the cheese set slightly, making them easier to cut and eat without losing all that oozy goodness.
Pair with a simple side salad, Mexican rice, or refried beans for a complete meal. A cold cerveza or a tangy margarita also complements the smoky heat beautifully.
For leftovers, store in an airtight container in the refrigerator for up to 3 days. Reheat covered in the oven at 350°F (175°C) until warmed through, or microwave with a damp paper towel to keep tortillas moist.
Flavors tend to meld and intensify after a day, so sometimes leftovers taste even better the next day — kind of like a cozy, spicy gift waiting for you in the fridge.
Nutritional Information & Benefits
One serving (about 2 enchiladas) provides roughly 350-400 calories, with a good balance of protein, carbs, and fats. Hatch chiles are low in calories but rich in vitamins A and C, plus capsaicin, which may boost metabolism and reduce inflammation.
The cheese offers calcium and protein, essential for bone health and muscle repair. Using fresh chiles adds antioxidants too, supporting overall wellness.
This recipe can be adapted to gluten-free and dairy-free diets, making it versatile for many nutritional needs. Plus, it’s a satisfying way to enjoy bold flavors without relying on processed ingredients.
Conclusion
Flavorful roasted Hatch chile and cheese enchiladas are a straightforward, satisfying dish that brings a little smoky southwestern magic into your kitchen. What stuck with me was how simple ingredients, treated with a bit of care and patience, can turn into something truly special. You can tweak this recipe to match your taste — add protein, go vegetarian, or dial the spice up or down — making it all your own.
I love how this recipe feels like a cozy gathering around a shared plate, and I hope it finds a place at your table too. If you try it out, I’d love to hear how you make it yours or what sides you pair with it — maybe a refreshing twist like the creamy no-churn strawberry cheesecake ice cream for dessert?
Here’s to good food, good company, and plenty of melty cheese on top.
FAQs About Flavorful Roasted Hatch Chile and Cheese Enchiladas
What’s the best way to roast Hatch chiles at home?
Use a gas stove flame, grill, or broiler to char the skins evenly. Turn often until blackened all over, then steam in a covered bowl to loosen skins before peeling.
Can I make these enchiladas ahead of time?
Absolutely! Assemble without sauce and cover tightly. Bake within 24 hours for best results, or freeze for up to 3 months.
What cheese works best for these enchiladas?
A blend of Monterey Jack and sharp cheddar melts beautifully and balances flavor. You can substitute with mozzarella for milder taste.
How spicy are Hatch chiles?
They have a mild to medium heat, similar to a poblano, but roasting brings out a smoky sweetness that tones down the burn while amplifying flavor.
Can I use corn tortillas instead of flour?
Yes! Corn tortillas add authentic texture and are gluten-free, but warm them gently to avoid cracking when rolling.
Pin This Recipe!
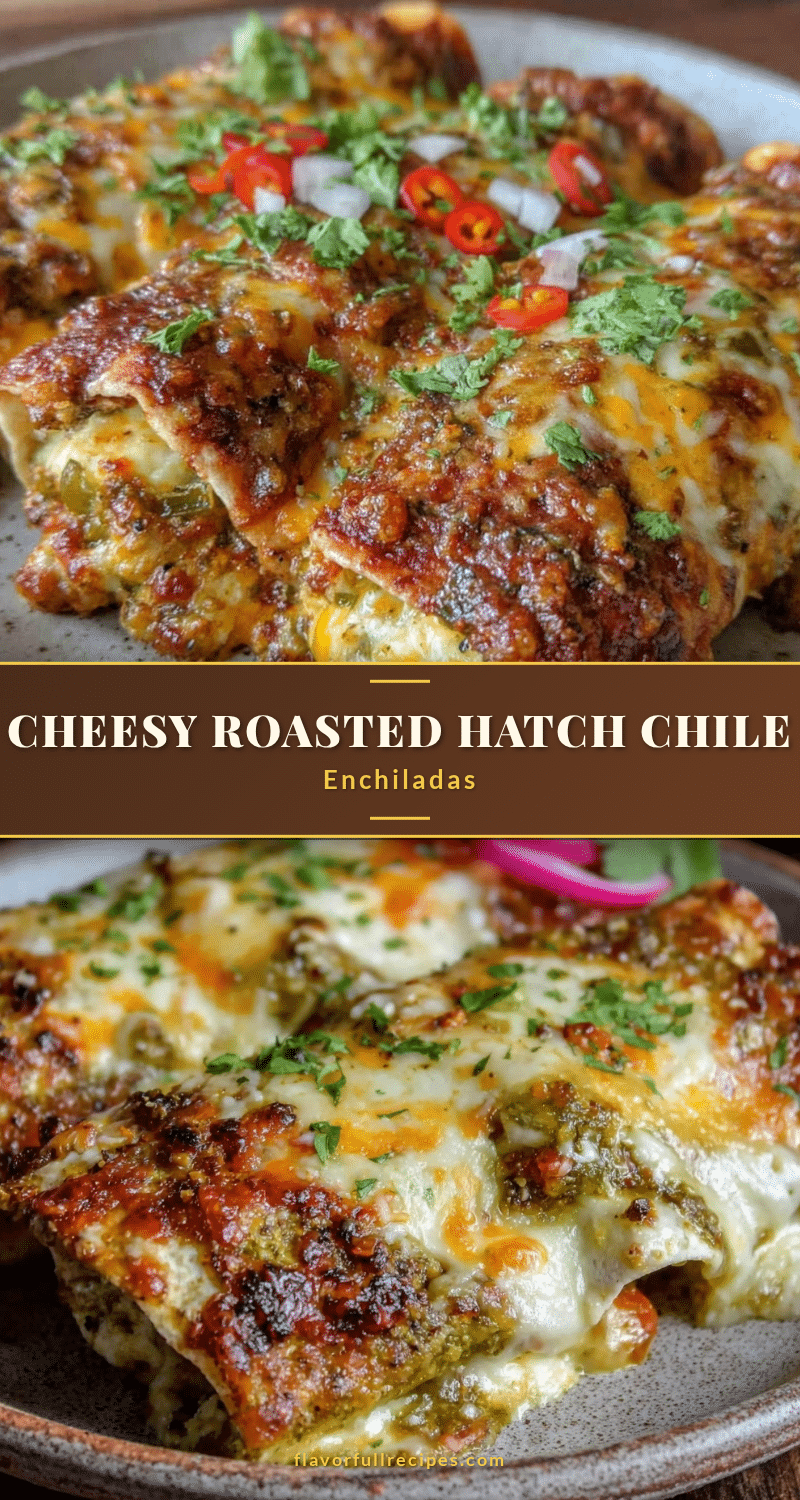
Flavorful Roasted Hatch Chile and Cheese Enchiladas
- Total Time: 50 minutes
- Yield: 4 servings 1x
Description
These roasted Hatch chile and cheese enchiladas combine smoky, roasted chiles with melty cheese for a comforting southwestern dish that’s quick and easy to prepare.
Ingredients
- 6–8 medium-sized roasted Hatch chiles, stems removed and seeds discarded (fresh or frozen roasted)
- 2 cups shredded cheese (Monterey Jack and sharp cheddar blend)
- 10–12 small (6-inch) flour or corn tortillas
- 1 medium onion, finely chopped
- 2 garlic cloves, minced
- 2 tablespoons olive oil or vegetable oil
- 2 cups enchilada sauce (preferably mild red chile sauce)
- ½ cup sour cream or Mexican crema (optional for serving)
- A handful fresh cilantro, chopped (optional for garnish)
- Salt and pepper to taste
- ½ teaspoon ground cumin (optional)
Instructions
- Roast the Hatch chiles over a gas burner flame or under a broiler, turning occasionally until skin is blackened and blistered, about 8-10 minutes. Transfer to a bowl and cover with plastic wrap to steam for 10 minutes.
- Peel off skins, remove stems and seeds, then chop the chile flesh roughly.
- Heat 2 tablespoons oil in a skillet over medium heat. Sauté chopped onion for 3-4 minutes until soft and translucent. Add minced garlic and cook for another minute until fragrant.
- Add chopped roasted chiles, cumin (if using), salt, and pepper to the skillet. Cook for 2-3 minutes, stirring occasionally. Remove from heat and let cool slightly.
- Preheat oven to 375°F (190°C).
- Pour about ½ cup enchilada sauce into the bottom of a 9×13-inch baking dish and spread evenly.
- Warm tortillas slightly to make them pliable. Spoon a generous amount of chile-onion mixture and shredded cheese onto each tortilla. Roll tightly and place seam side down in the baking dish.
- Pour remaining enchilada sauce over the rolled tortillas and sprinkle with remaining shredded cheese.
- Cover with aluminum foil and bake for 20 minutes. Remove foil and bake an additional 10 minutes until cheese is bubbly and slightly browned.
- Let enchiladas rest for 5 minutes. Garnish with chopped cilantro and a dollop of sour cream or crema. Serve warm.
Notes
Warm tortillas gently to avoid cracking. Covering enchiladas with foil during baking locks in moisture and prevents drying out. Roasting Hatch chiles over direct flame or broiler yields best smoky flavor. Avoid rinsing peeled chiles to retain flavor oils. For gluten-free, use corn tortillas; for dairy-free, substitute cheese and sour cream with plant-based alternatives.
- Prep Time: 20 minutes
- Cook Time: 30 minutes
- Category: Main Course
- Cuisine: Southwestern / Mexican
Nutrition
- Serving Size: About 2 enchiladas
- Calories: 375
- Sugar: 4
- Sodium: 650
- Fat: 18
- Saturated Fat: 9
- Carbohydrates: 32
- Fiber: 3
- Protein: 18
Keywords: Hatch chile, enchiladas, roasted chiles, cheese enchiladas, southwestern recipe, easy enchiladas, comfort food


