The lunchbox came home empty. Not just the food—the whole thing. She’d even licked the silicone muffin cup clean, if the sticky residue was any clue. That was the third day in a row my preschooler had demolished every single compartment, and honestly? I was more shocked than proud.
I hadn’t set out to invent anything. It was Tuesday, I was out of bread, and the thought of another sad cracker-and-cheese situation made me want to cry. So I grabbed a muffin tin, started filling the cups with whatever was in the fridge, and called it lunch. She called it “the rainbow tray” and asked for it again the next morning.
That’s the thing about easy preschool lunch box muffin tin meals—they look like you spent an hour planning, when really you just threw together a few leftovers and called it a day. And let’s be honest, some days that’s the kind of win we need. These little compartments turn eating into an activity, which means less negotiating and more actual food going into actual bellies.
I’ve been making these for over a year now, tweaking combinations, figuring out what stays fresh and what turns into a soggy mess. I’ve learned that the right balance of textures—crunchy, creamy, soft, chewy—can make or break a preschooler’s interest. And I’ve discovered that presentation matters more than I ever wanted to admit. A muffin tin makes everything feel like a snack, even broccoli.
So if you’re tired of uneaten sandwiches and untouched apple slices, stick with me. I promise this is the lunch hack that actually works.
Why You’ll Love This Recipe
Let me tell you why these muffin tin meals have become my go-to for preschool lunches, and why they might just change your lunch-packing life too.
- Quick & Easy: You can assemble these in under 10 minutes using leftovers or simple staples. No cooking required for most combinations.
- Simple Ingredients: Nothing fancy here. We’re talking cheese cubes, berries, crackers, and whatever protein you have on hand.
- Perfect for Picky Eaters: The compartment format makes food less intimidating. Kids can eat in any order and skip what they don’t want without feeling overwhelmed.
- Endless Variety: Every day can be different. No more lunchbox boredom for you or your child.
- Portion Control Built-In: Muffin cups naturally limit portions, which is perfect for small appetites.
- Crowd-Pleaser: I’ve served these at playdates and birthday parties. Kids love them. Parents ask for the “recipe.”
What makes this different from just throwing food in a container? It’s the intentional variety and the fun factor. When food is presented in a muffin tin, it becomes an activity—a little tasting menu for tiny people. And honestly, it makes me feel like a good mom, even on days when I’m running on three hours of sleep and cold coffee. That emotional payoff is real, and it matters.
What Ingredients You Will Need
The beauty of these easy preschool lunch box muffin tin meals is that there’s no strict recipe. Think of this as a template, not a rulebook. Here are the categories of ingredients I rotate through, with specific examples that work well.
Protein Options
- Hard-boiled eggs: Quartered or sliced. My daughter calls them “egg moons.” (Peel them under running water for easier removal.)
- Deli turkey or ham: Rolled into pinwheels or cut into small shapes with cookie cutters. I prefer Applegate or Boar’s Head for clean ingredients.
- String cheese: Torn into strips or cut into cubes. Kids love pulling it apart themselves.
- Hummus: A small dollop in one cup, served with veggie sticks for dipping. I like Hope or Cedar’s for flavor and texture.
- Greek yogurt: Plain or vanilla, in a tiny cup. Stonyfield is my go-to for low sugar options.
- Chicken salad: Made with plain yogurt instead of mayo for a lighter option. Keep it simple with shredded chicken, grapes, and a pinch of salt.
Fruit Options
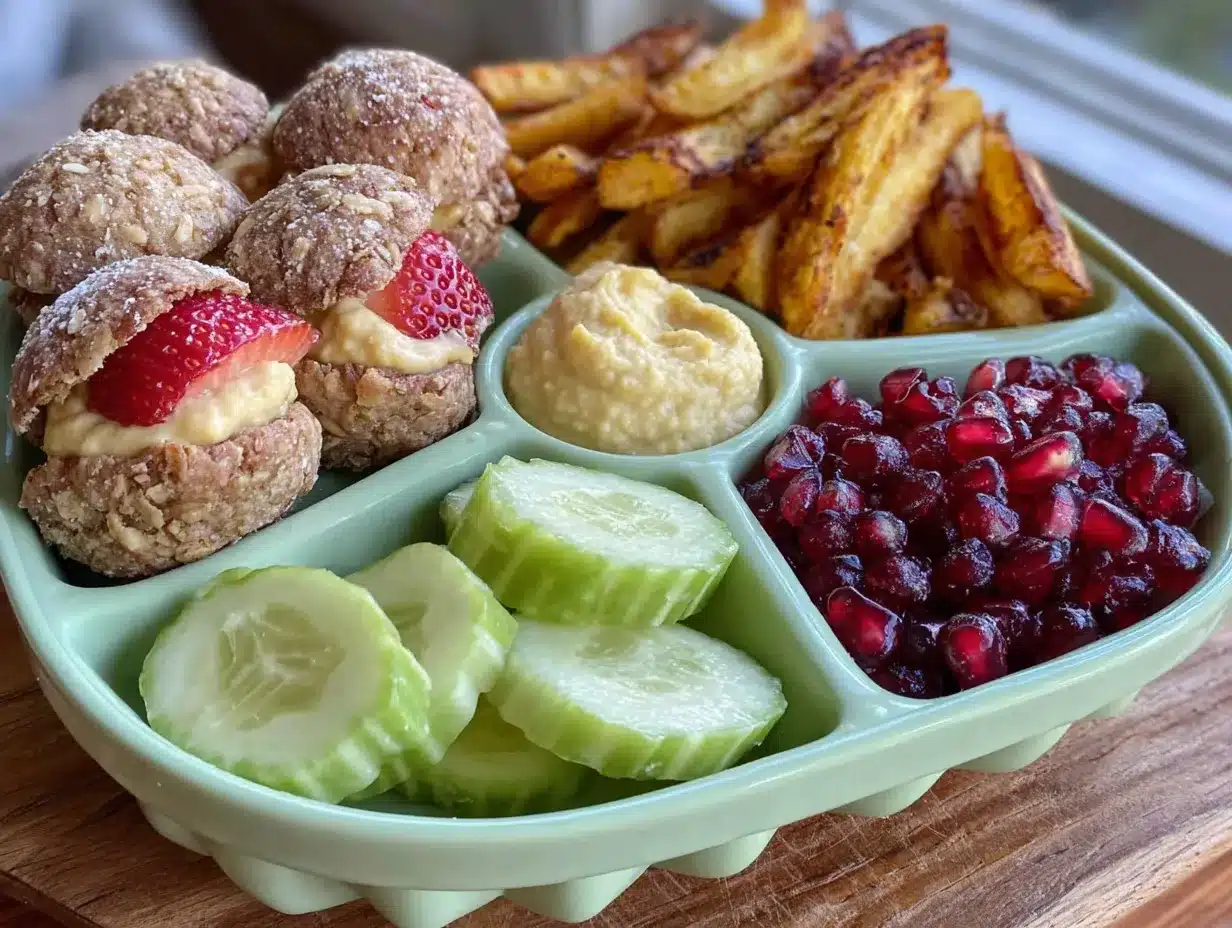
- Berries: Blueberries, raspberries, or sliced strawberries. Wash and dry thoroughly to prevent sogginess.
- Apple slices: Tossed in a little lemon juice to prevent browning. Or use mandarin orange segments for a no-prep option.
- Grapes: Halved lengthwise to prevent choking. Red grapes are sweeter and more appealing to kids.
- Dried fruit: Unsweetened apple rings, apricots, or raisins. Watch for added sugar in packaged options.
- Peach or mango chunks: Fresh or frozen (thawed). My daughter loves frozen mango straight from the bag in warm weather.
Crunchy Options
- Crackers: Whole wheat, rice crackers, or cheese crackers. I like Annie’s or Simple Mills for cleaner ingredients.
- Pretzel sticks: Easy for small hands to grasp and dip.
- Pita chips: Broken into bite-sized pieces. Stacy’s makes a good thin version.
- Popcorn: Air-popped and lightly salted. Skip this for kids under four due to choking risk.
- Roasted chickpeas: Crunchy and protein-packed. Biena makes a good snack version.
Veggie Options (Yes, They’ll Eat These)
- Cucumber rounds: Peeled or unpeeled, cut into thin coins. My daughter calls them “green wheels.”
- Bell pepper strips: Red or orange are sweeter than green. Cut into matchsticks for easy dipping.
- Cherry tomatoes: Halved or quartered depending on age. Remove the stem ends first.
- Steamed broccoli florets: Tiny trees that are fun to eat. Steam just until tender-crisp, then cool completely.
- Shredded carrots: Buy pre-shredded to save time. They add color and crunch without much effort.
Fun Extras
- Nut butter: Almond, peanut, or sunflower seed butter in a small cup. SunButter is a great school-safe option.
- Mini muffins: Homemade or store-bought. My moist banana zucchini muffins with chocolate chips are a huge hit in these tins.
- Cheese cubes: Cheddar, mozzarella, or colby jack. Cut into small, uniform pieces.
- Yogurt-covered raisins: A tiny sweet treat that feels like dessert.
- Dark chocolate chips: Just a few for a happy surprise. I use Enjoy Life for allergy-friendly options.
Equipment Needed
You don’t need much for these meals, which is part of the appeal. Here’s what I use:
- Standard 12-cup muffin tin: This is the star of the show. I prefer a non-stick metal one, but silicone works too—it’s just floppier to carry. Wilton makes a reliable metal option that’s lasted me years.
- Silicone muffin cups: These are optional but game-changing. They make cleanup a breeze and add color to the presentation. I bought a set of 12 in rainbow colors on Amazon for under ten dollars.
- Small cookie cutters: Star, heart, and animal shapes make food more fun. A basic set costs around five bucks.
- Lunch box: You’ll need one big enough to hold the muffin tin. I use a Bentgo box for smaller portions or a standard rectangular lunch bag for the full tin.
- Ice pack: Essential for keeping dairy and proteins safe. I like the thin, flexible gel packs that fit easily around the tin.
- Small condiment containers: For dips like hummus, yogurt, or nut butter. The 2-ounce round ones with lids work perfectly.
One tip I learned the hard way: don’t use paper liners in the muffin tin for these meals. They get soggy and fall apart. Silicone cups or directly filling the tin cavities works much better. And if you’re using a metal tin, give it a quick spray of cooking oil before adding sticky foods like cheese cubes or fruit.
Preparation Method
Here’s how I assemble these meals in about 10 minutes flat. The key is having a system and doing a little prep ahead of time.
- Wash and dry all produce. This is non-negotiable. Wet fruit makes everything else soggy. I lay berries and grapes on a clean kitchen towel and pat them dry before adding to the tin.
- Prep your proteins. Hard-boil eggs in advance (I do a batch of six on Sunday). Cube cheese, roll deli meat into pinwheels, portion out hummus. Having these ready means assembly takes seconds.
- Cut fruits and veggies into kid-friendly sizes. For toddlers, that means pea-sized or smaller. For older preschoolers, slightly larger pieces are fine. Remember to halve grapes lengthwise and quarter cherry tomatoes.
- Arrange the muffin tin. Start with the heaviest items—protein and fruit—in the outer cups. This stabilizes the tin. Fill the center cups with lighter items like crackers and veggies. Aim for at least three food groups per meal.
- Add dips and wet items last. Put hummus, yogurt, or nut butter in a small container placed inside a muffin cup. This prevents leaks and keeps everything fresh. If you don’t have tiny containers, silicone cups work well for thicker dips.
- Include a “surprise” cup. One compartment gets something special—a mini muffin, a few chocolate chips, or a sticker. My daughter looks forward to finding her surprise every day. It sounds silly, but it makes opening the lunchbox exciting.
- Cover and refrigerate. If making the night before, cover the tin with plastic wrap or a beeswax wrap. Add crackers and other crunchy items just before serving to keep them from getting soft.
- Pack in a lunch box with an ice pack. The muffin tin fits perfectly in most standard lunch bags. I place an ice pack on top to keep everything cool until lunchtime.
Pro tip: Let your child help assemble their own muffin tin. My daughter picks one item from each food group and places it in the cups herself. She’s way more likely to eat something she helped prepare. It takes a little longer, but the buy-in is worth it.
Time-saving hack: On Sunday evenings, I wash and portion all fruits and veggies into zip-top bags. I hard-boil a dozen eggs and cube a block of cheese. Then during the week, I just grab and assemble. It takes less than five minutes per lunch.
Cooking Tips & Techniques
I’ve made every mistake in the book with these meals, so you don’t have to. Here’s what I’ve learned through trial and error.
Don’t overfill the cups. Preschoolers can get overwhelmed by too much food. Fill each cup about halfway, and let them ask for more if they’re still hungry. A full muffin tin should look abundant, not crowded.
Texture variety is everything. If every cup has soft food, kids lose interest. Make sure you have at least one crunchy item, one creamy item, and one chewy item. The contrast keeps them engaged and makes the meal feel more complete.
Watch for cross-contamination. If your child has allergies, keep separate sets of silicone cups for different types of food. I use blue cups for dairy-free items and pink cups for everything else. It’s a simple visual system that prevents mistakes.
Temperature matters. Cold items should stay cold. Use an ice pack and pack the lunch box in the fridge overnight. If you’re including something warm (like leftover pasta), let it cool completely before adding it to the tin. Mixing hot and cold creates condensation that ruins crunchy items.
The “dip” trick. Kids are more likely to eat vegetables if there’s something to dip them in. A tiny container of ranch, hummus, or yogurt can turn raw broccoli into a treat. I’ve seen my daughter eat an entire cucumber just because she could dip it in her “special sauce.”
Prep in batches. I cannot stress this enough. Spend 20 minutes on Sunday washing, cutting, and portioning. Your future self—the one rushing to pack lunch at 7 AM—will thank you. I keep a “lunch box drawer” in my fridge with pre-portioned items in small containers. It’s a game-changer.
One mistake I made: I once packed a muffin tin with grapes, cheese, and crackers—all dry items. My daughter ate two bites and declared herself done. She needed a “wet” element to balance it out. Now I always include something like yogurt, applesauce, or a juicy fruit. It makes the meal feel more complete.
Variations & Adaptations
These muffin tin meals are endlessly customizable. Here are some of my favorite variations.
Themed Lunch Boxes
Create a theme to make lunch more fun. “Rainbow lunch” uses one color per cup—red peppers, orange cheese, yellow corn, green cucumber, blueberries, purple grapes. “Picnic lunch” includes mini sandwiches, fruit salad, and a tiny cookie. My daughter loves “breakfast for lunch” with a mini muffin, yogurt, berries, and a hard-boiled egg.
Dietary Adaptations
- Gluten-free: Use rice crackers, corn tortilla strips, or gluten-free pretzels. Most fruits and veggies are naturally gluten-free.
- Dairy-free: Swap cheese for avocado slices or dairy-free yogurt. Use coconut-based “cheese” cubes if desired.
- Nut-free: Use sunflower seed butter instead of peanut butter. Check labels on crackers and granola bars for nut contamination.
- Vegetarian: Focus on eggs, cheese, yogurt, hummus, and bean-based snacks. Roasted chickpeas add protein and crunch.
- Low-sugar: Skip dried fruit and sweetened yogurt. Use plain Greek yogurt with a drizzle of honey, and stick to fresh fruit.
Seasonal Swaps
- Summer: Fresh berries, peach slices, cherry tomatoes, and cucumber. Frozen grapes are a refreshing treat.
- Fall: Apple slices, pear chunks, roasted pumpkin seeds, and mini pumpkin muffins. Add a small container of cinnamon yogurt for dipping.
- Winter: Mandarin oranges, pomegranate seeds, roasted sweet potato cubes, and clementine segments. These hold up well in cold lunch boxes.
- Spring: Strawberries, snap peas, baby carrots, and hard-boiled eggs decorated with stickers. Fresh peas in the pod are fun to open.
Leftover Transformations
Last night’s dinner can become today’s lunch. Leftover pasta, grilled chicken strips, roasted vegetables, and rice all work well in muffin cups. I’ve even used leftover taco meat with cheese and salsa for a “taco Tuesday” lunch. My easy cheesy beef taco skillet leftovers are perfect for this—just let them cool and portion into cups.
Serving & Storage Suggestions
These meals are designed to be eaten at room temperature or cold. Here’s how to serve and store them for best results.
Serving temperature: Most items are best cold or at room temperature. If you’re including something that’s usually served warm (like leftover chicken or pasta), let it cool completely before packing. Warm food in a closed container creates condensation that makes everything soggy.
Presentation tips: Arrange items by color for visual appeal. Put contrasting colors next to each other—red strawberries next to green cucumber, orange cheese next to purple grapes. The visual variety makes the meal more inviting. I sometimes add a small sticker or a note in the center cup for a fun surprise.
Complementary additions: Pair the muffin tin with a small thermos of soup or a pouch of applesauce for a more filling meal. My creamy tomato basil soup is a favorite cold-weather companion. A small container of milk or water completes the lunch.
Storage instructions: Assemble the muffin tin the night before and store it covered in the refrigerator. Add crunchy items like crackers and pretzels just before serving to prevent sogginess. If you’re packing lunch for school, use an insulated lunch bag with an ice pack. The meal stays fresh for up to 4 hours.
Reheating tips: Most items in these meals are meant to be eaten cold. If you want to include something warm, pack it in a separate thermos and let your child add it to the muffin tin at lunchtime. Never microwave the whole tin—it heats unevenly and can make silicone cups too hot to handle.
How flavors develop: Some items taste better after sitting. Hard-boiled eggs become less sulfurous after a few hours in the fridge. Cheese cubes soften slightly and become creamier. Berries release a little juice that flavors neighboring items—in a good way. I actually prefer these meals after they’ve rested for an hour or two.
Nutritional Information & Benefits
These meals are naturally balanced and packed with nutrients. Here’s what you’re getting in a typical combination.
Estimated nutritional values (per meal with 6-8 filled cups): Approximately 300-400 calories, 15-20g protein, 30-40g carbohydrates, 10-15g fat, 5-8g fiber. These numbers vary based on your specific choices, but the format naturally encourages portion control and variety.
Health benefits of key ingredients: Berries provide antioxidants and vitamin C. Eggs offer choline for brain development. Cheese supplies calcium for growing bones. Hummus delivers plant-based protein and fiber. Vegetables add essential vitamins and minerals. The variety ensures a wider range of nutrients than a typical sandwich lunch.
Dietary considerations: These meals are naturally gluten-free if you choose gluten-free crackers and skip wheat-based items. They’re easy to make dairy-free by swapping cheese and yogurt for alternatives. Nut-free versions are simple with sunflower seed butter. The format works for most dietary restrictions with minor adjustments.
Potential allergens: Common allergens in these meals include dairy (cheese, yogurt), eggs, nuts (peanut butter, almond butter), and wheat (crackers, pretzels). Always check labels and communicate with your child’s school about any restrictions. I label each muffin cup with a small sticker if there’s an allergen concern.
Personal perspective: I love that these meals make healthy eating feel like a game. My daughter eats more variety than she ever did with traditional lunches. She’s tried foods she refused before, simply because they were in a cute little cup. That alone makes the extra five minutes of prep time worth it.
Conclusion
These easy preschool lunch box muffin tin meals have genuinely changed how I feed my kid. They’re not fancy or complicated—they’re just smart. The format makes food fun, reduces waste, and gives me one less thing to stress about during the morning rush.
I love that I can use whatever I have on hand, that leftovers get a second life, and that my daughter actually looks forward to opening her lunch box. She’s tried more new foods this year than in all her previous years combined, and I honestly think the muffin tin deserves the credit.
Start simple. Pick three or four items your child already likes and arrange them in a muffin tin. See how they react. I bet you’ll be surprised. And if you come up with a combination your kid loves, I’d love to hear about it. Drop a comment below or tag me in your photos. Let’s make lunchtime something we all look forward to.
You’ve got this. And your preschooler has a rainbow tray waiting.
Frequently Asked Questions
Can I use a mini muffin tin instead?
Absolutely. Mini muffin tins work great for smaller portions or younger toddlers. Just adjust the food sizes accordingly. You’ll get more cups per meal, which some kids find even more exciting.
How far in advance can I prepare these?
You can assemble the full meal the night before and store it covered in the refrigerator. For best freshness, add crunchy items like crackers and pretzels just before serving. Pre-chopped fruits and veggies can be prepped up to three days in advance and stored in separate containers.
What if my child doesn’t eat everything?
That’s totally normal. The beauty of the muffin tin is that leftovers are easy to save. Just transfer uneaten items to separate containers and reuse them in the next day’s lunch. Nothing goes to waste, and there’s no pressure to finish everything at once.
Can I pack hot food in a muffin tin?
I don’t recommend it. The muffin tin is designed for cold or room-temperature items. Hot food creates condensation that makes everything soggy. If you want to include something warm, pack it in a separate thermos and let your child add it to the tin at lunchtime.
How do I clean silicone muffin cups?
Silicone cups are dishwasher safe, which is one reason I love them. If you’re hand-washing, use warm soapy water and a soft sponge. For stubborn stains, soak them in a mixture of baking soda and water for 15 minutes before washing. Avoid abrasive scrubbers that can damage the surface.
Pin This Recipe!
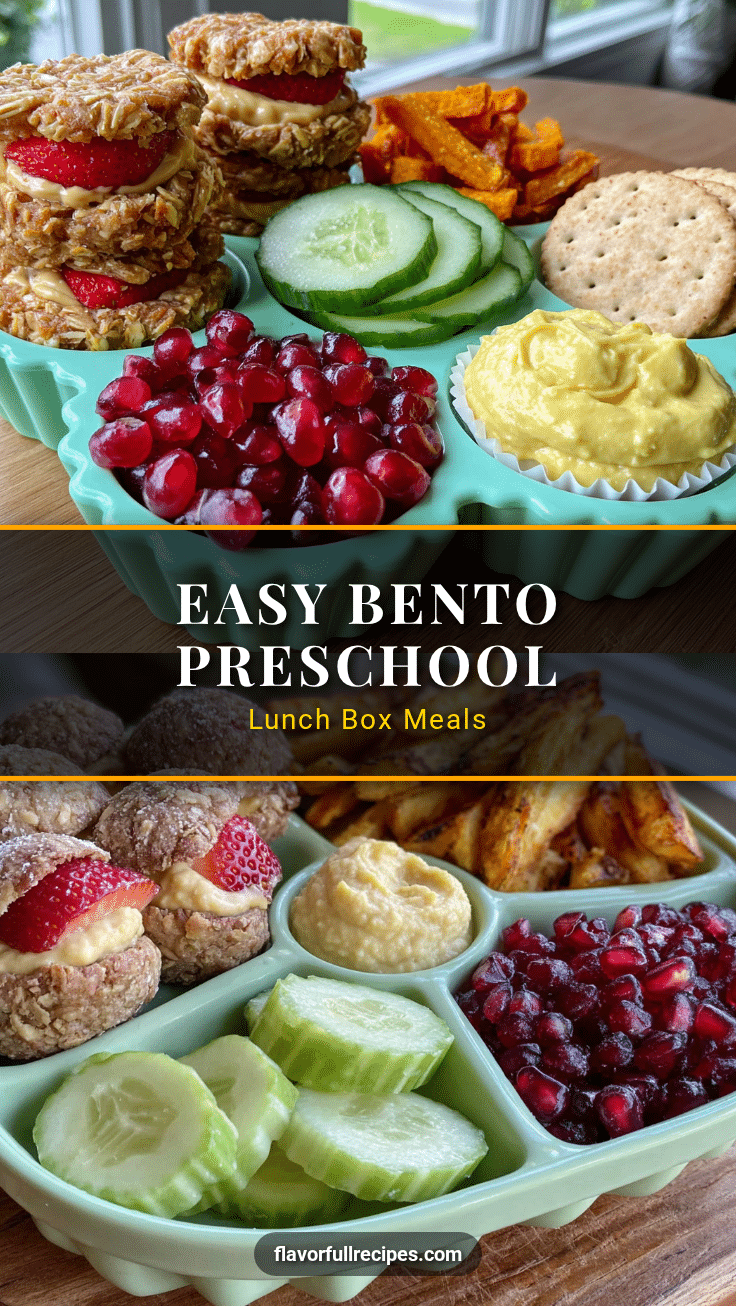
Easy Preschool Lunch Box Muffin Tin Meals
- Total Time: 10 minutes
- Yield: 1 serving
Description
A fun and flexible lunch idea for preschoolers using a muffin tin to create a variety of bite-sized, balanced meals that are quick to assemble and perfect for picky eaters.
Ingredients
- Hard-boiled eggs (quartered or sliced)
- Deli turkey or ham (rolled into pinwheels or cut into shapes)
- String cheese (torn into strips or cubed)
- Hummus
- Greek yogurt (plain or vanilla)
- Chicken salad (made with plain yogurt)
- Berries (blueberries, raspberries, sliced strawberries)
- Apple slices (tossed in lemon juice)
- Grapes (halved lengthwise)
- Dried fruit (unsweetened apple rings, apricots, raisins)
- Peach or mango chunks (fresh or thawed frozen)
- Whole wheat crackers, rice crackers, or cheese crackers
- Pretzel sticks
- Pita chips
- Air-popped popcorn (lightly salted)
- Roasted chickpeas
- Cucumber rounds (peeled or unpeeled)
- Bell pepper strips (red or orange)
- Cherry tomatoes (halved or quartered)
- Steamed broccoli florets
- Shredded carrots
- Nut butter (almond, peanut, or sunflower seed butter)
- Mini muffins (homemade or store-bought)
- Cheese cubes (cheddar, mozzarella, or colby jack)
- Yogurt-covered raisins
- Dark chocolate chips
Instructions
- Wash and dry all produce thoroughly to prevent sogginess.
- Prep proteins in advance: hard-boil eggs, cube cheese, roll deli meat into pinwheels, portion hummus.
- Cut fruits and veggies into kid-friendly sizes (pea-sized for toddlers, slightly larger for older preschoolers). Halve grapes lengthwise and quarter cherry tomatoes.
- Arrange the muffin tin: place heaviest items (protein, fruit) in outer cups for stability, fill center cups with lighter items (crackers, veggies). Aim for at least three food groups per meal.
- Add dips and wet items last in small containers placed inside muffin cups to prevent leaks.
- Include a ‘surprise’ cup with something special like a mini muffin, chocolate chips, or a sticker.
- Cover and refrigerate if making the night before. Add crunchy items like crackers just before serving.
- Pack in a lunch box with an ice pack to keep cool until lunchtime.
Notes
Don’t overfill cups; fill halfway. Include a variety of textures (crunchy, creamy, chewy). Use separate silicone cups for allergy-safe items. Let child help assemble for better buy-in. Prep fruits and veggies on Sunday for quick assembly during the week.
- Prep Time: 10 minutes
- Cook Time: 0 minutes
- Category: Lunch
- Cuisine: American
Nutrition
- Serving Size: 1 muffin tin meal (6
- Calories: 300400
- Sugar: 1520
- Sodium: 300500
- Fat: 1015
- Saturated Fat: 35
- Carbohydrates: 3040
- Fiber: 58
- Protein: 1520
Keywords: preschool lunch, muffin tin meals, kid-friendly, easy lunch, picky eater, lunch box ideas, healthy lunch