
My oldest started kindergarten this year, and I knew our snack game had to change. No more leisurely morning snacks—we needed something that could survive a backpack, sit in a lunchbox for three hours, and still be something she’d actually eat. Packaged granola bars were the obvious answer, but I kept reading ingredient lists that looked like chemistry experiments. So I started testing homemade versions, and honestly, the first few were disasters. They crumbled, they melted, they tasted like cardboard with honey.
For a while, I just accepted that homemade granola bars weren’t going to hold up like the store-bought ones. But I kept tweaking—more oats, less butter, a different ratio of sticky to dry ingredients. I wanted something that could handle being tossed into a backpack next to a water bottle and still come out intact. Something that didn’t require the oven (because let’s face it, September afternoons are still hot). Something my kid would actually look forward to eating.
These easy no-bake granola bars for school snacks are what finally worked. They’re sturdy without being hard, sweet without being sugary, and they actually taste like real food. The first time I packed one, my daughter came home and asked if I could make more. That’s when I knew we had something.
Why You’ll Love This Recipe
These aren’t just another homemade granola bar recipe. Here’s what makes them different—and why they’ve become a staple in our kitchen:
- No Oven Required: Summer heat or busy mornings, these come together on the stovetop in about 10 minutes. No preheating, no waiting.
- Backpack-Approved Sturdy: They hold their shape without being rock hard. I’ve dropped one on the floor (don’t ask), and it didn’t even crack.
- Simple Pantry Ingredients: Oats, peanut butter, honey, a few mix-ins—you probably have everything already. No specialty stores needed.
- Kid-Tested, Parent-Approved: My daughter actually eats these. She’s picky, and she reaches for these over the store-bought ones I used to buy.
- Customizable to the Max: Allergic to peanuts? Use sunflower seed butter. Want chocolate? Toss in some mini chips. This recipe adapts to whatever you have.
What really sets these apart is the texture. They’re chewy but not sticky, firm but not hard. The secret is in the ratio of wet to dry ingredients—too much honey and they’re a mess, too little and they crumble. I’ve tested this ratio at least a dozen times, and this is the sweet spot. These easy no-bake granola bars for school snacks are the kind of thing you make once and then realize you’ll never go back to the boxed stuff.
What Ingredients You Will Need
This recipe uses simple, wholesome ingredients that come together to create a bar that’s both satisfying and sturdy. Most of these are probably already in your pantry.
- Rolled oats (2 cups) – Use old-fashioned rolled oats, not quick oats. Quick oats absorb too much moisture and make the bars mushy. I prefer Bob’s Red Mill for consistent texture.
- Creamy peanut butter (½ cup) – Natural peanut butter works, but you need one that’s well-stirred and not too oily. If your peanut butter separates, stir it really well before measuring. For a nut-free option, sunflower seed butter works great—just know the bars will have a slight green tint from a natural reaction.
- Honey (⅓ cup) – This is the glue that holds everything together. Use a runny honey, not crystallized. If your honey is thick, warm it slightly to make it easier to mix.
- Coconut oil (2 tablespoons) – Adds moisture and helps the bars set firmly. You can substitute butter if that’s what you have, but coconut oil gives a cleaner flavor.
- Vanilla extract (1 teaspoon) – Pure vanilla is best, but imitation works fine here. It rounds out the flavors.
- Salt (¼ teaspoon) – Don’t skip this. Salt balances the sweetness and makes the peanut butter taste more peanut-buttery.
- Mix-ins (about ½ cup total) – I use a combination of mini chocolate chips and dried cranberries. You can also use chopped nuts, shredded coconut, raisins, or seeds. Just keep the total around ½ cup so the bars hold together.
One thing I’ve learned: measure your oats correctly. Scoop them into the measuring cup and level off—don’t pack them down. Too many oats and your bars will be dry and crumbly. Too few and they won’t hold together. It’s a small detail, but it matters.
Equipment Needed
You don’t need much for this recipe, which is part of the beauty. Here’s what you’ll need:
- 8×8-inch baking dish – This is the perfect size for bars that are thick enough to be satisfying but not too thick. If you only have a 9×9, the bars will be thinner and might need slightly less chilling time.
- Parchment paper – Absolutely essential. Line the dish with parchment so you can lift the bars out cleanly. Leave some overhang on two sides for easy grabbing.
- Medium saucepan – For melting the wet ingredients together. A non-stick pan makes cleanup easier.
- Large mixing bowl – For combining the dry ingredients with the wet mixture.
- Spatula or wooden spoon – For mixing and pressing the mixture into the pan.
- Measuring cups and spoons – Accurate measurements matter here since the ratio is key.
If you don’t have an 8×8 dish, you can use a loaf pan and make thicker bars, or press the mixture into a 9×13 for thinner, snack-sized bars. Just adjust the chilling time slightly—thicker bars need a bit longer to set. I’ve also used a silicone baking dish without parchment, and it worked fine, but parchment makes lifting them out so much easier.
Preparation Method
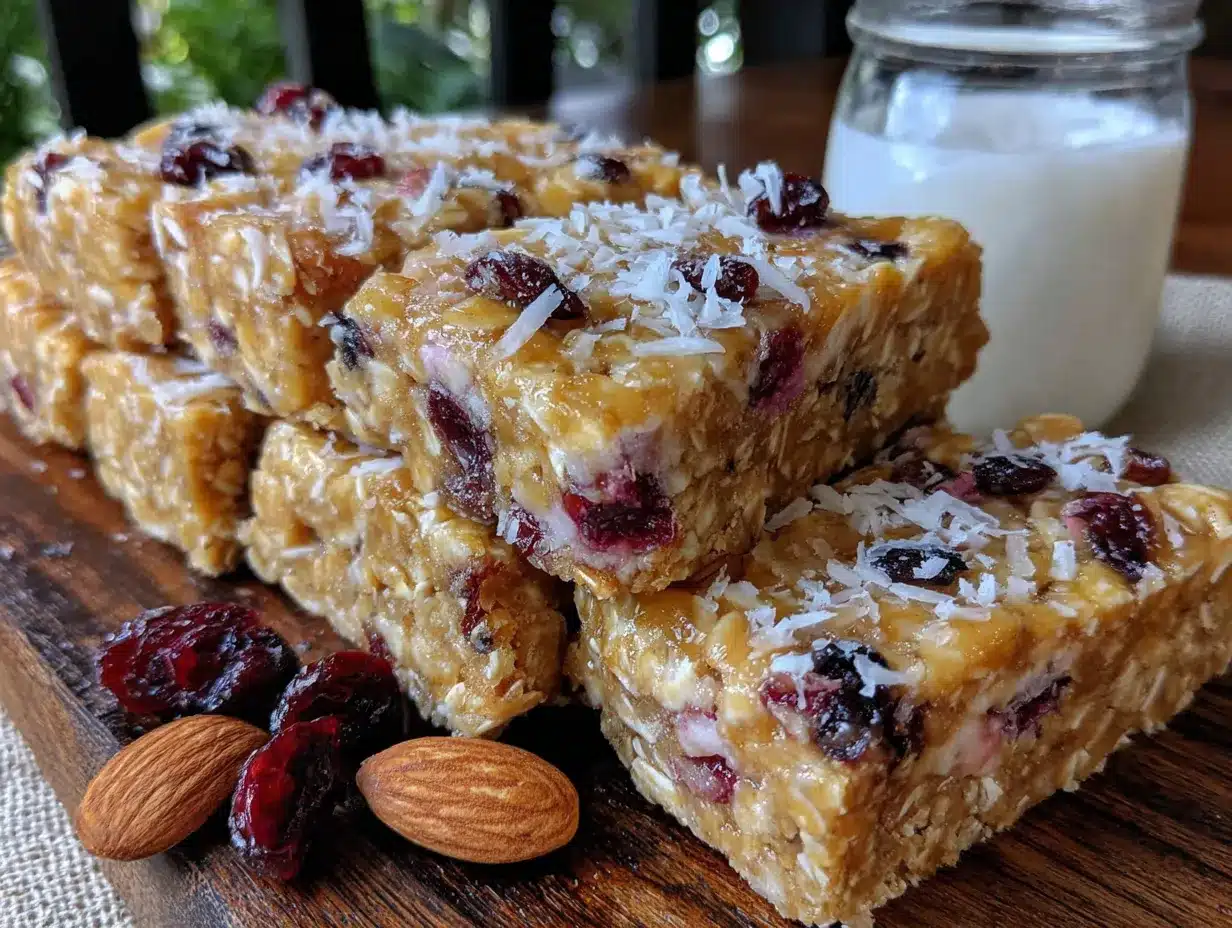
These easy no-bake granola bars for school snacks come together in about 15 minutes of active time. The hardest part is waiting for them to chill.
- Line your baking dish. Cut a piece of parchment paper to fit your 8×8 dish, leaving about 2 inches of overhang on two opposite sides. This creates handles for lifting the bars out later. Press the paper into the corners so it lies flat.
- Combine the wet ingredients. In a medium saucepan over low heat, combine ½ cup peanut butter, ⅓ cup honey, and 2 tablespoons coconut oil. Stir constantly with a spatula or wooden spoon until everything is melted and smooth. This takes about 2-3 minutes. Don’t let it boil—you just want it warm enough to blend. Remove from heat and stir in 1 teaspoon vanilla extract and ¼ teaspoon salt.
- Prepare the dry ingredients. In a large mixing bowl, measure out 2 cups of rolled oats. Add your mix-ins—I use ¼ cup mini chocolate chips and ¼ cup dried cranberries. Give everything a quick stir with your spatula to distribute the mix-ins evenly.
- Combine wet and dry. Pour the warm peanut butter mixture over the oats. Stir until every oat is coated. This takes a bit of elbow grease—make sure there are no dry patches of oats hiding at the bottom. The mixture should look uniformly glossy and smell amazing.
- Press into the pan. Transfer the mixture to your parchment-lined dish. Here’s the trick: use a second piece of parchment paper or lightly oil your hands to press the mixture down firmly. You want it compact and even. Really press hard—this is what keeps the bars from falling apart later. Spend a good minute pressing it into all the corners and flattening the top. I use the bottom of a measuring cup to get it really flat.
- Chill. Place the dish in the refrigerator for at least 2 hours. Overnight is even better. Don’t rush this—the bars need time to set completely. If you try to cut them too soon, they’ll crumble.
- Cut and store. Once fully chilled, lift the bars out using the parchment overhang. Place on a cutting board and use a sharp knife to cut into 12 bars (3 cuts lengthwise, 3 cuts crosswise). Wipe the knife clean between cuts for cleaner edges. Store in an airtight container in the refrigerator.
Cooking Tips & Techniques
After making these about twenty times, I’ve learned a few things the hard way. Here’s what I wish someone had told me:
Don’t overheat the wet ingredients. I made this mistake twice. If you get the peanut butter mixture too hot, it can make the oats soggy and the bars will never set properly. Low heat, constant stirring, and remove from heat as soon as everything is smooth. That’s the sweet spot.
Press harder than you think you need to. This is the number one reason homemade granola bars fall apart. You need to compact the mixture firmly into the pan. I use the flat bottom of a glass measuring cup to really press it down. The mixture should feel dense and solid, not loose and crumbly.
Chill time is non-negotiable. I know, waiting is hard. But 2 hours is the minimum. If you’re in a hurry, you can pop them in the freezer for 45 minutes, but keep an eye on them—they can get too hard and be difficult to cut cleanly. Room temperature bars will fall apart, so keep them refrigerated until you’re ready to pack them.
Use a sharp knife. A dull knife will drag through the bars and mess up the edges. A chef’s knife works great. Run it under hot water, dry it off, and cut with one clean motion. Wipe the blade between cuts for the cleanest edges.
If your mixture seems too dry, add a tablespoon of warm honey or peanut butter. If it seems too wet, add a tablespoon of oats. Humidity can affect how the mixture behaves, so trust your instincts. The mixture should hold together when you squeeze a handful—if it crumbles, add more wet ingredients.
Variations & Adaptations
One of the best things about this recipe is how flexible it is. Here are some variations I’ve tried and loved:
Nut-Free Version: Replace the peanut butter with sunflower seed butter. The bars will have a slightly different flavor—more earthy—but they hold together just as well. Just be aware that sunflower seeds can react with baking soda or other ingredients and turn green. It’s harmless, but it looks weird. To minimize this, add a splash of lemon juice to the wet mixture.
Chocolate Lover’s Version: Add 2 tablespoons of unsweetened cocoa powder to the dry ingredients before mixing. You might need an extra tablespoon of honey to balance the bitterness. I also add a handful of dark chocolate chunks for extra richness.
Tropical Version: Swap the dried cranberries for dried mango or pineapple, and add ¼ cup of shredded coconut. Use macadamia nuts instead of chocolate chips. This version tastes like a vacation.
Lower Sugar Version: Reduce the honey to ¼ cup and add 2 tablespoons of unsweetened applesauce. The bars will be slightly softer, so they need a full 3 hours in the fridge. They’re still sweet enough for kids, I promise.
Gluten-Free Version: Use certified gluten-free rolled oats. Everything else in the recipe is naturally gluten-free, so this is an easy swap. Just double-check your chocolate chips and other mix-ins.
I once made a batch with crushed pretzels and mini M&Ms for a school party, and they were gone in minutes. The salty-sweet combo is irresistible. Just crush the pretzels into small pieces—not dust—so they add crunch without making the bars fall apart.
Serving & Storage Suggestions
These easy no-bake granola bars for school snacks are designed to be grab-and-go, but here are some tips for serving and storing them at their best:
Serving: Serve them cold or at room temperature. Straight from the fridge, they’re firm and chewy. If you leave them out for 10-15 minutes, they soften slightly and become even more tender. For lunchboxes, I pack them straight from the fridge—they’ll thaw to room temperature by lunchtime and be perfect.
Storage: Keep the bars in an airtight container in the refrigerator for up to 2 weeks. I use a glass container with a tight lid, and I layer the bars with parchment paper between them so they don’t stick together. They also freeze beautifully—wrap individually in plastic wrap, then place in a freezer bag. They’ll keep for up to 3 months.
Reheating: You don’t really need to reheat these, but if you want a softer texture, microwave one bar for 10-15 seconds. It’ll be warm and gooey, almost like fresh-baked oatmeal. Just don’t overdo it, or they’ll fall apart.
Packing for school: I wrap each bar in a small piece of parchment paper or put them in a reusable snack bag. They hold up well in a lunchbox, even next to an ice pack. If you’re worried about melting (chocolate chips in summer), keep the bars in the fridge until morning and pack them with a small ice pack.
One thing I’ve noticed: the flavors actually get better after a day or two. The honey and peanut butter meld together, and the oats soften just a bit. So if you can, make these a day ahead. They’re even better on day two.
Nutritional Information & Benefits
Here’s the approximate nutrition for one bar (based on 12 bars per batch with the basic recipe):
- Calories: 185
- Protein: 6g
- Carbohydrates: 24g
- Fiber: 3g
- Sugar: 12g (naturally occurring from honey)
- Fat: 9g
- Iron: 1mg
These bars pack a surprising amount of nutrition for something that tastes like a treat. The oats provide slow-release energy and fiber, which helps kids stay full until lunch. Peanut butter adds protein and healthy fats that support brain development—perfect for school days. Honey gives a natural sweetness without refined sugar, and the mix-ins add antioxidants and vitamins.
If you’re watching sugar intake, the lower-sugar version with applesauce cuts the sugar to about 8g per bar. For a protein boost, add 2 tablespoons of hemp seeds or chia seeds to the dry ingredients. They blend right in and add 2-3g of protein per bar.
These are also dairy-free and can easily be made gluten-free and nut-free, making them a great option for classrooms with dietary restrictions. Just be sure to check labels on your mix-ins if allergies are a concern.
Conclusion
These easy no-bake granola bars for school snacks have become a non-negotiable in our kitchen. They’re the kind of recipe that makes you feel like you’ve got your act together—even on chaotic mornings. No oven, no fuss, no weird ingredients. Just real food that kids actually want to eat.
What I love most is how adaptable they are. You can make them exactly as written, or you can riff based on what’s in your pantry. Got a bag of dried cherries? Throw them in. Have some leftover trail mix? Use that. The recipe is forgiving, and it rewards creativity.
I’d love to hear how these turn out for you. What mix-ins did you use? Did your kids approve? Drop a comment below and let me know—I read every single one. And if you’re looking for more easy snack ideas, you might enjoy our easy no-bake peanut butter protein balls or these healthy make-ahead peanut butter banana overnight oats for a complete breakfast solution. Happy snacking!
Frequently Asked Questions
Can I use quick oats instead of rolled oats?
I don’t recommend it. Quick oats are more finely ground and absorb moisture differently, which can make your bars mushy or crumbly. Rolled oats give the best texture—chewy but firm. If quick oats are all you have, reduce the honey by a tablespoon and expect a softer bar.
How long do these granola bars last at room temperature?
They’re best kept in the fridge, but they’ll hold up at room temperature for about 2-3 days. If you’re packing them for a lunchbox, they’ll be fine from morning until lunch. For longer storage, keep them refrigerated. In hot weather, the chocolate chips might melt, so stick with dried fruit or seeds if you’re not refrigerating.
Can I freeze these granola bars?
Absolutely! Freeze them for up to 3 months. Wrap each bar individually in plastic wrap, then place them in a freezer bag. They thaw quickly—just pull one out the night before and it’ll be ready by morning. You can also eat them straight from the freezer; they’re a bit harder but still delicious.
My bars fell apart when I cut them. What went wrong?
This usually happens for one of three reasons: you didn’t press the mixture firmly enough into the pan, you didn’t chill them long enough, or your wet-to-dry ratio was off. Next time, press harder, chill for at least 2 hours (overnight is even better), and make sure your honey and peanut butter are measured accurately. If the mixture feels dry when you’re mixing, add a tablespoon of warm honey.
Can I make these without peanut butter?
Yes! Use sunflower seed butter, almond butter, or cashew butter instead. Each will change the flavor slightly, but they all work. Sunflower seed butter is the most common substitute and works great for nut-free classrooms. Just be aware it may turn slightly green over time—that’s a natural reaction and completely safe to eat.
Pin This Recipe!
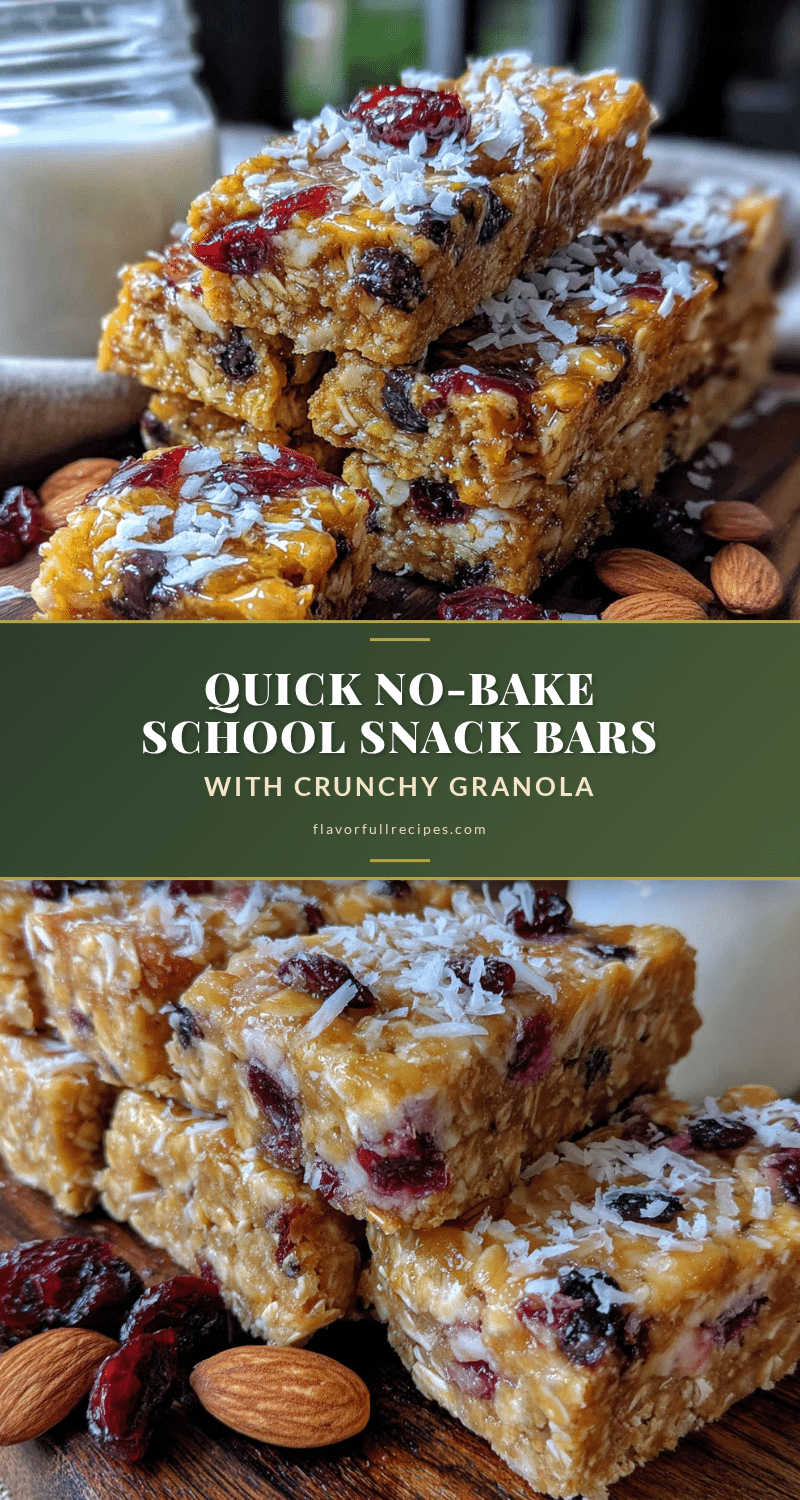
Easy No-Bake Granola Bars: Perfect School Snack Recipe
- Total Time: 2 hours 15 minutes (includes chilling)
- Yield: 12 bars 1x
Description
These easy no-bake granola bars are sturdy, chewy, and made with simple pantry ingredients. Perfect for school snacks, they hold up in a lunchbox and are kid-approved.
Ingredients
- 2 cups rolled oats (old-fashioned)
- 1/2 cup creamy peanut butter
- 1/3 cup honey
- 2 tablespoons coconut oil
- 1 teaspoon vanilla extract
- 1/4 teaspoon salt
- 1/4 cup mini chocolate chips
- 1/4 cup dried cranberries
Instructions
- Line an 8×8-inch baking dish with parchment paper, leaving overhang on two sides.
- In a medium saucepan over low heat, combine peanut butter, honey, and coconut oil. Stir until melted and smooth (2-3 minutes). Remove from heat and stir in vanilla and salt.
- In a large bowl, combine rolled oats, chocolate chips, and dried cranberries.
- Pour the warm peanut butter mixture over the oats and stir until all oats are coated.
- Transfer the mixture to the prepared dish. Press firmly and evenly using a second piece of parchment or a flat-bottomed measuring cup.
- Refrigerate for at least 2 hours (or overnight) until firm.
- Lift the bars out using the parchment overhang. Cut into 12 bars with a sharp knife. Store in an airtight container in the refrigerator.
Notes
Press the mixture firmly into the pan to prevent crumbling. Chill for at least 2 hours. For nut-free, use sunflower seed butter. For gluten-free, use certified gluten-free oats. Bars keep in the fridge for up to 2 weeks or freeze for up to 3 months.
- Prep Time: 15 minutes
- Cook Time: 0 minutes
- Category: Snack
- Cuisine: American
Nutrition
- Serving Size: 1 bar
- Calories: 185
- Sugar: 12
- Sodium: 95
- Fat: 9
- Saturated Fat: 3
- Carbohydrates: 24
- Fiber: 3
- Protein: 6
Keywords: no-bake granola bars, school snack, homemade granola bars, easy granola bars, peanut butter granola bars


