
“Mom, can you make those little sandwiches again? The ones with the melty cheese?” My six-year-old asked me this on a Thursday night, while I was scrolling through my phone, already dreading the next morning’s lunch-packing chaos. And that was it. That simple question, asked with ketchup on his chin from dinner, became the reason these easy mini turkey and cheese sliders became a weekly staple in our house. I wasn’t trying to reinvent the lunchbox wheel or anything. I was just tired of the same old sad sandwiches getting returned half-eaten, and I needed something that would actually get eaten, not traded.
These sliders came out of a desperate Tuesday night. I had leftover Hawaiian rolls from a party, some deli turkey about to turn, and a block of Swiss cheese. I threw them together, brushed the tops with butter and a few spices, and baked them until the cheese was a bubbly mess. The next morning, I packed two in a container, and for the first time in weeks, the lunchbox came home empty. Honestly, the feeling was pure victory. No crumbs left behind, no “I didn’t like it” complaints. Just a clean container and a request for more.
These aren’t fancy sliders. They are the kind of food that feels like a hug in a lunchbox. They’re warm, they’re satisfying, and they hold up way better than a soggy sandwich. If you have school-aged kids, or even a picky partner, this recipe is about to become your secret weapon. Trust me on this one.
Why You’ll Love This Recipe
I’ve tested a lot of lunchbox recipes over the years. Some are too complicated, some fall apart, and some just don’t taste good cold. These mini turkey and cheese sliders hit the sweet spot. They are the result of trial and error in my own kitchen, and I can tell you with confidence: these work.
- Quick & Easy: From start to finish, you’re looking at about 20 minutes of active time. The oven does the rest. Perfect for a Sunday meal prep session or a rushed weekday morning.
- Simple Ingredients: You probably have most of these in your fridge and pantry right now. Hawaiian rolls, deli turkey, cheese, butter, and a few pantry seasonings. No special trips to a fancy grocery store required.
- Perfect for School Lunches: These sliders are sturdy. They don’t get soggy, they taste great at room temperature, and they are easy for little hands to hold. Plus, they are way more exciting than a standard sandwich.
- Crowd-Pleaser: My kids devour these. My husband steals them from the fridge. Even my picky niece, who “doesn’t like sandwiches,” ate three at a family gathering. They are universally loved.
- Unbelievably Delicious: The magic is in the butter topping. When you brush melted butter mixed with a little mustard and poppy seeds over the tops, the rolls get this soft, slightly savory crust. Combined with the melty cheese and tender turkey, it is next-level comfort food.
This isn’t just another slider recipe. The trick is to let the assembled sliders sit for about 10 minutes before baking. This allows the flavors to meld and the rolls to soak up just a bit of the butter mixture. It’s a small step that makes a huge difference. This is the kind of recipe that makes you feel like a superhero parent, even on your most tired days. It’s fast, it’s foolproof, and it makes lunchtime something to look forward to.
What Ingredients You Will Need
This recipe uses simple, wholesome ingredients that work together to create something truly satisfying. You don’t need anything fancy, just good quality basics. Let’s break down what you’ll need and why each ingredient matters.
- Hawaiian Sweet Rolls (12-count package): These are the foundation of the recipe. Their soft, slightly sweet texture is the perfect contrast to the savory turkey and cheese. I recommend King’s Hawaiian rolls for consistent results. They hold up well to baking and don’t get tough. You can substitute with any soft slider bun or even dinner rolls, but the sweetness is key.
- Deli Turkey (about 1 pound, thinly sliced): Use good quality deli turkey. I prefer oven-roasted or honey-roasted turkey for the best flavor. Avoid the pre-packaged, super-processed stuff if you can—it tends to be watery and can make the sliders soggy. Ask for it sliced thin at the deli counter. Leftover Thanksgiving turkey works beautifully here too.
- Swiss Cheese (8-10 slices): Swiss cheese melts beautifully and has a mild, nutty flavor that pairs perfectly with turkey. You can use provolone, havarti, or even cheddar if you prefer. For a stronger flavor, try Gruyère. Make sure the slices are large enough to cover the rolls.
- Unsalted Butter (1/2 cup, 1 stick): The butter is brushed on top of the rolls before baking. It creates that golden, slightly crispy crust. Using unsalted butter lets you control the salt level. If you only have salted butter, just reduce the added salt in the seasoning mix.
- Dijon Mustard (2 tablespoons): This is whisked into the melted butter. It adds a tangy depth that cuts through the richness of the cheese and butter. You won’t taste a strong mustard flavor, just a subtle background note. Yellow mustard or honey mustard can be used in a pinch.
- Poppy Seeds (1 tablespoon): These are classic on slider buns. They add a tiny crunch and a nutty flavor. If you don’t have poppy seeds, you can use sesame seeds, everything bagel seasoning, or even just leave them off.
- Onion Powder (1 teaspoon): This adds a savory, allium flavor without the texture of fresh onions. It’s a must for that classic “slider” taste. Garlic powder can be substituted, but onion powder is traditional.
- Worcestershire Sauce (1 teaspoon): This adds a deep, umami richness to the butter mixture. It’s a secret ingredient that makes these sliders taste like they’ve been simmering all day. A little goes a long way.
That’s it. Seven main ingredients, plus a few pantry staples. Everything is easy to find and affordable. For a gluten-free option, use gluten-free Hawaiian rolls or slider buns. For a dairy-free version, use dairy-free cheese and a plant-based butter substitute. The recipe is very forgiving.
Equipment Needed
You don’t need a lot of fancy gadgets for this recipe. That’s part of the beauty of it. Here is what you will need:
- 9×13-inch Baking Dish: This is the perfect size for a 12-count package of rolls. A glass or ceramic dish works great. You can also use a metal baking pan.
- Sharp Knife or Serrated Bread Knife: You’ll need this to slice the entire block of rolls in half horizontally. A serrated knife makes this much easier and prevents squishing the soft rolls.
- Small Saucepan or Microwave-Safe Bowl: For melting the butter. A microwave is the fastest method, but a small saucepan gives you more control.
- Whisk or Fork: To combine the melted butter with the mustard, Worcestershire sauce, and seasonings.
- Pastry Brush: For brushing the butter mixture evenly over the tops of the rolls. A silicone brush is my favorite because it doesn’t shed bristles. You can also use a spoon if you don’t have a brush.
- Aluminum Foil: For covering the dish during the first part of baking. This helps the rolls steam and get soft without burning the tops.
That’s really all you need. If you don’t have a pastry brush, don’t sweat it. Just drizzle the butter mixture over the tops and use a spoon to spread it around. The recipe is pretty forgiving. I’ve made these in a pinch with just a knife and a baking sheet, and they still turned out great.
Preparation Method
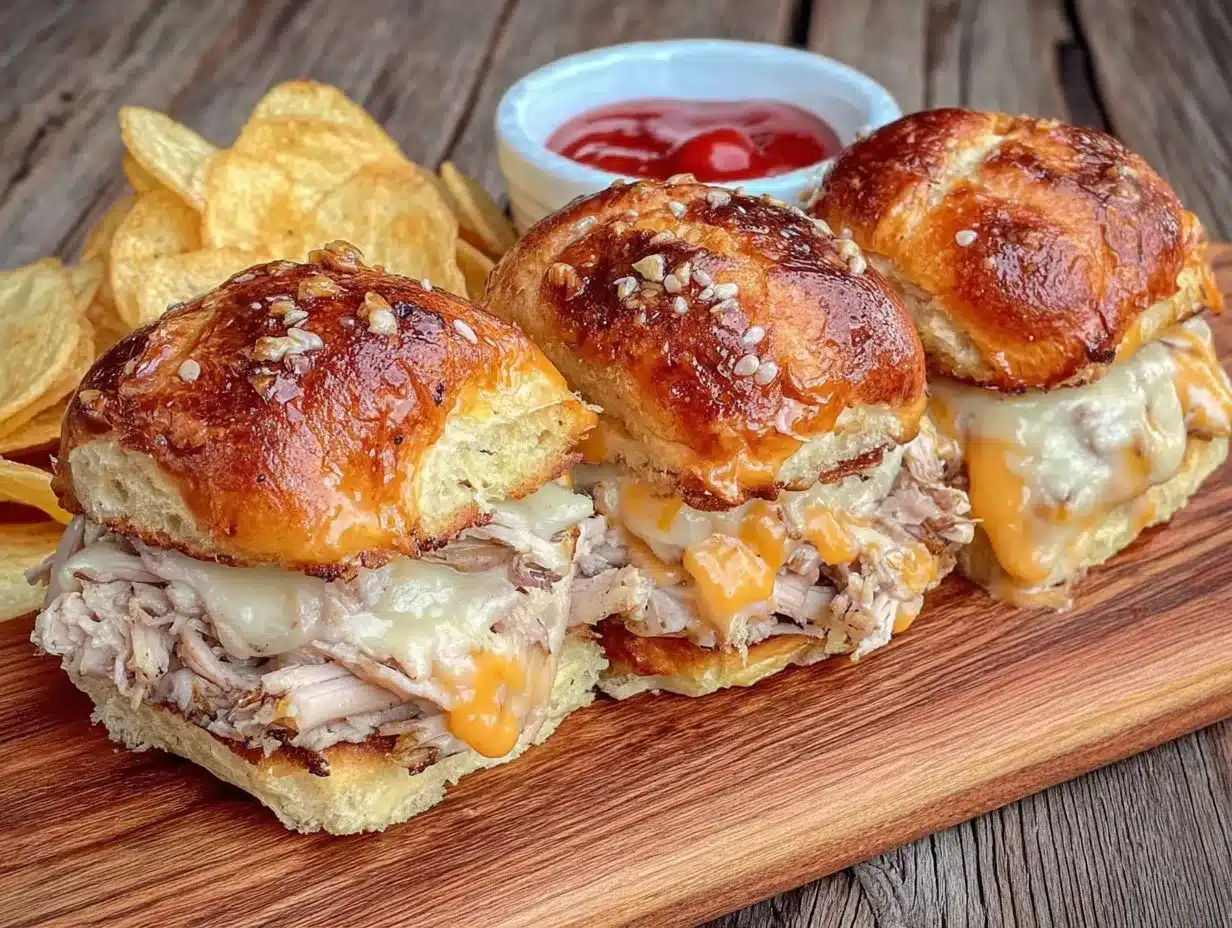
Let’s get to the fun part. The process is simple, but a few key steps make all the difference. Follow these instructions, and you will have perfect sliders every single time.
- Preheat and Prep: Preheat your oven to 350°F (175°C). While it’s heating, take your package of Hawaiian rolls and, without separating them, slice the entire block in half horizontally. You want one large top half and one large bottom half. Place the bottom half of the rolls in your 9×13-inch baking dish.
- Layer the Turkey: Layer the sliced deli turkey evenly over the bottom half of the rolls. Don’t be shy here. You want a generous layer of meat. I usually use about half a pound to three-quarters of a pound. Fold the slices to fit if needed.
- Add the Cheese: Place the Swiss cheese slices on top of the turkey. Make sure the cheese covers the meat completely. This will help hold everything together and create that beautiful, melty texture. Tear the cheese slices to fit if necessary.
- Top the Rolls: Carefully place the top half of the rolls over the cheese. Press down gently to make sure everything is snug.
- Make the Butter Topping: In your small saucepan or microwave-safe bowl, melt the stick of butter. Once melted, whisk in the Dijon mustard, Worcestershire sauce, onion powder, and poppy seeds. Stir until everything is well combined.
- Brush and Rest: Using your pastry brush, generously brush the entire butter mixture over the tops of the rolls. Make sure to get the edges. Don’t worry if some drips down the sides—that just adds flavor. Here is the crucial step: let the sliders sit for 10-15 minutes. This allows the rolls to absorb some of the butter mixture, which prevents them from becoming soggy and ensures the flavors meld together.
- First Bake: Cover the baking dish tightly with aluminum foil. Bake for 15 minutes. This steams the rolls and melts the cheese perfectly.
- Second Bake: Remove the foil and bake for another 5-7 minutes, or until the tops are golden brown and the edges are slightly crispy. The cheese should be fully melted and bubbly.
- Rest and Slice: Let the sliders rest in the pan for at least 5 minutes before slicing. This allows them to set up and makes them easier to cut. Use a sharp knife to cut along the individual roll lines. You can also use a pizza cutter for a super clean cut.
A few notes from my own experience: If you are making these for a lunchbox, let them cool completely before packing them. They are delicious warm, but they hold up much better at room temperature. Also, don’t skip the resting step before baking. I did once when I was in a hurry, and the rolls were a bit soggy on the bottom. Trust the process!
Cooking Tips & Techniques
Over the years, I have made these sliders more times than I can count. I’ve learned a few tricks that separate good sliders from great ones. Let me share them with you.
The Biggest Mistake: The most common mistake people make is not letting the assembled sliders rest before baking. I know it’s tempting to just pop them in the oven, but that 10-minute rest is non-negotiable. It gives the butter mixture time to soak into the rolls, which creates a soft, flavorful interior while the outside gets golden and slightly crispy. Skip this step, and you risk a soggy bottom.
My Biggest Failure: I once tried to double the recipe and crammed it into a pan that was too small. The rolls were stacked on top of each other, and the ones in the middle never got crispy. The edges were burnt, and the center was doughy. It was a mess. Lesson learned: use the right size pan. A 9×13-inch dish is perfect for a 12-count package. If you are doubling, use two pans.
Timing and Multitasking: These sliders are great for meal prep. I will often assemble them the night before, cover them with foil, and keep them in the fridge. The next morning, I just brush the butter on (do this right before baking, not the night before, or the rolls get too soggy) and bake them. This saves so much time on busy school mornings. You can also freeze the baked sliders for up to a month.
Consistency Tips: For the most consistent results, use a kitchen scale to weigh your turkey. A pound is a pound, whether you get it from the deli counter or a package. Also, make sure your butter is fully melted but not hot when you brush it on. If it’s too hot, it will cook the rolls before they even hit the oven.
Professional Technique: A trick I learned from a caterer friend is to use a serrated knife to slice the entire block of rolls in one go. It’s much easier and cleaner than trying to slice each roll individually. Just make sure your knife is sharp. A dull knife will squish the soft rolls.
Variations & Adaptations
This recipe is a fantastic base that you can adapt in so many ways. Don’t be afraid to experiment and make it your own. Here are some of my favorite variations.
- For a Different Protein: Swap the turkey for ham, roast beef, or even shredded rotisserie chicken. I love making these with leftover crockpot pulled pork for a completely different flavor profile. The sweetness of the rolls pairs perfectly with the savory, smoky pork.
- For a Vegetarian Version: Use thinly sliced portobello mushrooms or a good quality plant-based deli meat. You can also use roasted vegetables like bell peppers and zucchini. The key is to make sure the filling is flavorful and not too wet.
- For a Different Cheese: Try provolone, mozzarella, cheddar, or pepper jack for a spicy kick. A mix of cheeses is also fantastic. I’ve used a combination of Swiss and cheddar, and it was incredible.
- For a Spicy Version: Add a few slices of pickled jalapeños or a drizzle of sriracha to the butter mixture. You can also use pepper jack cheese and add a pinch of cayenne pepper to the seasoning.
- For a Breakfast Version: Use scrambled eggs, cooked breakfast sausage, and cheddar cheese. The same technique works perfectly for a quick and easy breakfast slider. These are great for a busy morning or a weekend brunch.
I once made a version with leftover marry me chicken that I had shredded. I layered it with provolone and a little bit of the sun-dried tomato sauce from the recipe. It was absolutely divine. Don’t be afraid to get creative with leftovers!
Serving & Storage Suggestions
These sliders are incredibly versatile. They are perfect for school lunches, but they also make a great quick dinner or party appetizer. Here is how to serve and store them for the best results.
Serving: These sliders are best served warm, right out of the oven. The cheese is perfectly melty, and the tops are golden and slightly crispy. They are fantastic on their own, but you can also serve them with a side of dipping sauce. My kids love them with ketchup, but honey mustard, ranch dressing, or a simple marinara sauce are also great options. For a school lunch, let them cool completely before packing. They taste great at room temperature and hold up perfectly.
Complementary Dishes: If you are serving these as a dinner, pair them with a simple side salad, some fresh fruit, or a bowl of soup. They are especially good with a creamy butternut squash soup on a cold day. For a party, they are a hit alongside other finger foods like sausage and hashbrown breakfast casserole for a brunch spread, or with a bowl of Texas cowboy caviar for a game day gathering.
Storage: Store any leftover sliders in an airtight container in the refrigerator for up to 3-4 days. They are great for a quick lunch or snack throughout the week. To reheat, you can microwave them for about 20-30 seconds, but for the best texture, reheat them in the oven at 350°F (175°C) for about 5-7 minutes. This will crisp the tops back up.
Freezing: These sliders freeze beautifully. Let them cool completely, then wrap them tightly in plastic wrap and then in aluminum foil. Freeze for up to 3 months. To reheat from frozen, bake them at 350°F (175°C) for about 20-25 minutes, or until heated through. This is a lifesaver for busy mornings. Just pull a few out the night before and let them thaw in the fridge.
Flavor Development: Honestly, these sliders taste even better the next day. The flavors have time to meld together, and the rolls absorb all that delicious buttery goodness. The texture is a bit softer, but the flavor is incredible. I often make a double batch just so we have leftovers.
Nutritional Information & Benefits
While these sliders are definitely a comfort food, they can be part of a balanced diet. Here is a rough estimate of the nutritional information for one slider. Please note that this is an approximation and will vary based on the specific brands and ingredients you use.
| Nutrient | Per Slider (approx.) |
|---|---|
| Calories | 280-320 |
| Fat | 15-18g |
| Saturated Fat | 8-10g |
| Carbohydrates | 22-26g |
| Protein | 15-18g |
| Sodium | 500-600mg |
Health Benefits: Turkey is a lean source of protein, which is essential for muscle growth and repair, especially for growing kids. Swiss cheese provides calcium and vitamin D for strong bones. The Hawaiian rolls provide carbohydrates for energy, making these sliders a well-rounded meal option. You can easily make them healthier by using whole wheat rolls, low-sodium turkey, and reduced-fat cheese.
Dietary Considerations: This recipe is not gluten-free or dairy-free in its standard form, but it is very easy to adapt. Use gluten-free rolls and dairy-free cheese to make it suitable for those with allergies or intolerances. It is also a great option for those following a low-carb diet if you use lettuce wraps instead of the rolls, though that changes the nature of the recipe significantly. As always, check the labels of your ingredients to ensure they meet your dietary needs.
Potential Allergens: This recipe contains gluten (from the rolls), dairy (from the cheese and butter), and mustard. It may also contain traces of other allergens depending on the specific brands you use. Always read labels carefully if you are cooking for someone with food allergies.
Conclusion
These easy mini turkey and cheese sliders are more than just a recipe—they are a solution to the daily lunchbox struggle. They are quick, simple, and unbelievably delicious. I love that I can make a batch on a Sunday afternoon and have perfect lunches ready for the entire week. It takes the stress out of the morning rush and ensures my kids are eating something they actually enjoy.
I encourage you to make this recipe your own. Play with the fillings, try different cheeses, and don’t be afraid to experiment. The base is so forgiving that you really can’t go wrong. Whether you are packing them for school, serving them at a party, or just making a quick dinner for the family, these sliders are guaranteed to be a hit.
I would love to hear how they turn out for you! Did you try a fun variation? Did your kids love them? Drop a comment below and let me know. And if you share a photo on social media, tag me so I can see your creations. Happy cooking, and here is to empty lunchboxes and happy bellies!
Frequently Asked Questions
Can I make these sliders ahead of time?
Absolutely! You can assemble the sliders completely (minus the butter topping) the night before. Cover them with foil and store them in the fridge. In the morning, just brush on the butter mixture and bake as directed. This is a huge time-saver for busy mornings.
Can I use a different type of roll?
Yes, you can. While Hawaiian sweet rolls are the classic choice for their soft, sweet texture, you can use any type of soft slider bun or dinner roll. Just keep in mind that the flavor and texture will change slightly. Brioche rolls are a great alternative.
How do I keep the sliders from getting soggy?
The key is to let the assembled sliders rest for 10-15 minutes after brushing on the butter mixture before baking. This allows the rolls to absorb the liquid and prevents them from becoming soggy. Also, make sure your turkey is not too wet. Pat it dry with a paper towel if necessary.
Can I freeze these sliders?
Yes, they freeze beautifully. Let them cool completely, then wrap them tightly in plastic wrap and aluminum foil. Freeze for up to 3 months. To reheat, bake them directly from frozen at 350°F (175°C) for 20-25 minutes, or until heated through.
Can I add vegetables to these sliders?
Definitely! You can add a layer of fresh spinach, roasted red peppers, caramelized onions, or thinly sliced tomatoes. Just make sure to pat any wet vegetables dry to prevent sogginess. Sautéed mushrooms are also a fantastic addition.
Print
Easy Mini Turkey and Cheese Sliders: Best School Lunch
- Total Time: 42 minutes
- Yield: 12 sliders 1x
Description
These easy mini turkey and cheese sliders are the perfect solution for school lunches or a quick dinner. Made with Hawaiian rolls, deli turkey, Swiss cheese, and a buttery topping, they are warm, satisfying, and hold up way better than a soggy sandwich.
Ingredients
- 1 (12-count) package Hawaiian sweet rolls
- 1 pound deli turkey, thinly sliced
- 8–10 slices Swiss cheese
- 1/2 cup (1 stick) unsalted butter
- 2 tablespoons Dijon mustard
- 1 tablespoon poppy seeds
- 1 teaspoon onion powder
- 1 teaspoon Worcestershire sauce
Instructions
- Preheat your oven to 350°F (175°C). Without separating the rolls, slice the entire block of Hawaiian rolls in half horizontally. Place the bottom half in a 9×13-inch baking dish.
- Layer the sliced deli turkey evenly over the bottom half of the rolls. Fold slices to fit if needed.
- Place the Swiss cheese slices on top of the turkey, covering the meat completely. Tear slices to fit if necessary.
- Carefully place the top half of the rolls over the cheese and press down gently.
- In a small saucepan or microwave-safe bowl, melt the butter. Whisk in the Dijon mustard, Worcestershire sauce, onion powder, and poppy seeds until well combined.
- Brush the entire butter mixture generously over the tops of the rolls, including the edges. Let the sliders sit for 10-15 minutes to allow the rolls to absorb the mixture.
- Cover the baking dish tightly with aluminum foil and bake for 15 minutes.
- Remove the foil and bake for another 5-7 minutes, or until the tops are golden brown and the edges are slightly crispy.
- Let the sliders rest in the pan for at least 5 minutes before slicing along the individual roll lines. Serve warm or at room temperature.
Notes
For best results, let the assembled sliders rest for 10-15 minutes after brushing with butter to prevent sogginess. These sliders can be assembled the night before (without butter topping) and refrigerated; brush with butter just before baking. They freeze well for up to 3 months. Reheat in the oven at 350°F for 5-7 minutes for best texture.
- Prep Time: 20 minutes
- Cook Time: 22 minutes
- Category: Main Course
- Cuisine: American
Nutrition
- Serving Size: 1 slider
- Calories: 300
- Sugar: 8
- Sodium: 550
- Fat: 16
- Saturated Fat: 9
- Carbohydrates: 24
- Fiber: 1
- Protein: 16
Keywords: turkey sliders, mini sliders, school lunch, easy lunch, Hawaiian roll sliders, turkey and cheese sliders, kid-friendly lunch