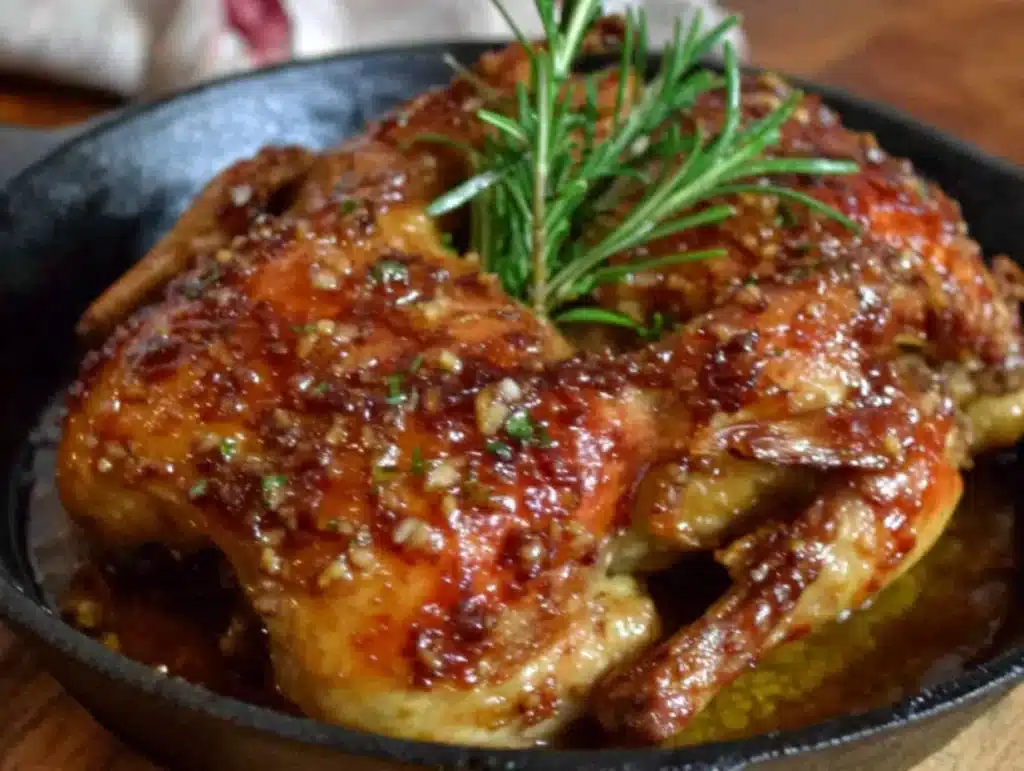
It was 11 PM on a random Tuesday, and a craving for something sticky, savory, and deeply satisfying hit me out of nowhere. I didn’t have the energy for a complicated roast chicken, but I had two little Cornish hens thawing in the fridge and a bottle of honey that was almost empty. The idea just arrived — what if I treated these tiny birds like the main event, not just a substitute for a bigger bird? I grabbed the soy sauce, some garlic that was starting to sprout, and went for it. Honestly, I was half-asleep and figured I’d either create a disaster or a new favorite. Let me tell you, the smell wafting through my kitchen at midnight was pure magic. I mean, there I was in my pajamas, basting these little hens, and I knew I was onto something. The sweet and savory glaze caramelized into this perfect, sticky crust that made the meat incredibly tender. Maybe you’ve been there — you just need a meal that feels special, even if it’s just for you on a quiet weeknight. That’s exactly what this honey garlic roasted Cornish hens recipe became: a cozy, no-fuss dinner that feels like a celebration. I’ve made it at least a dozen times since that late-night experiment, and it never fails to make me close my eyes after the first bite.
Why You’ll Love This Recipe
This isn’t just another roasted bird recipe. After testing this dish more times than I care to count, I can tell you it’s the perfect balance of effort and reward. I’ve worked with everything from grocery store birds to farm-fresh hens, and this method delivers every single time.
- Quick & Easy: Ready in about an hour with just 15 minutes of hands-on prep. Perfect for a weeknight dinner that feels like a weekend feast.
- Simple Ingredients: You probably have honey, soy sauce, and garlic in your kitchen right now. No fancy grocery trips required.
- Perfect for a Cozy Dinner for Two: Each hen serves one person, making it the ideal romantic dinner, anniversary meal, or just a quiet night in.
- Crowd-Pleaser: The sweet and savory glaze appeals to everyone, even picky eaters who usually avoid poultry.
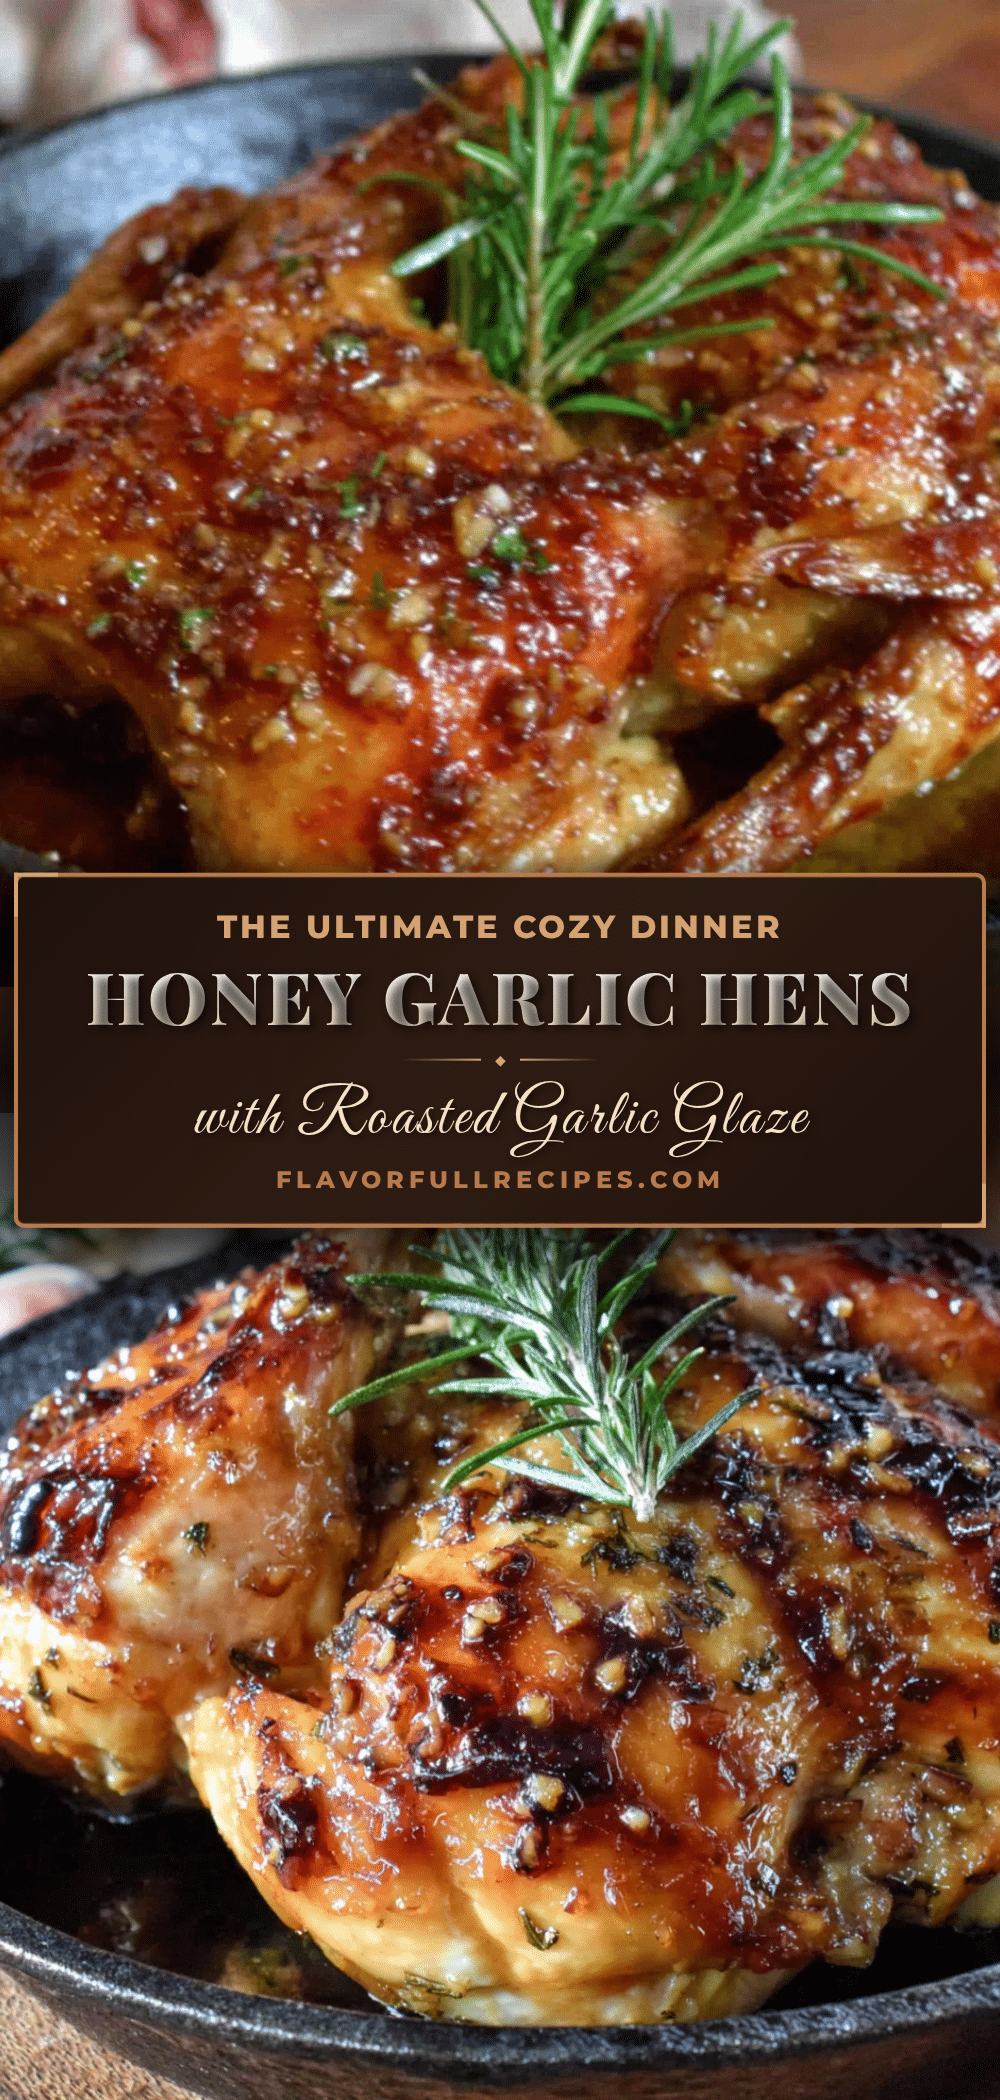
- Unbelievably Delicious: The honey caramelizes into a gorgeous golden crust while the garlic infuses every bite with savory depth. The meat stays incredibly juicy.
What makes this recipe different? It’s the basting technique. Most recipes have you brush the glaze on once and call it done. I developed a three-step basting method that builds layers of flavor and creates that crackling skin you dream about. Plus, the honey-to-soy ratio is perfectly balanced — not too sweet, not too salty. This is the kind of meal that makes you feel like you’re dining at a fancy restaurant, but you’re actually in your cozy kitchen in sweatpants. It’s comfort food reimagined — impressive enough for guests but simple enough for a Tuesday night.
What Ingredients You Will Need
This recipe uses simple, wholesome ingredients that come together to create something truly special. Most of these are pantry staples, which makes this dish perfect for those nights when you want to cook something impressive without a special shopping trip.
For the Honey Garlic Glaze
- 1/3 cup honey (use a good quality honey for the best flavor; I prefer local wildflower honey)
- 4 cloves garlic, minced (fresh garlic is non-negotiable here — the jarred stuff won’t give you the same depth)
- 3 tablespoons soy sauce (low-sodium works great; tamari for gluten-free)
- 2 tablespoons unsalted butter, melted (adds richness and helps the glaze stick)
- 1 tablespoon apple cider vinegar (balances the sweetness with a touch of acidity)
- 1 teaspoon Dijon mustard (adds a subtle tang and helps emulsify the glaze)
- 1/2 teaspoon black pepper
- 1/4 teaspoon red pepper flakes (optional, for a tiny kick of heat)
For the Cornish Hens
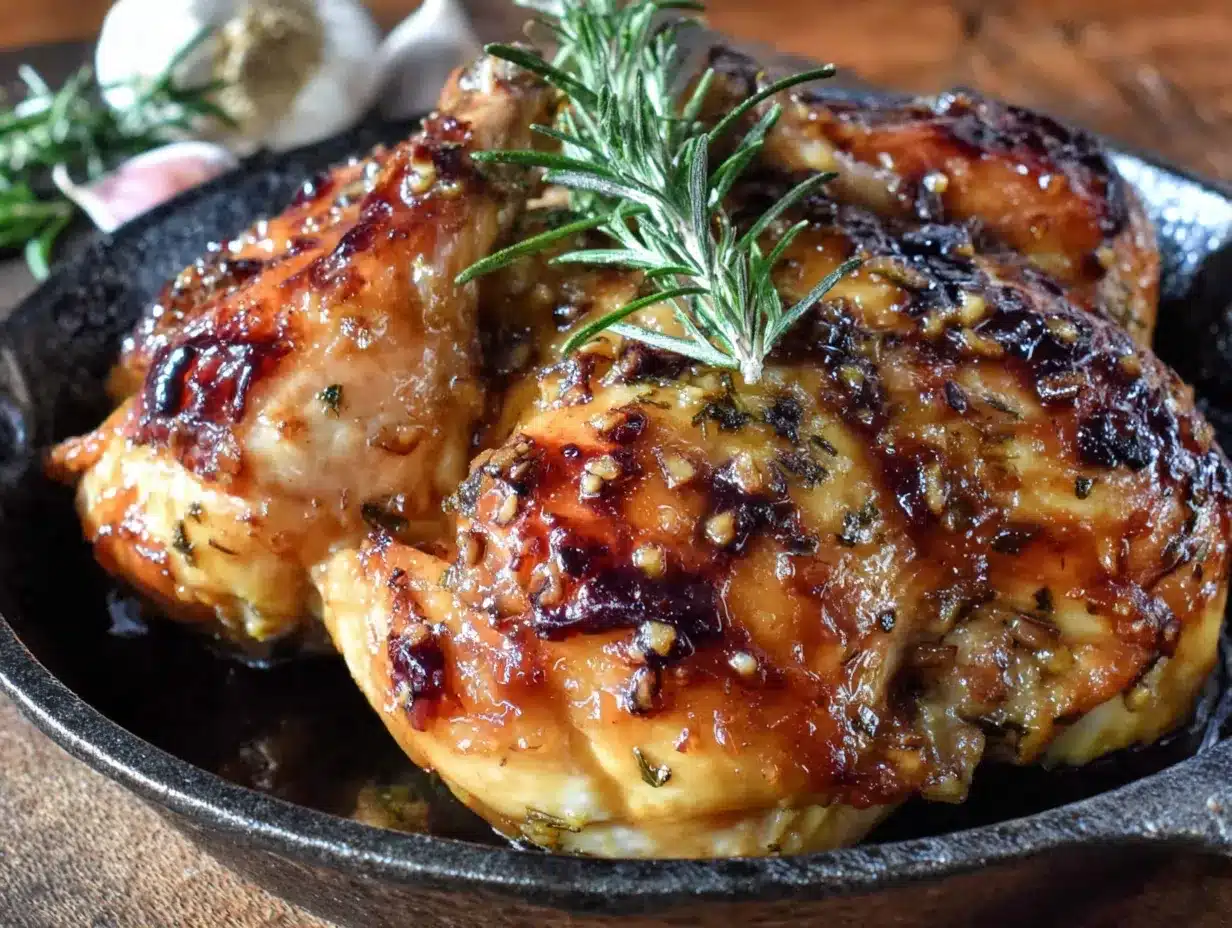
- 2 Cornish hens, about 1.5 pounds each (thawed if frozen; pat them very dry with paper towels)
- 1 tablespoon olive oil (for rubbing the skin before roasting)
- 1 teaspoon salt (I use kosher salt for even seasoning)
- 1/2 teaspoon black pepper
- 1 lemon, quartered (for stuffing inside the cavities — adds moisture and brightness)
- 4 sprigs fresh thyme (or 1 teaspoon dried thyme if that’s what you have)
- 2 sprigs fresh rosemary (optional but lovely)
Ingredient Selection Tips: Look for Cornish hens that feel plump and have smooth, unblemished skin. If you can’t find Cornish hens, you can substitute one small chicken (about 3 pounds) and adjust the cooking time. For the honey, avoid the stuff that comes in a plastic bear — it’s often cut with corn syrup. A good honey makes a noticeable difference in the glaze’s depth and how it caramelizes.
Equipment Needed
You don’t need a professional kitchen to make this recipe shine. Here’s what you’ll need:
- Roasting pan or baking dish: A 9×13 inch baking dish works perfectly. If you have a cast iron skillet, even better — it holds heat beautifully and helps the skin crisp up.
- Small saucepan: For making the glaze. Any small pot will do.
- Basting brush: A silicone brush is ideal because it doesn’t shed bristles. A spoon works in a pinch, but a brush gives you better coverage.
- Meat thermometer: This is non-negotiable for perfect poultry. I’ve ruined too many birds by guessing. An instant-read thermometer costs about $10 and will change your cooking life.
- Kitchen twine: For trussing the hens (optional but helps them cook evenly).
- Cutting board and sharp knife: For mincing garlic and prepping herbs.
If you don’t have a roasting pan, a rimmed baking sheet lined with foil works fine. Just be careful with the juices — they might spill over if the sheet is too shallow. I learned that the hard way and spent an hour scrubbing my oven.
Preparation Method
Let me walk you through this step by step. Trust me, it’s easier than you think.
- Preheat your oven to 400°F (200°C). Position the rack in the middle of the oven. While it’s heating, take the Cornish hens out of the fridge and let them sit at room temperature for about 15 minutes. This helps them cook more evenly.
- Pat the hens completely dry. Use paper towels and really get in there — under the wings, inside the cavity, everywhere. Dry skin equals crispy skin. I cannot stress this enough. If the skin is damp, the glaze won’t stick properly and you’ll end up with soggy skin.
- Season the hens inside and out. Rub the olive oil all over the skin, then sprinkle with salt and pepper. Don’t forget the cavity — season that too. Stuff each hen with lemon quarters and herb sprigs. This aromatics the meat from the inside as it roasts.
- Truss the hens (optional but recommended). Tie the legs together with kitchen twine and tuck the wing tips under the body. This creates a compact shape that cooks evenly and looks beautiful on the plate. If you don’t have twine, just tuck the legs as best you can.
- Make the glaze. In a small saucepan over medium heat, combine the honey, minced garlic, soy sauce, melted butter, apple cider vinegar, Dijon mustard, black pepper, and red pepper flakes if using. Whisk everything together and bring it to a gentle simmer. Let it bubble for 2-3 minutes until it thickens slightly. Remove from heat and set aside. The smell at this point is absolutely intoxicating.
- Place the hens in your roasting pan. Arrange them breast-side up with a little space between them. Roast uncovered for 20 minutes. This initial dry roast starts the browning process and helps the skin begin to crisp.
- Start basting. After 20 minutes, remove the pan from the oven and brush the hens generously with the honey garlic glaze. Be thorough — get the legs, the wings, the breast. Return to the oven for another 15 minutes.
- Baste again. After 15 minutes, baste the hens a second time with the remaining glaze. The pan juices will have mixed with the glaze to create a beautiful, sticky sauce. Spoon some of that over the hens too.
- Finish roasting. Roast for another 10-15 minutes, or until the internal temperature reaches 165°F (74°C) when inserted into the thickest part of the thigh without touching bone. The skin should be deep golden brown and caramelized. If the skin is browning too quickly, tent loosely with foil for the last 10 minutes.
- Rest before serving. This is crucial. Remove the hens from the oven and let them rest for 10 minutes. Don’t skip this step — it allows the juices to redistribute throughout the meat. If you cut into them immediately, all those delicious juices will run out onto the cutting board instead of staying in the meat.
Pro tip: While the hens rest, pour the pan juices into a small bowl and skim off the fat. Drizzle this liquid gold over the hens when you serve them. It’s concentrated flavor that you don’t want to waste.
Cooking Tips & Techniques
I’ve made this recipe enough times to know where things can go wrong. Let me save you the trouble.
The biggest mistake I made was not drying the hens thoroughly enough. The first time I made this, I was in a hurry and left the skin slightly damp. The glaze slid right off and I ended up with pale, sad-looking birds. Now I use three paper towels per hen and really press them into the skin. It makes all the difference.
Another thing I learned the hard way: don’t rush the basting. I tried to speed things up by brushing the glaze on all at once at the beginning. The honey burned before the hens were cooked through. The three-step basting method — once at 20 minutes, once at 35 minutes, and letting the final 10-15 minutes caramelize the last layer — creates that gorgeous, sticky crust without burning.
Temperature is everything with poultry. I used to rely on cooking times alone, but ovens vary wildly. A meat thermometer is your best friend. When that little needle hits 165°F, you know you’re done. No guessing, no dry meat, no food safety worries.
If you’re multitasking (and let’s face it, who isn’t?), start your side dishes while the hens roast. I like to toss some baby potatoes and green beans in olive oil and salt, then add them to the pan around the hens during the last 30 minutes. They soak up the pan juices and come out perfectly seasoned.
One more thing: let the glaze cool slightly before brushing it on. If it’s too hot, it will slide right off the cold hens. A warm glaze sticks better and creates a more even coating.
Variations & Adaptations
This recipe is wonderfully flexible. Here are some ways I’ve adapted it over the years:
Spicy Honey Garlic Version: Add an extra teaspoon of red pepper flakes and a minced fresh chili to the glaze. The heat balances the sweetness beautifully. I made this for a friend who loves spicy food, and she emailed me the next day asking for the recipe.
Citrus-Herb Twist: Replace the lemon with orange quarters and add a tablespoon of orange zest to the glaze. Use fresh oregano instead of thyme. The orange notes complement the honey in a completely different way — brighter and more floral.
Dietary Adaptations: For a gluten-free version, use tamari instead of soy sauce. For a lower-sugar option, reduce the honey to 1/4 cup and add an extra tablespoon of apple cider vinegar. The glaze will be less sticky but still flavorful.
Different Cooking Methods: You can also make these on the grill. Set up for indirect heat at 375°F and roast for about 45-50 minutes, basting every 15 minutes. The smoky flavor from the grill adds another dimension. I tried this last summer and it was incredible — the honey caramelized with a hint of char that you just can’t get from an oven.
One-Pot Meal: Add halved Brussels sprouts and quartered apples to the pan around the hens during the last 25 minutes. They roast in the pan juices and become caramelized and tender. Dinner is literally all in one pan.
Serving & Storage Suggestions
These honey garlic roasted Cornish hens are stunning on a plate. Serve them whole for maximum visual impact, or halve them along the breastbone for easier eating. I like to place each hen on a bed of wild rice or creamy mashed potatoes to soak up all those pan juices.
What to serve alongside: The sweet-savory glaze pairs beautifully with roasted vegetables like carrots, parsnips, or asparagus. A simple green salad with a lemon vinaigrette cuts through the richness. For something more indulgent, try garlic butter green beans or roasted sweet potatoes. A glass of crisp white wine like Sauvignon Blanc or a light Pinot Noir completes the meal perfectly.
Storage: Leftover meat can be stored in an airtight container in the refrigerator for up to 3 days. The flavor actually deepens overnight as the glaze continues to penetrate the meat. I’ve been known to make extra just for leftovers.
Reheating: The best way to reheat is in a 350°F oven for about 10-15 minutes, covered with foil to prevent drying. You can also reheat in a skillet over medium heat with a splash of chicken broth. Avoid the microwave — it makes the skin rubbery and ruins the texture.
Freezing: Cooked hens freeze well for up to 2 months. Wrap them tightly in plastic wrap and then foil. Thaw overnight in the refrigerator before reheating. The glaze may lose some of its sticky quality after freezing, but the flavor remains excellent.
Nutritional Information & Benefits
Per serving (one hen with glaze):
- Calories: Approximately 520
- Protein: 42g
- Fat: 28g
- Carbohydrates: 24g
- Fiber: 0g
- Sugar: 22g
- Sodium: 890mg
Cornish hens are an excellent source of lean protein, which supports muscle health and keeps you feeling full. The garlic in this recipe isn’t just for flavor — it contains allicin, a compound known for its anti-inflammatory and immune-boosting properties. Honey provides quick energy and contains antioxidants, though it should be enjoyed in moderation as part of a balanced diet.
This recipe is naturally gluten-free if you use tamari instead of soy sauce. It’s also relatively low in carbohydrates compared to many comfort food dishes. If you’re watching your sodium intake, use low-sodium soy sauce and reduce the added salt.
I love that this meal feels indulgent but is actually quite balanced — protein-rich, moderate in fat, and sweetened with natural honey rather than refined sugar. It’s the kind of dinner that nourishes both body and soul.
Conclusion
These honey garlic roasted Cornish hens have become my go-to for those nights when I want to feel like I’m having a special dinner without spending hours in the kitchen. The sweet, sticky glaze, the tender meat that falls off the bone, the gorgeous presentation — it all comes together in about an hour with minimal fuss. Whether you’re cooking for a romantic date night, a small celebration, or just treating yourself to something beautiful on a Tuesday, this recipe delivers. I love that it feels fancy but is actually so simple. The honey caramelizes into this perfect golden crust, the garlic infuses everything with warmth, and the whole kitchen smells incredible. I honestly can’t recommend it enough.
Now I want to hear from you. Have you tried making Cornish hens before? What’s your favorite way to glaze them? Drop a comment below and let me know how yours turn out. And if you loved this recipe, share it with someone who deserves a cozy dinner for two. Happy cooking, friends!
Frequently Asked Questions
Can I use chicken instead of Cornish hens?
Absolutely. Substitute one small whole chicken (about 3-4 pounds) and increase the roasting time to about 60-75 minutes, or until the internal temperature reaches 165°F. The glaze recipe works perfectly for a chicken too.
How do I know when the hens are fully cooked?
The most reliable method is using a meat thermometer. Insert it into the thickest part of the thigh without touching bone. When it reads 165°F (74°C), they’re done. The juices should also run clear when you pierce the thigh with a knife.
Can I make the glaze ahead of time?
Yes! The glaze can be made up to 3 days in advance and stored in an airtight container in the refrigerator. Let it come to room temperature before using, or gently warm it on the stove to loosen it up.
What if my glaze burns before the hens are cooked?
If the glaze is browning too quickly, tent the hens loosely with aluminum foil for the remainder of the cooking time. This allows the meat to continue cooking without the sugar in the glaze burning. Make sure the foil doesn’t touch the skin.
Can I freeze the uncooked hens with the glaze?
I don’t recommend it. The glaze contains honey, which can become grainy when frozen and thawed on raw poultry. It’s better to freeze the cooked hens after they’ve cooled completely, or freeze the glaze separately and apply it fresh when you’re ready to cook.
Pin This Recipe!
Easy Honey Garlic Roasted Cornish Hens: Best Cozy Dinner for Two
- Total Time: 1 hour
- Yield: 2 servings 1x
Description
These honey garlic roasted Cornish hens are the perfect balance of sweet and savory, with a sticky, caramelized glaze and tender, juicy meat. Ready in about an hour with minimal prep, this cozy dinner for two feels like a celebration any night of the week.
Ingredients
- 1/3 cup honey
- 4 cloves garlic, minced
- 3 tablespoons soy sauce (low-sodium or tamari for gluten-free)
- 2 tablespoons unsalted butter, melted
- 1 tablespoon apple cider vinegar
- 1 teaspoon Dijon mustard
- 1/2 teaspoon black pepper
- 1/4 teaspoon red pepper flakes (optional)
- 2 Cornish hens, about 1.5 pounds each, thawed if frozen
- 1 tablespoon olive oil
- 1 teaspoon kosher salt
- 1/2 teaspoon black pepper
- 1 lemon, quartered
- 4 sprigs fresh thyme (or 1 teaspoon dried thyme)
- 2 sprigs fresh rosemary (optional)
Instructions
- Preheat your oven to 400°F (200°C). Position the rack in the middle of the oven. Take the Cornish hens out of the fridge and let them sit at room temperature for about 15 minutes.
- Pat the hens completely dry with paper towels, including under the wings and inside the cavity.
- Rub the olive oil all over the skin, then season inside and out with salt and pepper. Stuff each hen with lemon quarters and herb sprigs.
- Truss the hens by tying the legs together with kitchen twine and tucking the wing tips under the body (optional but recommended).
- In a small saucepan over medium heat, combine honey, minced garlic, soy sauce, melted butter, apple cider vinegar, Dijon mustard, black pepper, and red pepper flakes if using. Whisk and bring to a gentle simmer for 2-3 minutes until slightly thickened. Remove from heat.
- Place the hens breast-side up in a roasting pan or 9×13 inch baking dish, leaving space between them. Roast uncovered for 20 minutes.
- After 20 minutes, remove the pan from the oven and brush the hens generously with the honey garlic glaze. Return to the oven for another 15 minutes.
- Baste the hens a second time with the remaining glaze and pan juices. Roast for another 10-15 minutes, or until the internal temperature reaches 165°F (74°C) in the thickest part of the thigh. If browning too quickly, tent loosely with foil.
- Remove from the oven and let the hens rest for 10 minutes before serving. Pour pan juices into a small bowl, skim off fat, and drizzle over the hens when serving.
Notes
For best results, dry the hens thoroughly to ensure crispy skin. Use a three-step basting method for a perfect caramelized crust. Let the glaze cool slightly before brushing to help it stick. Rest the hens for 10 minutes before serving to redistribute juices.
- Prep Time: 15 minutes
- Cook Time: 45 minutes
- Category: Main Course
- Cuisine: American
Nutrition
- Serving Size: 1 hen
- Calories: 520
- Sugar: 22
- Sodium: 890
- Fat: 28
- Saturated Fat: 10
- Carbohydrates: 24
- Protein: 42
Keywords: honey garlic Cornish hens, roasted Cornish hens, dinner for two, romantic dinner, easy roasted chicken, honey garlic glaze, cozy dinner