That deep, dark purple stain on my thumb—the one that takes three days and a lot of lemon juice to fully fade—always takes me straight back to my grandmother’s tiny kitchen. She’d be standing at the counter, a pot of simmering elderberries filling the whole house with this earthy, almost floral steam that clung to the curtains. It wasn’t a recipe she ever wrote down; it was just something she *did* every fall, like clockwork, long before anyone was talking about “immune support” or “wellness shots.” For her, it was just what you did when the air got that first real chill.
I remember watching her strain the dark liquid through an old cheesecloth, her hands moving with a quiet kind of confidence. She’d pour that syrup into a glass jar and set it on the counter, and somehow, that little jar felt like armor against the winter. But honestly? As a kid, I *hated* the taste. It was too tart, too… medicine-y. I’d hold my nose and gulp it down, making a face that always made her laugh. So when I started making my own immune boosters years later, I knew I had to find a way to make it something I actually *looked forward* to.
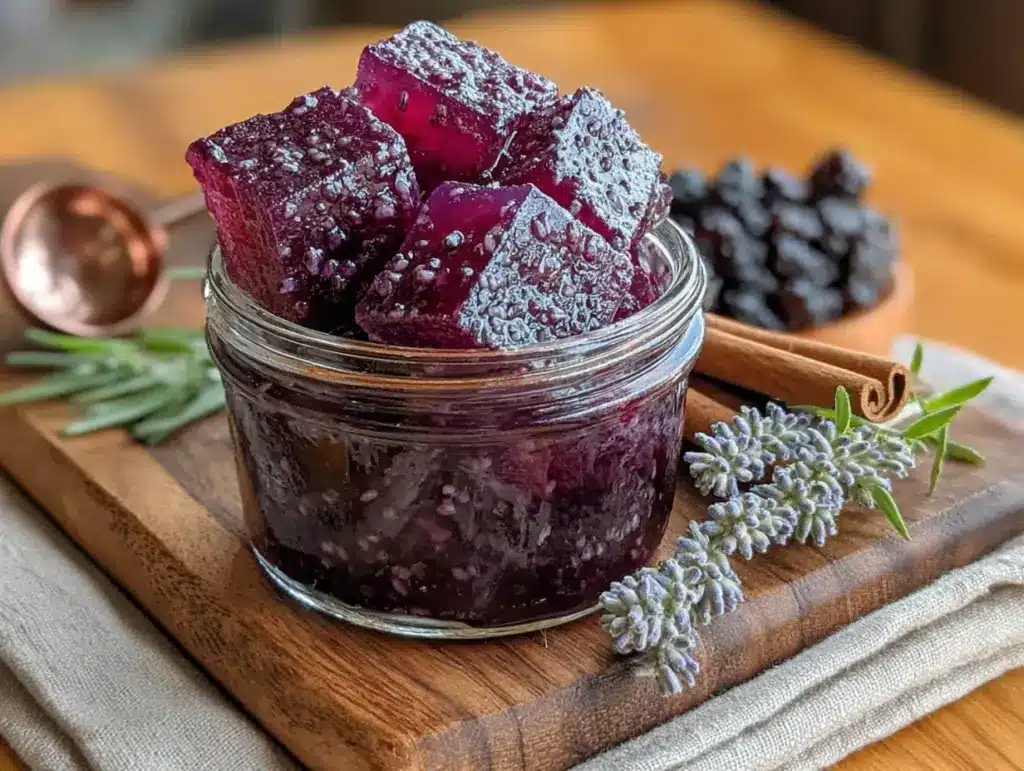
That’s how these Homemade Elderberry Syrup Gummies for Cold Season were born. They’ve got all the same goodness, the same protective feeling, but in a little chewy package that doesn’t make you pucker. It’s like taking a little piece of her kitchen wisdom and making it fun. And honestly? They work just as well as the syrup, maybe even better because you actually want to take them. This quick immune-boosting elderberry syrup is the base for everything, and turning it into gummies just made sense for my own picky taste buds.
Why You’ll Love This Recipe
This isn’t just another gummy recipe. I’ve tested this more times than I can count—some batches were too sticky, some were too hard, and one memorable disaster turned into a purple puddle on the counter. But after all that trial and error, I landed on a version that works every single time. Here’s why you’ll love it too:
- So Much Easier Than Syrup: No standing over a stove every morning measuring out spoonfuls. Just pop a couple of gummies and you’re done. It takes the hassle out of daily dosing.
- Simple, Real Ingredients: You won’t find any corn syrup, artificial flavors, or weird preservatives here. Just elderberries, honey (or maple syrup), and a little gelatin. You probably have most of this in your pantry already.
- Perfect for Picky Eaters: Kids (and honestly, adults too) who hate the taste of straight elderberry syrup will happily chew these. They’re sweet, slightly tart, and have a fun, bouncy texture that feels like a treat.
- Great for Cold Season Prep: I start making a batch in early October, and it gets us through the worst of the winter sniffles. It’s become my go-to for school lunches and afternoon snacks when I feel that first tickle in my throat.
- Totally Customizable: You can adjust the sweetness, use different fruit juices for flavor, or even make them with a little ginger or cinnamon for an extra warming kick. They’re yours to play with.
I’ve shared these with friends who swear by store-bought vitamins, and they always ask for the recipe. There’s just something about knowing exactly what’s in them that makes you feel better, you know? They’re comfort food for your immune system.
What Ingredients You Will Need
This recipe uses simple, wholesome ingredients that work together to create a delicious and effective little gummy. The magic is really in the elderberries, but each component plays a role. Here’s what you’ll need:
- Dried Elderberries (½ cup): These are the star of the show. You can find them online or at health food stores. Look for deep, dark purple berries that are plump and not too dusty. I buy mine from a local herb shop, and the smell alone is so comforting.
- Water (3 cups): Just regular filtered water. It’s the base for steeping the berries and drawing out all that goodness.
- Raw Honey (¼ cup, or more to taste): This adds sweetness and has its own immune-supporting properties. Use local honey if you can! If you’re making these for a baby under one year old, swap in maple syrup or agave nectar instead.
- Fresh Lemon Juice (2 tablespoons): A little brightness to balance the earthy flavor of the elderberries. It also helps preserve the gummies and adds a nice zing.
- Unflavored Gelatin (3 tablespoons): This is what gives the gummies their chewy texture. I recommend using a high-quality brand like Great Lakes or Knox. Make sure it’s unflavored, or you’ll end up with weird-tasting gummies. Trust me on this one.
- Optional Flavor Boosters:
- Fresh ginger (a 1-inch piece, sliced) – adds a warming, spicy kick that’s amazing for cold season.
- Cinnamon stick (1) – adds a cozy, sweet spice that pairs beautifully with elderberry.
- Cloves (a few whole) – for a deeper, more complex flavor.
That’s it. Seriously. No weird preservatives or artificial colors. The elderberries do all the heavy lifting, and the honey makes it all palatable. If you’re feeling adventurous, you can even use a splash of tart cherry juice or pomegranate juice instead of some of the water for a different flavor profile.
Equipment Needed
You don’t need a lot of fancy gear for this, which is one of the reasons I love it. Here’s what you’ll need to have on hand:
- Medium Saucepan: For simmering the elderberries. A stainless steel or enameled pot works best. Avoid aluminum, as it can react with the acidity.
- Fine-Mesh Strainer or Cheesecloth: To strain out the cooked berries. A nut milk bag works great too. Be prepared for some purple stains, but it’s worth it.
- Measuring Cups and Spoons: Standard kitchen tools. Precision is key here, especially with the gelatin.
- Small Bowl: For blooming the gelatin. A glass or ceramic bowl is fine.
- Whisk: To make sure the gelatin dissolves completely without any lumps.
- Silicone Gummy Molds: This is the most important tool. I use bear-shaped molds because they’re fun, but you can use any shape you like. Silicone is non-stick and makes popping the gummies out a breeze. I’ve also used mini ice cube trays in a pinch.
- Dropper or Small Pitcher: For pouring the mixture into the molds. A dropper gives you more control, but a small spouted pitcher works fine too.
- Refrigerator: For setting the gummies. They need at least 2-3 hours of chill time, so plan ahead.
If you don’t have silicone molds, you can pour the mixture into a small, greased baking dish (like an 8×8 inch pan) and cut them into squares once set. They won’t be as cute, but they’ll taste just as good.
Preparation Method
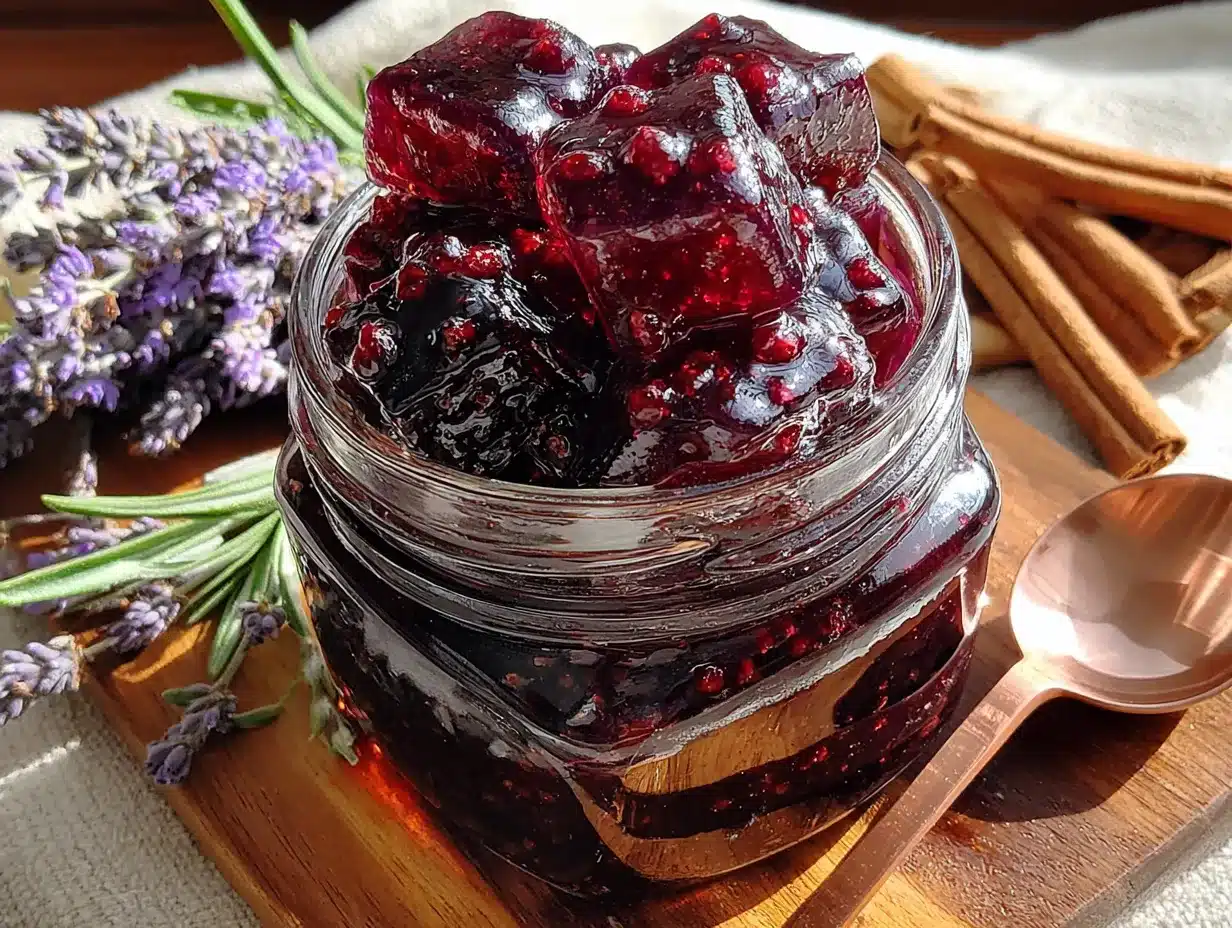
Alright, let’s get to the fun part. This is where the magic happens. Follow these steps, and you’ll have a batch of gummies ready in no time.
- Make the Elderberry Concentrate: In your medium saucepan, combine the dried elderberries and 3 cups of water. If you’re using ginger, cinnamon, or cloves, add them now. Bring the mixture to a boil over medium-high heat, then reduce the heat to low and let it simmer, uncovered, for about 30-40 minutes. You want the liquid to reduce by about half. The berries will soften and the liquid will turn a deep, almost black-purple. The smell at this point is incredible—earthy, sweet, and a little bit spicy.
- Strain the Berries: Place your fine-mesh strainer or cheesecloth over a large bowl or measuring cup. Carefully pour the mixture through the strainer, pressing down on the berries with the back of a spoon to extract as much liquid as possible. Don’t skip this step—you want every last drop of that good stuff. Discard the spent berries (they’re done their job). You should have about 1 ½ cups of concentrated elderberry liquid. Let it cool for 10-15 minutes until it’s warm but not hot.
- Bloom the Gelatin: While the liquid is cooling, pour ½ cup of the warm elderberry liquid into a small bowl. Sprinkle the 3 tablespoons of unflavored gelatin evenly over the surface. Do not stir yet. Let it sit for 5-10 minutes. This is called “blooming,” and it allows the gelatin to absorb the liquid and soften. It will look like a thick, jiggly purple mass. That’s exactly what you want.
- Combine and Warm: Pour the rest of the elderberry liquid back into the saucepan. Add the honey and lemon juice. Warm it over low heat, stirring gently, until the honey is fully dissolved. Do not let it boil—boiling can destroy some of the beneficial properties of the honey and elderberries. Once it’s warm and smooth, remove it from the heat.
- Add the Bloomed Gelatin: Now, add the bloomed gelatin mixture to the warm liquid in the saucepan. Whisk constantly and gently until the gelatin is completely dissolved and the mixture is smooth. This might take 2-3 minutes. Be patient—lumpy gelatin means lumpy gummies. The mixture will look like a thick, glossy syrup.
- Pour into Molds: Place your silicone molds on a baking sheet (this makes them easier to move). Using a dropper or a small spouted pitcher, carefully pour the mixture into the molds. Fill them almost to the top, but don’t overfill. Work quickly, as the mixture will start to set as it cools. If it gets too thick, you can gently warm it again over low heat.
- Set the Gummies: Carefully transfer the baking sheet with the filled molds to the refrigerator. Let them chill for at least 2-3 hours, or until they are firm and springy to the touch. I usually leave them overnight for best results.
- Pop Them Out: Once set, gently press on the back of the silicone molds to release the gummies. They should pop right out. If they stick, try placing them in the freezer for 5 minutes—it helps loosen them up.
And that’s it! You’ve just made your own batch of elderberry gummies.
Cooking Tips & Techniques
I’ve made a lot of mistakes with these gummies, so you don’t have to. Here are the hard-earned lessons I’ve learned along the way:
- Don’t Overheat the Gelatin: Gelatin is a delicate protein. If you boil it, it can lose its thickening power and your gummies won’t set properly. Always keep the heat low and gentle when you’re working with it.
- Test the Set: Before you pour the mixture into all your molds, test a small amount on a plate and pop it in the fridge for 5 minutes. If it sets to a firm, jiggly consistency, you’re good to go. If it’s still liquid, you might need a little more gelatin.
- Work in Batches: If you have a lot of molds, don’t try to pour all the mixture at once. Keep the remaining mixture on the stove over the lowest possible heat (or a warm water bath) to keep it liquid while you work.
- Use a Dropper for Clean Lines: A dropper gives you way more control than pouring directly from a pitcher. It prevents spills and makes sure each cavity is filled evenly. I learned this after a particularly messy batch that looked more like a purple abstract painting than gummies.
- Don’t Skip the Blooming Step: I know it seems like an extra step, but blooming the gelatin is crucial. It prevents lumps and ensures a smooth, even texture. I once skipped it in a hurry, and the gummies had these weird, chewy bits of undissolved gelatin. Not pleasant.
- Sticky Gummies? No Problem: If your gummies are a little sticky after you pop them out, let them air dry on a parchment-lined baking sheet for a few hours. The surface will dry out slightly, making them less tacky to handle.
Variations & Adaptations
One of the best things about this recipe is how flexible it is. Here are some of my favorite ways to change it up:
- Spiced Elderberry Gummies: Add a cinnamon stick, a few slices of fresh ginger, and a couple of whole cloves to the simmering water with the elderberries. It gives the gummies a warm, cozy flavor that’s perfect for fall and winter. I made a batch with ginger last year, and it was a total game-changer.
- Berry Blast Gummies: Replace ½ cup of the water with tart cherry juice or pomegranate juice. This adds a brighter, fruitier flavor and an extra antioxidant boost. My kids love this version.
- Vegan Gummies: You can swap the gelatin for agar agar powder, a plant-based alternative. Use about 2 tablespoons of agar agar powder. The texture will be a bit firmer and less bouncy, but they work great. You’ll need to boil the mixture for 2-3 minutes to activate the agar, so adjust the method accordingly.
- Less Sweet Gummies: If you prefer a less sweet gummy, reduce the honey to 2 tablespoons. The elderberries are naturally a little tart, so they’ll still have a nice flavor. You can also add a few drops of stevia if you want extra sweetness without the sugar.
- Gummy “Cubes” Instead of Shapes: Don’t have silicone molds? No problem. Pour the mixture into a small, greased 8×8 inch baking dish. Refrigerate until firm, then cut into small squares. They won’t be as cute as bears, but they’ll taste just as good.
Serving & Storage Suggestions
These gummies are best enjoyed straight from the fridge. The cold temperature keeps them firm and chewy. Here’s how to serve and store them:
- Serving Size: For adults, I recommend 2-3 gummies per day during cold season. For kids (over age 1), start with 1-2 gummies per day. Always check with your pediatrician before giving any new supplement to children.
- How to Serve: Pop them out of the fridge and eat them as is. They’re a great little afternoon snack or a quick morning boost. I like to take a couple with me when I’m heading out the door.
- Storage: Store the gummies in an airtight container in the refrigerator. They will stay fresh for up to 2-3 weeks. Make sure they are completely dry before storing to prevent mold. I like to layer them between pieces of parchment paper to keep them from sticking together.
- Freezing: You can also freeze the gummies for up to 3 months. Place them in a single layer on a baking sheet and freeze until solid, then transfer them to a freezer-safe bag. They thaw quickly, so you can just grab a few as needed.
- Flavor Development: The flavor of the gummies actually deepens and mellows after a day or two in the fridge. The tartness of the elderberries softens, and the honey becomes more pronounced. So don’t worry if they taste a little strong at first—they’ll settle.
Nutritional Information & Benefits
While I’m not a nutritionist, I can share what I’ve learned about the benefits of these ingredients. Elderberries are packed with antioxidants and vitamins, especially vitamin C, which is known for supporting the immune system. They also contain flavonoids that may help reduce the severity and duration of cold symptoms. The honey adds its own antimicrobial properties, and the lemon juice provides a little extra vitamin C.
- Estimated Nutrition (per 2 gummies): Calories: 35, Total Fat: 0g, Sodium: 5mg, Total Carbohydrates: 8g (Sugars: 6g), Protein: 2g. These are rough estimates and will vary based on your specific ingredients.
- Dietary Considerations: This recipe is naturally gluten-free and dairy-free. For a vegan option, use agar agar as mentioned above. For a low-sugar option, reduce the honey or use a sugar-free sweetener.
- Potential Allergens: None typically, but always check your labels. Some people may have a mild allergic reaction to elderberries, so start with a small amount if you’ve never had them before.
I personally find that taking these gummies at the first sign of a sniffle helps me bounce back faster. They’re not a cure, but they’re a wonderful, natural way to support your body during cold season.
Conclusion
Making your own elderberry gummies is one of those small, satisfying acts of care—for yourself and for your family. It’s a way of saying, “Hey, I’ve got you,” without having to say a word. And honestly, there’s something deeply comforting about knowing exactly what’s in the things you’re putting into your body. No mystery ingredients, no long lists of things you can’t pronounce.
This recipe is forgiving, flexible, and genuinely fun to make. Whether you’re a seasoned home cook or someone who’s just starting to explore homemade remedies, I promise you can do this. And once you taste that first sweet-tart gummy, you’ll wonder why you ever bought the store-bought stuff. They’re so much better, and they come with a little bit of love built right in.
So go ahead, give it a try. Make a batch this weekend, stash them in the fridge, and feel a little more prepared for whatever the season throws your way. And if you come up with your own fun variation—maybe with a little cozy browned butter banana bread on the side—I’d love to hear about it. Drop a comment below and let me know how they turned out. Happy cold season, friends!
Frequently Asked Questions
Can I use fresh elderberries instead of dried?
Yes, you can! Use about 1 cup of fresh elderberries in place of the ½ cup dried. Keep in mind that fresh elderberries have a higher water content, so you may need to simmer them a little longer to reduce the liquid properly. Also, never eat raw elderberries—they can cause stomach upset. Always cook them first.
How long do these gummies last?
Stored in an airtight container in the refrigerator, they’ll stay fresh for 2-3 weeks. You can also freeze them for up to 3 months. Just make sure they’re completely dry before storing to prevent any mold from forming.
Can I make these without honey?
Absolutely. If you’re avoiding honey (or making these for a child under 1 year old), swap it with maple syrup, agave nectar, or even a little coconut sugar dissolved in the warm liquid. The texture might be slightly different, but they’ll still work.
My gummies didn’t set. What went wrong?
This usually happens for one of two reasons: either you didn’t use enough gelatin, or you overheated the mixture after adding the gelatin. Make sure you’re measuring the gelatin correctly (3 tablespoons is key) and keep the heat low. If all else fails, you can reheat the mixture, add a little more dissolved gelatin, and try again.
Can I take these gummies every day?
Yes, they’re safe for daily use during cold season. Start with 2-3 gummies per day for adults and 1-2 for kids. It’s always a good idea to listen to your body and adjust as needed. If you have any underlying health conditions or are on medication, check with your doctor first.
Pin This Recipe!
Easy Elderberry Gummies Recipe for Cold Season
- Total Time: 3 hours 55 minutes (includes chilling time)
- Yield: 4 servings 1x
Description
These homemade elderberry gummies are a fun, chewy alternative to traditional syrup, packed with immune-supporting elderberries and honey. Perfect for cold season, they’re easy to make and a hit with picky eaters.
Ingredients
- ½ cup dried elderberries
- 3 cups water
- ¼ cup raw honey (or more to taste)
- 2 tablespoons fresh lemon juice
- 3 tablespoons unflavored gelatin
- Optional: 1-inch piece fresh ginger, sliced
- Optional: 1 cinnamon stick
- Optional: a few whole cloves
Instructions
- Make the Elderberry Concentrate: In a medium saucepan, combine dried elderberries and 3 cups water. Add optional ginger, cinnamon, or cloves if using. Bring to a boil over medium-high heat, then reduce heat to low and simmer uncovered for 30-40 minutes until liquid reduces by half.
- Strain the Berries: Place a fine-mesh strainer or cheesecloth over a large bowl. Pour the mixture through, pressing on berries to extract liquid. Discard berries. You should have about 1½ cups concentrated liquid. Let cool 10-15 minutes until warm but not hot.
- Bloom the Gelatin: Pour ½ cup of the warm elderberry liquid into a small bowl. Sprinkle 3 tablespoons unflavored gelatin evenly over the surface. Let sit for 5-10 minutes without stirring until it becomes a thick, jiggly mass.
- Combine and Warm: Pour remaining elderberry liquid back into the saucepan. Add honey and lemon juice. Warm over low heat, stirring gently, until honey dissolves. Do not boil. Remove from heat.
- Add the Bloomed Gelatin: Add bloomed gelatin to the warm liquid. Whisk constantly until completely dissolved and smooth, about 2-3 minutes.
- Pour into Molds: Place silicone molds on a baking sheet. Using a dropper or small spouted pitcher, carefully fill molds almost to the top. Work quickly as mixture will start to set.
- Set the Gummies: Transfer baking sheet to refrigerator. Chill for at least 2-3 hours, or until firm and springy. Overnight is best.
- Pop Them Out: Gently press on the back of silicone molds to release gummies. If they stick, place in freezer for 5 minutes to loosen.
Notes
Do not overheat gelatin; keep heat low. Test a small amount on a plate in the fridge to ensure set before pouring all. Work in batches to keep mixture liquid. Use a dropper for clean lines. If gummies are sticky, let air dry on parchment paper. Store in airtight container in fridge for up to 2-3 weeks or freeze for up to 3 months.
- Prep Time: 15 minutes
- Cook Time: 40 minutes
- Category: Snack
- Cuisine: American
Nutrition
- Serving Size: 2 gummies
- Calories: 35
- Sugar: 6
- Sodium: 5
- Carbohydrates: 8
- Protein: 2
Keywords: elderberry gummies, homemade gummies, immune support, cold season, elderberry recipe, gelatin gummies, natural remedy