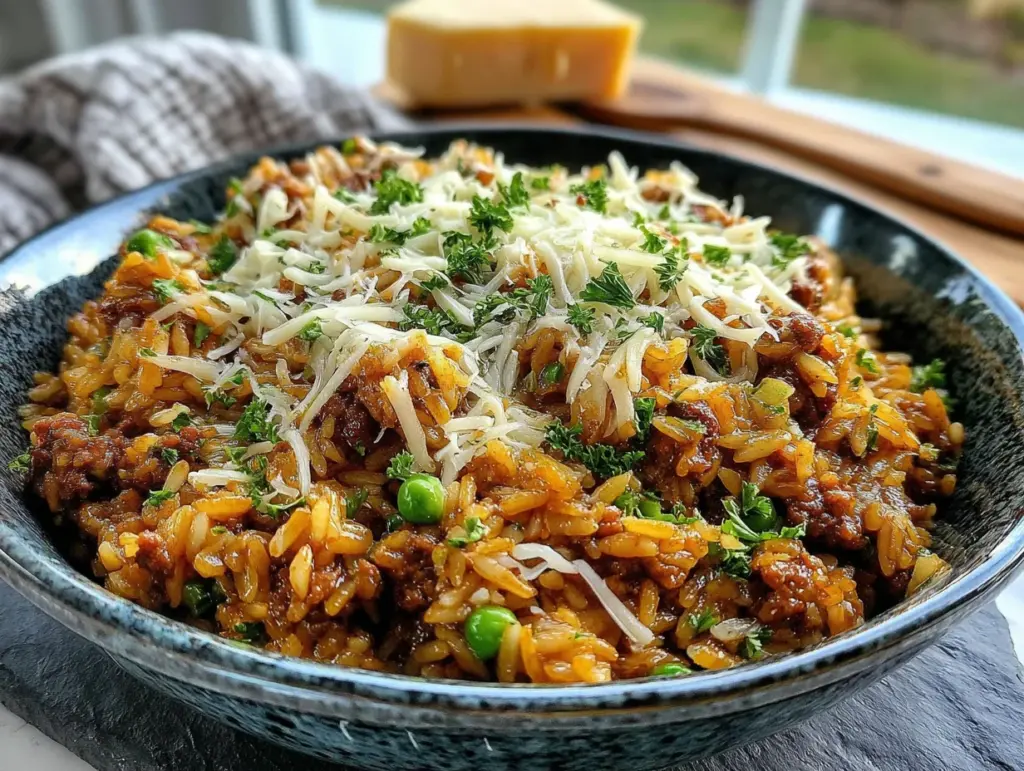
I need dinner on the table in twenty minutes and I refuse to order takeout again. That’s the exact thought that hit me at 5:47 PM on a Tuesday, staring into my fridge at a pound of ground beef I’d defrosted that morning with absolutely zero plan. The rice cooker was already out from last night’s stir-fry, and I could hear my stomach making decisions my brain hadn’t caught up with yet. This Easy Cheesy Ground Beef & Rice Skillet was born from pure, unfiltered weeknight desperation.
You know those nights when you just need something warm, filling, and cheesy without a sink full of dishes? That’s this recipe. It’s the kind of meal that doesn’t ask for much—just one pan, some pantry staples, and about the same amount of time it takes to watch a single episode of your comfort show. Honestly, I’ve made it so many times now that I could probably assemble it in my sleep.
The first time I made this, I wasn’t sure if it would work. I mean, rice straight from the pantry, beef straight from the package, and cheese that I was pretty sure was about to hit its expiration date. But something magical happens when you let simple ingredients do their thing in a hot skillet. The rice soaks up all that savory beef flavor, the cheese melts into every little crevice, and suddenly you’ve got a meal that tastes like you actually planned ahead.
This isn’t fancy food, and it’s not trying to be. It’s the kind of honest cooking that gets you through a busy week without breaking the bank or your sanity. And honestly? That’s exactly what I needed that Tuesday night.
Why You’ll Love This Recipe
Let me tell you why this Easy Cheesy Ground Beef & Rice Skillet has become my most-requested weeknight meal. I’ve tested this recipe at least a dozen times, tweaking the liquid ratio, playing with the cheese blend, and even accidentally burning one batch (we don’t talk about that one). What I landed on is pure weeknight gold.
- Ready in 20 Minutes Flat: From the moment you turn on the stove to the moment you’re scooping it onto your plate, it’s twenty minutes. I timed it. Twice. This is faster than most delivery options in my neighborhood.
- One Pan, Zero Drama: You use one skillet for the entire process. That means one pan to wash. One. If you’ve ever faced a mountain of dishes after cooking, you’ll understand why this matters.
- Pantry-Friendly Ingredients: Ground beef, rice, broth, cheese, and a few seasonings. That’s it. No trips to specialty stores, no hunting down obscure ingredients. You probably have everything right now.
- Budget-Friendly Comfort: This whole meal costs about the same as two fast-food value meals, but it feeds a family of four with leftovers. My wallet appreciates this recipe as much as my stomach does.
- Kid-Approved and Adult-Friendly: My picky eater nephew devours this. My foodie friend from culinary school asked for the recipe. It’s that rare dish that pleases everyone at the table.
What makes this version different from all the other ground beef and rice recipes out there? It’s the technique. Instead of cooking the rice separately and mixing it in at the end (which always gives you sad, mushy rice), we cook everything together. The rice absorbs the beef broth and seasoned drippings as it cooks, which means every single grain is packed with flavor. Plus, we add the cheese in two stages—some stirred in for creaminess, and some melted on top for that gorgeous, bubbly finish.
This is the recipe you’ll make on nights when you’re too tired to think but too hungry to settle for cereal. It’s comfort food that works with your schedule, not against it.
What Ingredients You Will Need
This recipe uses simple, wholesome ingredients that work together to create something way more delicious than the sum of their parts. Here’s what you’ll need and why each one matters.
- Ground Beef (1 pound / 450g): I recommend 80/20 ground beef for the best flavor. The fat content adds richness and helps the rice cook up fluffy. If you use leaner beef (like 93/7), add a tablespoon of olive oil to compensate for the missing fat. I’ve tested this with ground turkey too, and it works great—just add an extra splash of Worcestershire sauce for depth.
- Long-Grain White Rice (1 cup / 200g): This is my go-to for this recipe. Long-grain rice stays separate and fluffy, unlike medium-grain which can get sticky. Basmati or jasmine both work beautifully. Do not use minute rice or instant rice—the texture will be off, and the cooking time won’t match up. I learned this the hard way.
- Beef Broth (2 cups / 480ml): This is where most of the flavor comes from. Use low-sodium broth so you can control the salt level. I prefer Swanson or Kitchen Basics for consistent results. If you only have chicken broth, it’ll still work—just add a teaspoon of beef bouillon paste to deepen the flavor.
- Shredded Cheddar Cheese (1.5 cups / 170g): Sharp cheddar gives the most flavor, but medium cheddar works too. Shred it yourself from a block if you can—pre-shredded cheese has anti-caking agents that prevent it from melting as smoothly. I’ve used a mix of cheddar and Monterey Jack before, and that creamy melt is absolutely worth trying.
- Yellow Onion (1 medium, diced): About 1 cup once diced. Onion adds sweetness and depth. If you’re in a rush, you can use 1 teaspoon of onion powder instead, but fresh onion really makes a difference here.
- Garlic (3 cloves, minced): Fresh garlic is non-negotiable in my kitchen. Jarred minced garlic works in a pinch, but use 1.5 teaspoons if going that route. Garlic powder (1/2 teaspoon) can substitute if that’s all you have.
- Tomato Paste (2 tablespoons / 30g): This adds a subtle tang and deepens the savory flavor. It also helps the rice take on a beautiful golden color. I buy the tubes of tomato paste so I can use just what I need without wasting a whole can.
- Worcestershire Sauce (1 tablespoon / 15ml): This is the secret ingredient that makes people ask “what’s in this?” It adds umami and complexity. A splash of soy sauce works as a substitute if needed.
- Seasonings: 1 teaspoon smoked paprika, 1/2 teaspoon garlic powder, 1/2 teaspoon onion powder, 1/2 teaspoon dried thyme, 1/4 teaspoon black pepper, and salt to taste. The smoked paprika is what gives this dish its subtle smoky warmth—don’t skip it.
- Butter (1 tablespoon / 15g): For sautéing the onion and garlic. Olive oil works too, but butter adds a richness that pairs perfectly with the beef.
- Fresh Parsley (for garnish, optional): A sprinkle of fresh parsley right before serving adds color and a fresh pop that cuts through the richness. Completely optional, but it makes the dish look restaurant-worthy.
Equipment Needed
You don’t need a fancy kitchen to make this Easy Cheesy Ground Beef & Rice Skillet. Here’s what you’ll actually use:
- Large Skillet or Deep Pan (12-inch / 30cm with a lid): This is the star of the show. You need a pan that’s wide enough to spread the rice in an even layer and deep enough to hold everything without spilling. A Dutch oven works too. I use my trusty Lodge cast iron skillet, but any heavy-bottomed pan with a tight-fitting lid will do.
- Wooden Spoon or Silicone Spatula: For breaking up the beef and stirring everything together. Metal utensils can scratch non-stick pans, so stick with wood or silicone.
- Sharp Knife and Cutting Board: For dicing the onion and mincing the garlic. A dull knife makes this step frustrating—trust me, I’ve been there.
- Measuring Cups and Spoons: Accurate measurements matter here, especially for the rice and broth ratio. Eyeballing it can lead to mushy or crunchy rice.
- Box Grater (optional but recommended): If you’re shredding cheese from a block, a box grater is faster than a food processor for small amounts. Plus, it’s easier to clean.
- Lid or Foil: Your pan needs a tight seal while the rice cooks. If your skillet doesn’t have a lid, use a sheet of heavy-duty aluminum foil crimped tightly around the edges.
I’ve made this recipe in a cheap non-stick pan from the grocery store and it worked fine. Don’t overthink the equipment—use what you have.
Preparation Method
Let’s get cooking. This Easy Cheesy Ground Beef & Rice Skillet comes together in one pan with minimal fuss. Follow these steps, and you’ll have dinner ready before you know it.
- Prep Your Ingredients (5 minutes): Dice the onion, mince the garlic, and measure out your rice, broth, and seasonings. Having everything ready before you start cooking makes the process smooth and stress-free. I keep a small bowl with the smoked paprika, garlic powder, onion powder, thyme, and black pepper mixed together so I can add it all at once.
- Brown the Beef (5-7 minutes): Place your large skillet over medium-high heat. Add the ground beef and break it apart with your wooden spoon. Let it cook without moving it too much for the first 2 minutes—this gives you nice brown bits instead of gray, steamed meat. Continue cooking until the beef is fully browned and no pink remains, about 5-7 minutes total. Use a slotted spoon to transfer the beef to a plate, leaving about 1 tablespoon of drippings in the pan. If your beef is very lean, add a splash of olive oil here.
- Sauté the Aromatics (2 minutes): Reduce the heat to medium. Add the butter to the pan with the beef drippings. Once it melts, add the diced onion. Cook for about 2 minutes, stirring occasionally, until the onion softens and becomes translucent. Add the minced garlic and cook for 30 seconds more—just until fragrant. Don’t let the garlic burn, or it’ll turn bitter.
- Add Tomato Paste and Seasonings (1 minute): Stir in the tomato paste and your pre-mixed seasonings. Cook for about 1 minute, stirring constantly. This step blooms the spices and caramelizes the tomato paste slightly, which deepens the overall flavor. You’ll notice the kitchen starting to smell incredible right about now.
- Add Rice and Broth (1 minute): Return the browned beef to the skillet. Add the uncooked rice and stir everything together until the rice is coated in the seasoned mixture. Pour in the beef broth and Worcestershire sauce. Give it a good stir, scraping up any brown bits from the bottom of the pan—that’s flavor you don’t want to leave behind.
- Bring to a Simmer (2 minutes): Increase the heat to high and bring the mixture to a boil. Once it’s bubbling, reduce the heat to low, cover the skillet with a tight-fitting lid, and let it simmer. Set a timer for 15 minutes. Do not lift the lid during this time—the steam is what cooks the rice perfectly.
- Check the Rice (15-minute mark): After 15 minutes, remove the lid carefully (steam is hot!). The rice should be tender and most of the liquid should be absorbed. If the rice still looks a bit firm or there’s too much liquid, cover and cook for 2-3 more minutes. If the rice is done but there’s a little liquid left, just let it sit uncovered for a minute or two—it’ll absorb.
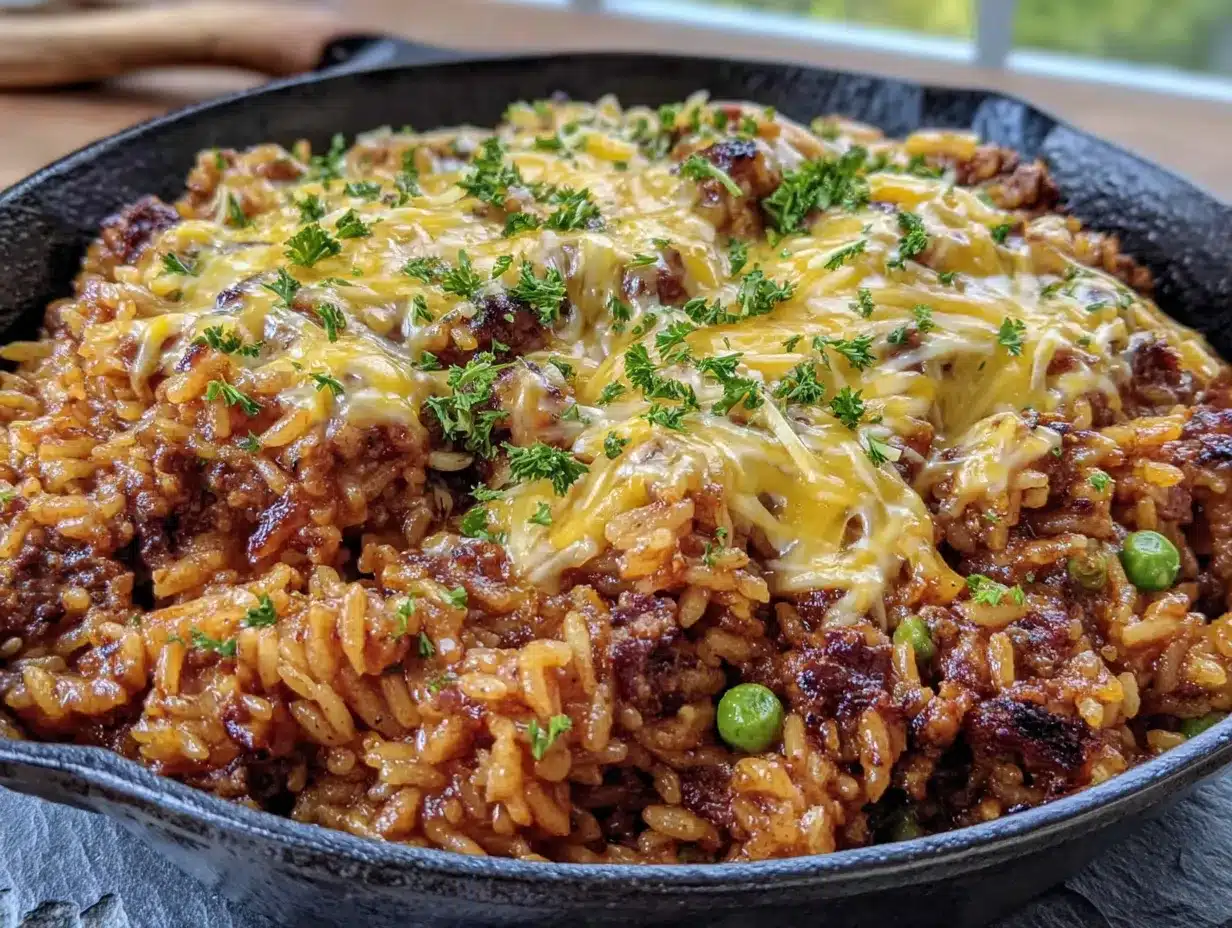
- Add the Cheese (2 minutes): Remove the skillet from the heat. Sprinkle 1 cup of the shredded cheddar over the top of the rice and beef mixture. Gently stir it in until it melts into creamy, cheesy goodness. Then sprinkle the remaining 1/2 cup of cheese on top. Cover the skillet again and let it sit for 2 minutes—the residual heat will melt the top layer into a gorgeous, bubbly finish.
- Rest and Serve (2 minutes): Let the skillet sit uncovered for 2 minutes before serving. This allows the dish to set slightly so it’s easier to scoop. Garnish with fresh parsley if using, and serve straight from the skillet.
Sensory Cues: When the rice is done, you should see small steam holes on the surface. The cheese should be fully melted and stretchy when you lift a spoonful. The aroma will be savory, slightly smoky from the paprika, and deeply comforting.
Cooking Tips & Techniques
After making this Easy Cheesy Ground Beef & Rice Skillet more times than I can count, I’ve picked up a few tricks that make a real difference. Here’s what I wish someone had told me the first time.
Don’t Skip the Browning Step: I know it’s tempting to just cook the beef until it’s done, but taking those extra few minutes to get a good sear adds so much flavor. Those browned bits stuck to the pan (called fond) dissolve into the broth and create a deeper, richer taste. If your pan is overcrowded and the beef is steaming instead of browning, cook it in two batches.
Toast the Rice (Optional but Worth It): Before adding the broth, try stirring the rice in the pan with the aromatics for about a minute. Toasting the grains gives them a nutty flavor and helps them hold their shape better during cooking. It’s a small step that makes a noticeable difference.
The Lid Stays On: I cannot stress this enough—do not lift the lid while the rice is simmering. Every time you lift it, steam escapes, and that steam is what cooks the rice. If you’re worried about it boiling over, use a slightly larger pan or reduce the heat a tiny bit. But keep that lid on.
My Biggest Failure: The first time I made this, I used jasmine rice and didn’t adjust the liquid ratio. The rice came out mushy and the whole thing turned into a porridge-like mess. I learned that different rice varieties absorb different amounts of liquid. Stick with long-grain white rice for this recipe, and if you want to experiment, adjust the broth accordingly.
Cheese Strategy: Adding cheese in two stages is the secret to getting both creamy texture and a beautiful top layer. The first addition incorporates the cheese throughout, creating a cohesive dish. The second addition gives you that Instagram-worthy melted cheese pull. Also, let the cheese come to room temperature before adding it—cold cheese doesn’t melt as smoothly.
Timing is Everything: This entire dish comes together in about 20 minutes of active time. While the rice is simmering, you can prep a simple side salad or set the table. I usually wash the cutting board and knife during that 15-minute simmer so cleanup is minimal.
Variations & Adaptations
One of the best things about this Easy Cheesy Ground Beef & Rice Skillet is how adaptable it is. Here are some variations I’ve tried and loved.
Mexican-Style Version: Swap the smoked paprika for 1 teaspoon of chili powder and 1/2 teaspoon of cumin. Add a drained can of black beans and a small can of diced green chiles along with the broth. Top with pepper jack cheese instead of cheddar, and serve with a dollop of sour cream and fresh cilantro. This version is a crowd-pleaser at our taco nights.
Vegetarian Adaptation: Replace the ground beef with 1.5 cups of cooked lentils or a 15-ounce can of black beans (drained and rinsed). Use vegetable broth instead of beef broth. The lentils provide a similar hearty texture, and they absorb the seasonings beautifully. I’ve made this for my vegetarian sister-in-law, and she asked for the recipe.
Low-Carb / Keto-Friendly: Replace the rice with 2 cups of cauliflower rice (fresh or frozen). Reduce the broth to 1 cup and cook for only 5-7 minutes covered, since cauliflower rice cooks much faster. The cheese helps bind everything together, and honestly, it’s surprisingly satisfying. I add an extra tablespoon of butter for richness.
Spicy Kick: Add 1/2 teaspoon of red pepper flakes along with the seasonings, or stir in a chopped jalapeño with the onion. For extra heat, use pepper jack cheese and a dash of hot sauce at the end. My husband loves this version—I make it when I’m feeling adventurous.
Veggie-Packed Version: Sneak in some extra vegetables by adding 1 cup of frozen peas and carrots along with the broth. You can also stir in a handful of fresh spinach right before adding the cheese—it wilts down into the dish without altering the flavor. This is my go-to when I want to feel virtuous about my dinner choices.
Serving & Storage Suggestions
This Easy Cheesy Ground Beef & Rice Skillet is incredibly versatile when it comes to serving and storing. Here’s how to make the most of it.
Serving Temperature: Serve this dish hot, straight from the skillet. The cheese should be melted and bubbly, and the rice should be tender. I like to let it rest for 2-3 minutes after adding the final layer of cheese so it sets slightly—this makes it easier to scoop without everything sliding apart.
Presentation Ideas: Garnish with fresh parsley or chopped green onions for a pop of color. A sprinkle of black pepper and a pinch of flaky sea salt right before serving adds a nice finishing touch. Serve it in shallow bowls with a side of crusty bread for soaking up any extra cheesy bits, or alongside a simple green salad dressed with lemon vinaigrette to cut through the richness.
Complementary Dishes: This skillet pairs beautifully with roasted vegetables like broccoli or asparagus. A side of steamed green beans or a simple cucumber salad also works well. If you’re feeding a crowd, consider serving it alongside easy chicken burrito bowls for a full meal prep spread, or try it with creamy baked ziti for a double-carb comfort food night.
Storage Instructions: Store leftovers in an airtight container in the refrigerator for up to 4 days. The flavors actually meld together overnight, making the leftovers even better. I’ve been known to make a double batch just for this reason.
Reheating Methods: The best way to reheat this dish is in a skillet over medium-low heat with a splash of water or broth. Cover and cook for 5-7 minutes, stirring occasionally, until heated through. You can also microwave individual portions—just cover the bowl with a damp paper towel to add moisture and heat in 30-second intervals. Add a sprinkle of fresh cheese on top after reheating for that just-made feel.
Freezer Instructions: This dish freezes surprisingly well. Let it cool completely, then transfer to a freezer-safe container. It will keep for up to 3 months. To thaw, place it in the refrigerator overnight, then reheat using the skillet method above. I portion it into individual containers for easy grab-and-heat lunches.
Flavor Development: Here’s a little secret—this dish tastes even better the next day. The rice continues to absorb the flavors, and the cheese sets into a cohesive, creamy texture. I actually prefer the leftovers sometimes. Don’t tell my family.
Nutritional Information & Benefits
While this Easy Cheesy Ground Beef & Rice Skillet is comfort food through and through, it also offers some surprising nutritional benefits. Here’s what you need to know.
Estimated Nutritional Values (per serving, based on 4 servings):
| Nutrient | Amount |
|---|---|
| Calories | 485 |
| Protein | 32g |
| Carbohydrates | 42g |
| Fat | 20g |
| Saturated Fat | 10g |
| Fiber | 2g |
| Sodium | 680mg |
| Calcium | 280mg |
Health Benefits of Key Ingredients:
- Ground Beef: A great source of high-quality protein, iron, and B vitamins. Iron is essential for energy and oxygen transport in the body. Using 80/20 beef provides a good balance of protein and healthy fats.
- Brown Rice (if substituted): While this recipe uses white rice, swapping in brown rice adds fiber, magnesium, and selenium. Brown rice has a chewier texture and takes longer to cook (about 40 minutes), so adjust the liquid and cooking time accordingly.
- Cheddar Cheese: Provides calcium for strong bones and teeth, plus protein and vitamin A. Using sharp cheddar means you can use less for more flavor.
- Garlic and Onion: Both are rich in antioxidants and have anti-inflammatory properties. Garlic is also known for its immune-supporting benefits.
Dietary Considerations: This recipe is naturally gluten-free (check your Worcestershire sauce label, as some brands contain gluten). To make it dairy-free, use a dairy-free cheese alternative and olive oil instead of butter. For a lower-sodium version, use low-sodium broth and reduce the added salt—the natural flavors from the beef and seasonings will still shine through.
Potential Allergens: This dish contains dairy (cheese, butter) and may contain gluten depending on your Worcestershire sauce. Always check labels if cooking for someone with allergies.
Personal Wellness Perspective: I believe in balance. This recipe is hearty and satisfying, and it keeps me full for hours. It’s not a health food, but it’s made with real ingredients and honest cooking. Sometimes that’s exactly what your body needs—a warm, comforting meal that nourishes you without any guilt.
Conclusion
This Easy Cheesy Ground Beef & Rice Skillet has saved my dinner routine more times than I can count. It’s the recipe I turn to when I’m tired, when I’m busy, and when I just need something that works. No complicated techniques, no obscure ingredients, no hours of cooking. Just honest, delicious food that comes together in one pan in twenty minutes.
What I love most about this dish is how it adapts to whatever you have on hand. Swap the cheese, change the seasonings, add some vegetables—it’s forgiving and flexible. It’s the kind of recipe that builds confidence in the kitchen because it’s nearly impossible to mess up. And when you pull that lid off and see all that melted cheese bubbling on top of perfectly cooked rice and savory beef, you’ll feel like a rockstar.
I encourage you to make this your own. Play with the variations, adjust the seasonings to your taste, and don’t be afraid to experiment. Cooking should be fun, not stressful. If you try this recipe, I’d love to hear how it turned out. Drop a comment below and let me know your favorite variation, or tag me in your photos if you share them online. Your feedback helps me create better recipes for this community.
Until next time, happy cooking. You’ve got this.
Frequently Asked Questions
Can I use instant rice in this recipe?
I don’t recommend it. Instant rice is pre-cooked and dehydrated, so it cooks much faster than regular rice. If you use it, reduce the broth to 1.5 cups and cook for only 5-7 minutes. The texture won’t be quite the same, but it’ll work in a pinch.
How do I prevent the rice from becoming mushy?
The key is using the right rice-to-liquid ratio and not lifting the lid while it cooks. Long-grain white rice needs exactly 2 cups of liquid per 1 cup of rice. Also, make sure your heat is low enough that the liquid simmers gently rather than boiling vigorously.
Can I make this recipe in a slow cooker or Instant Pot?
For the Instant Pot, use the sauté function to brown the beef and aromatics, then add the rice and broth. Pressure cook on high for 5 minutes with a natural release. For a slow cooker, brown the beef first, then add all ingredients except the cheese and cook on low for 4-6 hours. Add the cheese at the end.
What can I use instead of cheddar cheese?
Monterey Jack, Colby, mozzarella, or a Mexican blend all work beautifully. For a sharper flavor, try aged gouda or gruyere. If you’re dairy-free, use your favorite shredded dairy-free cheese alternative.
How do I make this recipe spicier?
Add 1/2 teaspoon of cayenne pepper or red pepper flakes along with the seasonings. You can also use pepper jack cheese, add a diced jalapeño with the onion, or drizzle with hot sauce before serving. For extra smoky heat, use chipotle powder instead of smoked paprika.
Pin This Recipe!
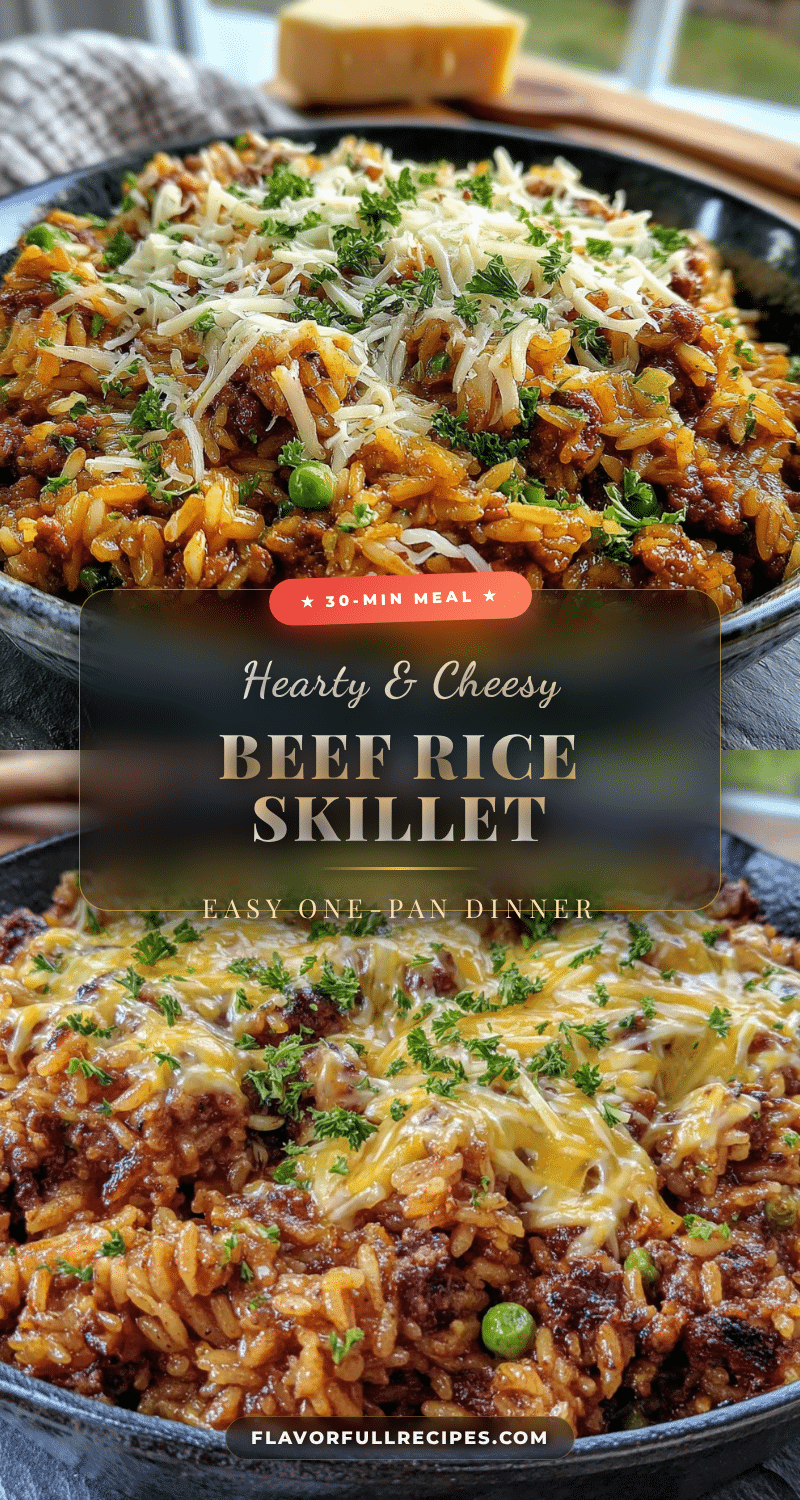

Easy Cheesy Ground Beef & Rice Skillet: Best 20-Minute Dinner
- Total Time: 20 minutes
- Yield: 4 servings 1x
Description
A quick, one-pan weeknight dinner with ground beef, rice, and melted cheddar cheese, ready in 20 minutes. Perfect for busy nights when you need comfort food fast.
Ingredients
- 1 pound (450g) ground beef (80/20 recommended)
- 1 cup (200g) long-grain white rice
- 2 cups (480ml) low-sodium beef broth
- 1.5 cups (170g) shredded sharp cheddar cheese
- 1 medium yellow onion, diced (about 1 cup)
- 3 cloves garlic, minced
- 2 tablespoons (30g) tomato paste
- 1 tablespoon (15ml) Worcestershire sauce
- 1 teaspoon smoked paprika
- 1/2 teaspoon garlic powder
- 1/2 teaspoon onion powder
- 1/2 teaspoon dried thyme
- 1/4 teaspoon black pepper
- Salt to taste
- 1 tablespoon (15g) butter
- Fresh parsley for garnish (optional)
Instructions
- Prep your ingredients: dice the onion, mince the garlic, and measure out the rice, broth, and seasonings. Mix the smoked paprika, garlic powder, onion powder, thyme, and black pepper in a small bowl.
- Place a large skillet (12-inch/30cm with a lid) over medium-high heat. Add the ground beef and break it apart with a wooden spoon. Cook without moving too much for 2 minutes to get brown bits, then continue cooking until fully browned, about 5-7 minutes. Use a slotted spoon to transfer the beef to a plate, leaving about 1 tablespoon of drippings in the pan.
- Reduce heat to medium. Add the butter to the pan with the drippings. Once melted, add the diced onion and cook for about 2 minutes until softened and translucent. Add the minced garlic and cook for 30 seconds until fragrant.
- Stir in the tomato paste and the pre-mixed seasonings. Cook for 1 minute, stirring constantly, until the spices are fragrant and the tomato paste darkens slightly.
- Return the browned beef to the skillet. Add the uncooked rice and stir until the rice is coated. Pour in the beef broth and Worcestershire sauce, scraping up any brown bits from the bottom of the pan.
- Increase heat to high and bring the mixture to a boil. Once boiling, reduce heat to low, cover the skillet with a tight-fitting lid, and let it simmer for 15 minutes. Do not lift the lid during this time.
- After 15 minutes, remove the lid carefully. The rice should be tender and most of the liquid absorbed. If the rice is still firm or there’s too much liquid, cover and cook for 2-3 more minutes. If done but with a little liquid left, let it sit uncovered for a minute.
- Remove the skillet from the heat. Sprinkle 1 cup of the shredded cheddar over the top and gently stir it in until melted. Sprinkle the remaining 1/2 cup of cheese on top. Cover the skillet and let it sit for 2 minutes until the top layer is melted and bubbly.
- Let the skillet sit uncovered for 2 minutes before serving. Garnish with fresh parsley if desired, and serve straight from the skillet.
Notes
For best results, use long-grain white rice (not instant). Do not lift the lid while the rice simmers. Add cheese in two stages for creamy texture and a bubbly top. Leftovers keep in the fridge for up to 4 days and taste even better the next day.
- Prep Time: 5 minutes
- Cook Time: 15 minutes
- Category: Main Course
- Cuisine: American
Nutrition
- Serving Size: 1 serving (about 1.5
- Calories: 485
- Sugar: 3
- Sodium: 680
- Fat: 20
- Saturated Fat: 10
- Carbohydrates: 42
- Fiber: 2
- Protein: 32
Keywords: ground beef, rice, skillet, cheesy, 20-minute dinner, one-pan, weeknight dinner, comfort food