
For a while, I just accepted that banana pudding desserts weren’t going to taste like the ones I remembered from my grandma’s kitchen—creamy, just sweet enough, and with that perfect soft cookie bite. I tried a handful of recipes that promised “easy” or “no-bake,” but somehow, they ended up either too runny or oddly stiff. The kind of banana pudding icebox cake I wanted was elusive: smooth, luscious layers that meld together overnight and a texture that’s more tender than mushy. Honestly, I wasn’t frustrated, just persistent—because I knew something this classic deserved better than compromise.
One evening, while pulling together a simple dessert for a summer potluck, I thought, why not combine what works from different recipes and trust a few instinctive tweaks? The result was quiet but satisfying—no flamboyant tricks, just a creamy banana pudding icebox cake that felt like it had always belonged in my recipe box. It’s that kind of dessert you don’t have to fuss over, yet somehow delivers the comfort and nostalgic sweetness you crave. The way the vanilla wafers soften just right, soaking up that cool pudding cream, and the fresh banana slices that hold their shape without turning brown—it all came together better than expected.
It’s not a showstopper in the dramatic sense, but it’s the kind of dessert you find yourself making again because it just fits—whether for a last-minute get-together or a quiet night in. I like how it sits in the fridge, waiting patiently, and how each forkful tastes like a little moment of calm. This creamy banana pudding icebox cake recipe has quietly become one of those dishes that’s easy to trust. And that’s why it sticks around in my kitchen rotation.
Why You’ll Love This Recipe
After testing countless banana pudding variations, this recipe stood out because it’s straightforward and doesn’t demand hours or fancy ingredients. It’s a no-bake dessert that even the busiest home cooks can pull off without breaking a sweat. Here’s why it’s worth keeping on hand:
- Quick & Easy: Comes together in about 15 minutes of prep and just needs a few hours chilling—perfect for busy weeknights or when you suddenly crave something sweet.
- Simple Ingredients: Most are pantry staples or easy to find—vanilla wafers, ripe bananas, pudding mix, and cream. No hunting for obscure items.
- Perfect for Gatherings: Whether it’s a casual family dinner or a summer potluck, this dessert feels both homey and a little special without stress.
- Crowd-Pleaser: My family’s unanimous favorite, especially the kids who like the soft cookies and creamy layers.
- Unbelievably Delicious: The pudding’s velvety texture combined with the banana’s fresh sweetness makes this more than just a simple icebox cake.
What sets this creamy banana pudding icebox cake apart isn’t just the flavor but how you build it: gently folding the whipped cream into the pudding mix for that light yet rich texture, layering the bananas so they don’t get mushy, and letting it all chill just long enough for the wafers to soften perfectly. It’s the kind of recipe that feels homemade but polished, a reliable comfort food that’s easy to share. Honestly, it’s the dessert I reach for when I want something sweet that doesn’t require turning on the oven—like when I made a batch alongside my ultimate bakery-style blueberry streusel muffins for a brunch, balancing something warm with a cool, creamy finish.
What Ingredients You Will Need
This creamy banana pudding icebox cake recipe uses simple, wholesome ingredients to deliver that classic flavor and smooth texture without any fuss. Most are easy to find and probably already in your kitchen.
- Instant vanilla pudding mix (3.4 oz / 96 g) – This is the foundation for the creamy flavor. I like the classic Jell-O brand for its smoothness.
- Whole milk (2 cups / 480 ml) – Needed to whisk with the pudding mix to create that silky base. You can swap with almond or oat milk for a dairy-free twist.
- Heavy whipping cream (1 ½ cups / 360 ml) – Whipped to soft peaks and folded into the pudding for that airy texture.
- Granulated sugar (2 tbsp) – Just a touch to sweeten the whipped cream slightly.
- Vanilla extract (1 tsp) – Adds depth and warmth to the pudding layers.
- Ripe bananas (3-4 medium) – Sliced fresh. Look for firm bananas to avoid browning and mushiness.
- Vanilla wafers (about 60 wafers) – The cookie layer that softens overnight, creating that signature texture contrast.
- Optional: Sweetened shredded coconut or toasted pecans – For a textural twist on top or between layers if you want a touch of crunch.
You can substitute the vanilla wafers for graham crackers or gluten-free cookies if needed. For a lower-sugar recipe, try using sugar-free pudding mix and reducing the sugar in the whipped cream. When I first made this, I used slightly underripe bananas intentionally to keep them from turning mushy too quickly, which worked well.
Equipment Needed
- Mixing bowls: One medium for pudding, one large for whipping cream.
- Electric mixer or stand mixer: Essential for whipping the cream to soft peaks quickly.
- Rubber spatula: For folding the whipped cream gently into the pudding mix without deflating it.
- 9×13-inch (23×33 cm) baking dish or a similar-sized glass container: For layering the pudding, bananas, and wafers. Glass helps you see the layers, which is kind of satisfying.
- Measuring cups and spoons: For accurate ingredient amounts; this really helps with pudding consistency.
If you don’t have a stand mixer, a handheld electric mixer works just fine. For whipping cream by hand, it’s doable but takes longer and more elbow grease. I’ve used both in my kitchen, and while hand-whipping is a workout, it does give a nice satisfying rhythm to the process. Also, keeping your bowl chilled before whipping cream can make a big difference, so I sometimes pop mine in the fridge for 10 minutes beforehand.
Preparation Method
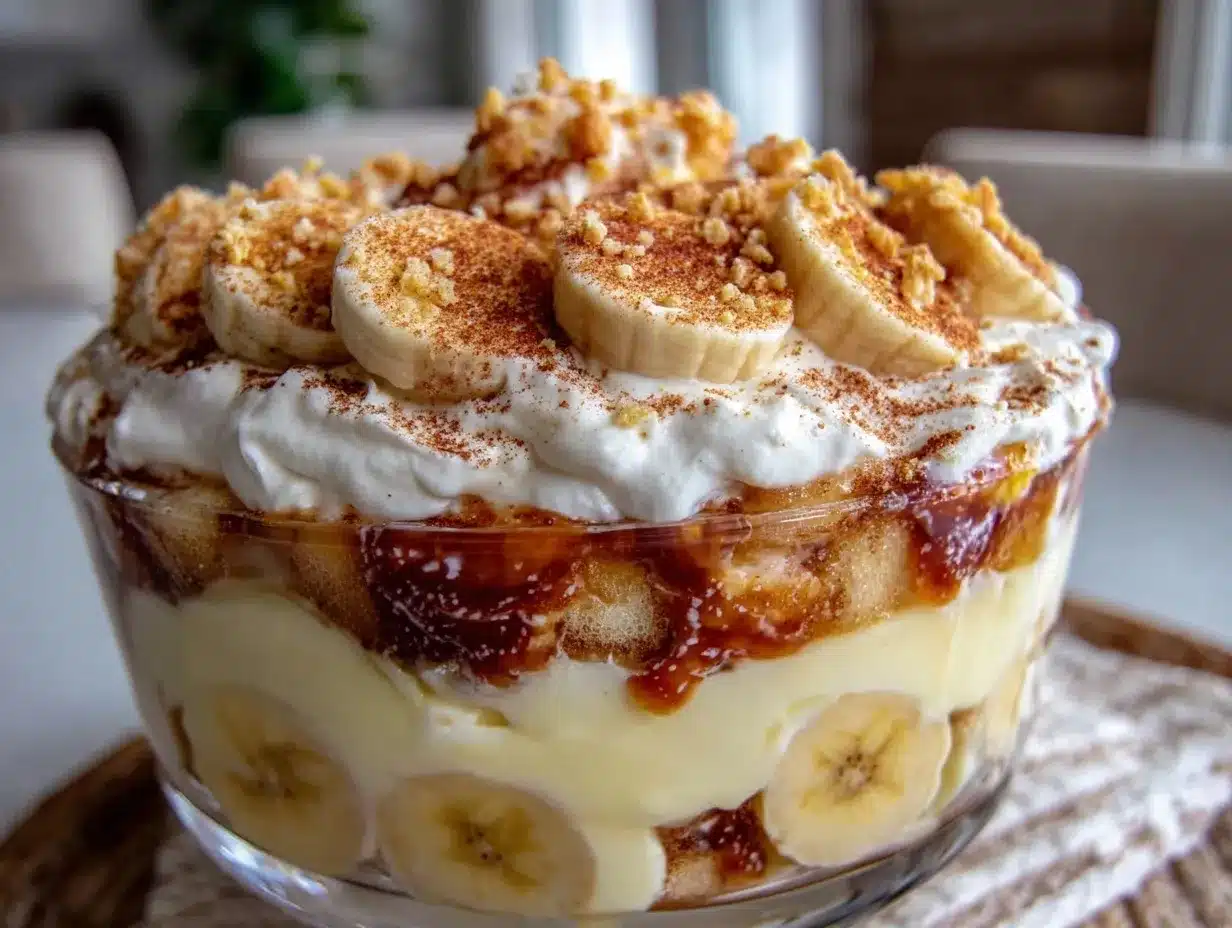
- Make the pudding: In a medium bowl, whisk together the instant vanilla pudding mix and whole milk (2 cups / 480 ml) for about 2 minutes until thickened. The consistency should be smooth and creamy, with no lumps. Set aside for a few minutes while you prepare the whipped cream.
- Whip the cream: In a large chilled bowl, combine heavy whipping cream (1 ½ cups / 360 ml), granulated sugar (2 tbsp), and vanilla extract (1 tsp). Using an electric mixer, beat on medium-high speed until soft peaks form (about 3-4 minutes). Be careful not to over-whip; the cream should hold shape but still be smooth and glossy.
- Fold whipped cream into pudding: Gently fold one-third of the whipped cream into the pudding to lighten it. Then fold in the remaining whipped cream carefully until fully combined. This creates the creamy, airy texture that makes the icebox cake so special.
- Prepare the bananas: Peel and slice 3-4 ripe bananas into thin rounds, roughly ¼ inch thick. Try to slice uniformly for even layering. If you want to keep them from browning, toss slices lightly with a teaspoon of lemon juice, but I usually skip this for that fresh banana flavor.
- Assemble the cake: Spread a thin layer of the pudding mixture in the bottom of your 9×13-inch dish. Add a single layer of vanilla wafers, then a layer of banana slices, followed by more pudding. Repeat layers ending with pudding on top. If you want, sprinkle shredded coconut or toasted pecans on top for texture.
- Chill: Cover the dish with plastic wrap and refrigerate for at least 4 hours, preferably overnight. This allows the wafers to soften into a cake-like texture and the flavors to meld beautifully.
- Serve: Slice into squares and serve chilled. The pudding should be creamy and luscious, and the bananas tender but intact.
If the pudding seems too runny before chilling, don’t worry—it will firm up in the fridge. On the other hand, if it thickens too much, a quick whisk can smooth it out. When I first made this, I accidentally used cold milk straight from the fridge, which slowed the pudding thickening slightly. Lesson learned: room temperature milk helps pudding set faster.
Cooking Tips & Techniques
Getting the perfect creamy banana pudding icebox cake is about a few little details that add up.
- Whip cream carefully: Under-whipping means the pudding will be less airy; over-whipping can turn it grainy. Stop when you see soft peaks that hold but still feel smooth.
- Gentle folding: When mixing whipped cream into pudding, fold gently. Stirring too hard deflates the cream, making the dessert dense.
- Banana freshness: Use bananas that are ripe but firm to avoid mush. If you’re prepping ahead, slice bananas just before layering or treat with lemon juice.
- Layer evenly: Spread layers evenly so each bite has a balance of pudding, bananas, and wafers. Uneven layers can cause soggy spots or dryness.
- Chill time matters: At least 4 hours is needed, but overnight is best. This lets the wafers absorb moisture and the cake firm up just right.
- Watch for sogginess: If you like a bit more crunch, add wafers on top just before serving instead of layering all of them.
I remember once rushing the chilling step and serving the cake after only an hour. It was tasty but lacked that melt-in-your-mouth softness. Patience makes all the difference here. Also, if you’re into layering desserts, you might enjoy the creamy texture contrast in my make-ahead breakfast casserole where layering flavors and textures also matters.
Variations & Adaptations
This recipe is flexible, which is part of why it’s so beloved. Here are a few variations you can try depending on your mood or dietary needs:
- Chocolate Banana Pudding: Swap out half the vanilla pudding mix for chocolate pudding for a rich twist.
- Gluten-free: Use gluten-free vanilla wafers or substitute with gluten-free graham crackers.
- Dairy-free Version: Use coconut milk-based pudding mix, almond or oat milk, and coconut whipped cream.
- Nutty Crunch: Add chopped pecans or walnuts between layers or toasted coconut flakes on top for extra texture.
- Seasonal Fruit Mix: In spring or summer, add sliced strawberries or blueberries for a fresh fruit flair.
Personally, I once layered in fresh sliced peaches when bananas were a bit overripe—and it was a happy accident. The peaches added a juicy brightness that paired well with the creamy pudding. If you like no-bake desserts, you might appreciate how layering works in my no-bake peanut butter granola bites recipe, which also comes together quickly and requires zero oven time.
Serving & Storage Suggestions
This creamy banana pudding icebox cake is best served chilled, straight from the fridge. The cool temperature is part of the charm, keeping the pudding thick and the bananas fresh. For presentation, slice into squares and serve on small plates with a fork or dessert spoon.
Pair it with a cup of strong coffee or a light, fruity tea to complement the sweetness. It also works well as a finish to a casual dinner or a sweet treat during a summer picnic.
Store leftovers covered tightly in the refrigerator for up to 3 days. The flavors mellow and meld even more after a day, though the bananas may soften further. If you want to keep the wafers from becoming too soggy, add a fresh layer of wafers on top when serving again.
To reheat slightly (if you prefer), let the cake sit at room temperature for 15 minutes—don’t microwave as it can ruin the texture. The dessert actually tastes better the next day, when the pudding and wafers have fully set. This slow flavor development reminds me a bit of how my favorite maple brown butter pumpkin bread tastes even better after resting.
Nutritional Information & Benefits
This creamy banana pudding icebox cake offers a comforting treat that’s surprisingly light considering its richness. A typical serving (about 1/12th of the recipe) contains approximately:
| Nutrient | Amount |
|---|---|
| Calories | 220 |
| Fat | 10g (mostly from heavy cream) |
| Carbohydrates | 30g (natural sugars from bananas and added sugars) |
| Protein | 3g |
| Fiber | 1.5g |
The bananas provide potassium and vitamin C, while the vanilla pudding mix adds calcium. Using real dairy cream boosts flavor but also fat content—so it’s a dessert to enjoy in moderation. For those with gluten sensitivities, swapping wafers is an easy fix. Personally, I find the balance of wholesome fruit and creamy indulgence makes this recipe worth keeping in my dessert lineup.
Conclusion
This creamy banana pudding icebox cake recipe is the kind of no-bake dessert that quietly wins you over. It’s straightforward, uses ingredients you likely have on hand, and tastes like a little nostalgic comfort in every bite. I love how it’s forgiving enough for a beginner but refined enough that I happily serve it to guests. It’s a recipe I keep returning to, whether for a casual snack or a summer gathering.
Feel free to customize the layers, experiment with add-ins, or adjust the sweetness to suit your taste. It’s one of those easy recipes that welcomes creativity without demanding perfection. If you try this recipe, I’d love to hear how you make it your own.
And hey, if you enjoy simple, comforting dishes with a homemade feel, you might appreciate my cozy sheet pan tailgate sliders with caramelized onions—another recipe that brings people together without fuss.
FAQs about Creamy Banana Pudding Icebox Cake No-Bake Dessert
Can I make this banana pudding icebox cake ahead of time?
Yes, it’s actually best when made a few hours or overnight ahead. The chilling time allows the wafers to soften and the flavors to meld beautifully.
How long will the banana pudding icebox cake last in the fridge?
Stored in an airtight container, it stays fresh for about 3 days. After that, bananas may start to brown and wafers get very soft.
Can I freeze the banana pudding icebox cake?
Freezing isn’t ideal because the pudding and bananas can become watery and lose texture. It’s better enjoyed fresh after chilling.
What can I substitute for vanilla wafers in this recipe?
Graham crackers, gluten-free cookies, or even thin ladyfingers work well as alternatives.
How do I keep the bananas from browning in the dessert?
Use firm, ripe bananas and slice them just before layering. Tossing slices with a bit of lemon juice can help, but it’s optional.
Pin This Recipe!
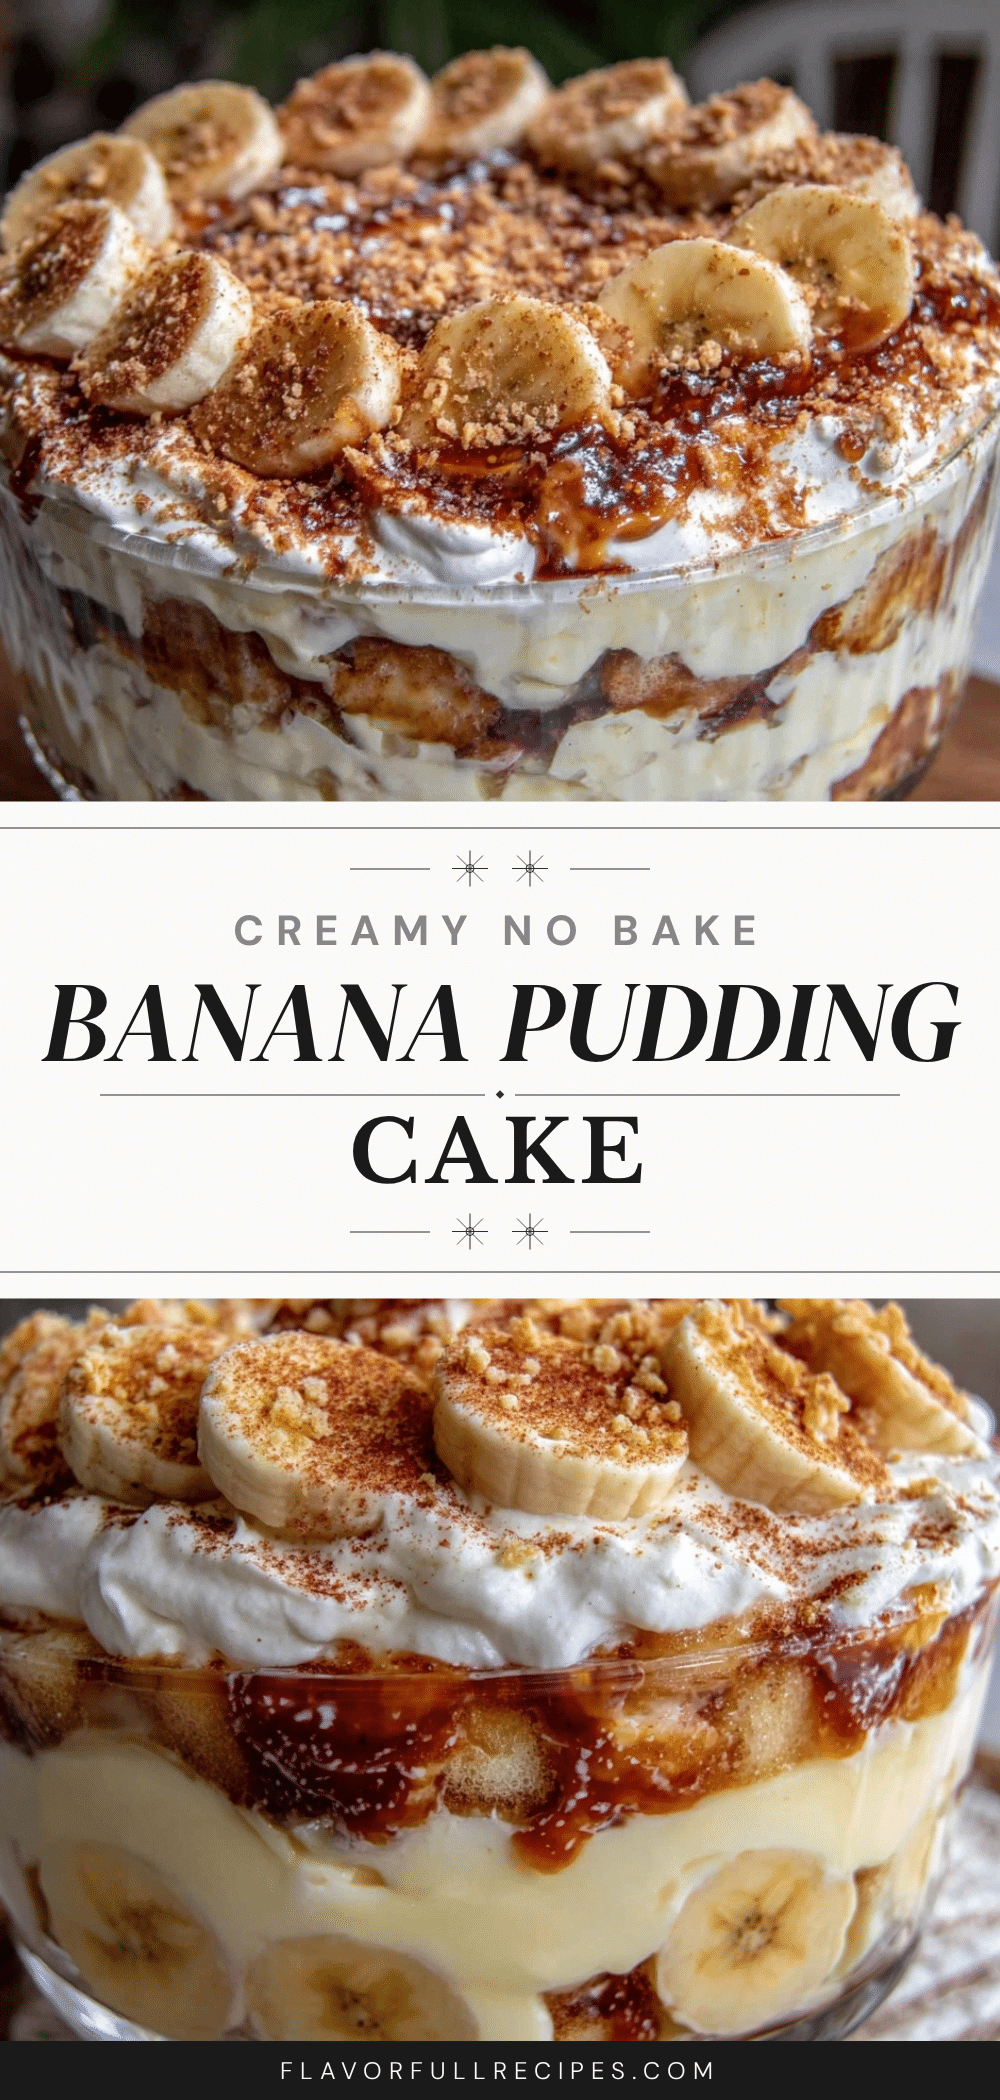
Creamy Banana Pudding Icebox Cake Recipe Easy No-Bake Dessert
- Total Time: 4 hours 15 minutes
- Yield: 12 servings 1x
Description
A no-bake, creamy banana pudding icebox cake with luscious layers of vanilla pudding, whipped cream, ripe bananas, and softened vanilla wafers. Perfect for quick preparation and chilling overnight for a nostalgic, comforting dessert.
Ingredients
- 3.4 oz (96 g) instant vanilla pudding mix
- 2 cups (480 ml) whole milk
- 1 ½ cups (360 ml) heavy whipping cream
- 2 tbsp granulated sugar
- 1 tsp vanilla extract
- 3–4 medium ripe bananas, sliced
- About 60 vanilla wafers
- Optional: sweetened shredded coconut or toasted pecans
Instructions
- In a medium bowl, whisk together the instant vanilla pudding mix and whole milk for about 2 minutes until thickened and smooth. Set aside.
- In a large chilled bowl, combine heavy whipping cream, granulated sugar, and vanilla extract. Beat with an electric mixer on medium-high speed until soft peaks form, about 3-4 minutes.
- Gently fold one-third of the whipped cream into the pudding to lighten it, then fold in the remaining whipped cream until fully combined.
- Peel and slice bananas into thin rounds about ¼ inch thick. Optionally toss with a teaspoon of lemon juice to prevent browning.
- In a 9×13-inch baking dish, spread a thin layer of pudding mixture. Layer vanilla wafers, then banana slices, followed by more pudding. Repeat layers ending with pudding on top. Optionally sprinkle shredded coconut or toasted pecans on top.
- Cover with plastic wrap and refrigerate for at least 4 hours, preferably overnight, to allow wafers to soften and flavors to meld.
- Slice into squares and serve chilled.
Notes
Use ripe but firm bananas to avoid mushiness. For best texture, chill overnight. If pudding is too runny before chilling, it will firm up in the fridge. Whip cream to soft peaks to avoid graininess. Optionally toss banana slices with lemon juice to prevent browning. Substitute vanilla wafers with graham crackers or gluten-free cookies if needed.
- Prep Time: 15 minutes
- Cook Time: 0 minutes
- Category: Dessert
- Cuisine: American
Nutrition
- Serving Size: 1/12th of the recipe
- Calories: 220
- Fat: 10
- Carbohydrates: 30
- Fiber: 1.5
- Protein: 3
Keywords: banana pudding, icebox cake, no-bake dessert, creamy dessert, vanilla wafers, easy dessert, summer dessert


