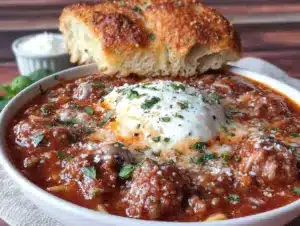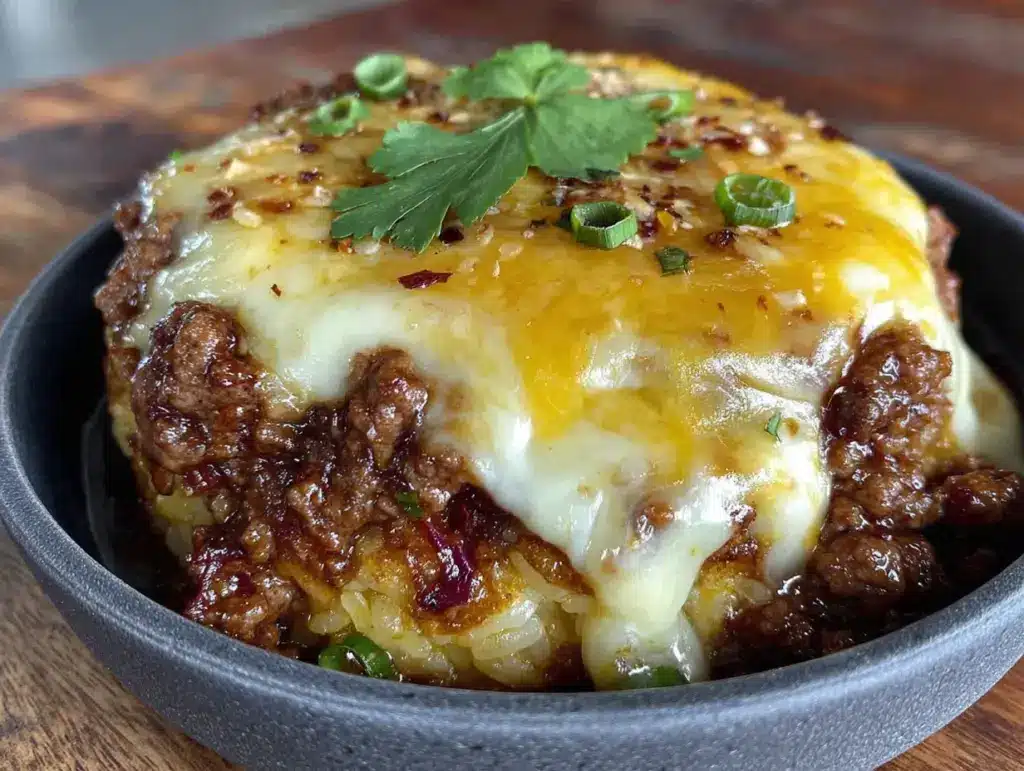
I wasn’t expecting cooking advice from my accountant, but there I was, sorting through a pile of receipts in his cluttered office, listening to him describe exactly how to make what he called “the only dinner that matters on a Tuesday.” His name is Gary, and for three years, all we’d talked about was tax deductions and quarterly estimates. Then, out of nowhere, while he was stamping a form, he started talking about a skillet. A cheesy, beefy, rice-filled skillet that his grandmother made during the Depression and that he still makes when the world feels a little too loud.
Honestly, I almost laughed. Gary is about as unassuming as they come—wire-rimmed glasses, a sweater vest, the kind of guy who alphabetizes his spice rack. But the way he described the smell of that rice toasting in butter? I mean, I had to write it down. I scribbled his recipe on the back of a bank deposit slip, which I still have, stained with olive oil and tomato sauce. That was three winters ago, and this skillet has become my go-to for those nights when you just need something warm, cheesy, and completely unpretentious.
Let me tell you, the first time I made it, I forgot the Worcestershire sauce. The skillet still turned out amazing, but that missing ingredient taught me something—this recipe is forgiving. It’s the kind of meal that doesn’t mind if you’re a little distracted. Maybe you’ve been there, staring into the fridge at 6 PM, wondering how to turn a pound of ground beef and a cup of rice into something that feels like a hug. This is that recipe. It’s the reason I keep coming back to my stove, even on the days I’d rather order pizza.
Why You’ll Love This Recipe
This isn’t just another ground beef and rice dish. This is the skillet that makes you close your eyes after the first bite. I’ve tested this recipe at least a dozen times, tweaking the cheese blend and the rice-to-liquid ratio until it hit that perfect, creamy-yet-hearty texture. It’s comfort food reimagined—faster, cheesier, and with the same soul-soothing satisfaction you’d get from a casserole that bakes for an hour.
- Quick & Easy: Comes together in under 35 minutes, from stove to table. Perfect for those weeknights when you’re short on time but craving something substantial.
- Simple Ingredients: No fancy grocery trips needed. You likely already have ground beef, rice, cheese, and a few pantry staples in your kitchen right now.
- Perfect for Busy Weeknights: Great for Tuesday dinners, meal prep Sundays, or even a lazy Saturday lunch when you want something cozy without the fuss.
- Crowd-Pleaser: Every single time I’ve served this, from my picky nephew to my in-laws, the skillet comes back empty. Kids and adults alike go for seconds.
- Unbelievably Delicious: The texture is next-level comfort food. The rice stays fluffy, the beef is perfectly seasoned, and the cheese melts into every single bite.
What makes this recipe different from the rest? It’s the technique. Instead of just simmering everything together, I toast the rice in butter first. That tiny step adds a nutty depth that you just don’t get from dumping uncooked rice into broth. Plus, the blend of sharp cheddar and Monterey Jack creates a creamy, pull-apart cheese layer that makes every spoonful feel special. This isn’t just another version—it’s my best version.
What Ingredients You Will Need
This recipe uses simple, wholesome ingredients to deliver bold flavor and satisfying texture without the fuss. Most of these are pantry staples, so you can whip this up without a special trip to the store. Here’s what you’ll need and why each one matters.
- Ground Beef (1 lb / 450g): I recommend 80/20 ground beef for the best flavor. The fat adds richness and keeps the meat juicy. If you use leaner beef, like 93/7, add a tablespoon of olive oil to prevent dryness.
- Long-Grain White Rice (1 cup / 200g): This is my go-to for this skillet. Basmati or jasmine work beautifully, too. Avoid instant rice—it turns mushy. The long grains stay separate and fluffy, which is exactly what you want.
- Yellow Onion (1 medium, diced): Adds a sweet, savory base. I like to dice it small so it almost melts into the beef.
- Garlic (3 cloves, minced): Fresh garlic is non-negotiable here. The jarred stuff just doesn’t have the same punch. If you’re in a pinch, use 1 teaspoon of garlic powder.
- Beef Broth (2 cups / 480ml): Use low-sodium broth so you can control the salt. I prefer Swanson or Kitchen Basics for a clean, rich flavor.
- Canned Diced Tomatoes (14.5 oz / 410g), undrained: These add acidity and moisture. Fire-roasted tomatoes are even better—they add a subtle smokiness.
- Worcestershire Sauce (2 tablespoons): This is the secret weapon. It adds umami and depth. Don’t skip it—trust me, Gary was right about this one.
- Sharp Cheddar Cheese (1 cup / 120g, shredded): Sharp cheddar gives you that bold, tangy flavor. Shred it yourself from a block—pre-shredded cheese has anti-caking agents that prevent smooth melting.
- Monterey Jack Cheese (1 cup / 120g, shredded): This adds creaminess and a mild, buttery flavor. The combination of cheddar and Jack is pure magic.
- Butter (2 tablespoons): Unsalted butter is best. You’ll use it to toast the rice, which is the step that makes this skillet special.
- Paprika (1 teaspoon): Smoked paprika adds a warm, earthy note. Regular paprika works, too, but smoked is worth seeking out.
- Dried Oregano (1/2 teaspoon): A little goes a long way. It adds a subtle herbiness that pairs perfectly with the tomatoes.
- Salt and Black Pepper (to taste): Season as you go. I usually add about 1 teaspoon of salt and 1/2 teaspoon of pepper.
- Fresh Parsley (for garnish, optional): A sprinkle of green at the end makes it look as good as it tastes. It’s not essential, but it’s pretty.
Substitution Guidance: Use ground turkey or chicken instead of beef. Swap the rice for cauliflower rice for a low-carb option (reduce broth to 1 cup and cook for 10 minutes). For a dairy-free version, use vegan cheddar and omit the Monterey Jack. If you’re gluten-free, double-check your Worcestershire sauce—some brands contain gluten.
Equipment Needed
You don’t need a fancy kitchen to make this skillet. Here’s what you’ll need, along with a few tips from my own experience.
- Large Skillet or Dutch Oven (12-inch / 30cm with a lid): This is non-negotiable. You need a wide, deep pan with a tight-fitting lid to cook the rice evenly. I use my trusty Lodge cast iron skillet, but a stainless steel or non-stick pan works, too. If you don’t have a lid, use a sheet of aluminum foil tightly crimped around the edges.
- Wooden Spoon or Silicone Spatula: For breaking up the beef and stirring the rice. A wooden spoon won’t scratch your pan, and it feels nice in your hand.
- Cheese Grater: Please, for the love of all things cheesy, grate your own cheese. A box grater or microplane works perfectly. It takes two minutes and makes a world of difference in texture.
- Cutting Board and Chef’s Knife: For dicing the onion and mincing the garlic. A sharp knife makes prep faster and safer.
- Measuring Cups and Spoons: Accuracy matters, especially with the rice and broth. I use a liquid measuring cup for the broth and dry measuring cups for the rice.
- Can Opener: For the diced tomatoes. A basic one does the job, but a good-quality can opener saves you from jagged edges.
Budget-Friendly Options: If you don’t have a Dutch oven, use a deep, heavy-bottomed pot. No cheese grater? You can buy pre-shredded cheese in a pinch, just know the melt won’t be as smooth. I’ve made this with a flimsy non-stick pan before, and it worked—just watch the heat so the rice doesn’t stick.
Preparation Method
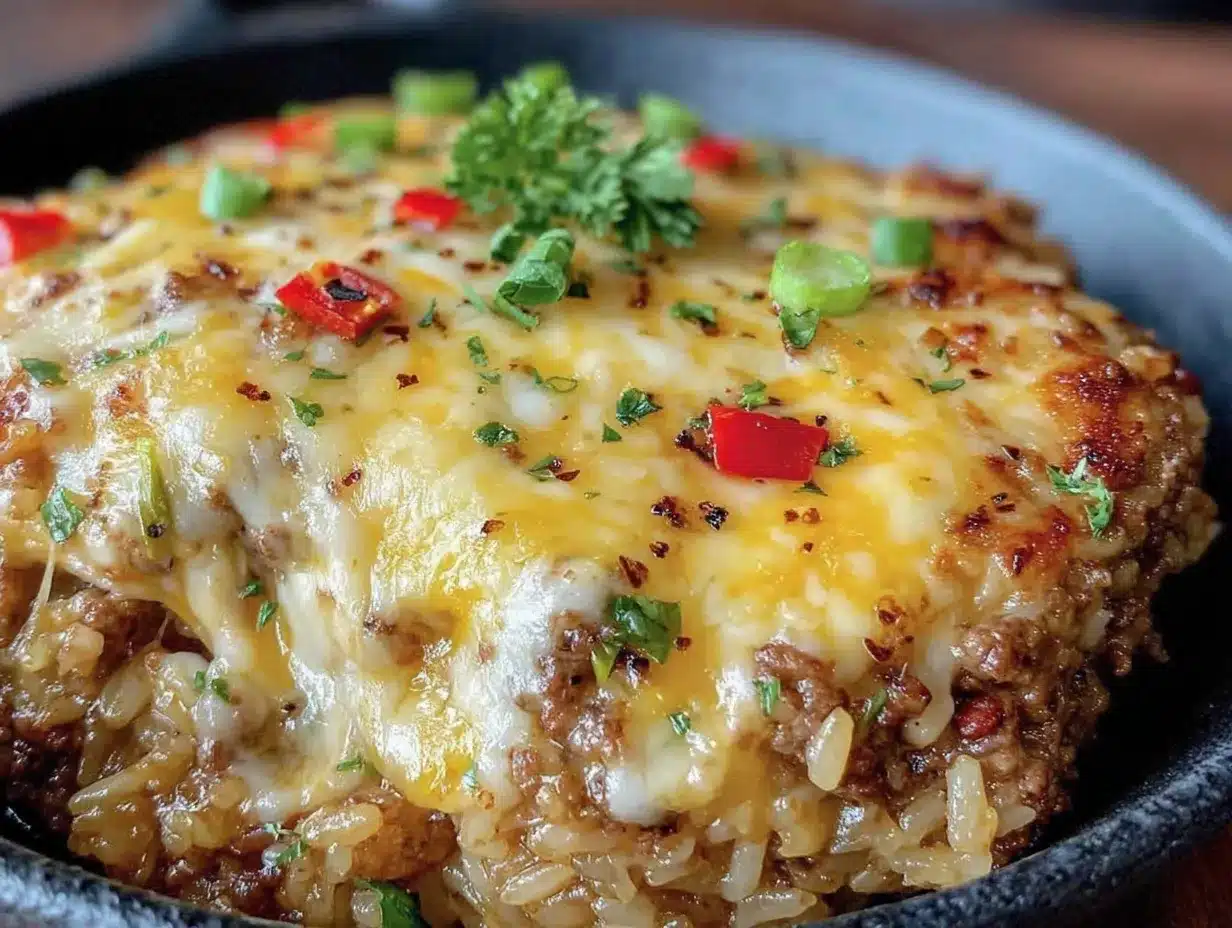
Let’s get cooking. This skillet comes together in one pan, which means less cleanup and more time to relax. Follow these steps carefully, and you’ll have a dinner that feels like a warm blanket on a cold night.
- Toast the Rice (5 minutes): Melt 2 tablespoons of butter in your large skillet over medium heat. Add 1 cup of long-grain white rice. Stir constantly for 3-4 minutes, until the rice turns golden and smells nutty. Tip: Don’t walk away—rice burns fast. You’re looking for a light tan color, not brown. Once toasted, transfer the rice to a bowl and set aside.
- Cook the Beef (6-8 minutes): In the same skillet, add 1 lb of ground beef. Break it up with your wooden spoon. Cook over medium-high heat until browned, about 5-6 minutes. Sensory cue: You’ll hear a satisfying sizzle, and the kitchen will smell like a diner. If there’s excess fat (more than 2 tablespoons), spoon it out, leaving a thin layer for flavor.
- Sauté the Aromatics (3 minutes): Add 1 diced yellow onion to the beef. Cook for 2 minutes, until softened. Stir in 3 minced garlic cloves and cook for 30 seconds more, until fragrant. Warning: Garlic burns quickly, so keep stirring. If you smell toast, you’ve gone too far.
- Add the Liquids and Seasonings (2 minutes): Pour in 2 cups of beef broth, 1 can of undrained diced tomatoes, and 2 tablespoons of Worcestershire sauce. Stir in 1 teaspoon of paprika, 1/2 teaspoon of dried oregano, 1 teaspoon of salt, and 1/2 teaspoon of black pepper. Scrape the bottom of the pan to release any browned bits—that’s flavor gold.
- Simmer the Rice (18-20 minutes): Return the toasted rice to the skillet. Stir everything together. Bring the mixture to a boil, then reduce the heat to low. Cover with a tight-fitting lid and let it simmer for 18-20 minutes. Sensory cue: You’ll hear a gentle bubbling sound. The liquid should be mostly absorbed when it’s done. Troubleshooting: If the rice is still crunchy after 20 minutes, add 1/4 cup of broth and cook for 5 more minutes.
- Add the Cheese (2 minutes): Turn off the heat. Sprinkle 1 cup of shredded sharp cheddar and 1 cup of shredded Monterey Jack evenly over the top. Cover the skillet again and let it sit for 2 minutes. Personal tip: Don’t stir the cheese in! Let it melt on top for that beautiful, gooey layer. If you stir, it becomes a cheesy mess—still delicious, but less photogenic.
- Garnish and Serve (1 minute): Uncover the skillet. The cheese should be melted and bubbly. Sprinkle with fresh parsley if you’re feeling fancy. Serve straight from the skillet—it keeps everything warm and cozy.
Prep Note: Dice the onion and mince the garlic before you start cooking. Once that rice hits the butter, you won’t have time to chop. I learned this the hard way when my onions were still half-diced and the garlic was burning. Trust me, mise en place saves the day.
Cooking Tips & Techniques
I’ve made this skillet more times than I can count, and I’ve learned a few things the hard way. Here are my best tips to make sure yours turns out perfect every time.
- Toast the Rice in Butter: This is the step that separates a good skillet from a great one. The butter adds richness, and the toasting process changes the rice’s starch structure, so it stays fluffy instead of turning into mush. I once skipped this step when I was in a hurry, and the rice was gluey. Never again.
- Don’t Over-Stir the Rice: Once you add the rice and broth, resist the urge to stir. Stirring releases excess starch, which can make the dish gummy. Just give it one good stir at the beginning, then let it do its thing under the lid.
- Use Low Heat for Simmering: A gentle simmer is key. If the heat is too high, the liquid evaporates before the rice cooks through. You want tiny bubbles, not a rolling boil. If you see steam escaping aggressively, turn the heat down.
- Let the Cheese Rest: That 2-minute rest after adding the cheese isn’t just for show. It allows the cheese to melt slowly and evenly, creating a creamy blanket. If you serve it immediately, the cheese might be clumpy.
- Season in Layers: I season the beef first, then add more salt and pepper with the broth. Layering the seasoning builds depth. One time, I forgot to season the beef, and the final dish tasted flat. Don’t make my mistake.
- Multitasking Strategy: While the rice simmers, use that time to wash the cutting board and knife, or set the table. The rice needs 20 minutes of undisturbed cooking, so it’s the perfect window to tidy up.
Variations & Adaptations
This skillet is a blank canvas. I’ve tried several variations over the years, and each one brings something new to the table. Here are a few of my favorites.
- Spicy Southwest Version: Add 1 diced jalapeño with the onion, and swap the paprika for 1 teaspoon of chili powder and 1/2 teaspoon of cumin. Use pepper jack cheese instead of Monterey Jack. Top with fresh cilantro and a squeeze of lime. This version is perfect for when you want a little heat.
- Vegetarian Adaptation: Omit the beef and use 1 can of black beans (drained and rinsed) and 1 cup of corn kernels. Use vegetable broth instead of beef broth. The beans add protein and fiber, and the corn adds a pop of sweetness. I’ve made this for my vegetarian sister, and she asked for the recipe.
- Low-Carb / Keto Option: Replace the white rice with 2 cups of cauliflower rice. Reduce the broth to 1 cup and cook for 10-12 minutes, until the cauliflower is tender. The cheese helps bind everything together. This version is surprisingly satisfying.
- Cheesy Bacon Twist: Cook 4 slices of bacon in the skillet before the beef. Remove the bacon, crumble it, and set aside. Cook the beef in the rendered bacon fat. Sprinkle the crumbled bacon over the cheese before serving. Honestly, bacon makes everything better.
- Italian-Inspired Version: Swap the paprika and oregano for 1 teaspoon of Italian seasoning and 1/2 teaspoon of red pepper flakes. Use mozzarella instead of Monterey Jack. Serve with a sprinkle of Parmesan and fresh basil. It tastes like a deconstructed lasagna.
Allergen Substitutions: For a dairy-free version, use vegan cheddar and omit the butter (use olive oil to toast the rice). For a gluten-free version, ensure your Worcestershire sauce is gluten-free—Lea & Perrins is a safe bet. For a nut-free version, this recipe is naturally nut-free, but always check your broth and cheese labels.
Serving & Storage Suggestions
This skillet is best served hot, straight from the pan. The cheese should be gooey and the rice fluffy. Here’s how to make the most of it.
- Serving Temperature: Serve immediately while the cheese is melted. If it sits too long, the cheese firms up. I like to set the skillet on a trivet in the middle of the table and let everyone dig in family-style.
- Presentation: Garnish with a sprinkle of fresh parsley or chives for a pop of color. A dollop of sour cream or a drizzle of hot sauce on top adds a nice finishing touch. For a prettier look, serve it in individual bowls with a wedge of lime.
- Complementary Dishes: This skillet is a meal in itself, but it pairs beautifully with a simple green salad dressed with lemon vinaigrette. The acidity cuts through the richness. Steamed broccoli or roasted green beans also work well. For a heartier meal, serve with warm tortillas or crusty bread to soak up the cheesy bits.
- Storage Instructions: Let the skillet cool completely, then transfer leftovers to an airtight container. It will keep in the refrigerator for up to 4 days. The rice absorbs liquid over time, so the texture will be a bit softer on day two—still delicious, just different.
- Freezer Instructions: This skillet freezes well. Portion it into freezer-safe containers and freeze for up to 3 months. Thaw overnight in the refrigerator before reheating.
- Reheating Methods: The best way to reheat is in a skillet over medium-low heat with a splash of broth or water. Stir occasionally until warmed through, about 5-7 minutes. You can also microwave individual portions for 2-3 minutes, stirring halfway. The cheese might not be as gooey, but it’ll still taste great.
- Flavor Development: Honestly, this dish tastes even better the next day. The flavors meld together overnight, and the rice absorbs all the savory goodness. I often make a double batch just for leftovers.
Nutritional Information & Benefits
This skillet is comfort food, but it also packs some surprising nutritional benefits. Here’s a rough estimate per serving (based on 6 servings).
| Nutrient | Amount Per Serving |
|---|---|
| Calories | 485 |
| Protein | 28g |
| Carbohydrates | 38g |
| Fat | 24g |
| Saturated Fat | 12g |
| Fiber | 2g |
| Sodium | 780mg |
Health Benefits: The ground beef provides high-quality protein and iron, which supports energy levels and healthy blood. The rice offers carbohydrates for sustained energy. The tomatoes are rich in lycopene, an antioxidant linked to heart health. The cheese adds calcium for strong bones. This isn’t a health food, but it’s a balanced meal that keeps you full and satisfied.
Dietary Considerations: This recipe is not gluten-free (check Worcestershire sauce) or dairy-free. For lower sodium, use low-sodium broth and reduce added salt. For a lighter version, use lean ground beef and reduce the cheese by half. As always, consult with a healthcare provider for specific dietary needs.
Conclusion
This cozy cheesy ground beef and rice skillet is the kind of recipe that earns a permanent spot in your dinner rotation. It’s simple enough for a Tuesday, but special enough that you’ll want to share it with friends. The toasted rice, the seasoned beef, the blanket of melted cheese—every bite is a reminder that comfort food doesn’t have to be complicated.
I hope you give this skillet a try. Make it your own—add extra veggies, swap the cheese, turn up the spice. That’s the beauty of a one-pan meal. It’s forgiving, it’s flexible, and it always delivers. When you make it, I’d love to hear how it turns out. Drop a comment below and tell me about your version. Did you add bacon? Use turkey instead of beef? Whatever you do, just promise me you’ll toast the rice in butter. Gary would want it that way.
Happy cooking, friends. Here’s to warm skillets and even warmer evenings.
Frequently Asked Questions
Can I use brown rice instead of white rice?
Yes, but the cooking time will change. Brown rice takes about 40-45 minutes to cook, so you’ll need to add more broth (about 2 1/2 cups total) and simmer longer. Keep the lid on and check for doneness at the 40-minute mark.
Why is my rice still crunchy after 20 minutes?
This usually happens if the heat was too low or the lid didn’t seal properly. Add 1/4 cup of broth, cover tightly, and cook for another 5-7 minutes. If the liquid is gone but the rice is still hard, add a splash of water and keep cooking.
Can I make this in a slow cooker?
You can, but the texture will be different. Brown the beef and sauté the onion first, then transfer everything except the cheese to a slow cooker. Cook on low for 2-3 hours, until the rice is tender. Add the cheese in the last 10 minutes. The rice won’t be as fluffy, but it’s still tasty.
How do I prevent the cheese from turning greasy?
Use block cheese and shred it yourself. Pre-shredded cheese is coated with cellulose and starch, which can make it greasy when melted. Also, let the cheese melt off the heat—high heat can cause the fats to separate.
Can I add vegetables to this skillet?
Absolutely. Add 1 cup of frozen peas and carrots with the broth, or stir in a handful of spinach after the rice is cooked. Diced bell peppers or zucchini work well, too. Just sauté them with the onion to soften them first.
Pin This Recipe!


Cozy Cheesy Ground Beef and Rice Skillet: Easy One-Pan Dinner
- Total Time: 35 minutes
- Yield: 6 servings 1x
Description
A comforting one-pan dinner featuring seasoned ground beef, fluffy rice, and a blend of melted cheeses. Perfect for busy weeknights, this easy recipe comes together in under 35 minutes with simple pantry ingredients.
Ingredients
- 1 lb (450g) ground beef (80/20 recommended)
- 1 cup (200g) long-grain white rice
- 1 medium yellow onion, diced
- 3 cloves garlic, minced
- 2 cups (480ml) low-sodium beef broth
- 1 can (14.5 oz / 410g) diced tomatoes, undrained
- 2 tablespoons Worcestershire sauce
- 1 cup (120g) sharp cheddar cheese, shredded
- 1 cup (120g) Monterey Jack cheese, shredded
- 2 tablespoons unsalted butter
- 1 teaspoon smoked paprika
- 1/2 teaspoon dried oregano
- 1 teaspoon salt
- 1/2 teaspoon black pepper
- Fresh parsley for garnish (optional)
Instructions
- Melt 2 tablespoons of butter in a large skillet over medium heat. Add 1 cup of rice and stir constantly for 3-4 minutes until golden and nutty. Transfer to a bowl and set aside.
- In the same skillet, add 1 lb of ground beef. Cook over medium-high heat, breaking it up, until browned (5-6 minutes). Drain excess fat if needed.
- Add 1 diced onion to the beef and cook for 2 minutes until softened. Stir in 3 minced garlic cloves and cook for 30 seconds until fragrant.
- Pour in 2 cups of beef broth, 1 can of undrained diced tomatoes, and 2 tablespoons of Worcestershire sauce. Stir in 1 teaspoon paprika, 1/2 teaspoon oregano, 1 teaspoon salt, and 1/2 teaspoon pepper. Scrape the bottom of the pan.
- Return the toasted rice to the skillet and stir. Bring to a boil, then reduce heat to low. Cover and simmer for 18-20 minutes until rice is tender and liquid is absorbed.
- Turn off the heat. Sprinkle 1 cup of shredded cheddar and 1 cup of shredded Monterey Jack evenly over the top. Cover and let sit for 2 minutes until cheese is melted.
- Garnish with fresh parsley if desired. Serve straight from the skillet.
Notes
Toast the rice in butter for nutty flavor. Don’t over-stir the rice once added. Let the cheese melt off the heat for a gooey layer. Season in layers for best flavor. For a vegetarian version, omit beef and use black beans and corn with vegetable broth.
- Prep Time: 10 minutes
- Cook Time: 25 minutes
- Category: Main Course
- Cuisine: American
Nutrition
- Serving Size: 1 serving (about 1.5
- Calories: 485
- Sugar: 4
- Sodium: 780
- Fat: 24
- Saturated Fat: 12
- Carbohydrates: 38
- Fiber: 2
- Protein: 28
Keywords: ground beef, rice, cheese, one-pan, skillet, easy dinner, weeknight meal, comfort food