I was elbow-deep in flour, butter, and a half-written grocery list when I heard it—that tiny, telltale sigh from the kitchen doorway. My youngest was standing there, eyes pleading, asking for a snack. Not just any snack, but something sweet, something chewy, something they could grab on the way out the door to soccer practice. I looked at the clock. We had twenty minutes. The pantry was a wasteland of half-empty bags and forgotten boxes. But then I spotted it: a jar of peanut butter, a drizzle of honey, and a box of oats. That was the moment those quick no-bake peanut butter granola bars were born. Honestly, it felt less like a recipe and more like a rescue mission.
There’s something about that moment—the one where you realize you don’t have to turn on the oven to make something good. The sticky, sweet smell of honey mixing with salty peanut butter filled the kitchen in under five minutes. I pressed the mixture into a pan, my fingers doing the work my brain was too tired to direct. It wasn’t fancy. It wasn’t planned. But as I cut those first imperfect squares, I knew I had stumbled onto something worth keeping. These bars have become my go-to for that exact reason: they save the day without any fuss.
These best easy no-bake peanut butter granola bars are the kind of recipe you don’t overthink. They’re forgiving, adaptable, and they taste like a treat you actually earned. No oven required. No complicated steps. Just a bowl, a spoon, and a little bit of patience while they set. I’ve made them so many times since that first frantic afternoon, and they never get old. They’re the snack that keeps on giving—and they just might save your afternoon too.
Why You’ll Love This Recipe
Let me tell you why these bars have earned a permanent spot in my kitchen. I’ve tested this recipe more times than I can count, tweaking the ratio of oats to peanut butter until it was just right. They’re not too crumbly, not too sticky—just the perfect chewy bite every single time.
- No Oven Required: It’s a no-bake recipe, which means you won’t heat up your kitchen or wait for preheating. Perfect for those hot afternoons when turning on the oven feels like a crime.
- Simple Ingredients: You probably have everything in your pantry right now. Oats, peanut butter, honey, and a few mix-ins. No trips to the store for obscure ingredients.
- Quick & Easy: From start to finish, you’re looking at about 10 minutes of active work. The hardest part is waiting for them to chill in the fridge.
- Perfect for Busy Days: These bars are a lifesaver for school lunches, post-workout snacks, or a quick breakfast when you’re running late. They pack well and stay fresh for days.
- Crowd-Pleaser: Kids love them, adults love them, and they disappear fast at potlucks or game days. I’ve even brought them to a fall tailgate alongside some easy sheet pan nacho board with cowboy caviar for a sweet-savory combo.
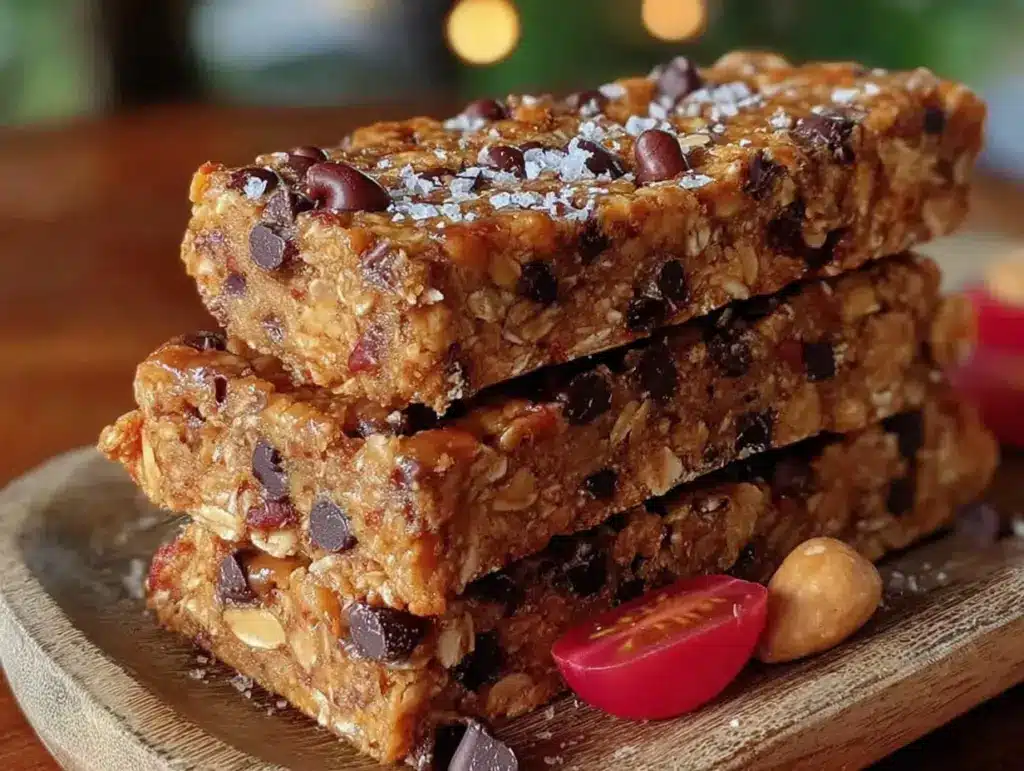
- Customizable: You can swap in different nut butters, add chocolate chips, or toss in dried fruit. They’re a blank canvas for your cravings.
What makes these bars different from every other recipe out there? It’s the texture. I’ve cracked the code on keeping them chewy without being dry, and sturdy without being hard. They hold together beautifully, even after a day in a lunchbox. And that first bite—the way the honey and peanut butter melt together with a little crunch from the oats—it’s pure comfort. I’ve made these for my family, for friends, and even for a quick snack before making a batch of easy homemade iced pumpkin chai latte on a crisp autumn morning. They just work.
What Ingredients You Will Need
This recipe uses simple, wholesome ingredients that come together to create a bar that’s both satisfying and delicious. You don’t need anything fancy—just a few pantry staples that you probably already have on hand.
- Rolled Oats (2 cups / 180g): These are the backbone of the bars. I recommend old-fashioned rolled oats for the best texture. Quick oats will work in a pinch, but they’ll make the bars softer and less chewy. I’ve found that rolled oats from brands like Bob’s Red Mill or Quaker give consistent results.
- Creamy Peanut Butter (1 cup / 240g): Use a natural, no-stir peanut butter for the best flavor and texture. Avoid the kind with added sugar or oil—it can make the bars greasy. I prefer Jif or Skippy for a classic taste, but any creamy peanut butter works. If you’re using a natural peanut butter that separates, stir it well before measuring.
- Honey (1/2 cup / 170g): This adds sweetness and helps bind everything together. You can use maple syrup or agave nectar as a substitute, but honey gives the bars a distinct floral note that I love. Local honey is always a bonus if you can find it.
- Dark Chocolate Chips (1/2 cup / 90g): Optional, but highly recommended. The little pockets of melted chocolate take these bars to another level. I like using semi-sweet or dark chocolate chips for a richer flavor. You can also use milk chocolate if you prefer a sweeter bar.
- Chopped Nuts (1/2 cup / 60g): Almonds, walnuts, or pecans add a lovely crunch. Toast them lightly in a dry pan for extra flavor. I usually go with roasted, unsalted almonds because they don’t overpower the peanut butter.
- Dried Fruit (1/2 cup / 80g): Raisins, dried cranberries, or chopped dried apricots are all great options. They add a chewy texture and natural sweetness. I love using dried cherries or chopped dates when I want something a little different.
- Salt (1/4 teaspoon): A pinch of salt balances the sweetness and enhances the peanut butter flavor. If your peanut butter is already salted, you can skip this or reduce it to a tiny pinch.
- Vanilla Extract (1 teaspoon): This adds warmth and depth to the bars. It’s a small addition that makes a big difference in the overall flavor profile.
When it comes to substitutions, this recipe is incredibly forgiving. For a nut-free version, you can use sunflower seed butter or tahini instead of peanut butter. Just note that the flavor will change slightly. For a gluten-free option, make sure your oats are certified gluten-free—cross-contamination can be an issue with some brands. I’ve also made these with coconut oil instead of honey for a vegan version, but the texture is a bit more crumbly. Play around and find what works for you.
Equipment Needed
You don’t need a lot of fancy tools for this recipe, which is part of its charm. Here’s what you’ll need:
- Mixing Bowl: A large bowl is essential for combining all the ingredients. I use a sturdy ceramic bowl that doesn’t slide around on the counter.
- Spatula or Wooden Spoon: For mixing the sticky peanut butter and honey mixture into the oats. A silicone spatula works best because it scrapes the sides clean.
- 8×8 Inch Baking Pan: This is the perfect size for these bars. Line it with parchment paper for easy removal. If you don’t have an 8×8 pan, a 9×9 will work—your bars will just be slightly thinner.
- Parchment Paper: This is non-negotiable. It makes lifting the bars out of the pan a breeze. Leave some overhang on two sides to create handles.
- Measuring Cups and Spoons: Accurate measurements are key for the right texture. I use dry measuring cups for the oats and nuts, and liquid measuring cups for the honey and peanut butter.
- Sharp Knife: For cutting clean bars. A chef’s knife or a large serrated knife works well. Run it under hot water before each cut for the neatest edges.
- Refrigerator: You’ll need space to chill the bars for at least an hour. Patience is a virtue here—don’t rush the setting process.
If you don’t have an 8×8 pan, you can use a loaf pan or even a small sheet pan. Just adjust the thickness accordingly. I’ve also used a glass dish in a pinch, and it worked fine. The key is to press the mixture firmly so it holds together. As for budget-friendly options, a simple metal pan from the dollar store works just as well as a fancy one. Trust me, I’ve used both.
Preparation Method
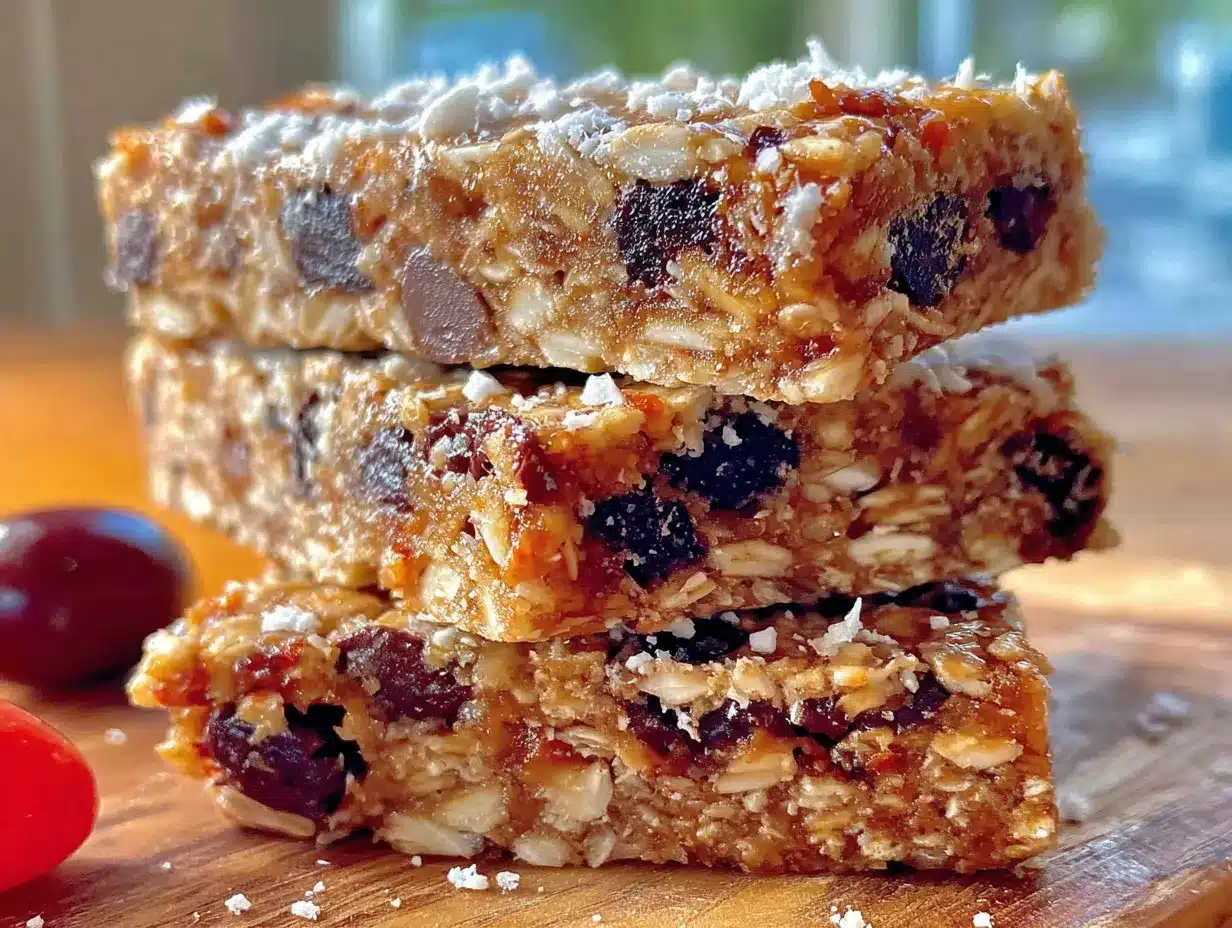
Making these bars is almost too easy. Here’s how to do it, step by step.
- Prepare the Pan (5 minutes): Line an 8×8 inch baking pan with parchment paper, leaving some overhang on two sides. This will act as handles to lift the bars out later. Set the pan aside while you prepare the mixture.
- Combine Dry Ingredients (2 minutes): In a large mixing bowl, combine 2 cups (180g) of rolled oats, 1/2 cup (60g) of chopped nuts, and 1/2 cup (80g) of dried fruit. If you’re using chocolate chips, add them now too. Stir everything together with a spatula until evenly distributed.
- Warm the Wet Ingredients (3 minutes): In a small saucepan over low heat, combine 1 cup (240g) of creamy peanut butter and 1/2 cup (170g) of honey. Stir constantly until the mixture is smooth and runny, about 2-3 minutes. Be careful not to overheat it—you just want it warm enough to blend easily. Remove from heat and stir in 1 teaspoon of vanilla extract and 1/4 teaspoon of salt.
- Combine Wet and Dry (2 minutes): Pour the warm peanut butter and honey mixture over the dry ingredients. Use your spatula to fold everything together until the oats are fully coated. This might take a minute—the mixture will be thick and sticky. Don’t be shy; really work it in.
- Press into the Pan (3 minutes): Transfer the mixture to your prepared pan. Use the back of a spatula or a piece of parchment paper to press it down firmly and evenly. This is crucial—if you don’t press hard enough, the bars will fall apart. I like to use a flat-bottomed measuring cup to really compact it. Make sure the corners are filled and the top is level.
- Chill (1-2 hours): Place the pan in the refrigerator and let it chill for at least 1 hour, or up to 2 hours for firmer bars. The bars need this time to set and hold their shape. Don’t skip this step—they won’t cut cleanly if you rush it.
- Cut and Serve (5 minutes): Once the bars are firm, use the parchment paper handles to lift the block out of the pan. Place it on a cutting board. Use a sharp knife to cut into 12-16 bars, depending on your preferred size. For clean cuts, run the knife under hot water and wipe it dry between each slice. Serve immediately or store for later.
A few sensory cues to watch for: When you press the mixture into the pan, it should feel tacky but not wet. The oats should be evenly coated, and you shouldn’t see any dry patches. When you lift the bars out of the pan, they should hold together firmly without crumbling. If they feel too soft, pop them back in the fridge for another 30 minutes. Patience pays off here.
Cooking Tips & Techniques
I’ve made these bars more times than I can count, and I’ve learned a few things along the way. Here are my best tips for perfect results every time.
Don’t Overheat the Peanut Butter and Honey. I learned this the hard way. If you heat the mixture too much, the honey can caramelize and make the bars too hard. You just want it warm enough to be runny—think thick syrup, not boiling. Use low heat and stir constantly. If it starts to bubble, pull it off the heat immediately.
Press Firmly and Evenly. This is the most common mistake I see. If you don’t press the mixture into the pan with enough force, the bars will be crumbly and fall apart. Use a flat-bottomed glass or a measuring cup to really compact it. I even use my hands (lightly oiled) to press the corners. The denser the mixture, the better the bars hold together.
Let Them Chill Completely. I know it’s tempting to cut into them right away, but trust me—waiting is worth it. One hour is the bare minimum. Two hours is even better. If you’re in a hurry, you can pop them in the freezer for 30 minutes, but keep an eye on them so they don’t freeze solid.
Use Room Temperature Ingredients. If your peanut butter is straight from the fridge, it won’t mix as smoothly with the honey. Let it sit on the counter for 15-20 minutes before you start. Same goes for the honey—if it’s crystallized, warm it gently in a bowl of hot water.
Add Mix-Ins Strategically. If you’re adding chocolate chips, fold them in after the wet ingredients are combined with the oats. This prevents the chocolate from melting into the warm peanut butter. For nuts and dried fruit, you can add them with the oats. If you want a more uniform texture, chop them into smaller pieces.
One of my biggest failures? I once used natural peanut butter that had separated, and I didn’t stir it well enough. The bars turned out greasy and didn’t set properly. Now I always give the jar a good stir before measuring. It’s a small step that makes a big difference.
Variations & Adaptations
One of the best things about this recipe is how adaptable it is. Here are some of my favorite variations.
Chocolate Lover’s Version: Add 1/4 cup (45g) of cocoa powder to the dry ingredients before mixing. The result is a rich, chocolatey bar that tastes like a candy bar. I also like to drizzle melted dark chocolate over the top before chilling for an extra indulgent touch.
Nut-Free Alternative: Swap the peanut butter for sunflower seed butter or tahini. The flavor is different—nutty and slightly earthy—but it’s just as delicious. Make sure to use certified gluten-free oats if you need to avoid gluten as well.
Vegan Option: Use maple syrup or agave nectar instead of honey. The bars will be slightly softer, so you might need to chill them a bit longer. I’ve also used coconut oil (1/4 cup) mixed with maple syrup for a vegan-friendly binder.
Protein-Packed Bars: Add 1 scoop of vanilla or chocolate protein powder to the dry ingredients. You may need to add an extra tablespoon of honey to keep the bars from being too dry. These are great for post-workout snacks.
Seasonal Twist: In the fall, I love adding pumpkin pie spice and dried cranberries. In the summer, I use dried mango and coconut flakes. The possibilities are endless. I’ve even made a batch with crushed pretzels for a salty-sweet crunch that pairs perfectly with a easy salted maple brown sugar cold brew concentrate recipe.
Spiced Version: Add 1 teaspoon of cinnamon, 1/2 teaspoon of ginger, and a pinch of nutmeg to the dry ingredients. This gives the bars a warm, cozy flavor that’s perfect for chilly mornings. I’ve also added a pinch of cayenne for a spicy kick—it works surprisingly well.
Serving & Storage Suggestions
These bars are incredibly versatile when it comes to serving and storing. Here’s what I recommend.
Serving: These bars are best served chilled or at room temperature. I like to take them straight from the fridge and let them sit for 5 minutes before eating—they soften just enough without losing their shape. They’re perfect for lunchboxes, road trips, or a quick snack between meals. For a fun presentation, cut them into small bite-sized squares and arrange them on a platter. They’re also great crumbled over yogurt or ice cream for a quick dessert.
Complementary Dishes: These bars pair beautifully with a hot cup of coffee or a glass of cold milk. For a more substantial snack, serve them alongside fresh fruit or a handful of nuts. I’ve also brought them to brunch alongside a batch of easy skillet apple crisp with thick oat streusel topping for a sweet spread.
Storage: Store the bars in an airtight container in the refrigerator for up to 1 week. They also freeze beautifully—just wrap each bar individually in plastic wrap and place them in a freezer-safe bag. They’ll keep for up to 3 months. When you’re ready to eat one, let it thaw at room temperature for about 15 minutes, or pop it in the microwave for 10-15 seconds.
Reheating: If you prefer a softer bar, you can microwave one for 10-15 seconds. This is especially nice on a cold day. Just be careful not to overheat it—the chocolate chips can melt and make a mess.
Flavor Development: The flavors in these bars actually deepen after a day or two in the fridge. The oats absorb the honey and peanut butter, making the bars even more cohesive and flavorful. I often make a batch on Sunday and enjoy them all week long.
Nutritional Information & Benefits
Here’s a rough estimate of the nutritional values for one bar (based on 16 bars per batch). Keep in mind that these numbers will vary depending on your specific ingredients and mix-ins.
| Nutrient | Per Serving |
|---|---|
| Calories | 210-240 |
| Protein | 6-8g |
| Carbohydrates | 28-32g |
| Fiber | 3-4g |
| Sugar | 12-15g |
| Fat | 9-12g |
| Saturated Fat | 2-3g |
| Sodium | 80-120mg |
These bars are packed with wholesome ingredients that offer real health benefits. Oats are a great source of soluble fiber, which helps keep you full and supports heart health. Peanut butter provides healthy fats and protein, making these bars a satisfying snack that won’t leave you crashing an hour later. Honey adds natural sweetness along with antioxidants, and the nuts and dried fruit contribute vitamins, minerals, and additional fiber.
For dietary considerations, this recipe can easily be made gluten-free by using certified gluten-free oats, and vegan by swapping the honey for maple syrup. It’s naturally dairy-free if you skip the chocolate chips or use dairy-free chocolate. The main allergens to watch for are peanuts and tree nuts—so be mindful if you’re serving these to someone with allergies. I personally love that these bars give me a quick energy boost without the guilt, and they’re a staple in my meal prep routine.
Conclusion
These best easy no-bake peanut butter granola bars have become a staple in my kitchen for a reason. They’re quick, they’re forgiving, and they taste like something you actually want to eat. Whether you’re a seasoned home cook or someone who’s just starting out, this recipe is practically foolproof. No oven, no fuss, just a delicious snack that comes together in minutes.
I love that this recipe is a blank canvas. You can make it your own—swap in your favorite nut butter, add whatever mix-ins you have on hand, or keep it simple with just oats and peanut butter. There’s no wrong way to do it. And honestly, that’s the beauty of it. It’s a recipe that adapts to you, not the other way around.
So go ahead—give these bars a try. Make a batch for your family, pack them in your bag for a hike, or just keep them in the fridge for those moments when you need a little something sweet. I’d love to hear how they turn out. Drop a comment below and let me know what mix-ins you used, or share a photo of your creation. Happy snacking, friends!
Frequently Asked Questions (FAQs)
Can I use quick oats instead of rolled oats?
Yes, you can use quick oats, but the texture will be softer and less chewy. Rolled oats give the bars a better structure and a more satisfying bite. If you only have quick oats, reduce the chilling time slightly and expect a more tender bar.
How do I keep the bars from falling apart?
The key is to press the mixture firmly into the pan. Use a flat-bottomed glass or a measuring cup to really compact it. Also, make sure you’re using enough peanut butter and honey—they act as the binders. If your mixture seems too dry, add an extra tablespoon of honey.
Can I freeze these granola bars?
Absolutely! Wrap each bar individually in plastic wrap, then place them in a freezer-safe bag or container. They’ll keep for up to 3 months. When you’re ready to eat one, let it thaw at room temperature for about 15 minutes, or microwave it for 10-15 seconds.
What’s the best way to cut clean bars?
Use a sharp knife and run it under hot water before each cut. Wipe the blade dry between slices to prevent sticking. This gives you neat, professional-looking edges. Chilling the bars for at least 2 hours also helps them cut cleanly.
Can I make these bars without honey?
Yes, you can substitute honey with maple syrup, agave nectar, or brown rice syrup. Keep in mind that the texture and sweetness level may vary slightly. Maple syrup adds a lovely flavor, while brown rice syrup creates a firmer, less sweet bar.
Pin This Recipe!
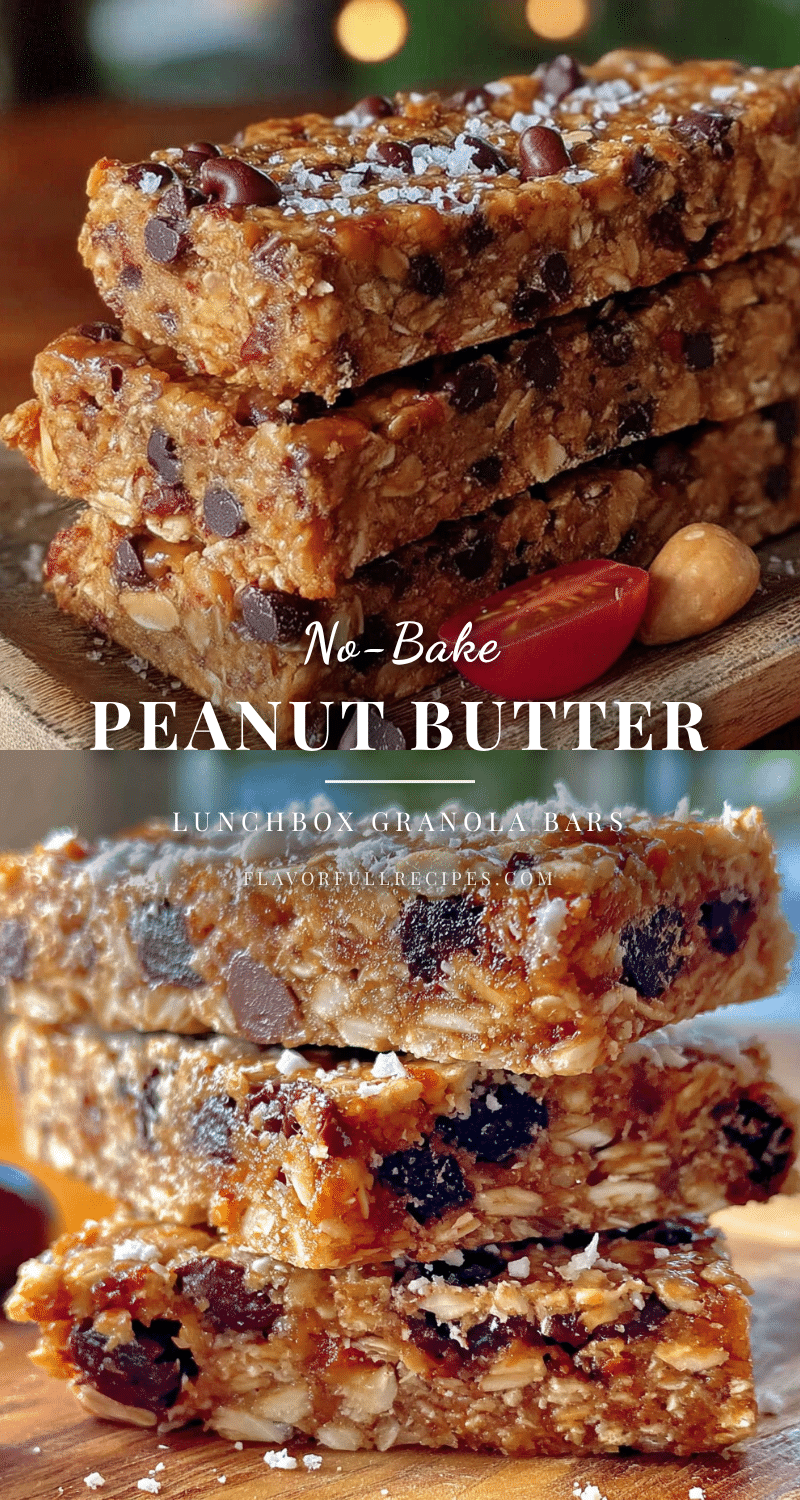
Best Easy No-Bake Peanut Butter Granola Bars
- Total Time: 1 hour 10 minutes (includes chilling)
- Yield: 12-16 bars 1x
Description
These no-bake peanut butter granola bars are quick, easy, and made with simple pantry ingredients. They’re chewy, satisfying, and perfect for busy days, school lunches, or a quick snack.
Ingredients
- 2 cups (180g) rolled oats
- 1 cup (240g) creamy peanut butter
- 1/2 cup (170g) honey
- 1/2 cup (90g) dark chocolate chips (optional)
- 1/2 cup (60g) chopped nuts (almonds, walnuts, or pecans)
- 1/2 cup (80g) dried fruit (raisins, cranberries, or apricots)
- 1/4 teaspoon salt
- 1 teaspoon vanilla extract
Instructions
- Line an 8×8 inch baking pan with parchment paper, leaving overhang on two sides.
- In a large bowl, combine rolled oats, chopped nuts, dried fruit, and chocolate chips (if using). Stir to distribute.
- In a small saucepan over low heat, warm peanut butter and honey, stirring constantly until smooth and runny (2-3 minutes). Remove from heat and stir in vanilla extract and salt.
- Pour the warm peanut butter mixture over the dry ingredients. Fold until oats are fully coated.
- Transfer mixture to the prepared pan. Press down firmly and evenly using a spatula or flat-bottomed measuring cup.
- Refrigerate for at least 1 hour, or up to 2 hours for firmer bars.
- Use parchment handles to lift the block out of the pan. Cut into 12-16 bars with a sharp knife (run knife under hot water between cuts for clean edges). Serve chilled or at room temperature.
Notes
Press the mixture firmly into the pan to prevent crumbling. For clean cuts, chill bars for at least 2 hours and run knife under hot water between slices. Bars can be stored in the refrigerator for up to 1 week or frozen for up to 3 months.
- Prep Time: 10 minutes
- Cook Time: 0 minutes
- Category: Snack
- Cuisine: American
Nutrition
- Serving Size: 1 bar
- Calories: 210240
- Sugar: 1215
- Sodium: 80120
- Fat: 912
- Saturated Fat: 23
- Carbohydrates: 2832
- Fiber: 34
- Protein: 68
Keywords: no-bake granola bars, peanut butter granola bars, easy granola bars, healthy snack, no-bake recipe