
Are you ready to indulge in the perfect combination of chocolatey goodness and coconut decadence? These Ultimate Double Chocolate Coconut Bliss Balls are a no-bake treat that’s easy, quick, and seriously satisfying. Whether you’re a chocoholic or just looking for a healthier dessert, this recipe will hit the sweet spot without turning on your oven.
I first discovered bliss balls during a quest to find snacks that felt indulgent but weren’t loaded with refined sugar. Then, I added a double dose of chocolate and coconut to take them to the next level. The result? Pure magic in every bite! Let’s dive into this recipe that’s perfect for busy weekdays, holiday parties, or just because-you-deserve-it moments.
The Story Behind Double Chocolate Coconut Bliss Balls
Bliss balls have been around for decades, but they’ve gained popularity in recent years as a simple, no-bake way to enjoy dessert without guilt. The origins trace back to energy balls crafted by health enthusiasts, but somewhere along the way, someone decided to toss in cocoa powder, chocolate chips, and shredded coconut—and the rest is history!
For me, these bliss balls are nostalgic. They remind me of the homemade chocolate truffles my mom made when I was little, but with a healthier twist. They’re also incredibly versatile—perfect for summer when you don’t want to heat up the kitchen or winter when you’re craving chocolate comfort. Plus, they store beautifully, making them a go-to option for meal prep or last-minute entertaining.
Whether you whip them up for a casual snack or dress them up with drizzled chocolate for special occasions, these bliss balls are bound to become a staple in your dessert rotation.
Ingredients Breakdown
Here’s everything you need to make these Ultimate Double Chocolate Coconut Bliss Balls. Each ingredient plays a starring role in bringing flavor, texture, and that perfect balance of sweetness.
- Medjool Dates: These natural sweeteners are sticky, caramel-like, and perfect for binding the mixture. If you can’t find Medjool dates, use Deglet Noor dates, but soak them in warm water for 10 minutes to soften.
- Cocoa Powder: Choose unsweetened cocoa powder for a rich and bold chocolate flavor. If you’re feeling fancy, Dutch-processed cocoa can add a smoother, deeper taste.
- Chocolate Chips: Semi-sweet chocolate chips work beautifully here, but you can swap them for dark chocolate chips if you prefer a less sweet option.
- Shredded Coconut: Use unsweetened shredded coconut to keep the recipe balanced. Toast it lightly if you want an added nuttiness.
- Almond Butter: Creamy almond butter adds richness and helps bind the ingredients. Peanut butter is a great alternative, though it will slightly change the flavor.
- Vanilla Extract: Just a splash of vanilla to enhance the chocolate notes and bring everything together.
- Salt: A pinch of salt makes all the difference in elevating the sweetness and balancing the flavors.
If you’re feeling adventurous, you can add mix-ins like chia seeds, flaxseeds, or even a pinch of espresso powder for a mocha twist. Get creative!
Equipment Needed
Making these bliss balls doesn’t require fancy tools—just a few kitchen basics:
- Food Processor: Essential for blending the dates and creating a smooth, sticky base.
- Spatula: Perfect for scraping down the sides of your food processor and mixing everything together.
- Measuring Cups and Spoons: For accurate measurements (especially for the cocoa).
- Mixing Bowl: Handy for combining the processed mixture with chocolate chips and shredded coconut.
- Baking Sheet: Use this to chill the bliss balls before serving.
If you don’t have a food processor, don’t worry! You can use a high-powered blender, though you might need to stop and stir frequently. Just be patient—it’ll work!
How to Make Double Chocolate Coconut Bliss Balls
- Prep the Dates: If your dates are dry, soak them in warm water for 10 minutes, then drain. Pit the dates if necessary.
- Blend the Base: Add the dates, cocoa powder, almond butter, vanilla extract, and salt to your food processor. Blend until the mixture is sticky and well combined. This should take about 1-2 minutes.
- Incorporate the Mix-ins: Transfer the base mixture to a bowl and stir in the chocolate chips and shredded coconut. Use a spatula or your hands to ensure everything is evenly distributed.
- Form the Bliss Balls: Roll the mixture into balls about 1 inch in diameter. You should get around 12-15 balls, depending on the size.
- Chill: Place the bliss balls on a baking sheet lined with parchment paper and refrigerate for at least 30 minutes to firm up.
- Optional Decoration: For extra flair, drizzle melted chocolate over the chilled bliss balls or roll them in more shredded coconut.
- Serve: Enjoy immediately or store for later!
The texture should be fudgy and satisfying, with bursts of chocolate and coconut in every bite. If the mixture feels too sticky while rolling, simply chill it for 10 minutes before forming the balls.
Cooking Tips & Techniques
Here are my tried-and-true tips for making the best bliss balls:
- Use Fresh Dates: Fresh Medjool dates are softer and easier to blend. Avoid overly dry dates, or soak them before using.
- Don’t Overblend: The mixture should be sticky but not overly smooth. A few chunks of chocolate or coconut add texture.
- Chill the Mixture: If your dough feels too soft or sticky, pop it in the fridge for 10 minutes before rolling.
- Customize the Size: Make larger balls for a more indulgent experience or smaller ones for bite-sized treats.
Once you’ve mastered the basics, you’ll be whipping these up like a pro. Trust me, they’re foolproof!
Variations & Adaptations
Here’s how you can switch things up:
- Vegan-Friendly: Swap traditional chocolate chips for dairy-free options and ensure your almond butter is vegan-approved.
- Nut-Free: Use sunflower seed butter instead of almond butter, and double-check that your chocolate chips are nut-free.
- Seasonal Twist: Add a pinch of cinnamon and nutmeg for a holiday-inspired flavor or fresh orange zest for a citrusy kick.
- Protein Boost: Mix in a scoop of your favorite protein powder (vanilla or chocolate works best).
I once experimented with adding crushed freeze-dried raspberries, and the tartness paired beautifully with the chocolate. Get creative with your favorite flavors!
Serving & Storage Suggestions
Here’s how to make the most of your bliss balls:
- Serving Temperature: These are best served chilled but can be enjoyed at room temperature for a softer bite.
- Presentation Ideas: Arrange them on a pretty plate, drizzle with melted chocolate, or serve in mini cupcake liners for a polished look.
- Storage Tips: Store bliss balls in an airtight container in the fridge for up to 1 week. For longer storage, freeze them for up to 3 months.
- Reheating: No reheating needed! Just let them thaw at room temperature for 10-15 minutes if frozen.
The flavors deepen as they sit, so don’t be surprised if they taste even better the next day!
Nutritional Information & Benefits
Here’s a general breakdown of the nutritional value in each bliss ball:
- Calories: Approximately 120 per ball
- Healthy Fats: Thanks to almond butter and coconut
- Fiber: Dates and coconut provide natural fiber
- No Refined Sugar: Sweetened naturally with dates
These bliss balls are gluten-free, making them suitable for those with sensitivities. They’re also packed with antioxidants from the cocoa powder, which is a nice bonus when you’re indulging!
Conclusion
If you’re looking for a quick, no-bake treat that’s rich, satisfying, and easy to make, these Ultimate Double Chocolate Coconut Bliss Balls are the answer. They’re perfect for sharing, snacking, or sneaking straight out of the fridge. Honestly, I love them because they’re a little indulgent, a little healthy, and totally customizable.
Give this recipe a try and let me know how you made it your own! Did you add a fun twist or try a unique variation? Drop a comment below and share your thoughts. And if you love this recipe, don’t forget to save it to your Pinterest board for easy access. Happy no-baking!
FAQs
Can I make these bliss balls ahead of time?
Absolutely! These bliss balls store well in the fridge for up to a week or in the freezer for up to three months.
Can I use a blender instead of a food processor?
Yes, but you may need to blend the mixture in smaller batches and stir often to ensure everything combines smoothly.
Are these bliss balls gluten-free?
Yes, provided you use gluten-free chocolate chips and check your other ingredients for cross-contamination.
Can I make these without coconut?
Sure! Substitute the shredded coconut with ground almonds, oats, or even crushed pretzels for a different texture.
How do I prevent the mixture from sticking to my hands while rolling?
Chill the mixture for 10 minutes before rolling, or lightly grease your hands with a bit of coconut oil.
Print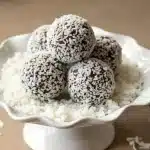
Ultimate Double Chocolate Coconut Bliss Balls
- Total Time: 45 minutes
- Yield: 12-15 balls 1x
Description
These no-bake bliss balls combine rich chocolate and coconut flavors for a quick, satisfying treat that’s perfect for any occasion.
Ingredients
- 1 cup Medjool dates (pitted, or soak Deglet Noor dates in warm water for 10 minutes)
- 1/4 cup unsweetened cocoa powder
- 1/4 cup semi-sweet chocolate chips (or dark chocolate chips)
- 1/2 cup unsweetened shredded coconut
- 1/4 cup creamy almond butter (or peanut butter as an alternative)
- 1 teaspoon vanilla extract
- Pinch of salt
Instructions
- If your dates are dry, soak them in warm water for 10 minutes, then drain. Pit the dates if necessary.
- Add the dates, cocoa powder, almond butter, vanilla extract, and salt to your food processor. Blend until the mixture is sticky and well combined (about 1-2 minutes).
- Transfer the base mixture to a bowl and stir in the chocolate chips and shredded coconut. Use a spatula or your hands to ensure everything is evenly distributed.
- Roll the mixture into balls about 1 inch in diameter. You should get around 12-15 balls, depending on the size.
- Place the bliss balls on a baking sheet lined with parchment paper and refrigerate for at least 30 minutes to firm up.
- Optional: Drizzle melted chocolate over the chilled bliss balls or roll them in more shredded coconut for decoration.
- Serve immediately or store for later.
Notes
If the mixture feels too sticky while rolling, chill it for 10 minutes before forming the balls. For a mocha twist, add a pinch of espresso powder.
- Prep Time: 15 minutes
- Cook Time: 0 minutes
- Category: Dessert
- Cuisine: American
Nutrition
- Serving Size: 1 ball
- Calories: 120
- Sugar: 10
- Sodium: 30
- Fat: 6
- Saturated Fat: 2
- Carbohydrates: 15
- Fiber: 3
- Protein: 2
Keywords: bliss balls, no-bake dessert, chocolate coconut balls, healthy snack, gluten-free dessert