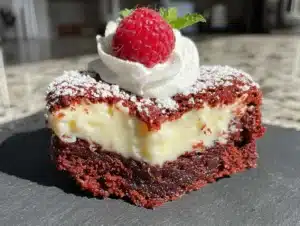
This was supposed to be a perfectly reasonable batch of regular brownies. I had the butter softening, the cocoa powder measured, and my daughter was “helping” by licking the spatula before it even touched anything. But somewhere between the grocery store chaos and my three-year-old deciding the kitchen floor needed a yogurt facial, I grabbed the wrong bottle from the baking shelf. Instead of vanilla extract, I grabbed the red food coloring I’d bought months ago for a kid’s birthday cake I never got around to making. I realized my mistake about two seconds after the first squeeze hit the batter. My heart sank. A whole stick of butter, two eggs, and my last cup of sugar—gone, because of a distracted moment and a bottle that looked way too similar to vanilla.
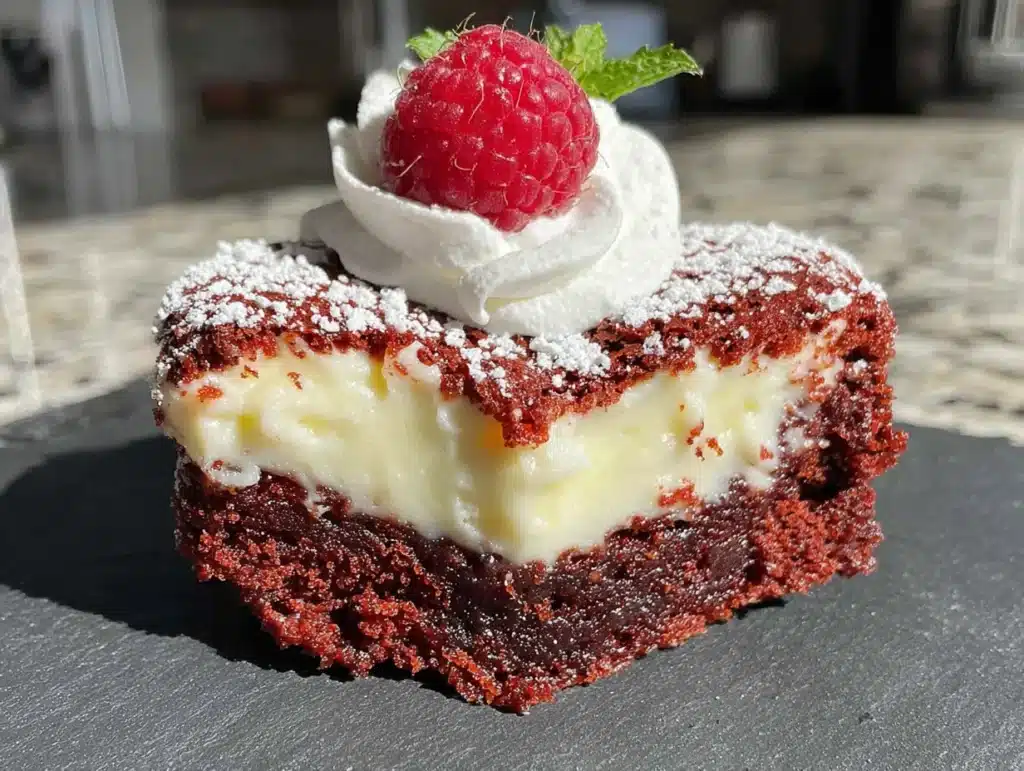
I stood there staring at this violently red batter, already planning the trip to the store I couldn’t afford to make that week. But my daughter, who is my honest-to-goodness toughest food critic, peered into the bowl and said, “That’s pretty, Mama.” So I kept going. I figured I’d bake it anyway and call it a science experiment. I grabbed some cream cheese from the back of the fridge—the one I was saving for bagels that never happened—and swirled it in, mostly because I needed something to distract from the fact that my brownies now looked like a clown’s wig. What came out of the oven was nothing like the plan—and honestly, better. The cream cheese mellowed the color into this gorgeous marbled pink-and-red, and the tangy swirl cut through the chocolate in a way I still can’t fully explain. I mean, maybe you’ve been there—you mess something up, and the universe just decides to reward you anyway. That was this brownie. And when I cut them into heart shapes the next day for Valentine’s Day, my husband asked me to make them every year from now on. That’s how this recipe stayed with me.
Why You’ll Love This Recipe
Let me tell you why these brownies have become my secret weapon for every family celebration, school bake sale, and Tuesday night that just needs a little something special. They check every box a busy, budget-conscious parent could want.
- Budget-Friendly: This recipe uses simple, affordable ingredients you probably already have. No expensive specialty flours, no imported cocoa powder, no fancy extracts. I’m talking pantry staples that won’t wreck your grocery budget.
- Quick & Easy: From start to finish, these come together in under an hour. The batter takes about 15 minutes to mix, and the oven does the rest. Perfect for those after-school cravings or last-minute party contributions.
- Simple Ingredients: You don’t need a trip to a specialty baking store. Everything here is available at your regular grocery store, and most items are probably in your kitchen right now.
- Perfect for Occasions: These heart-shaped beauties are made for Valentine’s Day, anniversaries, Galentine’s parties, or just showing your family some love on a random Wednesday. They also work great for birthday parties and holiday gatherings.
- Crowd-Pleaser: I’ve brought these to potlucks, school events, and family dinners, and they disappear every single time. Kids love the fun color, and adults appreciate the sophisticated cream cheese swirl. It’s a win-win.
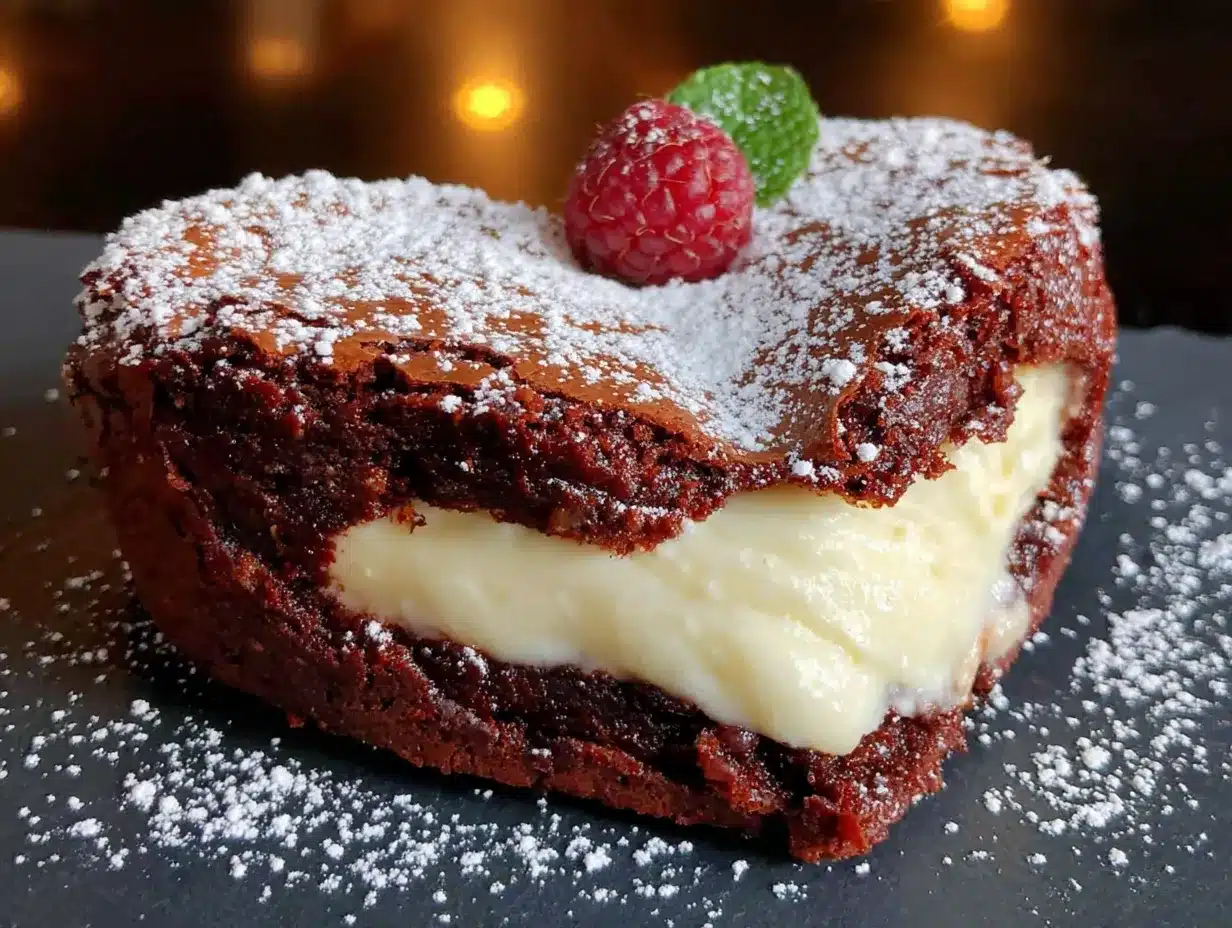
- Unbelievably Delicious: The texture is pure magic—fudgy, dense brownie base with a creamy, tangy cheesecake swirl. The red velvet flavor is subtle and elegant, not artificial or overwhelming.
What makes this recipe different from the rest? It’s the technique of swirling the cream cheese mixture at just the right moment and the specific ratio of cocoa to fat that creates that signature fudgy texture without being greasy. I’ve tested this about a dozen times to get the balance perfect—not too sweet, not too tangy, just right. This isn’t just another version of red velvet brownies; it’s my best version, born from a happy accident and perfected through trial and error. It’s the kind of recipe that makes you close your eyes after the first bite and remember exactly why homemade treats are worth the effort.
What Ingredients You Will Need
This recipe uses simple, wholesome ingredients to deliver that rich, fudgy red velvet flavor and creamy cheesecake swirl without any fuss. Most of these are pantry staples, and I’ve included notes to help you make smart substitutions if needed.
For the Brownie Base
- 1/2 cup (113g) unsalted butter, melted (salted butter works too—just skip the added salt)
- 1 cup (200g) granulated sugar (adds sweetness and helps create that crackly top)
- 2 large eggs, room temperature (cold eggs can seize the melted butter)
- 1 teaspoon vanilla extract (I use pure vanilla extract for best flavor, but imitation works fine)
- 1 tablespoon red food coloring (liquid or gel—gel gives a more vibrant color with less liquid)
- 1 tablespoon unsweetened cocoa powder (natural or Dutch-process both work here)
- 1 cup (125g) all-purpose flour (spooned and leveled—don’t scoop directly from the bag)
- 1/4 teaspoon salt (enhances the chocolate flavor)
For the Cheesecake Swirl
- 8 ounces (226g) cream cheese, softened to room temperature (full-fat works best, but reduced-fat is okay)
- 1/4 cup (50g) granulated sugar
- 1 large egg yolk (adds richness and helps the swirl set properly)
- 1/2 teaspoon vanilla extract
Let me share a few ingredient tips I’ve learned the hard way. For the cream cheese, make sure it’s genuinely softened—leave it on the counter for at least 30 minutes. Cold cream cheese creates lumps that are nearly impossible to smooth out, and nobody wants a chunk of cold cream cheese in their warm brownie. I prefer Philadelphia brand for consistent results, but any block-style cream cheese works. Avoid the spreadable tub kind, as it has too much air and water.
For the red food coloring, gel food coloring is my go-to. It gives a deeper, more vibrant red without thinning the batter too much. Liquid food coloring works perfectly fine, though—just know you might need an extra half-teaspoon to get the same intensity. I’ve used both, and the brownies turn out delicious either way.
If you’re looking to make substitutions, here are a few that work well. For a dairy-free version, use vegan butter and dairy-free cream cheese. For a gluten-free option, swap the all-purpose flour with a 1:1 gluten-free baking flour blend. I’ve tested both, and the texture holds up surprisingly well. And if you’re out of cocoa powder, you can use 2 tablespoons of melted dark chocolate instead—just reduce the butter by a tablespoon to account for the extra fat.
Equipment Needed
You don’t need a professional bakery setup for these brownies. Here’s what you’ll need:
- 8×8-inch baking pan (a 9×9 works too, but the brownies will be slightly thinner and bake faster)
- Heart-shaped cookie cutter (any size works—I use a 2-inch cutter for about 9 hearts)
- Mixing bowls (one medium for the brownie batter, one small for the cheesecake swirl)
- Whisk (for combining ingredients without overmixing)
- Spatula (for spreading the batter and scraping every last bit)
- Electric hand mixer or stand mixer (for the cream cheese mixture—a whisk works too, but your arm will get tired)
- Parchment paper (for easy removal—trust me on this one)
- Toothpick or skewer (for creating the swirl pattern)
If you don’t have a heart-shaped cookie cutter, don’t worry. You can cut the brownies into squares and they’ll taste just as amazing. I’ve also used a small paring knife to freehand hearts—they don’t look perfect, but my kids think they’re charming. For the mixer, a simple hand mixer costs about $15 and lasts for years. If you’re really on a budget, a sturdy whisk and some elbow grease will get the job done.
Preparation Method
Let me walk you through this step by step. I’ve included all the little details I wish someone had told me the first time I made these.
- Preheat your oven to 350°F (175°C). Line your 8×8-inch baking pan with parchment paper, leaving a little overhang on two sides. This creates handles that make lifting the brownies out super easy. Lightly grease the parchment with butter or non-stick spray.
- Make the brownie batter. In a medium bowl, whisk together the melted butter and granulated sugar until well combined. The mixture should look glossy and smooth. Add the eggs one at a time, whisking well after each addition. Stir in the vanilla extract and red food coloring. The batter will look alarmingly bright at this point—that’s normal, and it will deepen as it bakes.
- Add the dry ingredients. Sift the cocoa powder, all-purpose flour, and salt over the wet ingredients. Fold gently with a spatula until just combined. Do not overmix—stop as soon as you no longer see streaks of flour. Overmixing develops gluten, which makes brownies tough instead of fudgy. The batter should be thick and slightly shiny.
- Prepare the cheesecake swirl. In a small bowl, beat the softened cream cheese with the granulated sugar until smooth and creamy. Add the egg yolk and vanilla extract, and beat until fully incorporated. The mixture should be silky with no lumps. If you see lumps, your cream cheese wasn’t soft enough—try microwaving it for 10 seconds and beating again.
- Assemble the layers. Pour about two-thirds of the brownie batter into the prepared pan and spread it evenly. Drop spoonfuls of the cheesecake mixture over the brownie batter. I usually do about 6-8 dollops. Then drizzle the remaining brownie batter over the top. Don’t worry if it doesn’t cover the cream cheese completely—the swirling will take care of that.
- Create the swirl. Take a toothpick or skewer and drag it through the batter in a figure-eight pattern. Go slowly and don’t over-swirl—about 5-6 passes is plenty. You want distinct pockets of cream cheese, not a muddy pink mess. I learned this the hard way after turning my first batch into a uniform Pepto-Bismol color.
- Bake. Place the pan in the preheated oven and bake for 28-32 minutes. The edges should look set and slightly pulling away from the sides, but the center should still jiggle slightly when you gently shake the pan. A toothpick inserted into the center should come out with a few moist crumbs, not wet batter. Overbaking is the enemy of fudgy brownies.
- Cool completely. This is the hardest part. Let the brownies cool in the pan on a wire rack for at least 1 hour. Then refrigerate for another 30 minutes before cutting. Chilling makes the brownies firm enough to cut cleanly, especially if you’re using a cookie cutter.
- Cut into hearts. Once completely cooled and chilled, lift the brownies out of the pan using the parchment handles. Place them on a cutting board. Press your heart-shaped cookie cutter firmly into the brownie and wiggle gently to release. If the cutter sticks, dip it in warm water between cuts and wipe dry. You’ll get about 9 perfect hearts from one batch, plus some delicious scraps that nobody will complain about.
Cooking Tips & Techniques
After making these brownies more times than I care to count, I’ve collected a few tricks that make a real difference. Let me share the ones that saved me from disaster more than once.
Don’t overmix the brownie batter. This is the number one mistake I see home cooks make. Once you add the flour, mix just until it disappears. Overmixing develops gluten, which gives you cakey brownies instead of fudgy ones. We want fudgy—dense, rich, and slightly gooey in the center. If you see a few tiny flour streaks, that’s actually better than a perfectly smooth batter.
Room temperature ingredients matter. I know it’s tempting to use cold eggs and cold cream cheese straight from the fridge, but trust me on this. Cold ingredients don’t emulsify properly, which means your batter can separate or your cheesecake swirl can end up lumpy. Leave everything on the counter for 30 minutes before you start. If you forget, place the eggs in a bowl of warm water for 5 minutes, and microwave the cream cheese for 10-15 seconds.
The toothpick test is tricky with these. Because of the cream cheese swirl, a toothpick inserted into the center might come out with some gooey cream cheese even when the brownies are perfectly baked. Instead, rely on visual cues. The edges should look set and slightly cracked, and the center should have a slight jiggle—like a firm Jell-O, not a liquid. If the center still ripples like soup when you shake the pan, give it another 3-4 minutes.
Chill before cutting. I cannot stress this enough. Warm brownies are a crumbly mess when you try to cut them, especially into shapes. Refrigerating for at least 30 minutes firms up the cream cheese and makes clean cuts possible. I’ve ruined more than a few batches by being impatient. The wait is worth it.
Use a sharp cookie cutter. A dull cutter will squish the edges instead of cutting cleanly. If your cutter is getting dull, you can sharpen it by running it along the edge of a ceramic mug a few times. And always dip it in warm water between cuts to prevent sticking.
Variations & Adaptations
One of the best things about this recipe is how adaptable it is. Here are some variations I’ve tried and loved.
Chocolate Swirl Variation: Instead of the cream cheese swirl, melt 1/4 cup of semi-sweet chocolate chips with 2 tablespoons of heavy cream and swirl that into the brownie batter. It creates a double-chocolate effect that’s absolutely decadent. My kids actually prefer this version, though I’m partial to the original.
Peppermint Red Velvet: Add 1/2 teaspoon of peppermint extract to the brownie batter along with the vanilla, and crush some candy canes to sprinkle on top before baking. This is my go-to for Christmas parties. The peppermint pairs beautifully with the red velvet flavor, and the crushed candy adds a nice crunch.
Gluten-Free Version: Substitute the all-purpose flour with a 1:1 gluten-free baking flour blend. I’ve tested this with Bob’s Red Mill and King Arthur brands, and both work perfectly. The texture is slightly more delicate, so be extra gentle when cutting the hearts. Let them cool completely before even attempting to cut.
Vegan Adaptation: Use melted vegan butter, flax eggs (1 tablespoon ground flaxseed mixed with 3 tablespoons water per egg), and vegan cream cheese. The texture is a bit less fudgy, but the flavor is still fantastic. I made these for a friend’s vegan birthday party, and nobody guessed they were plant-based.
Extra Fudgy Version: Add 1/2 cup of semi-sweet chocolate chips to the brownie batter before pouring it into the pan. The chips melt into pockets of gooey chocolate that take these brownies to another level. This is my husband’s favorite variation—he says it’s “brownie perfection.”
Serving & Storage Suggestions
These heart-shaped beauties are best served at room temperature or slightly warm. If you’ve refrigerated them, let them sit on the counter for about 15 minutes before serving. The cream cheese softens just enough to become creamy again, and the brownie base becomes perfectly fudgy.
For presentation, arrange the hearts on a pretty plate or cake stand. Dust with powdered sugar for a snowy, romantic look, or drizzle with a simple white chocolate glaze (melt 1/2 cup white chocolate chips with 1 tablespoon coconut oil). Fresh raspberries or strawberries on the side add a pop of color and a tart contrast to the sweet brownies.
These pair beautifully with a glass of cold milk, a cup of hot coffee, or a scoop of vanilla ice cream. For a Valentine’s Day dessert board, arrange them alongside fresh fruit, chocolate-covered strawberries, and heart-shaped cookies. It’s a showstopper that costs a fraction of what you’d pay at a bakery.
Storage Instructions: Store the brownies in an airtight container in the refrigerator for up to 5 days. Place a piece of parchment paper between layers to prevent sticking. They actually taste better on day two—the flavors meld together, and the texture becomes even more fudgy.
Freezer Instructions: These freeze beautifully. Place the cut hearts on a baking sheet in a single layer and freeze for 1 hour until firm. Transfer to a freezer-safe bag or container, separating layers with parchment paper. They’ll keep for up to 3 months. To thaw, let them sit at room temperature for about 20 minutes, or microwave for 15 seconds for that fresh-from-the-oven warmth.
Reheating Tip: For that just-baked experience, warm individual brownies in the microwave for 10-15 seconds. The cream cheese gets slightly melty, and the chocolate becomes extra gooey. It’s dangerous how good they are warm.
Nutritional Information & Benefits
Here’s the honest truth—these are a treat, not a health food. But that doesn’t mean they’re without merit. Each heart-shaped brownie (based on 9 servings) contains approximately:
- Calories: 290
- Fat: 18g
- Carbohydrates: 30g
- Protein: 5g
- Sugar: 22g
The cream cheese adds a good amount of protein and calcium, and the cocoa powder provides antioxidants called flavonoids that support heart health. The eggs contribute high-quality protein and essential vitamins like B12 and D. And because these are homemade, you control exactly what goes into them—no preservatives, artificial flavors, or mystery ingredients.
For those with dietary concerns, this recipe contains gluten, dairy, and eggs. For a gluten-free version, use a 1:1 gluten-free flour blend. For a dairy-free version, use vegan butter and dairy-free cream cheese. For an egg-free version, use flax eggs, though the texture will be slightly different.
My personal philosophy is that treats like these have a place in a balanced lifestyle. They’re made with love, shared with family, and enjoyed without guilt. That’s the kind of wellness I can get behind.
Conclusion
These Budget-Friendly Heart-Shaped Red Velvet Cheesecake Brownies are more than just a pretty dessert—they’re a testament to the fact that some of the best things in life come from happy accidents. That moment of panic when I grabbed the wrong bottle turned into a recipe I now make every Valentine’s Day, every anniversary, and every time I want to show my family a little extra love without breaking the bank.
I hope you give these a try and make them your own. Maybe you’ll add extra chocolate chips, or swap the hearts for stars, or double the cream cheese swirl because you’re extra like that. That’s the beauty of a good recipe—it’s a starting point, not a rulebook. The best version is the one that makes your family smile.
If you make these, I’d love to hear about it. Drop a comment below and tell me how they turned out, what variations you tried, or if your kids helped you in the kitchen (and how much food coloring ended up on the counter). Share a photo on Pinterest or Instagram and tag me—I genuinely get excited seeing your creations. And if you’re looking for more budget-friendly desserts, check out my easy chocolate lava cake or my no-bake strawberry cheesecake for more sweet inspiration.
Until next time, happy baking—and remember, even the mistakes can turn into something beautiful.
Frequently Asked Questions
Can I make these brownies without a heart-shaped cookie cutter?
Absolutely! You can simply cut them into squares or rectangles using a sharp knife. They’ll taste exactly the same—just without the heart shape. If you want the heart shape without buying a cutter, you can use a small paring knife to freehand cut hearts. They won’t be perfect, but they’ll be charming and full of love.
Can I use natural food coloring instead of artificial?
Yes, you can use natural red food coloring made from beet juice or pomegranate powder. Keep in mind that natural colorings are less vibrant than artificial ones, so your brownies will have a more muted pinkish-red hue. I’ve tested this with beet powder, and the flavor is unaffected—just the color is different. For a deeper natural color, use 2 tablespoons of beet powder instead of the liquid food coloring.
Why did my cream cheese swirl turn into a muddy mess?
This usually happens from over-swirling. When you drag the toothpick through the batter, do it gently and no more than 5-6 times. Over-swirling blends the cream cheese into the brownie batter, creating a uniform pink color instead of distinct white and red swirls. Also, make sure your cream cheese is fully softened so it incorporates smoothly into the sugar and egg yolk without lumps.
Can I double this recipe?
Yes, this recipe doubles beautifully. Use a 9×13-inch baking pan and increase the baking time to 35-40 minutes. The brownies will be slightly thicker, so you might get 16-18 heart shapes instead of 9. Just make sure to use two separate bowls for the cheesecake mixture if you’re doubling—it’s easier to mix in smaller batches.
How do I get clean cuts when cutting the hearts?
The secret is chilling the brownies thoroughly before cutting. Refrigerate them for at least 30 minutes, or even better, 1 hour. Use a sharp cookie cutter and dip it in warm water between cuts, wiping it dry with a paper towel. Press straight down without twisting, then wiggle gently to release. If the brownie sticks to the cutter, it’s not chilled enough—pop it back in the fridge for 15 minutes.
Pin This Recipe!
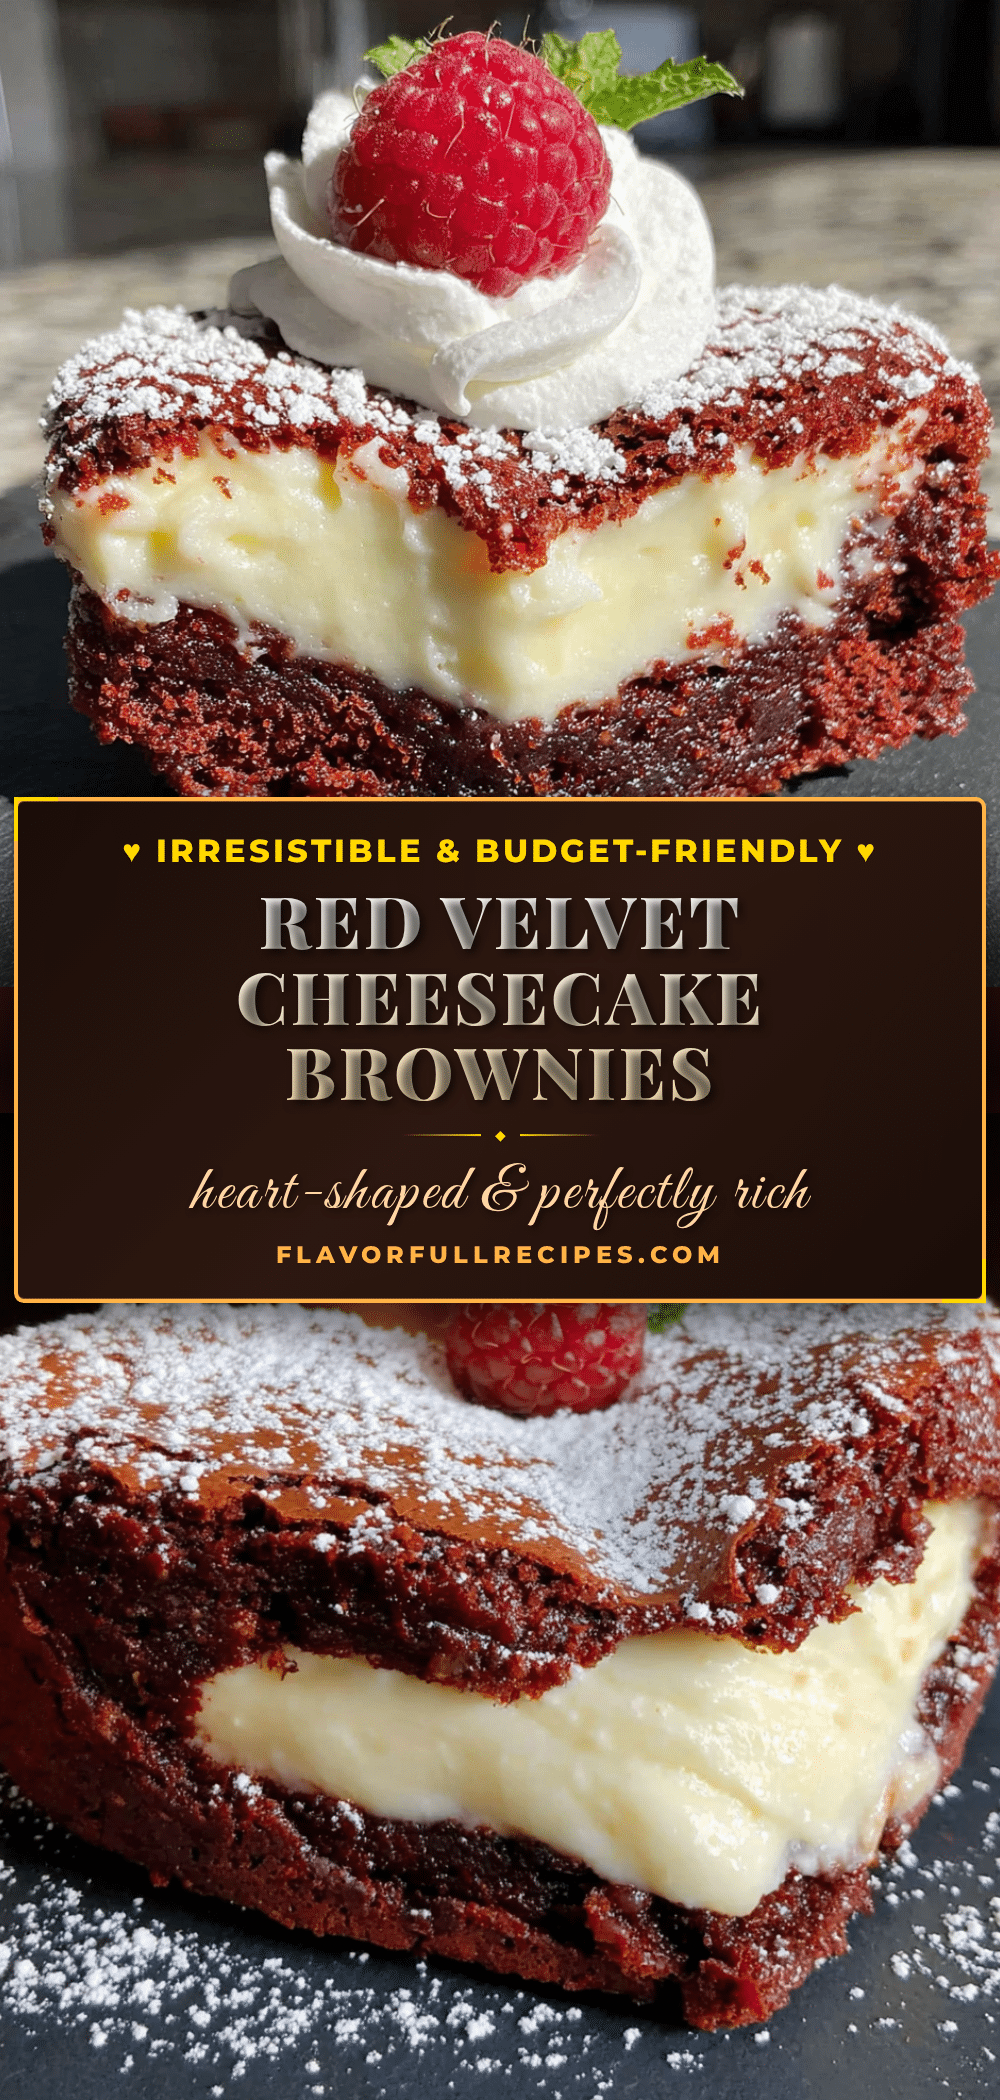
Best Budget Heart-Shaped Red Velvet Cheesecake Brownies
- Total Time: 45 minutes
- Yield: 9 servings 1x
Description
These fudgy red velvet brownies with a creamy cheesecake swirl are a budget-friendly, easy-to-make treat perfect for Valentine’s Day or any occasion. Born from a happy accident, they deliver rich chocolate flavor and a stunning marbled look.
Ingredients
- 1/2 cup (113g) unsalted butter, melted
- 1 cup (200g) granulated sugar
- 2 large eggs, room temperature
- 1 teaspoon vanilla extract
- 1 tablespoon red food coloring (liquid or gel)
- 1 tablespoon unsweetened cocoa powder
- 1 cup (125g) all-purpose flour, spooned and leveled
- 1/4 teaspoon salt
- 8 ounces (226g) cream cheese, softened to room temperature
- 1/4 cup (50g) granulated sugar
- 1 large egg yolk
- 1/2 teaspoon vanilla extract
Instructions
- Preheat your oven to 350°F (175°C). Line an 8×8-inch baking pan with parchment paper, leaving overhang on two sides. Lightly grease the parchment with butter or non-stick spray.
- In a medium bowl, whisk together the melted butter and 1 cup granulated sugar until glossy and smooth. Add the eggs one at a time, whisking well after each addition. Stir in 1 teaspoon vanilla extract and the red food coloring.
- Sift the cocoa powder, all-purpose flour, and salt over the wet ingredients. Fold gently with a spatula until just combined. Do not overmix.
- In a small bowl, beat the softened cream cheese with 1/4 cup granulated sugar until smooth and creamy. Add the egg yolk and 1/2 teaspoon vanilla extract, and beat until fully incorporated.
- Pour about two-thirds of the brownie batter into the prepared pan and spread evenly. Drop spoonfuls of the cheesecake mixture over the batter (about 6-8 dollops). Drizzle the remaining brownie batter on top.
- Use a toothpick or skewer to drag through the batter in a figure-eight pattern, about 5-6 passes, to create a swirl.
- Bake for 28-32 minutes. The edges should look set and slightly pulling away from the sides, but the center should still jiggle slightly when shaken.
- Cool the brownies in the pan on a wire rack for at least 1 hour. Then refrigerate for another 30 minutes before cutting.
- Lift the brownies out of the pan using the parchment handles. Place on a cutting board. Press a heart-shaped cookie cutter firmly into the brownie and wiggle gently to release. Repeat to cut out hearts.
Notes
Chill brownies thoroughly before cutting for clean shapes. For a gluten-free version, use a 1:1 gluten-free flour blend. For dairy-free, use vegan butter and dairy-free cream cheese. Store in an airtight container in the refrigerator for up to 5 days. Freeze for up to 3 months.
- Prep Time: 15 minutes
- Cook Time: 30 minutes
- Category: Dessert
- Cuisine: American
Nutrition
- Serving Size: 1 heart-shaped brown
- Calories: 290
- Sugar: 22
- Sodium: 180
- Fat: 18
- Saturated Fat: 10
- Carbohydrates: 30
- Fiber: 1
- Protein: 5
Keywords: red velvet, cheesecake brownies, heart-shaped, budget-friendly, Valentine's Day, easy dessert