I was standing in line at the hardware store—of all places—when the woman ahead of me turned around and started talking about jello. Not just any jello, mind you. She was describing these little cups of sugar-free gelatin she made every Sunday, packed with protein and topped with yogurt, and she was talking about them with the kind of reverence most people reserve for chocolate cake.
Her name was Carol, and she was probably seventy-five, holding a bag of birdseed and a new garden hose. She told me she’d been making these for her grandchildren for years, but recently started making them for herself after her doctor mentioned she needed more protein. “They taste like a treat,” she said, “but they’re actually good for you.” I scribbled the basics on a receipt from my pocket, and honestly? I’ve been making them ever since.
There’s something about homemade sugar-free protein jello cups that just hits different. They’re wobbly and fun, creamy on top, and they satisfy that late-night craving for something sweet without the sugar crash. Maybe you’ve been there—standing in front of the fridge at ten o’clock, wanting something that feels indulgent but won’t ruin your progress. These are that something.
The first batch I made was a disaster, let me tell you. I used too much gelatin and ended up with what looked like jello-flavored rubber. But Carol’s method—the one she learned from her grandmother, who apparently learned it from a magazine in the 1950s—works like a charm. It’s simple, it’s forgiving, and it turns out a pretty perfect little cup of protein-packed goodness every time.
Why You’ll Love This Recipe
These homemade sugar-free protein jello cups are the kind of recipe that makes you wonder why you haven’t been making them your whole life. They’re ridiculously easy, require zero fancy equipment, and they solve that eternal problem of wanting something sweet but not wanting to undo all your hard work.
- Quick & Easy: From start to fridge in about 10 minutes. Seriously. The hardest part is waiting for them to set.
- Simple Ingredients: You probably have most of this stuff already. No trips to specialty stores, no weird ingredients you’ll never use again.
- Perfect for Meal Prep: Make a batch on Sunday and you’ve got snacks for the whole week. They keep beautifully in the fridge.
- Crowd-Pleaser: I’ve served these to kids, to fitness-minded friends, and to my skeptical mother-in-law. Everyone loves them.
- Unbelievably Delicious: The combo of wobbly, fruity jello and thick, tangy Greek yogurt is honestly next-level. It’s like eating a cloud that’s good for you.
What makes this recipe different from the countless other jello recipes out there? It’s the protein boost. By using a combination of sugar-free jello mix and unflavored gelatin, plus a generous dollop of Greek yogurt on top, you’re getting a snack that actually keeps you full. It’s not just empty sweetness—it’s a legitimately satisfying treat that fits into low-carb, keto, and high-protein lifestyles without trying too hard.
This is comfort food reimagined. Lighter, faster, packed with protein, but with the same soul-soothing satisfaction of eating something sweet and creamy. It’s the kind of snack that makes you close your eyes after that first bite. And honestly? That’s exactly what we all need sometimes.
What Ingredients You Will Need
This recipe uses simple, wholesome ingredients to deliver bold flavor and satisfying texture without the fuss. Most of these are pantry staples or easy to find at any grocery store.
- Sugar-free jello mix (1 box, 0.3 oz or 8.5g): Any flavor you love. Strawberry, lime, orange, cherry—they all work beautifully. I personally love the raspberry for its vibrant color.
- Unflavored gelatin (1 tablespoon, about 7g): This is the secret to getting that perfect, bouncy texture. I use Knox brand, but any unflavored gelatin works. (Adds extra protein without changing the flavor.)
- Boiling water (1 cup, 240ml): This dissolves the gelatin and jello mix completely. Make sure it’s actually boiling, not just hot.
- Cold water (1/2 cup, 120ml): Helps cool the mixture down so you can safely add the yogurt without curdling it.
- Plain Greek yogurt (1 cup, 240g, divided): Use full-fat or 2% for the creamiest texture. I recommend Fage or Chobani for their thick, rich consistency. (The protein content here is no joke—about 20g per cup.)
- Optional: Liquid stevia or monk fruit drops (a few drops): If you like things a bit sweeter, add a drop or two. The jello mix is already sweet, so taste first.
- Optional: Fresh berries (for topping): Adds a pop of color and a fresh burst of flavor. Completely optional but highly recommended.
Ingredient Tips: Look for jello mixes that use natural flavors if you can find them. Some brands have a cleaner ingredient list than others. For the unflavored gelatin, stick with trusted brands like Knox or Great Lakes—they dissolve more reliably. If you’re dairy-free, you can substitute the Greek yogurt with a thick coconut yogurt, just note that the protein content will be lower.
Equipment Needed
You don’t need much for this recipe, which is part of its beauty. Here’s what you’ll need:
- Small mixing bowl: For dissolving the gelatin. A glass bowl works best because it handles the hot water well.
- Whisk: A small whisk is ideal for dissolving the gelatin without lumps. A fork works in a pinch, but a whisk is better.
- Measuring cups and spoons: For accuracy. Jello is forgiving, but gelatin ratios matter.
- 4 to 6 small cups or ramekins (4 oz or 120ml each): I use little glass jars I saved from store-bought desserts. Mason jars work too. Just make sure they’re heat-safe.
- Spoon or small ladle: For pouring the jello mixture into the cups.
- Refrigerator space: You’ll need a flat spot in your fridge where the cups can sit undisturbed for at least 2 hours.
Budget-Friendly Tip: Don’t go buying special jello molds for this. Any small cup, jar, or even a muffin tin lined with plastic wrap will work. I’ve used everything from espresso cups to leftover yogurt containers. It all works.
Preparation Method
Let’s get into the actual making of these protein jello cups. Trust me, it’s easier than you think.
- Bloom the gelatin: In your small mixing bowl, combine the unflavored gelatin with 1/4 cup (60ml) of the cold water. Stir it gently with your whisk and let it sit for about 5 minutes. It’ll look like a thick, weird paste. That’s normal. This step is crucial for getting that perfect wobble.
- Dissolve the jello mix: Pour the boiling water over the bloomed gelatin mixture. Whisk vigorously until both the unflavored gelatin and the jello mix are completely dissolved. This usually takes about 1-2 minutes of steady whisking. You shouldn’t see any granules at the bottom of the bowl.
- Add the remaining cold water: Pour in the remaining 1/4 cup (60ml) of cold water and whisk to combine. This cools the mixture down just enough that you can safely add the yogurt without it separating. Let it sit for 2-3 minutes to cool slightly.
- Whisk in the Greek yogurt: Add 1/2 cup (120g) of the Greek yogurt to the jello mixture. Whisk until it’s completely smooth and uniform in color. You’re looking for a silky, slightly thick liquid. If you see any streaks of white, keep whisking. This is where the magic happens—the yogurt adds creaminess and a massive protein boost.
- Pour into cups: Carefully pour or ladle the mixture into your prepared cups, filling each one about 2/3 full. You want to leave room for the yogurt topping later. If you get bubbles on top, tap the cup gently on the counter to release them.
- Chill until set: Place the cups in the refrigerator on a flat surface. Let them set for at least 2 hours, but overnight is even better. You’ll know they’re ready when the jello is firm to the touch and doesn’t jiggle too much when you move the cup.
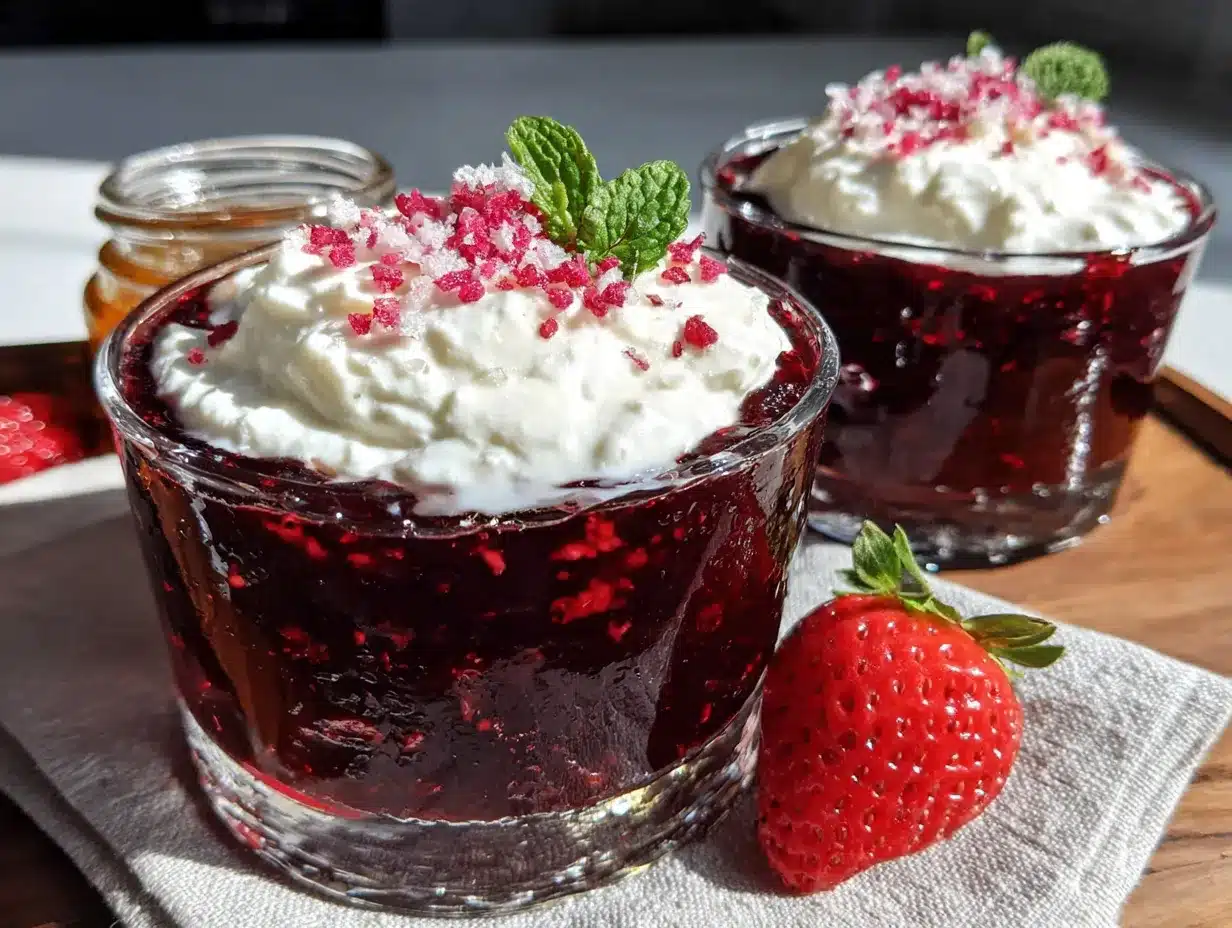
- Add the yogurt topping: Once the jello is fully set, spoon the remaining 1/2 cup (120g) of Greek yogurt on top of each cup. Spread it gently with the back of a spoon. If you’re using fresh berries, arrange a few on top of the yogurt.
- Chill again (optional but recommended): Pop the cups back in the fridge for another 30 minutes to let the yogurt firm up slightly. This makes them easier to serve and gives a beautiful, clean layer.
Pro Tip: If you want a swirled effect instead of two distinct layers, gently fold the yogurt into the jello mixture before pouring. It creates a beautiful marbled look and distributes the creaminess throughout.
Cooking Tips & Techniques
After making these protein jello cups about a dozen times, I’ve learned a few things the hard way. Let me save you the trouble.
Don’t skip the blooming step. I know it seems fussy, but blooming the gelatin in cold water before adding the hot water ensures it dissolves evenly. Skip this, and you might end up with chewy, rubbery bits in your jello. Trust me, I’ve been there.
Temperature matters. If your mixture is too hot when you add the yogurt, the yogurt can curdle and separate. If it’s too cold, the gelatin will start setting before you can pour it. Aim for warm but not hot—think comfortable bathwater temperature.
Whisk like you mean it. The yogurt needs to be fully incorporated into the jello mixture. If you see white streaks, you’re not done whisking. A smooth, even color means a smooth, even texture.
Patience is a virtue. I know you want to eat these immediately. I get it. But if you don’t let them set for the full 2 hours (or longer), they’ll be more like jello soup than jello cups. The wait is worth it.
Flavor layering: Try using a flavored Greek yogurt (like vanilla or strawberry) for the topping instead of plain. It adds another dimension of flavor without any extra effort.
Variations & Adaptations
One of the best things about this recipe is how endlessly adaptable it is. Here are some of my favorite variations:
- Dairy-Free Version: Swap the Greek yogurt for a thick coconut yogurt or a plant-based Greek-style yogurt. The texture will be slightly different, but it’s still delicious. Just note that the protein content will drop significantly.
- Layer It Up: Make two different flavors of jello and layer them in the cups. Let the first layer set for an hour, then pour the second layer on top. It looks gorgeous and tastes amazing.
- Fruit-Infused: Add a few fresh berries or diced fruit to the bottom of each cup before pouring the jello mixture. The fruit adds natural sweetness and a lovely texture contrast.
- Keto-Friendly Boost: Add a tablespoon of MCT oil or coconut oil to the jello mixture before pouring. It adds healthy fats and makes this even more keto-friendly.
- Citrus Zest Twist: Grate a little lemon, lime, or orange zest into the jello mixture for a bright, fresh flavor. It pairs especially well with berry or citrus jello flavors.
- Chocolate Lover’s Version: Use sugar-free chocolate jello mix and top with a dollop of Greek yogurt mixed with a teaspoon of cocoa powder. It’s like a healthy chocolate mousse.
Serving & Storage Suggestions
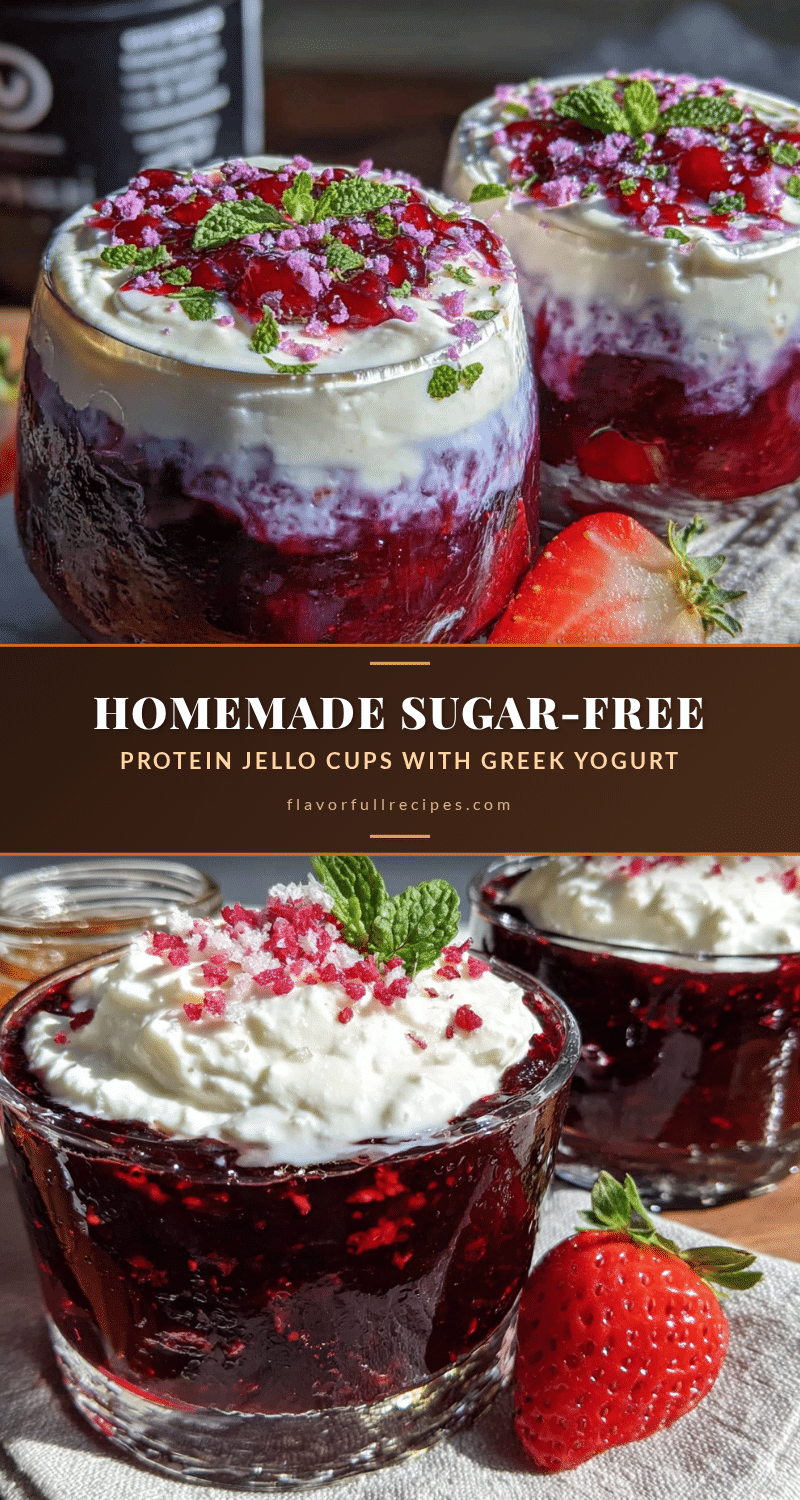
These protein jello cups are best served cold, straight from the fridge. The contrast between the firm, wobbly jello and the thick, creamy yogurt is part of the magic.
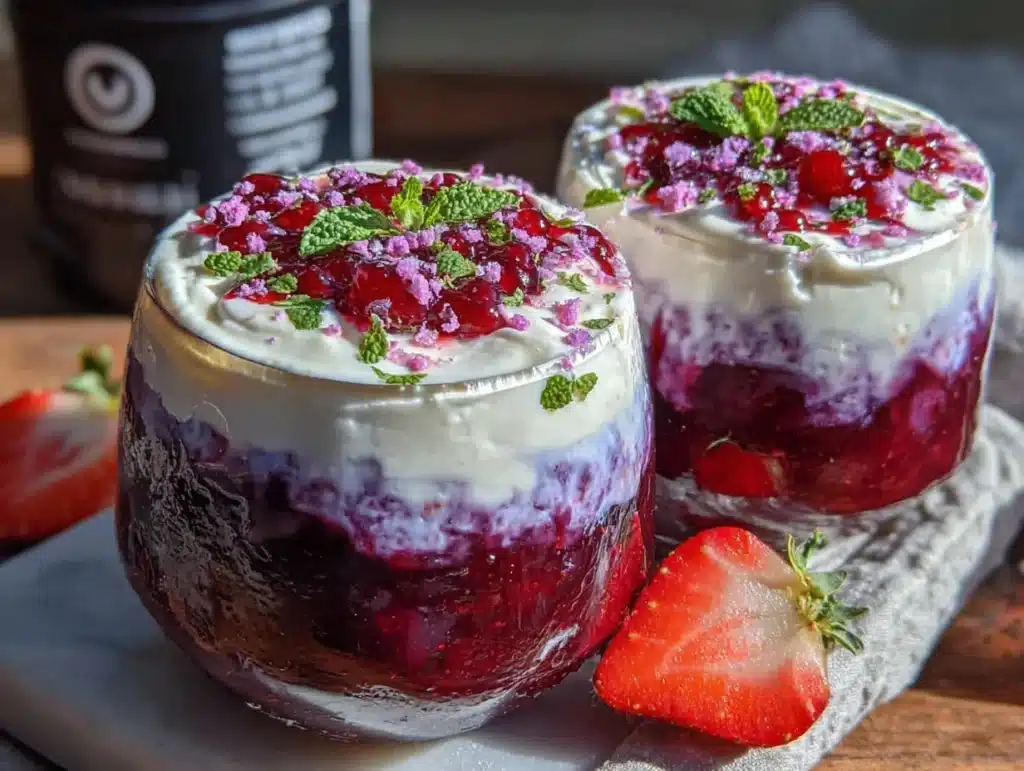
Presentation Ideas: Serve them in clear glass cups so you can see the beautiful layers. Top with a few fresh berries, a sprinkle of shredded coconut, or a tiny mint leaf for a pop of color. They look fancy enough for a dinner party but easy enough for a Tuesday afternoon snack.
Storage: Keep these covered in the refrigerator for up to 5 days. I use little silicone lids on my glass jars, but plastic wrap works just fine. The texture stays perfect for days, though the yogurt topping might release a little liquid over time—just stir it back in before eating.
Freezing: I don’t recommend freezing these. The gelatin structure breaks down when frozen and thawed, leaving you with a watery, grainy mess. Stick to the fridge for these.
Flavor Development: Honestly, these taste even better on day two. The flavors meld together, and the texture becomes even more consistent. So if you can wait, make them a day ahead.
Nutritional Information & Benefits
Here’s the breakdown for one serving (based on 4 servings per batch):
- Calories: Approximately 85
- Protein: 12g
- Fat: 3g (from the Greek yogurt)
- Carbohydrates: 4g (net carbs about 3g after fiber)
- Sugar: 2g (from the yogurt, no added sugar)
Health Benefits: These little cups are packed with protein from both the Greek yogurt and the gelatin. Protein helps keep you full, supports muscle recovery, and stabilizes blood sugar levels. The sugar-free jello mix means you get a sweet treat without the sugar spike. Greek yogurt also provides probiotics for gut health, calcium for strong bones, and vitamin B12 for energy.
Dietary Considerations: This recipe is naturally gluten-free, low-carb, keto-friendly, and high-protein. It’s suitable for most low-sugar and diabetic-friendly diets. If you’re dairy-free, use a plant-based yogurt alternative.
Conclusion
These homemade sugar-free protein jello cups with Greek yogurt are proof that you don’t have to sacrifice flavor for nutrition. They’re quick, easy, and endlessly customizable. Whether you’re looking for a post-workout snack, a healthy dessert, or just something to satisfy that sweet tooth without the guilt, these little cups deliver.
I love that I can whip up a batch in ten minutes and have snacks for the whole week. I love that they actually keep me full. And I really love that they taste like a treat—because honestly, life is too short for boring snacks.
I’d love to hear how yours turn out! Drop a comment below and let me know what flavor combinations you tried. Did you add berries? Try the chocolate version? Made them for your kids? Share your creations and tag me on social media—I love seeing your kitchen adventures.
Go ahead, make a batch tonight. Your future self will thank you.
Frequently Asked Questions
Can I use regular jello mix instead of sugar-free?
Yes, absolutely. Just be aware that regular jello mix contains sugar, which will increase the carbohydrate and calorie content. The texture will be the same, but the nutritional profile will change significantly.
Why did my jello turn out rubbery?
This usually happens when you use too much gelatin or don’t dissolve it properly. Make sure you’re measuring accurately and whisking until everything is fully dissolved. Also, avoid boiling the mixture after adding the gelatin—it can weaken the structure.
Can I make these without the yogurt mixed in?
Sure! You can make the jello cups with just the sugar-free jello and unflavored gelatin, then top with yogurt after they set. The texture will be more like traditional jello, and the yogurt will sit on top as a separate layer.
How long do these keep in the fridge?
They’ll stay fresh for up to 5 days when stored covered in the refrigerator. The texture is best within the first 3 days, but they’re still good after that. Just keep them covered to prevent them from absorbing other fridge odors.
Can I use flavored Greek yogurt instead of plain?
Absolutely! Vanilla, strawberry, or even lemon Greek yogurt work beautifully. Just be aware that flavored yogurts often contain added sugar, so check the label if you’re watching your sugar intake. The flavor combinations are endless!
Pin This Recipe!
Homemade Sugar-Free Protein Jello Cups with Greek Yogurt
- Total Time: 2 hours 10 minutes (including setting time)
- Yield: 4 servings 1x
Description
These homemade sugar-free protein jello cups are quick, easy, and packed with protein. They satisfy that late-night craving for something sweet without the sugar crash, and they’re perfect for meal prep.
Ingredients
- 1 box (0.3 oz or 8.5g) sugar-free jello mix (any flavor)
- 1 tablespoon (about 7g) unflavored gelatin
- 1 cup (240ml) boiling water
- 1/2 cup (120ml) cold water, divided
- 1 cup (240g) plain Greek yogurt, divided
- Optional: a few drops liquid stevia or monk fruit drops
- Optional: fresh berries for topping
Instructions
- Bloom the gelatin: In a small mixing bowl, combine the unflavored gelatin with 1/4 cup (60ml) of the cold water. Stir gently and let sit for about 5 minutes until it forms a thick paste.
- Dissolve the jello mix: Pour the boiling water over the bloomed gelatin mixture. Whisk vigorously until both the unflavored gelatin and jello mix are completely dissolved, about 1-2 minutes.
- Add the remaining cold water: Pour in the remaining 1/4 cup (60ml) of cold water and whisk to combine. Let sit for 2-3 minutes to cool slightly.
- Whisk in the Greek yogurt: Add 1/2 cup (120g) of the Greek yogurt to the jello mixture. Whisk until completely smooth and uniform in color.
- Pour into cups: Carefully pour or ladle the mixture into 4 to 6 small cups or ramekins (4 oz or 120ml each), filling each about 2/3 full. Tap gently to release any bubbles.
- Chill until set: Place cups in the refrigerator on a flat surface and let set for at least 2 hours, or overnight.
- Add the yogurt topping: Once jello is fully set, spoon the remaining 1/2 cup (120g) of Greek yogurt on top of each cup. Spread gently with the back of a spoon. Add fresh berries if desired.
- Chill again (optional): Return cups to the fridge for another 30 minutes to let the yogurt firm up slightly.
Notes
Don’t skip the blooming step for the gelatin. Temperature matters: the mixture should be warm but not hot when adding yogurt to prevent curdling. Whisk thoroughly to avoid white streaks. Patience is key—let the jello set for at least 2 hours. For a swirled effect, gently fold the yogurt into the jello mixture before pouring. These keep covered in the fridge for up to 5 days and taste even better on day two.
- Prep Time: 10 minutes
- Cook Time: 0 minutes
- Category: Dessert
- Cuisine: American
Nutrition
- Serving Size: 1 cup (about 4 oz)
- Calories: 85
- Sugar: 2
- Sodium: 40
- Fat: 3
- Saturated Fat: 2
- Carbohydrates: 4
- Fiber: 1
- Protein: 12
Keywords: sugar-free, protein jello, Greek yogurt, healthy dessert, low-carb, keto, high-protein, meal prep