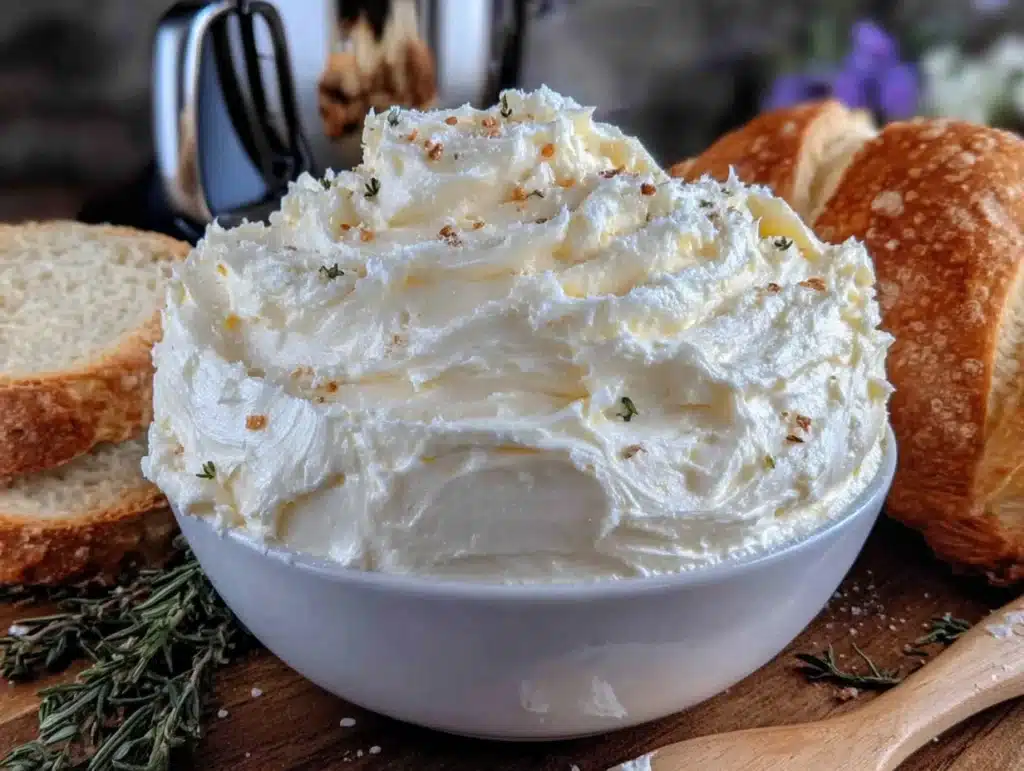
My friend Jenna asked why I couldn’t just skip the culturing step and churn cream straight into butter. I started to explain why that wouldn’t work—then stopped. Honestly, I had no good reason. I’d been making butter for years, following the same method my grandmother used, and I’d never questioned it. I just assumed cultured butter was something you bought from fancy cheese shops, not something you made on a random Tuesday afternoon.
But Jenna was right. There was no rule saying I couldn’t try. So I poured heavy cream into a jar, added a splash of buttermilk, and let it sit on my counter for 24 hours. The next day, I shook that jar until my arm ached, and what came out was the most ridiculously creamy, tangy butter I’d ever tasted. I stood there in my kitchen, butter smeared on my fingers, laughing at myself. All those years of buying expensive cultured butter, and I could have been making it at home for pennies.
That moment changed how I think about homemade cultured butter. It’s not complicated or fussy. It’s just cream, a little patience, and the willingness to be wrong. Maybe you’ve been there—sticking to a method just because that’s how you were taught, never stopping to ask if there’s a better way. This recipe is that better way. It’s creamy, it’s simple, and it tastes like something you’d pay way too much for at a farmers’ market. Except you made it yourself, which somehow makes it taste even better.
Why You’ll Love This Recipe
Let me tell you, this homemade cultured butter is a game-changer. I’ve tested this recipe at least a dozen times, tweaking the fermentation time and cream temperature, and I can honestly say it’s foolproof. Here’s why you’ll keep coming back to it:
- Quick & Easy: Active prep time is about 10 minutes. The culturing happens while you sleep, and the churning takes less than 5 minutes. You can have fresh butter in under 45 minutes of actual work.
- Simple Ingredients: You need exactly two ingredients—heavy cream and cultured buttermilk. No weird additives, no preservatives, nothing you can’t pronounce.
- Perfect for Cozy Evenings: There’s something deeply satisfying about spreading butter you made yourself on a warm slice of bread on a cold night. It’s comfort food at its most basic and most beautiful.
- Crowd-Pleaser: I’ve brought this butter to dinner parties and watched people go quiet after the first bite. It’s the kind of thing that makes everyone feel fancy without any effort.
- Unbelievably Delicious: The tang from the culturing process adds a complexity that regular butter just doesn’t have. It’s richer, creamier, and somehow more buttery than butter should be.
What makes this recipe different from every other butter recipe you’ve seen? It’s the culturing process. Most homemade butter recipes skip this step entirely, but letting the cream ferment for 12 to 24 hours develops those beautiful, tangy notes that make cultured butter so special. It’s the same technique used by artisan dairies, except you’re doing it in your own kitchen with zero special equipment.
This isn’t just butter. It’s the kind of butter that makes you close your eyes after the first bite. It’s comfort food reimagined—simpler, more rewarding, and packed with the same soul-soothing satisfaction as your favorite childhood meal. Perfect for impressing guests without stress, or turning a simple piece of toast into something truly memorable.
What Ingredients You Will Need
This recipe uses just two simple ingredients to deliver that rich, tangy flavor and silky texture. The magic happens through fermentation, not through a long list of fancy components. Here’s what you’ll need:
For the Cultured Butter
- Heavy cream, 2 cups (480 ml), preferably not ultra-pasteurized (I recommend Organic Valley or Kalona SuperNatural for best results—they culture beautifully)
- Cultured buttermilk, 2 tablespoons (30 ml), full-fat and active culture (look for Lifeway or Maple Hill—avoid ultra-pasteurized buttermilk if possible)
- Salt (optional), 1/2 teaspoon flaky sea salt like Maldon or Fleur de Sel (adds a lovely crunch and enhances the tanginess)
Ingredient Selection Tips
Let me share what I’ve learned from making this recipe more times than I can count. The cream matters more than you’d think. Ultra-pasteurized cream has been heated to very high temperatures, which kills off most of the beneficial bacteria that help with culturing. It’ll still work, but the fermentation will be slower and the flavor less complex. If you can find cream that’s simply pasteurized, grab that instead.
For the buttermilk, make sure it’s live and active. Check the label for phrases like “contains live cultures” or “active probiotic cultures.” The bacteria in the buttermilk is what kickstarts the fermentation, so you want it to be alive and hungry. I’ve had great luck with store-brand cultured buttermilk from Whole Foods and local dairies.
Salt is completely optional. Unsalted cultured butter has a cleaner, more pronounced tang that’s wonderful for baking or spreading on delicate pastries. Salted butter is perfect for toast, compound butters, or finishing vegetables. I keep both versions in my fridge depending on what I’m making.
Substitution Guidance
- If you can’t find cultured buttermilk, use 2 tablespoons of plain whole-milk yogurt with live cultures. The tang will be slightly milder, but it still works beautifully.
- For a dairy-free option, this recipe won’t work with plant-based creams. However, you can make a coconut-based cultured butter using full-fat coconut cream and dairy-free yogurt cultures.
- If you only have ultra-pasteurized cream, let it culture for 36 to 48 hours instead of 24. The fermentation will be slower, but the flavor will still develop.
Equipment Needed
Here’s the best part—you probably already own everything you need. No fancy churns or butter paddles required. Just a few basic kitchen tools:
- Glass jar (1 quart or 1 liter), with a tight-fitting lid (a mason jar works perfectly)
- Fine-mesh strainer or cheesecloth for draining the buttermilk
- Mixing bowl, medium size
- Wooden spoon or silicone spatula for pressing the butter
- Cold water for washing the butter
- Parchment paper or wax paper for wrapping the finished butter
- Measuring cups and spoons
If you don’t have a glass jar, any container with a tight seal will work. I’ve used a plastic deli container in a pinch, though glass is better because it doesn’t retain odors. For the straining, a clean kitchen towel works just as well as cheesecloth—just make sure it’s lint-free.
One tip I learned the hard way: don’t use a metal bowl for washing the butter. The cold water makes the metal uncomfortably cold to hold, and there’s something about the reaction between metal and butter that can leave a slight metallic taste. Stick with glass or ceramic.
Preparation Method
Making homemade cultured butter is surprisingly simple, but there are a few key moments where paying attention makes all the difference. Let me walk you through it step by step.
Step 1: Culture the Cream
Pour the 2 cups of heavy cream into your clean glass jar. Add the 2 tablespoons of cultured buttermilk and stir gently with a clean spoon to combine. Don’t shake it—you want to mix without incorporating too much air. Screw the lid on loosely (the cream needs to breathe a little) and let it sit at room temperature for 12 to 24 hours.
Here’s what to look for: the cream should thicken slightly and develop a gentle tangy smell. It’ll look a bit like very thick yogurt or crème fraîche. If it separates or develops any mold, toss it and start over. That’s rare, but it can happen if your cream was old or your jar wasn’t perfectly clean.
The longer you let it culture, the tangier it gets. I prefer 24 hours for a pronounced tang, but 12 hours gives a milder flavor that’s closer to regular butter. Trust your nose—when it smells pleasantly sour, it’s ready.
Step 2: Chill the Cultured Cream
Once your cream has cultured, pop it in the refrigerator for at least 2 hours, or overnight. Cold cream churns into butter much faster than warm cream. I’ve made the mistake of churning at room temperature, and it took forever to separate. Cold cream is the secret to quick, easy butter.
Step 3: Churn the Butter
Pour the cold cultured cream into your mixing bowl. Now comes the fun part—you can churn it by hand or use a stand mixer. For hand churning, put the cream in a jar with a tight lid and shake vigorously. It takes about 5 to 10 minutes of steady shaking. For the stand mixer, use the whisk attachment on medium speed and let it run for 3 to 5 minutes.
Watch carefully. First, the cream will whip into soft peaks, then stiff peaks, then it’ll start to look grainy. Suddenly, the butter solids will separate from the liquid buttermilk. You’ll hear the sound change—it goes from a smooth whir to a sloshing, splattering noise. That’s the moment of truth.
When you see yellow butter solids floating in a pool of white liquid, you’re done. Don’t over-churn, or the butter can get greasy.
Step 4: Drain the Buttermilk
Set your fine-mesh strainer over a bowl and pour the contents through it. The liquid that drains out is real, fresh buttermilk—save it! It’s amazing for pancakes, biscuits, or even drinking. I always save mine and use it to culture my next batch of butter.
Let the butter drain for a minute or two, then transfer the butter solids back to your mixing bowl.
Step 5: Wash the Butter
This step is crucial, and it’s where most homemade butter goes wrong. Pour very cold water over the butter and press it with your wooden spoon or spatula. The water will turn cloudy as it washes away residual buttermilk. Pour off the cloudy water and repeat 3 to 5 times, until the water runs mostly clear.
Why does this matter? Any leftover buttermilk will cause your butter to spoil faster. Well-washed butter keeps for weeks in the fridge and months in the freezer. Skippy washing means your butter might go rancid in a week. Trust me, I learned this the hard way.
Step 6: Salt and Shape
If you’re adding salt, sprinkle it over the washed butter and work it in with your spatula. Taste a tiny bit and adjust if needed. I usually add about 1/2 teaspoon of flaky sea salt for 2 cups of cream.
Now shape your butter. You can roll it into a log using parchment paper, press it into a small ramekin, or just form it into a rough block. I like rolling it into a log because it’s easy to slice off pats for serving.
Cooking Tips & Techniques
I’ve made this recipe at least thirty times, and I’ve messed it up in almost every way possible. Here’s what I’ve learned so you don’t have to repeat my mistakes.
Temperature is everything. If your cream is too warm, the butter will be soft and greasy instead of firm and creamy. If it’s too cold, the culturing process slows down. I aim for cream that’s been at room temperature for about an hour before culturing, then chilled thoroughly before churning. That sweet spot makes all the difference.
Don’t skip the washing step. I know it’s tempting to just drain the buttermilk and call it done. But that leftover buttermilk will ferment further in the fridge, making your butter taste sour and funky after a few days. Wash it thoroughly, and your butter will stay fresh for up to three weeks.
Save the buttermilk! The liquid you drain off is liquid gold. It’s packed with live cultures and has a more complex flavor than store-bought buttermilk. Use it to make pancakes, salad dressings, or even to culture your next batch of cream. I always keep a jar in my fridge for baking.
Let the butter rest before serving. Freshly made butter is delicious, but it gets even better after sitting in the fridge for a day. The flavors meld and mellow, and the texture firms up perfectly. Make your butter a day ahead if you’re serving it to guests.
One mistake I still make—over-churning. When you’re using a stand mixer, it’s easy to walk away and let it run too long. The butter can get overworked and start to melt, turning greasy. Set a timer for 4 minutes and check it. You can always churn a little more, but you can’t un-churn overworked butter.
Variations & Adaptations
Once you’ve mastered the basic recipe, the possibilities are endless. Here are some of my favorite variations:
Garlic & Herb Compound Butter
After washing the butter, mix in 2 minced garlic cloves, 2 tablespoons of finely chopped fresh parsley, and 1 tablespoon of chopped chives. This is incredible on steak, roasted vegetables, or warm crusty bread. I make a batch every time I grill.
Honey Cinnamon Butter
Add 2 tablespoons of honey and 1/2 teaspoon of ground cinnamon to the finished butter. This sweet version is perfect for pancakes, waffles, or spreading on toast for a cozy breakfast. It’s like a warm hug on a cold morning.
Smoked Salt Butter
Replace the flaky sea salt with smoked salt for a deeply savory, almost bacon-like flavor. This is my favorite compound butter for finishing grilled meats or roasted potatoes. The smokiness pairs beautifully with the tangy cultured notes.
Dairy-Free Cultured Butter
Use full-fat coconut cream instead of heavy cream and dairy-free yogurt with live cultures instead of buttermilk. The process is identical, though the flavor is distinctly coconutty. It’s not the same as dairy butter, but it’s genuinely delicious in its own right.
Spiced Cultured Butter
Mix in 1/2 teaspoon of smoked paprika, 1/4 teaspoon of cayenne, and a pinch of black pepper after washing. This spicy version is amazing on cornbread or stirred into grits. It adds warmth and depth to simple dishes.
Serving & Storage Suggestions
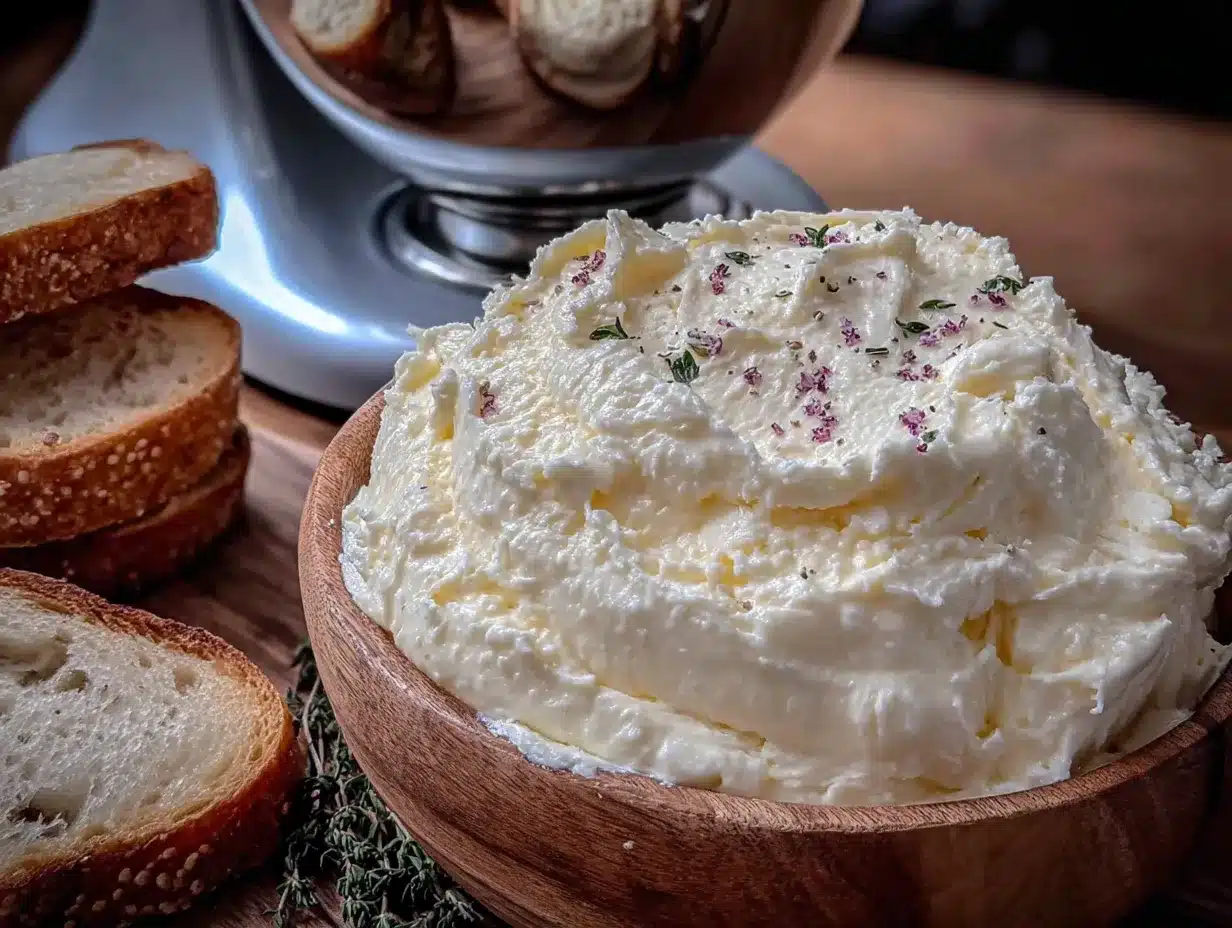
This butter shines brightest when served simply. Let it come to room temperature for about 30 minutes before serving so it spreads easily. The flavors open up beautifully at room temperature, revealing all those complex, tangy notes.
What to serve it with:
- Fresh, crusty bread or warm baguette slices
- Flaky sea salt sprinkled on top for texture
- Drizzled with honey for a sweet-savory treat
- Spread on pancakes, waffles, or French toast
- Melted over steamed vegetables or roasted potatoes
- Smeared on grilled corn on the cob
Storage: Wrap the butter tightly in parchment paper or wax paper, then place it in an airtight container. It will keep in the refrigerator for up to 3 weeks. For longer storage, wrap it well and freeze for up to 6 months. I always keep a log in the freezer and just slice off what I need.
Reheating: If your butter has been frozen, thaw it in the refrigerator overnight. Don’t microwave it—that will melt the butter unevenly and ruin the texture. Let it come to room temperature naturally.
One thing I love about this butter is how the flavor develops over time. After a week in the fridge, the tanginess deepens and becomes more pronounced. It’s like a fine cheese in that way—it gets better with age. Just make sure your butter is well-washed to prevent spoilage.
Nutritional Information & Benefits
Homemade cultured butter isn’t just delicious—it has some surprising benefits compared to commercial butter. Here’s what you need to know:
| Nutrient | Per 1 tablespoon (14g) |
|---|---|
| Calories | 102 |
| Total Fat | 11.5g |
| Saturated Fat | 7.3g |
| Cholesterol | 31mg |
| Sodium (unsalted) | 2mg |
| Vitamin A | 11% DV |
The culturing process introduces beneficial probiotics that can support gut health. While the heat from cooking kills most live cultures, eating the butter raw on bread or vegetables delivers those good bacteria directly to your digestive system. It’s a small but meaningful boost.
Butter from grass-fed cows is higher in conjugated linoleic acid (CLA), which has been linked to improved metabolism and reduced inflammation. If you can find grass-fed cream, it’s worth the extra cost for both flavor and nutrition.
Dietary considerations: This butter is naturally gluten-free, low-carb, and keto-friendly. It contains dairy and is not suitable for vegan diets unless made with coconut cream. The salted version contains sodium, so adjust for low-sodium diets.
Conclusion
Honestly, I never thought I’d be the person who makes their own butter. It sounded like something people did in pioneer times or on reality cooking shows. But after that first batch Jenna inspired, I was hooked. There’s something deeply satisfying about taking two simple ingredients and transforming them into something so much greater than the sum of their parts.
This homemade cultured butter is creamy, tangy, and incredibly easy to make. It’s the kind of recipe that makes you feel like a kitchen wizard, even though it’s almost embarrassingly simple. I hope you’ll try it and make it your own—add your favorite herbs, play with different salts, or just enjoy it plain on a warm piece of bread.
I’d love to hear how it turns out for you. Did you try a variation? Did you save the buttermilk for pancakes? Drop a comment below and let me know. And if you’re looking for more simple, rewarding kitchen projects, check out my easy sourdough starter or my no-knead crusty bread—they pair perfectly with a pat of this butter.
Happy culturing, friends. Your toast is about to get a whole lot better.
Frequently Asked Questions
Can I use store-bought buttermilk instead of cultured buttermilk?
Yes, absolutely. Store-bought cultured buttermilk works perfectly. Just make sure it contains live active cultures—check the label. The flavor might be slightly milder, but it will still produce delicious cultured butter.
How long does homemade cultured butter last?
Properly washed and stored, it keeps for up to 3 weeks in the refrigerator and up to 6 months in the freezer. The key is washing out all the buttermilk—that’s what causes spoilage. I always label mine with the date so I know when it was made.
Can I make this without a stand mixer?
Definitely! You can shake it in a jar by hand—it takes about 5 to 10 minutes of steady shaking. Or use a hand mixer with the whisk attachment. I’ve even made it by whisking vigorously in a bowl, though that’s a serious arm workout.
Why did my butter turn out greasy?
That usually means you over-churned it or the cream was too warm. The butter solids can break down and release their fat if they’re worked too hard or too long. Next time, chill the cream thoroughly and stop churning as soon as you see the butter separate from the buttermilk.
Can I use this butter for baking?
Absolutely. Cultured butter works beautifully in baking—it adds a subtle tang that enhances cookies, cakes, and pastries. Just keep in mind that if you’re using salted butter, you may need to reduce the salt in your recipe slightly. I love using it in flaky buttermilk biscuits for an extra layer of flavor.
Pin This Recipe!
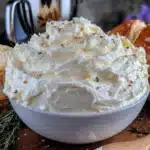
Homemade Cultured Butter: Easy Creamy Recipe in 45 Minutes
- Total Time: 45 minutes (plus 12-24 hours culturing and 2 hours chilling)
- Yield: 1 cup (about 16 tablespoons) 1x
Description
Learn how to make creamy, tangy cultured butter at home with just two ingredients and minimal effort. This simple recipe transforms heavy cream and buttermilk into a delicious, artisan-quality butter in under 45 minutes of active time.
Ingredients
- 2 cups (480 ml) heavy cream, preferably not ultra-pasteurized
- 2 tablespoons (30 ml) cultured buttermilk, full-fat and active culture
- 1/2 teaspoon flaky sea salt (optional)
Instructions
- Pour the heavy cream into a clean glass jar. Add the cultured buttermilk and stir gently to combine. Screw the lid on loosely and let it sit at room temperature for 12 to 24 hours until thickened and tangy.
- Chill the cultured cream in the refrigerator for at least 2 hours or overnight.
- Pour the cold cultured cream into a mixing bowl. Churn by shaking in a jar for 5-10 minutes or using a stand mixer with whisk attachment on medium speed for 3-5 minutes until butter solids separate from buttermilk.
- Drain the buttermilk through a fine-mesh strainer set over a bowl. Reserve the buttermilk for another use.
- Wash the butter by pouring very cold water over it and pressing with a wooden spoon or spatula. Repeat 3-5 times until the water runs mostly clear.
- If using salt, sprinkle it over the washed butter and work it in with a spatula. Shape the butter into a log using parchment paper or press into a ramekin.
Notes
Temperature is key: cream should be at room temperature for about an hour before culturing, then chilled thoroughly before churning. Don’t skip the washing step—it prevents spoilage. Save the drained buttermilk for pancakes or baking. Let the butter rest in the fridge for a day before serving for best flavor.
- Prep Time: 10 minutes
- Cook Time: 5 minutes
- Category: Condiment
- Cuisine: American
Nutrition
- Serving Size: 1 tablespoon (14g)
- Calories: 102
- Sodium: 2
- Fat: 11.5
- Saturated Fat: 7.3
Keywords: homemade butter, cultured butter, easy butter recipe, DIY butter, fermented butter, tangy butter, artisan butter