
The power went out halfway through my daughter’s first-grade holiday party planning session. There I was, covered in flour, with a bowl of half-mixed sugar cookie dough that was never going to bake in time. My neighbor across the hall, a grandmother from the Philippines named Mrs. Reyes, knocked on my door to check if we had flashlights. She saw the mess on my counter and just laughed. Then she walked back to her apartment and returned with a box of crispy rice cereal and a bag of marshmallows that were slightly squished on one side.
“You’re overthinking it,” she said, gesturing at my dough. “Kids don’t care about fancy cookies. They want something sweet they can help make.” She showed me how to melt the butter low and slow so the marshmallows turned into liquid gold, then fold in the cereal until every piece was coated. I added a splash of vanilla extract and some rainbow sprinkles, and suddenly we had these chewy, buttery bars that smelled like a bakery. The kids devoured them in about four minutes flat. Honestly, I’ve never looked back.
These kid-approved sugar cookie Rice Krispie treats with holiday sprinkles are exactly what you need when life throws you a curveball—or when you just want to make something that tastes like childhood without spending hours in the kitchen. The sugar cookie flavor comes from a simple trick: extra butter and a pinch of almond extract that makes everything taste like a soft-baked cookie. And the sprinkles? They turn an ordinary bar into a celebration. Maybe you’ve been there—staring at a recipe that looks too complicated, wondering if there’s an easier way. This is that easier way, and it works every single time.
Why You’ll Love This Recipe
I’ve tested this recipe at least a dozen times across different kitchens, different stovetops, and different levels of kid chaos. Here’s what I’ve learned: these bars are practically foolproof, and they solve the eternal problem of feeding a crowd on a budget. Let me break down why they’ve become my go-to for school events, playdates, and holiday gatherings.
- Quick & Easy: From start to finish, you’re looking at about 15 minutes of active work. The hardest part is waiting for them to cool before cutting.
- Simple Ingredients: Butter, marshmallows, crispy rice cereal, vanilla extract, almond extract, and sprinkles. That’s it. No obscure baking supplies or expensive add-ins.
- Perfect for Holidays and School Events: These bars travel beautifully, don’t crumble in a lunchbox, and look festive with just a handful of sprinkles. They’re a hit at classroom parties, cookie exchanges, and family movie nights.
- Crowd-Pleaser: I’ve served these to toddlers, teenagers, grandparents, and guests who claim they don’t eat sweets. Every single person has asked for the recipe. The sugar cookie flavor is subtle enough for picky eaters but distinct enough to feel special.
- Unbelievably Delicious: The texture is what gets people every time. They’re chewy but not sticky, buttery but not greasy, with a slight crunch from the cereal that makes each bite satisfying. The almond extract is the secret weapon—it adds that warm, bakery-style flavor that makes you close your eyes after the first bite.
What makes this different from every other crispy rice treat recipe out there? It’s the ratio. Most recipes use too much cereal, which makes the bars dry and crumbly. I use a little less cereal and a little more butter, which gives you that dense, chewy texture that reminds you of a sugar cookie. Plus, the almond extract is non-negotiable. Trust me on this one.
What Ingredients You Will Need
This recipe relies on pantry staples that you probably already have, but a few specific choices make all the difference. Here’s what you’ll need and why each ingredient matters.
- Unsalted butter, 6 tablespoons (85 grams) — I use unsalted so I can control the salt level. Salted butter works in a pinch, but skip the extra salt in the recipe. I prefer Land O’Lakes or Kerrygold for the richest flavor.
- Mini marshmallows, 10 ounces (283 grams) — Mini marshmallows melt faster and more evenly than the big ones. If you only have large marshmallows, cut them into quarters with kitchen scissors. Jet-Puffed is my go-to brand because they melt into a smooth, silky texture without turning grainy.
- Crispy rice cereal, 5 cups (150 grams) — I use name-brand Rice Krispies for the best crunch. Generic brands tend to be softer and can make the bars mushy. If you want extra crunch, toast the cereal in a dry skillet over medium heat for 2 minutes before adding it to the marshmallow mixture.
- Vanilla extract, 1 teaspoon (5 ml) — Pure vanilla extract gives the bars that warm, familiar flavor. Imitation vanilla works, but the flavor is noticeably less rich. I always reach for Nielsen-Massey or Simply Organic.
- Almond extract, ½ teaspoon (2.5 ml) — This is the magic ingredient. It adds that distinct sugar cookie flavor that makes these bars taste like you spent hours baking. Don’t skip it, and don’t use more than called for—almond extract is potent and can quickly become overpowering.
- Holiday sprinkles, ¼ cup (40 grams) plus extra for topping — Use any mix of red, green, white, and gold sprinkles. I prefer jimmies (the long, skinny ones) because they hold their color and don’t bleed into the marshmallow mixture. Avoid nonpareils (the tiny round ones) as they tend to melt and create a streaky effect.
- Kosher salt, ¼ teaspoon — A small pinch balances the sweetness and enhances the buttery flavor. If you’re using salted butter, omit this.
For a dairy-free version, use vegan butter and dairy-free marshmallows. Dandies brand makes excellent marshmallows that melt just like the real thing. The texture will be slightly less chewy, but still delicious.
Equipment Needed
You don’t need fancy equipment for this recipe, which is part of the appeal. Here’s what I use and a few tips I’ve picked up along the way.
- Large saucepan or Dutch oven — A 4-quart pot works perfectly. The sides need to be tall enough to stir the cereal without it spilling over. I use my Le Creuset Dutch oven because it distributes heat evenly, but any heavy-bottomed pot does the job.
- Silicone spatula — This is non-negotiable. A silicone spatula won’t scratch your pot and makes folding the cereal into the marshmallow mixture much easier. I’ve ruined two wooden spoons trying to stir hot marshmallows. Learn from my mistakes.
- 9×13-inch baking dish — A metal pan works best because it cools quickly and helps the bars set faster. Glass or ceramic dishes retain heat longer, which can make the bars stick. If you only have glass, let the bars cool completely before cutting.
- Parchment paper — Line your baking dish with parchment paper, leaving an overhang on two sides. This creates handles that let you lift the entire block of treats out of the pan for easy cutting. I’ve made these without parchment and spent 20 minutes scraping marshmallow off the sides of the pan. Never again.
- Sharp knife or bench scraper — A sharp knife gives you clean edges. A bench scraper works even better because it cuts through the bars without dragging the marshmallow. Spray the blade with nonstick spray before each cut for the cleanest slices.
- Measuring cups and spoons — Accurate measurements matter here. Too much cereal and the bars are dry. Too little and they’re sticky puddles. Use dry measuring cups for the cereal and liquid measuring cups for the extracts.
If you’re on a budget, skip the Dutch oven and use any large pot you have. The silicone spatula is worth the $5 investment, though. Your future self will thank you.
Preparation Method
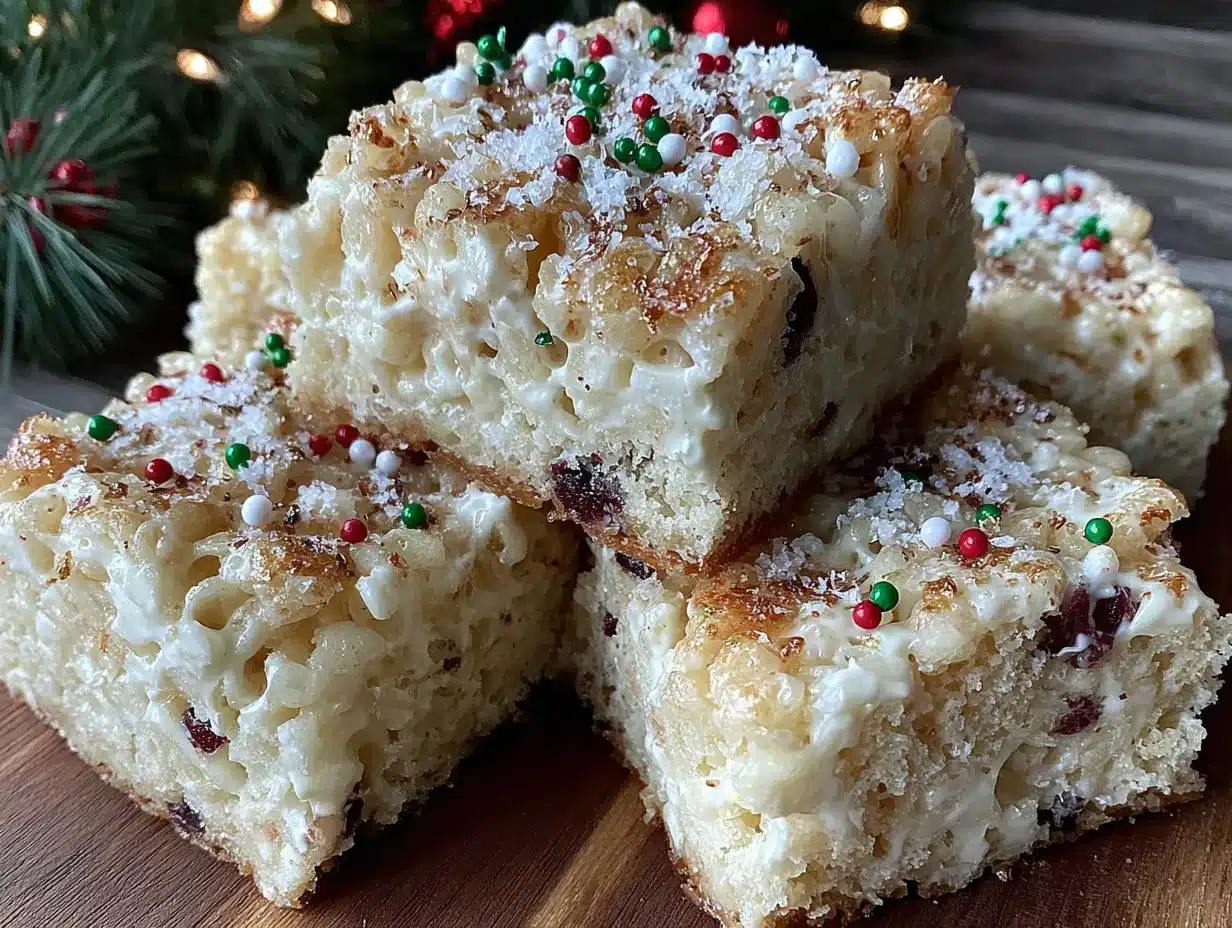
This is where the magic happens. Follow these steps carefully, and you’ll have perfect bars every time. I’ve included time estimates and sensory cues so you know exactly what to look for.
- Prepare your baking dish — Line a 9×13-inch baking dish with parchment paper, leaving a 2-inch overhang on the long sides. Lightly spray the parchment with nonstick cooking spray. This step takes 2 minutes but saves you 15 minutes of cleanup. Set the dish aside.
- Melt the butter — Place 6 tablespoons of unsalted butter in a large saucepan over medium-low heat. Stir occasionally with your silicone spatula until the butter is completely melted, about 2 to 3 minutes. The butter should be fully liquid but not bubbling aggressively. If it starts to brown, your heat is too high—turn it down immediately.
- Add the marshmallows — Pour 10 ounces of mini marshmallows into the melted butter. Stir constantly with your spatula, scraping the bottom and sides of the pot to prevent burning. The marshmallows will start to puff up and then collapse into a smooth, glossy liquid. This takes about 4 to 5 minutes. You’re looking for a uniform, silky texture with no lumps. When you lift the spatula, the mixture should drip off in a steady ribbon.
- Remove from heat and add flavorings — Take the pot off the burner immediately. Stir in 1 teaspoon of vanilla extract, ½ teaspoon of almond extract, and ¼ teaspoon of kosher salt. Mix until everything is fully incorporated. The smell at this point is incredible—warm, buttery, and sweet, like the inside of a bakery.
- Fold in the cereal — Add 5 cups of crispy rice cereal to the pot. Use your silicone spatula to fold the cereal into the marshmallow mixture gently. Start from the bottom and work your way up, turning the mixture over itself until every piece of cereal is coated. This should take about 1 minute. Don’t overmix, or the cereal will crush and the bars will be dense. You want the cereal to stay intact for that perfect crunch.
- Add the sprinkles — Sprinkle ¼ cup of holiday sprinkles over the cereal mixture. Fold them in with 2 to 3 gentle strokes. You want the sprinkles distributed throughout the bars, not concentrated in one spot. Overmixing at this stage can cause the sprinkles to bleed their color into the marshmallow.
- Press into the pan — Scrape the entire mixture into your prepared baking dish. Use the back of your silicone spatula to press it into an even layer. If the mixture is sticking to the spatula, spray it lightly with nonstick cooking spray. Work from the center outward, pressing firmly but gently. The mixture should be about ¾ inch thick.
- Top with extra sprinkles — While the bars are still warm, sprinkle an additional 2 tablespoons of holiday sprinkles over the top. Press them lightly into the surface with your spatula so they stick. This gives the bars a festive, bakery-style look.
- Cool completely — Let the bars cool at room temperature for at least 30 minutes. Don’t rush this step. If you cut them while they’re warm, the marshmallow will stick to your knife and the bars will fall apart. I’ve made this mistake more times than I care to admit.
- Cut and serve — Once the bars are completely cool, lift the entire block out of the pan using the parchment overhang. Place it on a cutting board. Use a sharp knife or bench scraper to cut into 24 squares (6 rows by 4 rows). Wipe the blade clean between cuts for the neatest edges. Serve immediately or store for later.
Cooking Tips & Techniques
I’ve made this recipe enough times to know exactly where things can go wrong. Here are the lessons I learned the hard way, so you don’t have to.
Low heat is your friend. The biggest mistake people make is cranking up the heat to melt the marshmallows faster. High heat scorches the marshmallows and creates a grainy, sugary texture that never smooths out. Keep the burner on medium-low and be patient. The marshmallows will melt in about 5 minutes, and the result will be silky and luxurious.
Use fresh marshmallows. Stale marshmallows are dry and won’t melt properly. Check the expiration date before you start. If your marshmallows feel hard or have a powdery surface, buy a new bag. Fresh marshmallows create a smooth, stretchy marshmallow base that coats the cereal perfectly.
Don’t skimp on the butter. I know six tablespoons sounds like a lot, but it’s what gives these bars their sugar cookie flavor. Less butter means drier bars that taste like plain cereal. The butter also helps the bars stay soft for days. Trust the recipe.
Work quickly once the marshmallows are melted. The marshmallow mixture starts to set as soon as it cools, so you need to add the cereal and press it into the pan within 2 to 3 minutes. Have everything measured and ready before you start. I once had to stop mid-step to find my sprinkles, and the mixture was already too stiff to spread evenly.
Press, don’t smash. When you’re pressing the mixture into the pan, use gentle, even pressure. If you press too hard, the bars become dense and tough. You want them to hold together without feeling like a brick. I use the back of my spatula and make slow, sweeping motions from the center outward.
Let them cool completely. I know it’s tempting to cut into them while they’re still warm, but patience pays off. Warm bars are sticky and messy. Cold bars cut cleanly and hold their shape. If you’re in a hurry, pop the pan in the refrigerator for 15 minutes after they’ve cooled at room temperature for 20 minutes.
Variations & Adaptations
This recipe is endlessly adaptable, which is one of the reasons I love it. Here are a few variations I’ve tried and loved.
Chocolate Sugar Cookie Bars: Stir ½ cup of mini chocolate chips into the cereal mixture along with the sprinkles. The chocolate melts slightly from the warmth of the marshmallow, creating pockets of gooey goodness. My kids go crazy for this version, and it’s perfect for Valentine’s Day.
Lemon Sugar Cookie Bars: Replace the almond extract with 1 teaspoon of lemon zest and ½ teaspoon of lemon extract. Use yellow and white sprinkles for a bright, sunny look. These are fantastic for spring celebrations and Easter brunch. The lemon cuts through the sweetness beautifully.
Peppermint Holiday Bars: Add ½ teaspoon of peppermint extract along with the vanilla. Use red and white sprinkles and crush 2 candy canes to sprinkle on top. This version tastes exactly like a peppermint sugar cookie and is a showstopper at Christmas parties.
Gluten-Free Option: This recipe is naturally gluten-free as long as you use certified gluten-free crispy rice cereal. Rice Krispies are made with malt flavoring, which contains gluten. Look for brands like One Degree Organic Sprouted Brown Rice Crisps or Erewhon Crispy Brown Rice Cereal. The texture is identical, and no one will know the difference.
Vegan Option: Use vegan butter (I like Miyoko’s or Earth Balance) and vegan marshmallows (Dandies are my favorite). The process is exactly the same, and the bars turn out just as chewy and delicious. I’ve served these to vegan and non-vegan friends alike, and they disappeared within minutes.
Extra-Crunchy Version: Toast the cereal in a dry skillet over medium heat for 2 to 3 minutes before adding it to the marshmallow mixture. This gives the bars a deeper, nuttier flavor and a satisfying crunch. Be careful not to burn the cereal—stir constantly and remove it from the heat as soon as it starts to turn golden.
Serving & Storage Suggestions
These bars are best served at room temperature, straight from the cutting board. The texture is perfectly chewy, and the sprinkles add a festive pop of color that makes everyone smile.
Serving Ideas: Arrange the bars on a platter with extra sprinkles scattered around the edges for a bakery-style presentation. For holiday parties, stack them on a cake stand and garnish with fresh mint leaves or edible glitter. They pair beautifully with a glass of cold milk, a warm cup of hot chocolate, or a mug of spiced apple cider. If you’re serving them at a brunch, set them next to a bowl of fresh fruit to balance the sweetness.
Storage Instructions: Store the bars in an airtight container at room temperature for up to 5 days. Layer them between sheets of parchment paper to prevent sticking. Do not refrigerate them—the cold temperature makes the marshmallow hard and the bars lose their chewy texture. If your kitchen is warm and the bars start to soften, pop them in the refrigerator for 10 minutes before serving.
Freezer Instructions: These bars freeze beautifully. Cut them into squares and place them on a baking sheet lined with parchment paper. Freeze for 1 hour until solid, then transfer the bars to a freezer-safe bag or container. They’ll keep for up to 3 months. To thaw, leave them at room temperature for 20 minutes. The texture will be exactly as fresh as the day you made them.
Reheating Tips: If you want that just-made warmth, microwave a single bar for 8 to 10 seconds. Don’t overheat, or the marshmallow will become sticky and the bar will lose its shape. For a larger batch, warm them in a 300°F oven for 3 to 4 minutes.
Flavor Development: These bars actually taste better the day after you make them. The flavors meld together overnight, and the almond extract becomes more pronounced. If you can resist eating them all on day one, you’re in for a treat on day two.
Nutritional Information & Benefits
Let’s be real—these are a treat, not a health food. But that doesn’t mean they can’t fit into a balanced diet. Here’s the nutritional breakdown per bar (based on 24 servings).
| Nutrient | Amount Per Bar |
|---|---|
| Calories | 145 |
| Total Fat | 6g |
| Saturated Fat | 3.5g |
| Cholesterol | 15mg |
| Sodium | 95mg |
| Total Carbohydrates | 22g |
| Dietary Fiber | 0g |
| Total Sugars | 12g |
| Protein | 1g |
The crispy rice cereal provides a small amount of iron and B vitamins from the enrichment process. Butter contains vitamin A and healthy fats that support brain function in growing kids. And while the sugar content isn’t negligible, portion control is easy—one bar is satisfying without being overwhelming.
For a slightly lighter version, reduce the butter to 4 tablespoons and use a sugar-free marshmallow brand. The texture will be less rich, but the flavor will still be delicious. I’ve also made these with brown rice syrup instead of marshmallows for a less processed option, but honestly, nothing beats the original.
Conclusion
These kid-approved sugar cookie Rice Krispie treats with holiday sprinkles are more than just a recipe—they’re a solution. They solve the problem of what to bring to the school party, what to make when the power goes out, and what to bake when you want something sweet without spending hours in the kitchen. They’re the kind of treat that makes people close their eyes after the first bite and say, “These are amazing.”
I love this recipe because it’s forgiving. You can use a different cereal, swap the extracts, change the sprinkles, and it still works. It’s a canvas for creativity, and it invites everyone—even the littlest hands—to help. My daughter now makes these on her own, and she beams with pride every time she sets a plate of them on the table.
I’d love to hear how these turn out for you. Did you try a variation? Did your kids help? Drop a comment below and let me know. And if you’re looking for more no-fuss desserts that please a crowd, check out our collection of easy no-bake desserts that are perfect for busy families. Happy baking, friends!
Frequently Asked Questions
Can I use salted butter instead of unsalted?
Yes, you can. Just omit the added kosher salt in the recipe. The bars will be slightly saltier, which actually pairs nicely with the sweetness. I’ve done this when I ran out of unsalted butter, and no one noticed the difference.
Why did my bars turn out hard and crunchy?
This usually happens when the marshmallow mixture is overcooked or the heat is too high. The sugar in the marshmallows can crystallize and harden as it cools. To avoid this, melt the marshmallows over medium-low heat and remove the pot from the burner as soon as they’re smooth. Also, make sure you’re using fresh marshmallows—stale ones don’t melt properly.
Can I use generic crispy rice cereal?
You can, but the texture will be different. Generic brands are often softer and can make the bars feel mushy. If you only have generic cereal, reduce the amount by ½ cup and add it slowly until you reach the desired texture. Name-brand Rice Krispies have a distinct crunch that holds up better.
How do I cut clean squares without the bars sticking to the knife?
Spray your knife or bench scraper with nonstick cooking spray before each cut. Wipe the blade clean between cuts with a paper towel. For the cleanest edges, let the bars cool completely before cutting—warm bars are sticky and won’t cut neatly.
Can I make these ahead of time for a party?
Absolutely. These bars are actually better the next day. Make them up to 2 days in advance and store them in an airtight container at room temperature. Wait to add the top sprinkles until just before serving so they stay bright and festive. If you’re making them more than 2 days ahead, freeze them and thaw at room temperature for 20 minutes before serving.
Pin This Recipe!
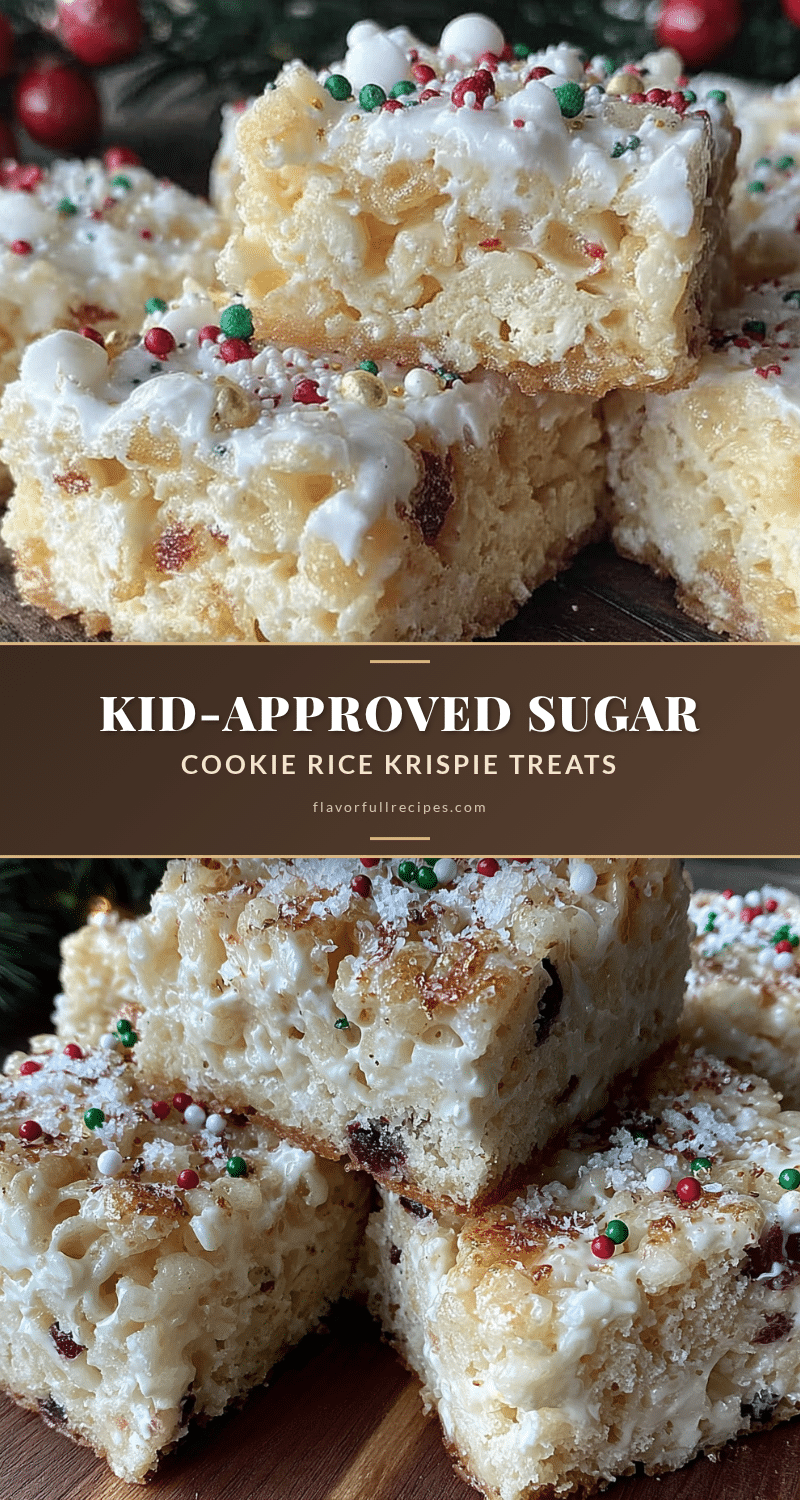

Kid-Approved Sugar Cookie Rice Krispie Treats with Holiday Sprinkles
- Total Time: 55 minutes (including cooling)
- Yield: 24 servings 1x
Description
These chewy, buttery Rice Krispie treats taste just like a sugar cookie thanks to a simple trick: extra butter and a pinch of almond extract. They’re quick, easy, and perfect for holiday parties, school events, or any time you need a crowd-pleasing dessert in minutes.
Ingredients
- 6 tablespoons (85 grams) unsalted butter
- 10 ounces (283 grams) mini marshmallows
- 5 cups (150 grams) crispy rice cereal (e.g., Rice Krispies)
- 1 teaspoon (5 ml) vanilla extract
- ½ teaspoon (2.5 ml) almond extract
- ¼ cup (40 grams) holiday sprinkles (jimmies), plus 2 tablespoons for topping
- ¼ teaspoon kosher salt
Instructions
- Line a 9×13-inch baking dish with parchment paper, leaving a 2-inch overhang on the long sides. Lightly spray the parchment with nonstick cooking spray. Set aside.
- Place 6 tablespoons of unsalted butter in a large saucepan over medium-low heat. Stir occasionally with a silicone spatula until the butter is completely melted, about 2 to 3 minutes. Do not let it brown.
- Add 10 ounces of mini marshmallows to the melted butter. Stir constantly with the spatula, scraping the bottom and sides, until the marshmallows are completely melted and smooth, about 4 to 5 minutes. The mixture should drip off the spatula in a steady ribbon.
- Remove the pot from the heat immediately. Stir in 1 teaspoon vanilla extract, ½ teaspoon almond extract, and ¼ teaspoon kosher salt until fully incorporated.
- Add 5 cups of crispy rice cereal to the pot. Gently fold the cereal into the marshmallow mixture using the spatula, starting from the bottom and working upward, until every piece is coated. Do not overmix; this should take about 1 minute.
- Sprinkle ¼ cup of holiday sprinkles over the cereal mixture. Fold in with 2 to 3 gentle strokes to distribute evenly.
- Scrape the mixture into the prepared baking dish. Use the back of the silicone spatula (lightly sprayed with nonstick spray if sticky) to press it into an even layer, about ¾ inch thick. Press gently from the center outward.
- While still warm, sprinkle an additional 2 tablespoons of holiday sprinkles over the top and press lightly into the surface.
- Let the bars cool completely at room temperature for at least 30 minutes. Do not cut while warm.
- Once cool, lift the block out of the pan using the parchment overhang. Place on a cutting board and cut into 24 squares (6 rows by 4 rows) using a sharp knife or bench scraper sprayed with nonstick spray. Wipe the blade clean between cuts.
Notes
Use fresh marshmallows for best results. Keep heat on medium-low to avoid scorching. Work quickly once marshmallows are melted. For clean cuts, spray knife with nonstick spray. Bars taste even better the next day. Store in an airtight container at room temperature for up to 5 days. Freeze for up to 3 months.
- Prep Time: 15 minutes
- Cook Time: 10 minutes
- Category: Dessert
- Cuisine: American
Nutrition
- Serving Size: 1 bar
- Calories: 145
- Sugar: 12
- Sodium: 95
- Fat: 6
- Saturated Fat: 3.5
- Carbohydrates: 22
- Protein: 1
Keywords: sugar cookie rice krispie treats, holiday sprinkles, easy dessert, no-bake, kid-friendly, school party, Christmas treats