
My neighbor, a man named Gary who spends November through February in a flannel shirt that has seen better days, had claimed to hate peppermint for thirty-seven years. Swore up and down that the flavor reminded him of toothpaste and disappointment. Then I caught him, last Tuesday night, standing in my kitchen with a Holiday No-Bake Peppermint Avalanche Cookie halfway to his mouth, crumbs on his sweater, looking like a kid caught with his hand in the cookie jar—which, I mean, he was. “These aren’t peppermint,” he said, chewing defiantly. “These are… different.” And that, right there, is the magic of this recipe. It doesn’t taste like a candy cane got dropped into a bowl of dough. It tastes like winter itself decided to be delicious. The cool crunch of the peppermint, the rich creaminess of the white chocolate, the satisfying chew of the oats—it all comes together in a way that makes even the most stubborn peppermint skeptic shut up and ask for the recipe. Honestly, I made them on a whim, trying to use up some leftover candy canes from a decorating project gone wrong. I wasn’t trying to convert anyone. But Gary’s conversion, caught in the act, is why I keep a stash of these in my freezer all season long. Maybe you’ve got a Gary in your life—someone who swears they don’t like a certain holiday flavor. Make these. Watch the magic happen. It’s the quiet satisfaction of proving someone wrong without ever having to say a word.
Why You’ll Love This Recipe
Let’s be real for a second. The holidays are a beautiful, chaotic mess of sugar cookies, gingerbread houses, and last-minute gift wrapping. The last thing you need is a complicated recipe that requires a stand mixer, a candy thermometer, and the patience of a saint. These Holiday No-Bake Peppermint Avalanche Cookies are the opposite of all that. They are the recipe you turn to when you need something impressive but have zero time and even less energy.
- Quick & Easy: From start to finish, we’re talking about 10 minutes of active work. No oven, no baking sheets, no waiting for the oven to preheat. Just a bowl, a spoon, and a little bit of patience for them to set.
- Simple Ingredients: You probably have most of these in your pantry right now. Oats, peanut butter, white chocolate chips, and a few candy canes. No weird, hard-to-find items that require a specialty grocery store run.
- Perfect for Holiday Chaos: These are a lifesaver for cookie swaps, last-minute holiday parties, or a quiet night in when you just want something sweet without turning your kitchen into a disaster zone. They travel beautifully, too.
- Crowd-Pleaser: I’ve brought these to three different holiday gatherings this year, and every single time, the bowl is empty within the first hour. Kids love the crunch, adults love the nostalgic flavor, and everyone loves that they don’t feel overly heavy or sugary.
- Unbelievably Delicious: There’s something about the combination of creamy white chocolate, salty peanut butter, and cool peppermint that just works. It’s a flavor profile that feels special without being fussy. It’s comfort food, holiday-style.
What makes this recipe different from the dozens of other no-bake cookie recipes out there? It’s the texture. Most avalanche cookies are either too crumbly or too sticky. This version, through a little trial and error on my part, hits that perfect sweet spot: a firm, chewy base with a satisfying crunch from the crushed peppermint. It’s not just another version—it’s the one that finally works. It’s the kind of cookie that makes you close your eyes after the first bite, because it tastes exactly like what a cozy winter evening should feel like. No stress, no fuss, just pure, unadulterated holiday joy.
What Ingredients You Will Need
This recipe uses simple, wholesome ingredients to deliver bold flavor and satisfying texture without the fuss. You don’t need a culinary degree to pull this off—just a few pantry staples and a little holiday spirit. The beauty is in the simplicity: each ingredient plays a specific role, and together, they create a cookie that is greater than the sum of its parts.
- Old-Fashioned Rolled Oats (2 cups / 180g): These are the backbone of the cookie, providing that chewy, satisfying texture. I recommend using old-fashioned oats rather than quick oats, as they hold their shape better and give a nicer bite. Quick oats can turn the cookies into a mushy paste, and nobody wants that. I’ve used Bob’s Red Mill for years and love the texture.
- Creamy Peanut Butter (1 cup / 240g): This acts as the binder and the flavor anchor. Use a standard, no-stir creamy peanut butter for the best results. Natural peanut butter, where the oil separates, can make the cookies too greasy and they won’t set properly. I’ve learned this the hard way—trust me on this one. The saltiness of the peanut butter perfectly balances the sweetness of the other ingredients.
- White Chocolate Chips (1 ½ cups / 270g): These melt down to create the creamy, sweet coating that holds everything together. I prefer Ghirardelli white chocolate chips for their smooth melt and rich flavor. Avoid white melting wafers or almond bark if you can—they have a different fat content and can leave a waxy aftertaste. The real white chocolate chips are worth the splurge here.
- Crushed Peppermint Candies (½ cup / 60g): This is where the magic happens. You can use candy canes, starlight mints, or even peppermint baking chips. I find that crushing candy canes yourself gives the best texture and the most vibrant peppermint flavor. The pre-crushed stuff can sometimes be too fine. Just throw a few candy canes in a zip-top bag and whack them with a rolling pin. It’s a great way to release some holiday stress, honestly.
- Powdered Sugar (¼ cup / 30g): This is a secret ingredient that helps stabilize the mixture and gives the cookies a slightly firmer, more fudge-like texture. It also adds a subtle sweetness without making things grainy. Don’t skip it—it makes a difference in the final structure.
- Vanilla Extract (1 teaspoon): A good quality vanilla extract rounds out the flavors and adds depth. It makes the white chocolate taste even creamier and the peppermint taste brighter. I always use pure vanilla extract, not imitation, for the best flavor.
- Salt (a pinch): Just a tiny pinch of flaky sea salt, like Maldon, can really elevate the flavors. It cuts through the sweetness and makes the peppermint and peanut butter pop. I add it to the dry ingredients, not as a topping.
Equipment Needed
You don’t need a fancy kitchen to make these cookies. In fact, the simpler, the better. Here’s what you’ll need:
- Large Microwave-Safe Bowl: For melting the white chocolate and peanut butter together. A glass or ceramic bowl works best. Avoid plastic bowls, as they can hold onto grease and flavors.
- Medium Mixing Bowl: For combining the dry ingredients (oats, crushed peppermint, powdered sugar, salt).
- Rubber Spatula: A sturdy silicone spatula is essential for folding everything together without breaking the oats. It also helps you scrape every last bit of that delicious mixture out of the bowl.
- Baking Sheet: To hold the cookies while they set. Line it with parchment paper or a silicone baking mat for easy removal. I prefer parchment paper because it’s disposable and makes cleanup a breeze.
- Cookie Scoop (Optional but Recommended): A medium cookie scoop (about 1.5 tablespoons) ensures uniform cookies that look professional. If you don’t have one, you can use two spoons. The scoop just makes the process faster and cleaner.
- Zip-Top Bag and Rolling Pin: For crushing the candy canes. You can also use a food processor, but the bag-and-rolling-pin method is more satisfying and creates a more rustic, varied texture. Plus, it’s a great way to get the kids involved.
I’ve made these cookies with a cheap, $5 baking sheet from the grocery store and a spatula I’ve had since college. They turned out just as good as the batch I made with my fancy silicone mat and professional scoop. The equipment doesn’t make the cookie—the technique and the love do. But a good silicone spatula? That’s a game-changer for scraping the bowl clean.
Preparation Method

Alright, let’s get to it. This is the easy part. I mean, it’s called a no-bake recipe for a reason. Follow these steps, and you’ll have a batch of these little beauties ready to go in no time.
- Prep Your Workspace (5 minutes): Line a large baking sheet with parchment paper. Set it aside. In a small bowl, crush your candy canes. I usually put 6-8 standard candy canes in a zip-top bag, squeeze out the air, and go to town with a rolling pin. You want a mix of fine dust and small chunks—that’s the texture that works best. Set the crushed candy aside.
- Melt the Base (2 minutes): In your large microwave-safe bowl, combine the creamy peanut butter and the white chocolate chips. Microwave in 30-second intervals, stirring well after each interval. This is crucial—don’t just nuke it for 2 minutes straight or you’ll scorch the chocolate and end up with a grainy, burnt mess. It usually takes about 1 ½ to 2 minutes total. Stir until the mixture is completely smooth and glossy. It should look like a thick, creamy sauce. If it looks separated or oily, you might have overheated it. Next time, go slower.
- Combine the Dry Ingredients (1 minute): In your medium mixing bowl, whisk together the old-fashioned rolled oats, the powdered sugar, the pinch of salt, and about ¾ of your crushed peppermint. Reserve the remaining ¼ of the crushed peppermint for topping later. Whisking ensures everything is evenly distributed, so you don’t get a pocket of pure salt in one cookie.
- Fold It All Together (2 minutes): Pour the dry oat mixture into the bowl with the melted white chocolate and peanut butter. Using your rubber spatula, fold everything together gently but thoroughly. Make sure every oat is coated in that creamy, pepperminty goodness. The mixture will be thick and sticky—this is a good sign. Don’t overmix, or the oats can start to break down. Just fold until you don’t see any dry spots.
- Scoop and Shape (5 minutes): While the mixture is still warm (it sets quickly!), use your cookie scoop or two spoons to portion out the dough. Drop rounded scoops onto the prepared baking sheet, spacing them about an inch apart. They won’t spread, so you can pack them in there pretty tightly. If the mixture starts to cool and get too stiff to scoop, pop the bowl back in the microwave for 10-15 seconds to loosen it up.
- Add the Topping (2 minutes): Immediately after scooping, while the cookies are still slightly tacky, sprinkle the reserved crushed peppermint over the tops. Gently press the pieces in so they stick. This gives the cookies that beautiful, snowy, festive look. If you wait too long, the topping won’t adhere, and you’ll end up with a pile of peppermint at the bottom of the container. Don’t ask me how I know this.
- Set and Serve (30 minutes): Place the baking sheet in the refrigerator for at least 30 minutes to allow the cookies to firm up. This is the hardest part—the waiting. But it’s necessary. The cookies need this time to set into the perfect, fudge-like texture. After 30 minutes, they are ready to eat. They will be firm but not hard, with a satisfying chew.
Pro tip: I once forgot to line my baking sheet with parchment paper. The cookies stuck like glue. I spent 15 minutes chipping them off with a spatula, and half of them broke. Learn from my mistake. The parchment paper is not optional.
Cooking Tips & Techniques
I’ve made this recipe more times than I can count, and I’ve made every mistake in the book so you don’t have to. Here are the things I wish someone had told me the first time around.
Don’t Overheat the Chocolate. This is the number one mistake. White chocolate is sensitive. It scorches easily and turns into a grainy, oily mess. Always microwave in 30-second bursts and stir thoroughly between each one. The residual heat will continue to melt the chips, so stop when they are mostly melted and stir until smooth. Patience is a virtue here, honestly.
Use the Right Peanut Butter. I cannot stress this enough. Use a standard, shelf-stable creamy peanut butter like Jif or Skippy. The natural, stir-it-yourself kind has a different fat content and can cause the cookies to be greasy and not set properly. I learned this the hard way when I tried to be “healthy” and ended up with a puddle of oil on my baking sheet. Stick with the classic stuff for this recipe.
Crush Your Peppermint Strategically. You want a mix of textures. A fine dust will infuse the entire cookie with peppermint flavor, while small chunks provide those satisfying little bursts of crunch. Don’t pulverize it into a powder—save some for the topping to give it that visual pop. A rolling pin and a zip-top bag give you the most control.
Work Quickly. The mixture sets up faster than you think. Once you combine the wet and dry ingredients, you have about 10-15 minutes of workable time before it becomes too stiff to scoop. If it does get too stiff, just pop the bowl in the microwave for 10 seconds to soften it. Don’t try to force it—you’ll just end up with misshapen cookies.
Chill Thoroughly. The 30-minute chill time is non-negotiable. These cookies need that time in the fridge to firm up and develop their signature texture. If you try to eat them right away, they will be a warm, gooey mess. Delicious, yes, but not a cookie. Patience pays off.
Variations & Adaptations
One of the best things about this recipe is how adaptable it is. You can tweak it to fit almost any dietary need or flavor preference. Here are a few variations I’ve tried and loved.
- Gluten-Free Version: This one is easy. Just swap the old-fashioned rolled oats for certified gluten-free oats. That’s it. Everything else in the recipe is naturally gluten-free. I’ve made this for a friend with celiac disease, and she couldn’t tell the difference. Just make sure your oats are certified to avoid cross-contamination.
- Dairy-Free Version: Use a high-quality dairy-free white chocolate. I’ve had good luck with the Enjoy Life brand. Also, make sure your peanut butter is dairy-free (most are, but it’s worth checking the label). The texture will be slightly different—a little less creamy—but the flavor is still fantastic.
- Chocolate Peppermint Avalanche: For the chocolate lovers out there, swap the white chocolate chips for semi-sweet or dark chocolate chips. The combination of dark chocolate and peppermint is a classic for a reason. You can also add a tablespoon of cocoa powder to the dry ingredients for an extra chocolatey kick. I did this for a holiday party, and they were gone in 20 minutes.
- Add Some Texture: Feel free to throw in some mix-ins. Mini chocolate chips, chopped pecans, or even a handful of shredded coconut would all be delicious. Just add them in with the dry ingredients. I once added some toffee bits, and it was incredible—like a peppermint, chocolate, and toffee flavor bomb.
- Make Them Vegan: Use a vegan white chocolate and a vegan butter substitute (or just use a bit more peanut butter to help with binding). The process is exactly the same. I’ve tested this, and while the texture is a touch softer, they are still incredibly addictive.
Serving & Storage Suggestions
These cookies are best served cold, straight from the fridge. That firm, fudge-like texture is what makes them so special. I like to arrange them on a festive platter, maybe with a few extra crushed candy canes sprinkled around for a snowy effect. They look beautiful on a holiday dessert table or packed in a tin as a homemade gift.
Storage: Store the cookies in an airtight container in the refrigerator. They will keep well for up to 2 weeks. In fact, the flavors continue to meld and deepen after a day or two, so they might even be better on day two. Just make sure they are in a sealed container so they don’t absorb any funky fridge smells.
Freezing: These cookies freeze like a dream. Place them in a single layer on a baking sheet and freeze until solid (about 1 hour). Then transfer them to a freezer-safe bag or container. They will keep for up to 3 months. You can eat them frozen (they are like little peppermint ice cream bites) or let them thaw in the fridge for about 30 minutes. I always keep a stash in my freezer for unexpected guests or late-night cravings.
Reheating: Honestly, I don’t recommend reheating these. They are meant to be eaten cold. If you really want a softer texture, let them sit at room temperature for 5-10 minutes. But the magic is in the chilled, firm bite. Trust me on this one.
Nutritional Information & Benefits
Let’s be honest—these are a treat. They are not health food. But that doesn’t mean they can’t have some redeeming qualities. The oats provide a good source of fiber, which helps with digestion and keeps you feeling full. The peanut butter offers protein and healthy fats, which can help stabilize your blood sugar. And the peppermint? It’s actually good for digestion and can help soothe an upset stomach. So, in a way, these cookies are practically a wellness food. (I’m only half kidding.)
Estimated Nutritional Values (per cookie, based on 24 cookies):
- Calories: 180
- Fat: 10g
- Saturated Fat: 4g
- Carbohydrates: 20g
- Sugar: 14g
- Fiber: 2g
- Protein: 5g
Dietary Considerations: This recipe can easily be made gluten-free and dairy-free with simple substitutions. It is naturally vegetarian. The main allergens to be aware of are peanuts, dairy (from the white chocolate), and gluten (from the oats, unless certified gluten-free). Always check your labels if you are cooking for someone with allergies.
My personal take? Everything in moderation. These cookies are a holiday tradition, not a daily snack. Enjoy them, savor them, and don’t feel an ounce of guilt. The holidays are for joy, not for counting calories.
Conclusion
So there you have it. The Holiday No-Bake Peppermint Avalanche Cookie that converted a thirty-seven-year peppermint hater and has become my go-to for every single holiday gathering. They are quick, they are easy, and they are ridiculously delicious. They are the recipe you turn to when you want to impress without the stress, when you want to indulge without the oven, and when you want to share a little bit of holiday magic with the people you love.
I hope you give these a try. I hope you make a mess crushing candy canes with a rolling pin. I hope you sneak one (okay, three) straight from the fridge before anyone sees you. And I hope you find that quiet satisfaction in watching someone you love take that first bite and close their eyes. That’s what this recipe is all about. It’s not just a cookie. It’s a moment. It’s a memory. It’s the taste of winter, made simple.
If you make these, I’d love to hear about it. Leave a comment below and tell me how they turned out, or tag me in your photos on social media. Did you add a twist? Did you convert a peppermint skeptic in your own life? Share your story. I read every single comment, and they honestly make my day. Happy holidays, and happy baking (or, you know, no-baking)!
Frequently Asked Questions
Can I use quick oats instead of old-fashioned rolled oats?
I don’t recommend it. Quick oats are more processed and have a finer texture. They will absorb the moisture differently and can result in a mushy, paste-like cookie that doesn’t hold its shape well. Stick with old-fashioned rolled oats for the best texture and structure.
My mixture is too dry and crumbly. What did I do wrong?
This usually happens if the white chocolate and peanut butter mixture wasn’t melted enough or if it cooled down too much before you added the dry ingredients. Make sure your melted base is smooth and warm when you mix it in. If it’s already too stiff, try microwaving the entire mixture for 10-15 seconds to soften it up before scooping.
Can I use a different nut butter?
Absolutely. Almond butter, cashew butter, or even sunflower seed butter (for a nut-free version) will work. Just keep in mind that different nut butters have different fat contents, which can affect the final texture. A thicker, creamier nut butter will yield the best results. Avoid the natural, oily ones.
How do I crush the candy canes without making a huge mess?
The zip-top bag and rolling pin method is the best. Place the candy canes in a sturdy zip-top bag, squeeze out as much air as possible, and seal it. Then, place the bag on a cutting board and gently tap it with a rolling pin. Start slow to avoid puncturing the bag. You can also place a kitchen towel over the bag for extra protection.
Can I make these cookies ahead of time for a holiday party?
Yes, and I actually recommend it. These cookies taste even better after a day or two in the fridge, as the flavors have time to meld together. You can make them up to 2 weeks in advance and store them in an airtight container in the refrigerator. They are the perfect make-ahead holiday treat.
Pin This Recipe!
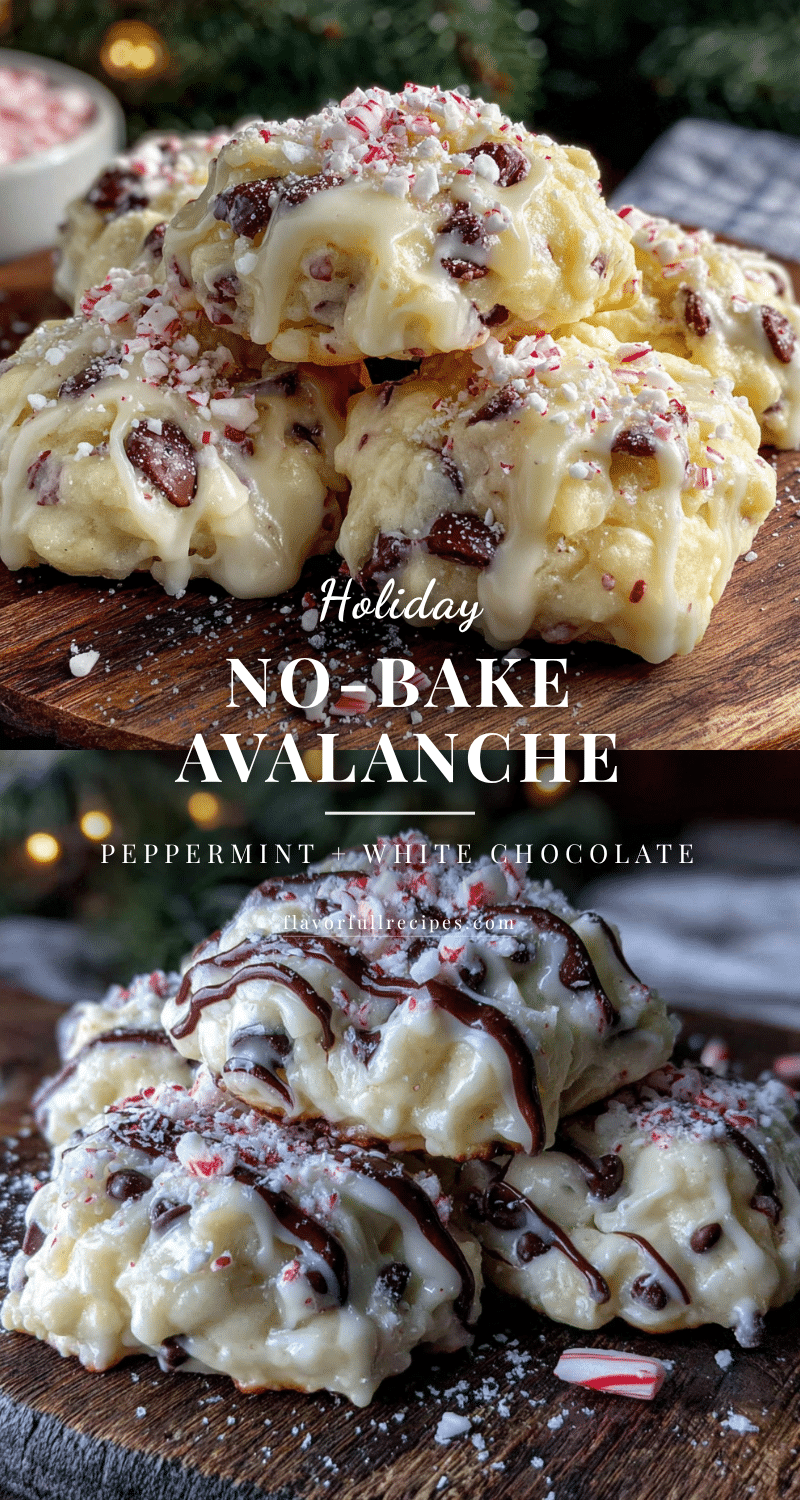

Holiday No-Bake Peppermint Avalanche Cookies
- Total Time: 40 minutes (including 30 minutes chilling)
- Yield: 24 cookies 1x
Description
These easy no-bake cookies combine creamy white chocolate, salty peanut butter, and cool peppermint for a quick, crowd-pleasing holiday treat that comes together in just 10 minutes.
Ingredients
- 2 cups (180g) old-fashioned rolled oats
- 1 cup (240g) creamy peanut butter (no-stir variety)
- 1 ½ cups (270g) white chocolate chips
- ½ cup (60g) crushed peppermint candies (about 6–8 candy canes)
- ¼ cup (30g) powdered sugar
- 1 teaspoon vanilla extract
- a pinch of salt
Instructions
- Line a large baking sheet with parchment paper. Crush candy canes in a zip-top bag with a rolling pin to a mix of fine dust and small chunks; set aside.
- In a large microwave-safe bowl, combine peanut butter and white chocolate chips. Microwave in 30-second intervals, stirring after each, until smooth and glossy (about 1½–2 minutes total).
- In a medium bowl, whisk together oats, powdered sugar, salt, and about ¾ of the crushed peppermint. Reserve the remaining ¼ for topping.
- Pour the dry oat mixture into the melted peanut butter and white chocolate. Fold gently with a rubber spatula until all oats are coated and no dry spots remain.
- While the mixture is still warm, use a cookie scoop (about 1.5 tablespoons) to portion dough onto the prepared baking sheet, spacing cookies about 1 inch apart.
- Immediately sprinkle the reserved crushed peppermint over the tops of the cookies, gently pressing to adhere.
- Refrigerate the baking sheet for at least 30 minutes until cookies are firm. Serve cold.
Notes
Use standard creamy peanut butter (not natural) for best results. Do not overheat white chocolate; microwave in short bursts. Work quickly as mixture sets fast. Chill thoroughly for proper texture. Store in an airtight container in the refrigerator for up to 2 weeks or freeze for up to 3 months.
- Prep Time: 10 minutes
- Cook Time: 0 minutes
- Category: Dessert
- Cuisine: American
Nutrition
- Serving Size: 1 cookie
- Calories: 180
- Sugar: 14
- Sodium: 85
- Fat: 10
- Saturated Fat: 4
- Carbohydrates: 20
- Fiber: 2
- Protein: 5
Keywords: no-bake cookies, peppermint cookies, holiday cookies, easy cookies, white chocolate peppermint, avalanche cookies