My neighbor wasn’t trying to impress anyone. I’d stopped by to return her measuring cup—the one I’d borrowed three weeks earlier and kept forgetting to give back—and this warm, cinnamon-laced smell hit me before I even got through her screen door. She was standing there in sweatpants, holding a tiny baking dish with two spoons, looking almost embarrassed that I’d caught her.
“It’s just apples,” she said, shrugging. “My grandmother used to make it when it was just her and me.”
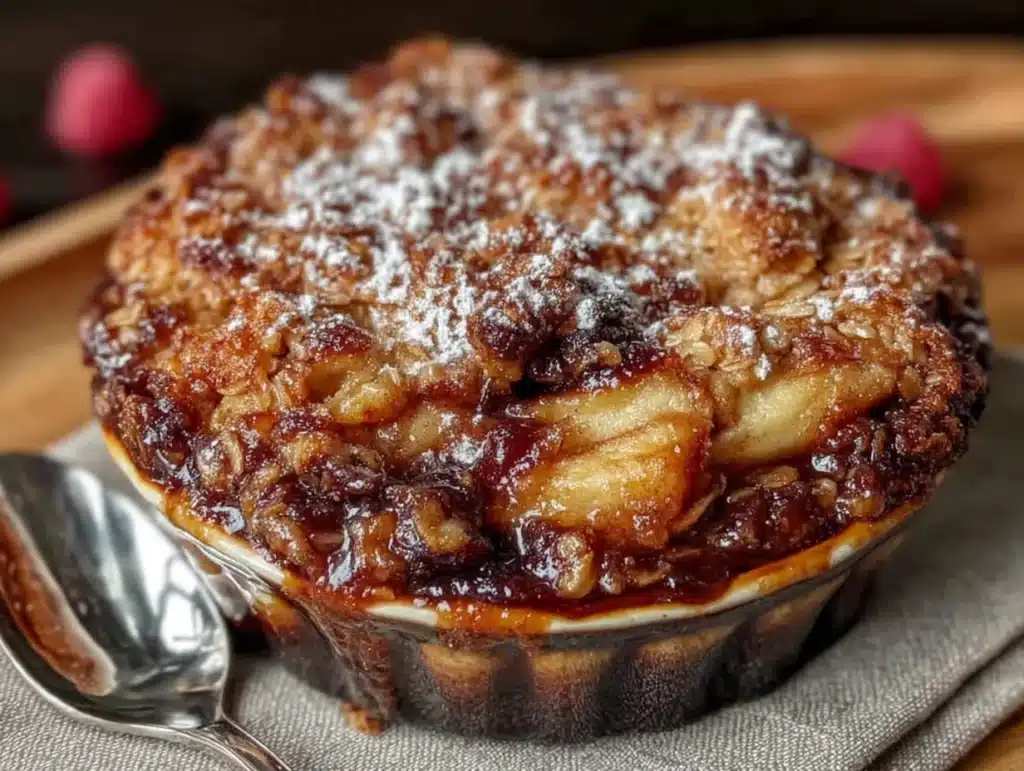
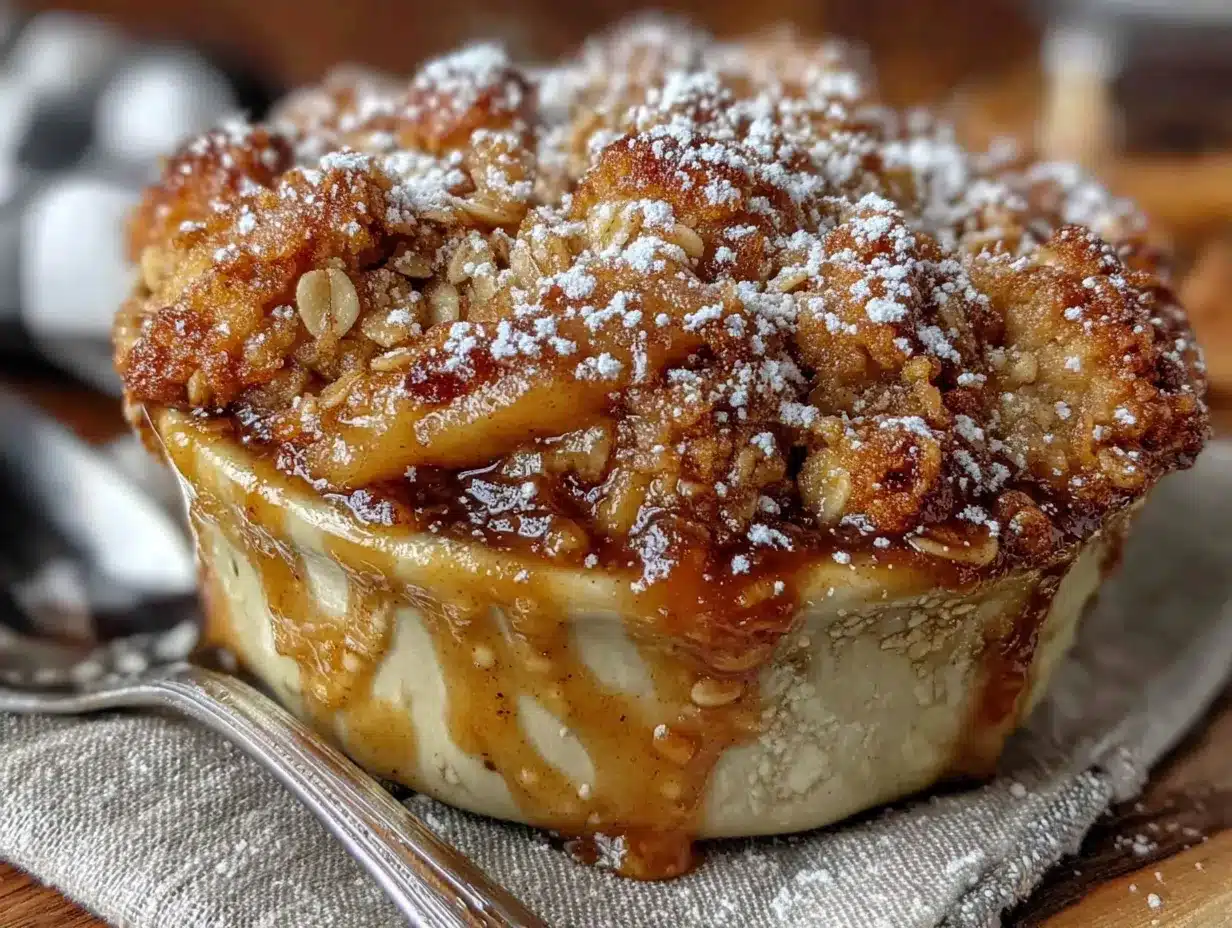
Just apples. Let me tell you, there was nothing “just” about it. The topping was this perfect crumble—buttery and crisp, with oats that had toasted into little golden clusters. The apples underneath had broken down into this jammy, tender filling that wasn’t too sweet. I stood in her kitchen, eating straight from the dish, and honestly, I think I moaned a little. She laughed and handed me the other spoon.
That’s the thing about the best recipes, right? They don’t come from fancy blogs or complicated techniques. They come from someone who’s been making them for years, who knows exactly how much cinnamon to add without measuring, who doesn’t even think of it as special. But it is special. It’s the kind of dessert that makes you slow down, that makes you want to sit on the couch and share it with someone you love.
I asked for the recipe, and she scribbled it on a sticky note. I’ve tweaked it a little over the years—added a pinch more salt, swapped in some brown sugar for depth—but the soul of it is still hers. And now I’m sharing it with you, because maybe you’ve been there, wanting something sweet but not wanting to make a whole production out of it. Maybe you just want a little warmth at the end of a long day.
This cozy small-batch apple crisp for two is exactly that. No leftovers to worry about. No giant dish to wash. Just two perfect servings of the most comforting, budget-friendly dessert you’ll make all week.
Why You’ll Love This Recipe
This isn’t just another apple crisp recipe. It’s the one I’ve tested more times than I can count, tweaking the topping-to-fruit ratio until it was absolutely perfect. Here’s why it’s become my go-to for quiet nights in:
- Perfectly Portioned: No more staring at a half-eaten 9×13 dish wondering what to do with it. This makes exactly two generous servings—enough to satisfy your sweet tooth without tempting you into a third helping.
- Budget-Friendly: You probably have most of these ingredients in your pantry right now. Apples, oats, flour, butter, sugar—nothing fancy, nothing expensive. This is smart cooking that doesn’t sacrifice flavor.
- Quick & Easy: From start to table in about 45 minutes, with only 10 minutes of hands-on prep. The oven does all the heavy lifting while you relax.
- Crowd-Pleasing: Even picky eaters love this one. The sweet, tender apples and crunchy oat topping are pure comfort food magic. I’ve served it to friends who claimed they “didn’t like cooked fruit,” and they went back for seconds.
- No Special Equipment: Just a mixing bowl, a small baking dish, and your hands. You don’t need a food processor or a pastry cutter—this recipe is gloriously low-tech.
What makes this version different from all the other apple crisp recipes out there? It’s the topping, honestly. Most recipes use too much flour, making it dense and doughy. Mine uses a higher ratio of oats and butter, so it bakes up shatteringly crisp and golden. The apples are tossed with a touch of lemon juice to balance the sweetness, and I add a tiny pinch of black pepper—trust me on this—that makes the cinnamon taste warmer and more complex. It’s not a gimmick; it’s just a little trick I picked up from my neighbor’s sticky note.
This recipe is the kind that makes you close your eyes after the first bite. It’s comfort food reimagined—simpler, faster, but with the same soul-soothing satisfaction. Perfect for a Tuesday night when you just need something warm and sweet, or for impressing someone special without breaking a sweat.
What Ingredients You Will Need
This recipe uses simple, wholesome ingredients to deliver bold flavor and satisfying texture without the fuss. Most of these are pantry staples, so you can whip this up on a whim without a trip to the store.
For the Apple Filling
- 2 medium apples (about 350g / 12 oz total) – I recommend Honeycrisp, Granny Smith, or Fuji. Granny Smith holds its shape beautifully and adds a nice tartness. If you prefer a sweeter filling, go with Honeycrisp. (No need to peel them if you’re short on time—the peel adds fiber and a nice rustic texture.)
- 2 tablespoons granulated sugar (25g) – Just enough to sweeten the fruit without overpowering it.
- 1 tablespoon brown sugar (12g) – Adds a subtle molasses depth that makes the filling taste richer.
- 1 tablespoon all-purpose flour (8g) – Helps thicken the juices so the filling isn’t watery.
- 1/2 teaspoon ground cinnamon – The star spice here. I prefer Saigon cinnamon for its intense, warm flavor.
- 1/8 teaspoon ground nutmeg – Freshly grated if you have it; it makes a surprising difference.
- 1 tiny pinch black pepper (optional, but trust me) – This isn’t detectable as pepper; it just makes the cinnamon taste rounder and more aromatic.
- 1 teaspoon lemon juice (5ml) – Balances the sweetness and prevents the apples from browning.
For the Crisp Topping
- 1/2 cup old-fashioned rolled oats (45g) – Don’t use quick oats here; they’ll turn mushy. Old-fashioned oats give that perfect crunchy texture. I’ve tried both, and the difference is noticeable.
- 1/4 cup all-purpose flour (30g) – Just enough to bind the topping without making it doughy.
- 1/4 cup brown sugar (50g) – Packed. This caramelizes beautifully in the oven.
- 1/4 teaspoon salt – Essential for balancing sweetness. Don’t skip it.
- 1/4 cup unsalted butter (56g / 4 tablespoons) – Cold, cut into small cubes. If you only have salted butter, reduce the added salt to a pinch.
- 1/4 cup chopped pecans or walnuts (optional, 30g) – Adds a lovely crunch. I use pecans when I have them, but walnuts work great too. Omit if you’re feeding someone with nut allergies.
Ingredient Notes: For the best texture, use cold butter straight from the fridge. I’ve tried this with coconut oil for a dairy-free version, and while it works, it’s not quite as crispy. If you’re gluten-sensitive, substitute the all-purpose flour with a good 1:1 gluten-free baking blend. The topping will be slightly more crumbly but still delicious.
Equipment Needed
The beauty of this recipe is that you don’t need much. Here’s what I use:
- Two 8-ounce ramekins or one small baking dish (about 5×7 inches / 1-quart capacity) – Ramekins make it feel special, like individual desserts at a restaurant. But a small casserole dish works perfectly too. I got my ramekins at a thrift store for a dollar each.
- Mixing bowls – One medium for the filling, one small for the topping.
- Chef’s knife and cutting board – For prepping the apples.
- Pastry cutter or two forks – To cut the butter into the dry ingredients. If you don’t have a pastry cutter, just use your fingertips—the warmth of your hands helps the butter incorporate, which is actually fine for this rustic recipe.
- Measuring cups and spoons – For accuracy, though I often eyeball the cinnamon at this point.
- Baking sheet – Place your ramekins or dish on a baking sheet to catch any overflow. Trust me, you don’t want to scrub burnt sugar off your oven floor.
Budget Tip: Don’t run out and buy ramekins if you don’t have them. A small oven-safe bowl or even a mug works in a pinch. I’ve made this in a ceramic soup bowl before, and it was just as good.
Preparation Method
Let’s get cooking. This comes together in about 10 minutes of active work, then the oven does the rest.
-
Preheat your oven to 375°F (190°C). Position a rack in the center of the oven. While it’s heating, place your ramekins or baking dish on a small baking sheet—this catches any bubbly overflow and makes cleanup a breeze.
-
Prepare the apples. Wash, core, and chop your apples into 1/2-inch cubes. You don’t need to be precise here, but try to keep them roughly the same size so they cook evenly. I leave the peel on for texture and fiber, but if you prefer a smoother filling, go ahead and peel them. (My neighbor peels hers; I don’t. Neither is wrong.)
-
Make the filling. In a medium bowl, toss the chopped apples with the granulated sugar, brown sugar, flour, cinnamon, nutmeg, black pepper (if using), and lemon juice. Stir until every apple piece is coated. The mixture will look a little dry at first—that’s fine. The apples will release their juices as they bake. Set this aside while you make the topping.
-
Make the crisp topping. In a separate small bowl, combine the rolled oats, flour, brown sugar, and salt. Stir with a fork to break up any clumps of brown sugar. Add the cold butter cubes. Using a pastry cutter, two forks, or your fingertips, work the butter into the dry ingredients until the mixture looks like coarse, crumbly sand with some pea-sized butter pieces remaining. You want those little butter pockets—they melt in the oven and create steam pockets that make the topping extra crispy. If you’re using nuts, stir them in now.
-
Assemble the crisps. Divide the apple filling evenly between your two ramekins (or spread it in the small baking dish). Don’t pack it down—just let it sit loosely. Sprinkle the topping evenly over the apples, covering them completely. Use all of it; it might seem like a lot, but it bakes down into a perfect crunchy layer.
-
Bake. Place the baking sheet with the ramekins in the preheated oven. Bake for 30 to 35 minutes, or until the topping is deep golden brown and the filling is bubbling up around the edges. You should be able to see thick, syrupy bubbles—that’s how you know the flour has done its thickening job. If your topping is browning too quickly after 25 minutes, tent loosely with foil for the remaining time.
-
Cool slightly and serve. Let the crisps cool on a wire rack for at least 10 minutes. I know it’s hard to wait, but the filling will be lava-hot straight out of the oven. The cooling time lets it set up so you get distinct layers instead of a soupy mess. Serve warm, preferably with a scoop of vanilla ice cream or a drizzle of heavy cream.
Sensory Cues: When it’s done, your kitchen should smell like a fall festival—warm cinnamon, toasted oats, and caramelized sugar. The topping should look golden and craggy, with some darker spots where the butter caramelized. If you tap it gently with a spoon, it should feel firm and crisp, not soft or doughy.
Cooking Tips & Techniques
After making this small-batch apple crisp probably twenty times, I’ve picked up a few tricks that make a real difference. Here’s what I’ve learned:
Don’t overwork the topping. This was my biggest mistake early on. I’d mix and mix, trying to get the butter perfectly incorporated, and the topping would turn out dense and almost pasty. You want visible pieces of butter—some the size of peas, some smaller. Those butter bits melt and create steam, which is what gives you that shatteringly crisp texture. Stop mixing when it looks uneven. Imperfection is the goal here.
Use a mix of apple varieties if you can. One tart apple (like Granny Smith) and one sweet apple (like Honeycrisp or Fuji) gives you a more complex flavor. The tart apple holds its shape, while the sweet one breaks down a little, creating that jammy, saucy texture. I learned this from a pie-baking friend, and it works beautifully here.
Let it rest before serving. I cannot stress this enough. The first time I made this, I was so impatient that I scooped it straight from the oven. The topping slid right off into the apples, and I ended up with apple soup with a soggy crumble floating on top. Letting it rest for 10 to 15 minutes allows the filling to thicken and the topping to set. Your patience will be rewarded.
Toast your oats first for extra crunch. If you have an extra five minutes, spread the oats on a baking sheet and toast them at 350°F for 5 minutes before mixing them into the topping. This deepens their nutty flavor and keeps them crunchier during baking. I do this when I’m feeling fancy, but honestly, it’s not necessary for a weeknight dessert.
Watch your oven temperature. Every oven runs differently. I’ve made this in three different ovens, and the baking time varies by up to 10 minutes. Start checking at 28 minutes. The topping should be a deep amber color, not pale golden. If it’s browning too fast, your oven runs hot—just cover loosely with foil for the last 10 minutes.
One more thing: Don’t skip the salt in the topping. I once forgot it, and the crisp tasted flat and one-dimensional. Salt doesn’t make it salty; it makes everything else taste more like itself—the oats toastier, the apples sweeter, the butter richer. It’s a tiny ingredient with a huge impact.
Variations & Adaptations
This recipe is wonderfully flexible. Here are some ways I’ve adapted it over the years:
Seasonal Fruit Swap: In summer, replace the apples with an equal amount of sliced peaches, nectarines, or plums. Reduce the sugar by a tablespoon since stone fruits are naturally sweeter. In fall, try pears—they pair beautifully with the same cinnamon-nutmeg seasoning. I’ve even made this with frozen mixed berries in winter, and it was surprisingly good. Just add an extra tablespoon of flour to the filling to absorb the extra juice.
Gluten-Free Version: Swap the all-purpose flour in both the filling and topping with a 1:1 gluten-free baking blend. I’ve used Bob’s Red Mill and King Arthur, and both worked well. The topping will be a bit more crumbly, so handle it gently when sprinkling. Make sure your oats are certified gluten-free if that’s a concern.
Dairy-Free Adaptation: Replace the butter with a good-quality vegan butter stick (not the spreadable kind in a tub). I’ve had good results with Miyoko’s and Earth Balance. Coconut oil works in a pinch, but the topping won’t be as crispy—it’ll be more like a crumble than a crisp. Still delicious, just different.
Lower Sugar Option: Reduce the total sugar by about a third. Use just 1 tablespoon of granulated sugar in the filling and 2 tablespoons of brown sugar in the topping. The apples provide plenty of natural sweetness, especially if you use a sweet variety like Fuji or Gala. My aunt, who’s diabetic, loves this version with a sprinkle of cinnamon and a tiny pinch of stevia instead of sugar.
Add Some Spice: For a chai-inspired twist, add 1/4 teaspoon of cardamom and a pinch of ground ginger to the filling. Or try a pinch of allspice and cloves for a more traditional winter flavor. I once added a splash of bourbon (about a tablespoon) to the apples before baking, and let me tell you—that was a very good decision.
Serving & Storage Suggestions
How to Serve: This apple crisp is best served warm, about 10 to 15 minutes after it comes out of the oven. The contrast between the hot, tender apples and the cold topping is pure magic. A scoop of vanilla ice cream is the classic choice—it melts into the warm filling and creates this incredible sauce. If you don’t have ice cream, a drizzle of heavy cream or a dollop of Greek yogurt works beautifully. For a special touch, dust the top with a little extra cinnamon or a tiny pinch of flaky sea salt right before serving.
What to Serve With: This dessert is perfect on its own, but if you’re feeling indulgent, pair it with a cup of hot coffee or a mug of spiced chai. A glass of cold milk is also a lovely companion—it cuts through the sweetness and makes the whole experience feel like a cozy hug.
Storage Tips: If you somehow have leftovers (it’s rare in my house), cover the ramekins tightly with plastic wrap or aluminum foil and refrigerate for up to 3 days. The topping will lose some of its crunch, but the flavor will actually deepen as the spices meld. To reheat, place the ramekin in a 350°F oven for 10 to 15 minutes, or microwave on high for 45 seconds. The microwave is faster, but the oven does a better job of crisping up the topping again.
Freezing: You can freeze the unbaked crisp for up to 3 months. Assemble it in a freezer-safe dish, wrap tightly in plastic wrap and foil, and freeze. Bake directly from frozen, adding about 10 minutes to the baking time. I do this when apples are in season and cheap, so I can enjoy a taste of fall in the middle of winter.
Flavor Development: Honestly, this crisp tastes even better the next day. The apples continue to absorb the spices, and the topping softens just enough to become almost like a crumble. I’ve been known to make it the night before and reheat it for a lazy Sunday breakfast. No judgment here.
Nutritional Information & Benefits
Here’s the approximate nutritional breakdown for one serving (using the recipe as written, without nuts or ice cream):
| Nutrient | Amount per Serving |
|---|---|
| Calories | 385 |
| Total Fat | 16g |
| Saturated Fat | 9g |
| Carbohydrates | 60g |
| Fiber | 6g |
| Sugar | 36g |
| Protein | 4g |
| Sodium | 210mg |
This dessert isn’t health food, but it’s not as indulgent as you might think. Apples are packed with fiber and vitamin C, and oats are a great source of soluble fiber, which helps with heart health and keeps you feeling full. The butter and sugar are the main calorie sources, but in a small-batch portion, it’s a perfectly reasonable treat.
If you’re watching your sugar intake, the lower-sugar variation cuts the sugar by about a third. For a lower-fat version, reduce the butter to 3 tablespoons—the topping won’t be as crispy, but it’ll still be delicious.
Dietary Notes: This recipe is vegetarian and can be made gluten-free and dairy-free with the substitutions mentioned above. It contains wheat (flour, oats) and dairy (butter) in its standard form. The nut variation adds tree nuts.
Conclusion
This cozy small-batch apple crisp for two is the kind of recipe that feels like a secret. It’s simple enough for a Tuesday night, special enough for a date night, and budget-friendly enough that you never feel guilty about making it. It’s the dessert I turn to when I want something warm and sweet without a lot of fuss, and it always, always delivers.
I love that this recipe came from a sticky note and a neighbor who didn’t think she was doing anything special. That’s the magic of cooking, isn’t it? The best things are often the simplest. The ones that don’t try to impress anyone, but somehow leave you standing in the kitchen, spoon in hand, wondering why you don’t make them every single day.
So go ahead—grab two apples, some oats, and a little butter. Make this for yourself, or for someone you love. And when you take that first warm, cinnamon-scented bite, I hope it makes you feel exactly the way it makes me feel: like everything is going to be okay.
I’d love to hear how yours turns out. Did you add nuts? Swap in peaches? Eat the whole thing standing at the counter (no judgment)? Drop a comment below and let me know—your tweaks might inspire someone else’s perfect version.
Frequently Asked Questions
Can I make this apple crisp in advance?
Absolutely. You can assemble the crisp (without baking) up to 24 hours ahead. Cover and refrigerate, then bake as directed, adding about 5 extra minutes since the dish will be cold. The topping might be slightly less crispy, but the flavor will be just as good.
What’s the best apple for apple crisp?
I love using a mix of Granny Smith and Honeycrisp. Granny Smith holds its shape and adds tartness, while Honeycrisp breaks down a little and adds natural sweetness. If you only have one type, either works—just adjust the sugar based on the apple’s sweetness.
Can I double this recipe?
Yes! Double all the ingredients and bake in an 8×8-inch dish (or a 1.5-quart baking dish). The baking time will increase by about 10 to 15 minutes. Check for doneness when the filling is bubbling and the topping is golden brown.
Why is my topping not crispy?
Most likely, the butter was too warm when you mixed it in, or you overworked the topping. Cold butter is essential for crispy results. Also, make sure your oven is fully preheated—a cooler oven will melt the butter slowly instead of creating steam pockets. Finally, don’t skip the resting time after baking; it lets the topping set.
Can I use quick oats instead of old-fashioned?
You can, but I don’t recommend it. Quick oats are cut finer and absorb more moisture, so they’ll turn soft and mushy instead of crispy. Old-fashioned rolled oats have a heartier texture that holds up much better during baking. If quick oats are all you have, reduce the baking time by about 5 minutes and expect a softer topping.
Pin This Recipe!
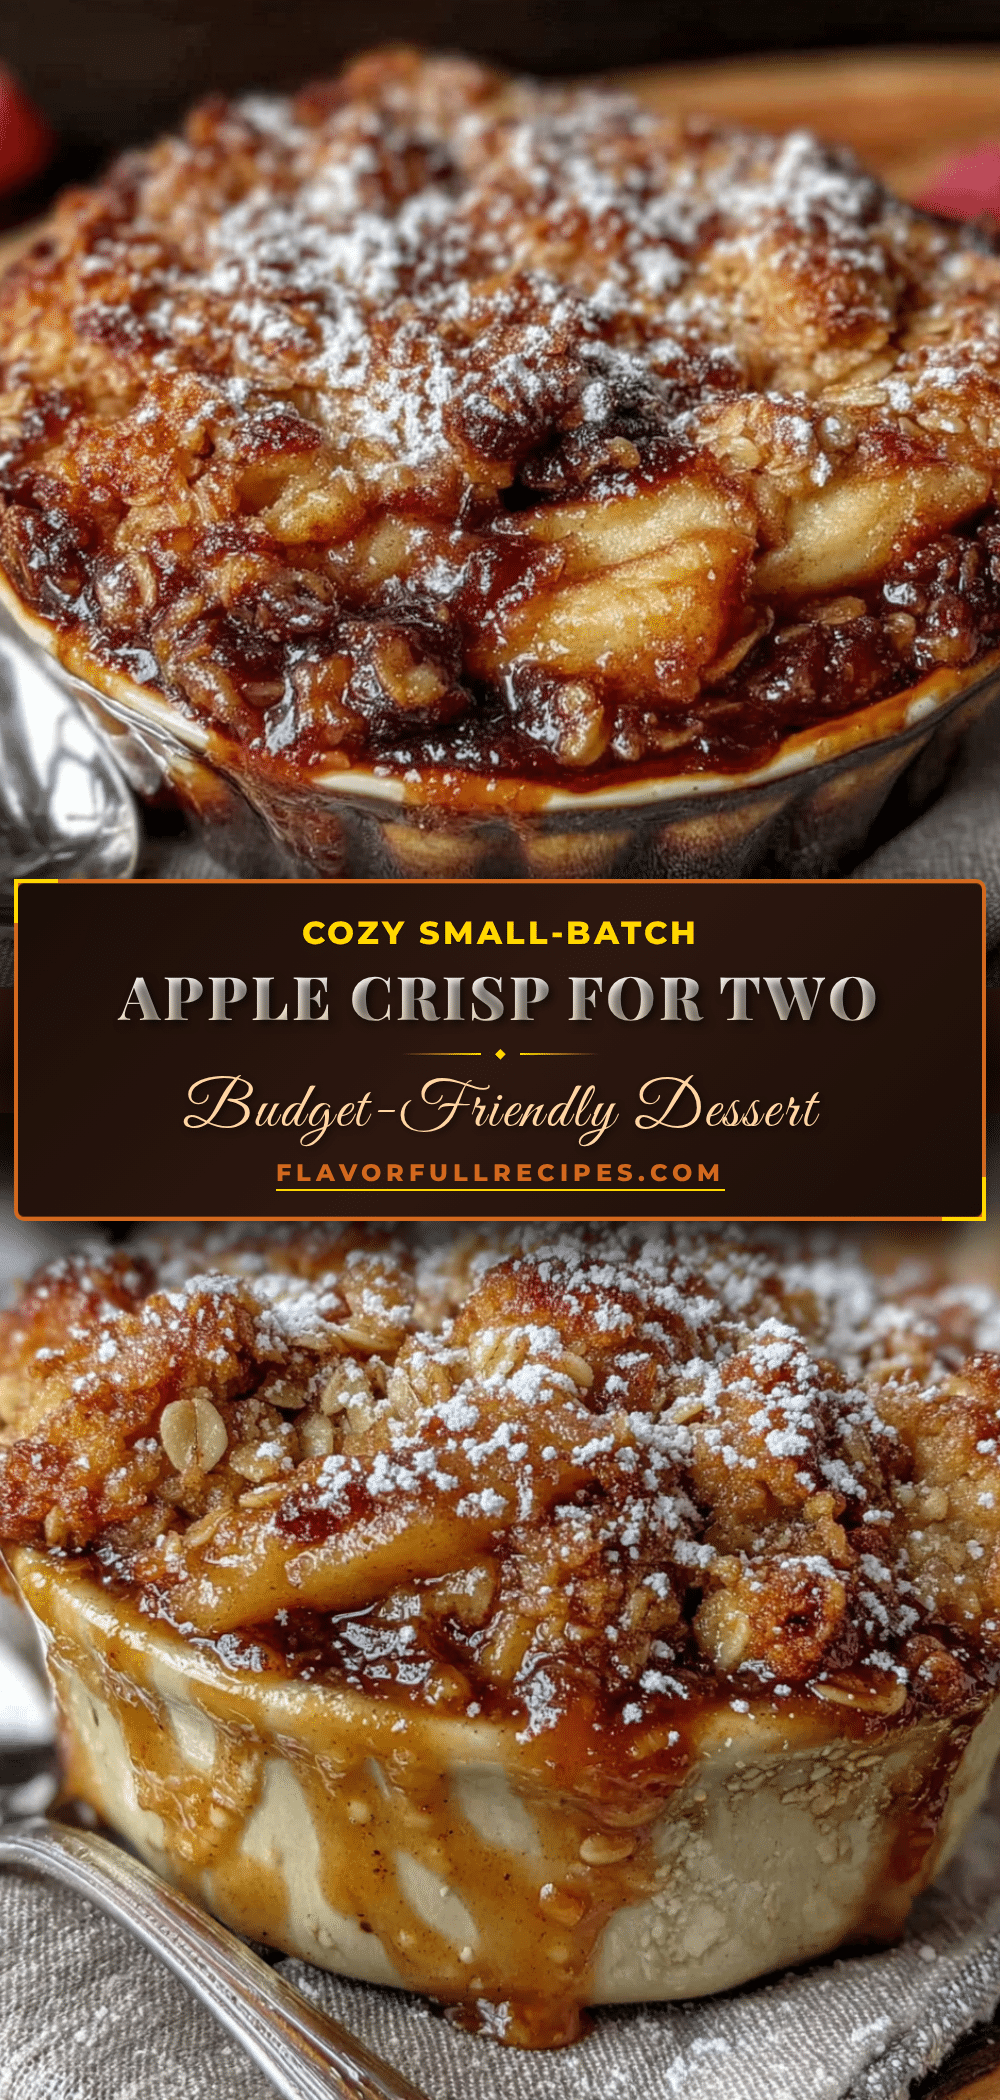

Cozy Small-Batch Apple Crisp for Two – Easy Budget Dessert
- Total Time: 45 minutes
- Yield: 2 servings 1x
Description
This perfectly portioned apple crisp for two features a buttery, crispy oat topping and tender, jammy apple filling. It’s a quick, budget-friendly dessert that comes together in about 45 minutes with simple pantry ingredients.
Ingredients
- 2 medium apples (about 350g / 12 oz total), such as Honeycrisp, Granny Smith, or Fuji
- 2 tablespoons granulated sugar (25g)
- 1 tablespoon brown sugar (12g)
- 1 tablespoon all-purpose flour (8g)
- 1/2 teaspoon ground cinnamon
- 1/8 teaspoon ground nutmeg
- 1 tiny pinch black pepper (optional)
- 1 teaspoon lemon juice (5ml)
- 1/2 cup old-fashioned rolled oats (45g)
- 1/4 cup all-purpose flour (30g)
- 1/4 cup brown sugar (50g), packed
- 1/4 teaspoon salt
- 1/4 cup unsalted butter (56g / 4 tablespoons), cold, cut into small cubes
- 1/4 cup chopped pecans or walnuts (optional, 30g)
Instructions
- Preheat your oven to 375°F (190°C). Position a rack in the center of the oven. Place your ramekins or baking dish on a small baking sheet to catch any overflow.
- Wash, core, and chop your apples into 1/2-inch cubes. Leave the peel on for texture and fiber, or peel if desired.
- In a medium bowl, toss the chopped apples with the granulated sugar, brown sugar, flour, cinnamon, nutmeg, black pepper (if using), and lemon juice until every apple piece is coated. Set aside.
- In a separate small bowl, combine the rolled oats, flour, brown sugar, and salt. Stir with a fork to break up clumps. Add the cold butter cubes. Using a pastry cutter, two forks, or your fingertips, work the butter into the dry ingredients until the mixture looks like coarse, crumbly sand with some pea-sized butter pieces remaining. If using nuts, stir them in now.
- Divide the apple filling evenly between two 8-ounce ramekins or spread it in a small baking dish (about 5×7 inches / 1-quart capacity). Sprinkle the topping evenly over the apples, covering them completely.
- Bake for 30 to 35 minutes, or until the topping is deep golden brown and the filling is bubbling up around the edges. If the topping is browning too quickly after 25 minutes, tent loosely with foil for the remaining time.
- Let the crisps cool on a wire rack for at least 10 minutes before serving. Serve warm, preferably with vanilla ice cream or a drizzle of heavy cream.
Notes
For the best texture, use cold butter straight from the fridge. Don’t overwork the topping; visible butter pieces are good. Let the crisp rest for 10-15 minutes after baking to allow the filling to thicken and the topping to set. For extra crunch, toast the oats at 350°F for 5 minutes before mixing. Don’t skip the salt in the topping.
- Prep Time: 10 minutes
- Cook Time: 30 minutes
- Category: Dessert
- Cuisine: American
Nutrition
- Serving Size: 1 serving (1/2 of re
- Calories: 385
- Sugar: 36
- Sodium: 210
- Fat: 16
- Saturated Fat: 9
- Carbohydrates: 60
- Fiber: 6
- Protein: 4
Keywords: apple crisp, small batch, dessert for two, easy dessert, budget dessert, apple crisp for two, cozy dessert, fall dessert