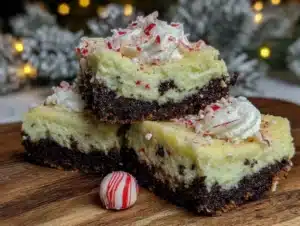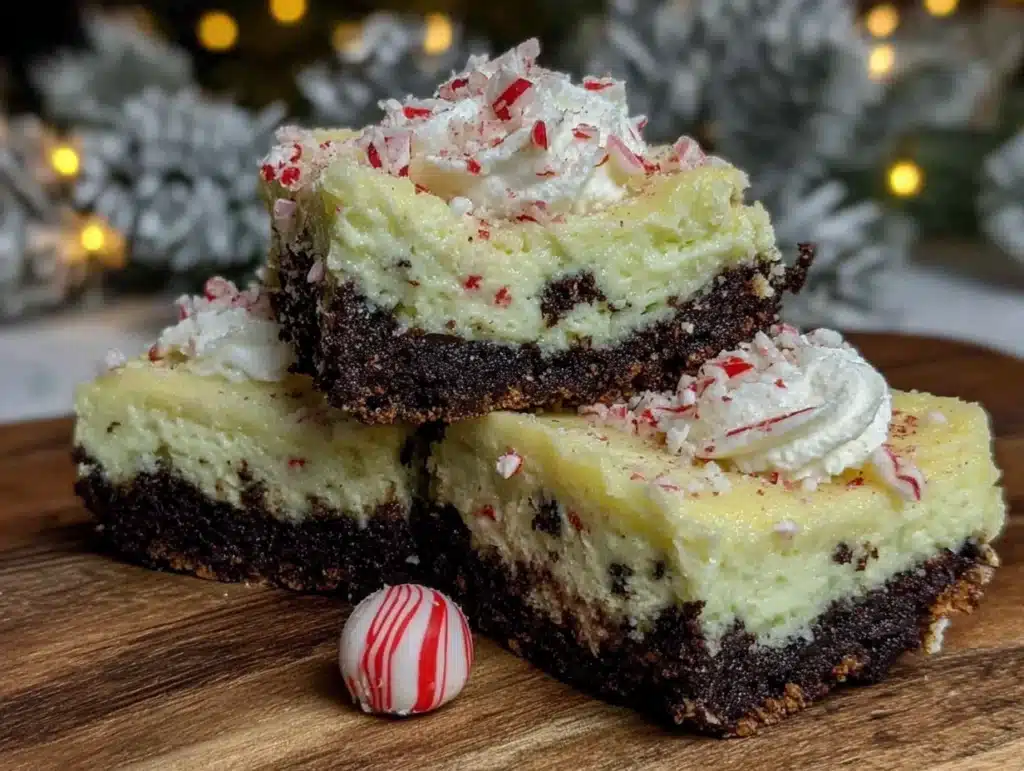
There used to be this little bakery tucked behind the old hardware store on Main Street, the kind of place that smelled like butter and sugar before you even opened the door. They made a peppermint cheesecake bar every December that was pure magic. When they closed suddenly two winters ago, I honestly felt a little lost. I mean, where else could you get that perfect combination — creamy, rich cheesecake with just enough cool peppermint, all sitting on a buttery crust that crumbled in the best way? After six tries, let me tell you — some were too soft, one was a crumbly disaster — I finally cracked it. And the best part? My kids declared it even better than the original. Maybe you’ve been there, chasing a flavor memory that just won’t let go. Well, this no-bake peppermint cheesecake bars recipe is that memory, made right in your own kitchen with zero oven time and a whole lot of holiday cheer.
Why You’ll Love This Recipe
Let me be honest with you — I’ve tested this recipe more times than I care to count. I’ve made it with full-fat cream cheese, reduced-fat cream cheese, and even tried a dairy-free version that my neighbor swore by. Through all those trials, I learned exactly what makes these no-bake peppermint cheesecake bars work every single time. And honestly, that experience taught me things you just can’t get from a quick scroll through a recipe card.
- Quick & Easy : Comes together in about 20 minutes of active prep time. No oven needed, no complicated steps. Even on the busiest December night, you can pull this off.
- Simple Ingredients : You probably already have most of these in your pantry. No hunting down fancy extracts or specialty items at three different stores.
- Perfect for Holiday Gatherings : Bring these to any party or potluck, and watch them disappear. They’re festive without being fussy.
- Crowd-Pleaser : I’ve served these to kids, grandparents, and everyone in between. The peppermint flavor is just right — not too strong, not too sweet.
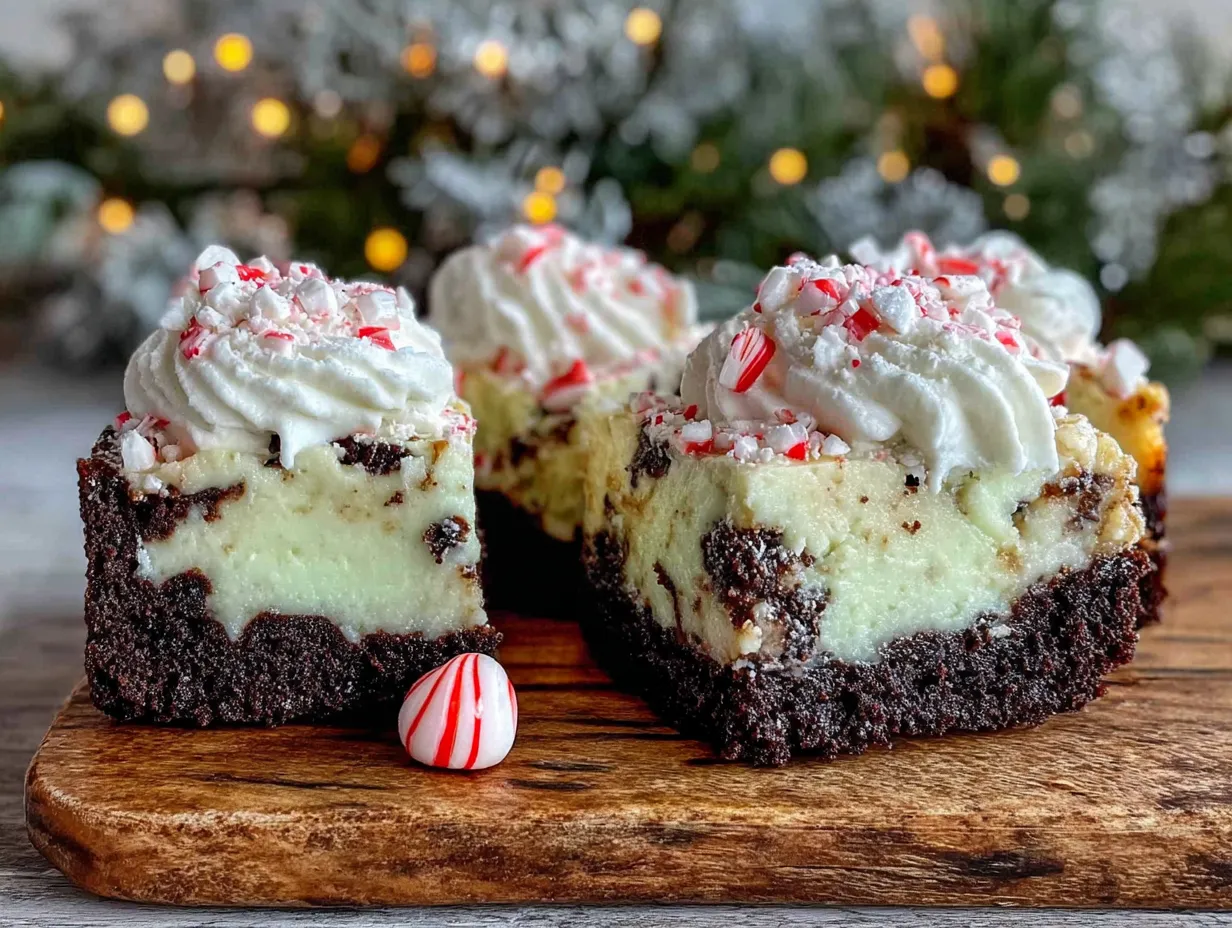
- Unbelievably Delicious : The texture is what gets me every time. That creamy, almost mousse-like filling against the crunchy crust and the little pop of crushed candy canes. It’s comfort food dressed up in holiday colors.
What makes these bars different from all the other recipes out there? It’s the technique. I spent weeks figuring out how to get that filling perfectly thick without using gelatin or any weird ingredients. The secret is in how you whip the cream cheese and how long you let it chill. Trust me, I learned the hard way that rushing this step turns your beautiful bars into a sad puddle.
This is the kind of recipe that makes you feel like a holiday hero without breaking a sweat. It’s the dessert that gets requested year after year, the one your kids will remember when they’re grown. And honestly? It’s the recipe that finally helped me let go of that little bakery on Main Street.
What Ingredients You Will Need
These no-bake peppermint cheesecake bars rely on simple, pantry-friendly ingredients to create something truly special. I’ve tested each one carefully, and I’ll share a few notes that will help you avoid my early mistakes.
- For the Crust:
- 2 cups (200g) crushed chocolate sandwich cookies, about 20 cookies (I prefer Oreos, but any brand works — just scrape out the filling first)
- 5 tablespoons (70g) unsalted butter, melted (salted butter works too, just skip the pinch of salt below)
- 1 tablespoon granulated sugar (optional, but adds a little extra sweetness)
- Pinch of salt (if using unsalted butter)
- For the Cheesecake Filling:
- 16 ounces (450g) full-fat cream cheese, softened to room temperature (this is non-negotiable — cold cream cheese makes lumpy filling)
- 1/2 cup (100g) granulated sugar
- 1 teaspoon vanilla extract
- 1/2 teaspoon peppermint extract (start with less — you can always add more, but you can’t take it out)
- 1 1/4 cups (300ml) heavy cream, cold (whipped cream from a can will NOT work here, I tried it once and it was a disaster)
- 1/2 cup (60g) powdered sugar, sifted
- For the Topping:
- 1/2 cup (80g) crushed candy canes or peppermint candies (about 8-10 regular candy canes)
- 1/2 cup (120ml) heavy cream, cold (for the whipped cream topping)
- 2 tablespoons powdered sugar
- 1/4 teaspoon vanilla extract
- Optional: a few mini chocolate chips or shaved dark chocolate for garnish
A few ingredient tips I’ve learned along the way. For the cream cheese, I really recommend Philadelphia brand — it gives the smoothest, creamiest texture. Store brands can sometimes be a little grainy, especially when you’re not baking the filling. And for the peppermint extract, look for pure peppermint extract rather than peppermint flavoring. The difference is noticeable, and you’ll get a cleaner, more authentic taste.
If you’re feeding picky eaters, you can dial back the peppermint extract to 1/4 teaspoon. The crushed candy canes on top still give plenty of festive flavor without overwhelming sensitive palates.
Equipment Needed
You don’t need a fancy kitchen to make these no-bake peppermint cheesecake bars. Here’s what you’ll actually use:
- 9×9-inch baking pan (an 8×8 works too, your bars will just be slightly thicker)
- Parchment paper (for easy lifting — trust me on this one)
- Mixing bowls (one medium, one large)
- Electric hand mixer or stand mixer (you can whisk by hand, but your arm will hate you)
- Rubber spatula
- Rolling pin or food processor for crushing cookies and candy canes
- Plastic bag (for crushing candy canes without making a mess)
- Measuring cups and spoons
If you don’t have a food processor, no worries. Just put the cookies in a zip-top bag and crush them with a rolling pin. It’s actually kind of therapeutic after a long day. For the candy canes, I always use the bag-and-rolling-pin method — it keeps the peppermint dust from flying everywhere.
Preparation Method
Let me walk you through this step by step. I’ve numbered everything so you can follow along without getting lost.
Step 1: Prepare Your Pan
Line your 9×9-inch baking pan with parchment paper, leaving some overhang on two opposite sides. This creates little handles that make lifting the finished bars out super easy. I learned this trick after destroying my first batch trying to pry them out with a spatula.
Step 2: Make the Crust
Crush your chocolate sandwich cookies into fine crumbs. You want them about the texture of sand — small enough to hold together but not so fine they turn into dust. In a medium bowl, combine the cookie crumbs with the melted butter, sugar, and salt. Stir until every crumb is coated and the mixture looks like wet sand. Press this firmly into the bottom of your prepared pan. I use the bottom of a measuring cup to really pack it down. Pop this in the fridge while you make the filling.
Step 3: Whip the Cream
In a large bowl, pour your cold heavy cream. Using your electric mixer, whip the cream on medium-high speed until it starts to thicken. Add the powdered sugar and vanilla, then continue whipping until stiff peaks form. You’ll know it’s ready when you lift the beaters and the cream stands up in peaks that don’t flop over. Set this aside in the fridge for a minute.
Step 4: Make the Cheesecake Filling
In another large bowl, beat the softened cream cheese with the granulated sugar until it’s completely smooth. This takes about 2-3 minutes with a hand mixer. Scrape down the sides of the bowl halfway through. Add the vanilla and peppermint extracts, then beat for another minute until everything is well combined. The mixture should be silky with no lumps at all.
Step 5: Fold It All Together
Here’s where patience matters. Take your whipped cream out of the fridge. Add about one-third of it to the cream cheese mixture and fold gently with your rubber spatula. I say “fold” but really I mean cut through the middle, scrape the bottom, and turn it over. Repeat until it’s mostly combined, then add the next third. Keep going until all the whipped cream is incorporated and the mixture is light, airy, and uniform in color. Don’t overmix or you’ll deflate all that air you worked so hard to create.
Step 6: Assemble the Bars
Pour the cheesecake filling over your chilled crust. Spread it evenly with your spatula, getting into all the corners. Give the pan a gentle tap on the counter to release any air bubbles. Cover with plastic wrap and refrigerate for at least 6 hours, but overnight is better. I know it’s tempting to rush this, but the bars need that time to set properly.
Step 7: Make the Topping
When your bars are fully set, make the whipped cream topping. Whip the remaining heavy cream with powdered sugar and vanilla until soft peaks form. Spread this over the chilled cheesecake layer.
Step 8: Add the Peppermint Crunch
Crush your candy canes into small pieces — not too fine, you want some texture. Sprinkle them generously over the whipped cream topping. Gently press them in so they stick. Return to the fridge for another 30 minutes before slicing.
Step 9: Slice and Serve
Use the parchment paper handles to lift the entire block out of the pan. Place it on a cutting board and use a sharp knife to slice into bars. Wipe the knife clean between cuts for neat edges. Serve cold.
Cooking Tips & Techniques
After making these no-bake peppermint cheesecake bars more times than I care to admit, I’ve collected a few hard-won lessons. Let me save you some trouble.
Room temperature cream cheese is not optional. I know, I know, you’re in a hurry. But cold cream cheese will leave you with lumpy filling that no amount of beating will fix. Take it out of the fridge at least an hour before you start. If you forget, unwrap it and microwave it in 10-second bursts until it’s soft but not warm.
Don’t skip the chill time. I once tried to rush these bars because guests were coming in four hours. They were… okay. But the next day, after a full night in the fridge, they were incredible. The flavors meld, the texture firms up perfectly, and the crust sets just right. Plan ahead.
Watch your peppermint extract. A little goes a long way. I learned this the hard way when I accidentally added a full teaspoon instead of half. The bars tasted like toothpaste. Not my finest moment. Start with 1/4 teaspoon, taste, and add more if you want a stronger kick.
Crush candy canes in a bag. Put them in a zip-top bag, cover with a kitchen towel, and go to town with a rolling pin. This keeps the peppermint dust contained and prevents candy cane shrapnel from ending up all over your kitchen.
Variations & Adaptations
One of the best things about this recipe is how flexible it is. Here are a few ways I’ve adapted it over the years.
Gluten-Free Version: Use gluten-free chocolate sandwich cookies for the crust. I’ve tried several brands, and they all work well. Just make sure to check the labels if you’re serving someone with celiac disease.
Dairy-Free Adaptation: Substitute the cream cheese with a good-quality dairy-free version, use coconut cream instead of heavy cream, and choose dairy-free butter for the crust. I’ve made this for a friend who’s lactose intolerant, and it turned out beautifully.
Chocolate Peppermint Dream: Add 1/4 cup of melted dark chocolate to the cheesecake filling before folding in the whipped cream. It creates a marbled effect that looks stunning and tastes even better.
Mint Chocolate Chip Version: Fold in 1/2 cup of mini chocolate chips into the filling along with the whipped cream. The little chocolate bits add a lovely texture and extra chocolate flavor.
Individual Mini Bars: Press the crust into a mini muffin tin lined with paper liners, then spoon the filling on top. These are perfect for holiday parties or lunchbox surprises. Just reduce the chill time to about 3 hours.
Serving & Storage Suggestions
These no-bake peppermint cheesecake bars are best served cold, straight from the fridge. I like to let them sit at room temperature for about 5 minutes before serving — it takes the chill off just enough without compromising the texture.
For presentation, I arrange them on a white platter with a few extra crushed candy canes scattered around. A sprig of fresh mint on the side adds a nice pop of green. If you’re feeling fancy, drizzle a little melted dark chocolate over the top just before serving.
These bars pair beautifully with a cup of hot cocoa, a peppermint mocha, or even a glass of cold milk. For holiday gatherings, I often serve them alongside my crispy garlic chicken — I know it sounds odd, but the contrast between savory and sweet is actually perfect for a holiday buffet.
Storage: Keep these bars in an airtight container in the refrigerator for up to 5 days. The crust stays crisp, and the filling stays creamy. Honestly, they taste even better on day two.
Freezing: These freeze beautifully. Wrap individual bars tightly in plastic wrap, then place them in a freezer-safe container. They’ll keep for up to 3 months. To serve, thaw in the refrigerator overnight. The texture remains perfect.
Reheating: Don’t. These are meant to be served cold. If you want a warm dessert, try a different recipe.
Nutritional Information & Benefits
Let’s be real — these no-bake peppermint cheesecake bars are a treat, not a health food. But I believe in enjoying the holidays without guilt, and a small bar now and then is part of a balanced life.
Per serving (one bar, based on 16 servings):
- Calories: 285
- Fat: 20g
- Saturated Fat: 12g
- Carbohydrates: 24g
- Sugar: 18g
- Protein: 4g
Some positives to note: the cream cheese provides a good amount of calcium and protein. Peppermint has been known to aid digestion — not that you need an excuse, but it’s nice to know. And honestly, the joy these bars bring to a holiday table is a benefit you can’t measure in numbers.
These bars are not gluten-free, dairy-free, or low-carb in their standard form, but as I mentioned above, adaptations are possible. Always check labels if you’re serving someone with allergies.
Conclusion
These no-bake peppermint cheesecake bars have become my holiday signature. They’re the dessert I bring to every party, the one my kids ask for by name, the recipe that finally let me stop missing that little bakery on Main Street. There’s something special about creating a tradition with your own hands — and this one is so simple that anyone can do it.
I’d love to hear how yours turn out. Did you add chocolate chips? Try the dairy-free version? Maybe your kids helped crush the candy canes and made a glorious mess? Drop a comment below and share your version. And if you’re looking for another easy holiday treat, check out my easy holiday cookies — they’re almost as popular as these bars.
Happy holidays, friend. Go make something delicious.
Frequently Asked Questions
Can I use low-fat cream cheese?
You can, but the texture won’t be as rich and creamy. Full-fat cream cheese gives the best results for no-bake cheesecake because it sets up firmer. If you use low-fat, expect a softer, slightly less stable bar.
How long do these bars need to chill?
At least 6 hours, but overnight is ideal. The filling needs time to firm up completely. If you try to cut them too soon, you’ll end up with a mess. Trust me, I’ve been there.
Can I use store-bought whipped topping instead of making my own?
I really don’t recommend it. Homemade whipped cream gives a much better texture and flavor. Store-bought toppings contain stabilizers that can make the filling taste artificial and leave a weird aftertaste.
My bars turned out too soft. What went wrong?
Most likely one of three things: your cream cheese wasn’t fully softened, you didn’t whip the cream to stiff peaks, or you didn’t chill them long enough. Next time, make sure your cream cheese is at room temperature and whip that cream until it’s truly stiff.
Can I make these ahead of time for a party?
Absolutely! These are perfect make-ahead desserts. You can prepare them up to two days in advance and keep them covered in the fridge. Add the whipped cream topping and crushed candy canes on the day you plan to serve them for the best presentation.
Pin This Recipe!
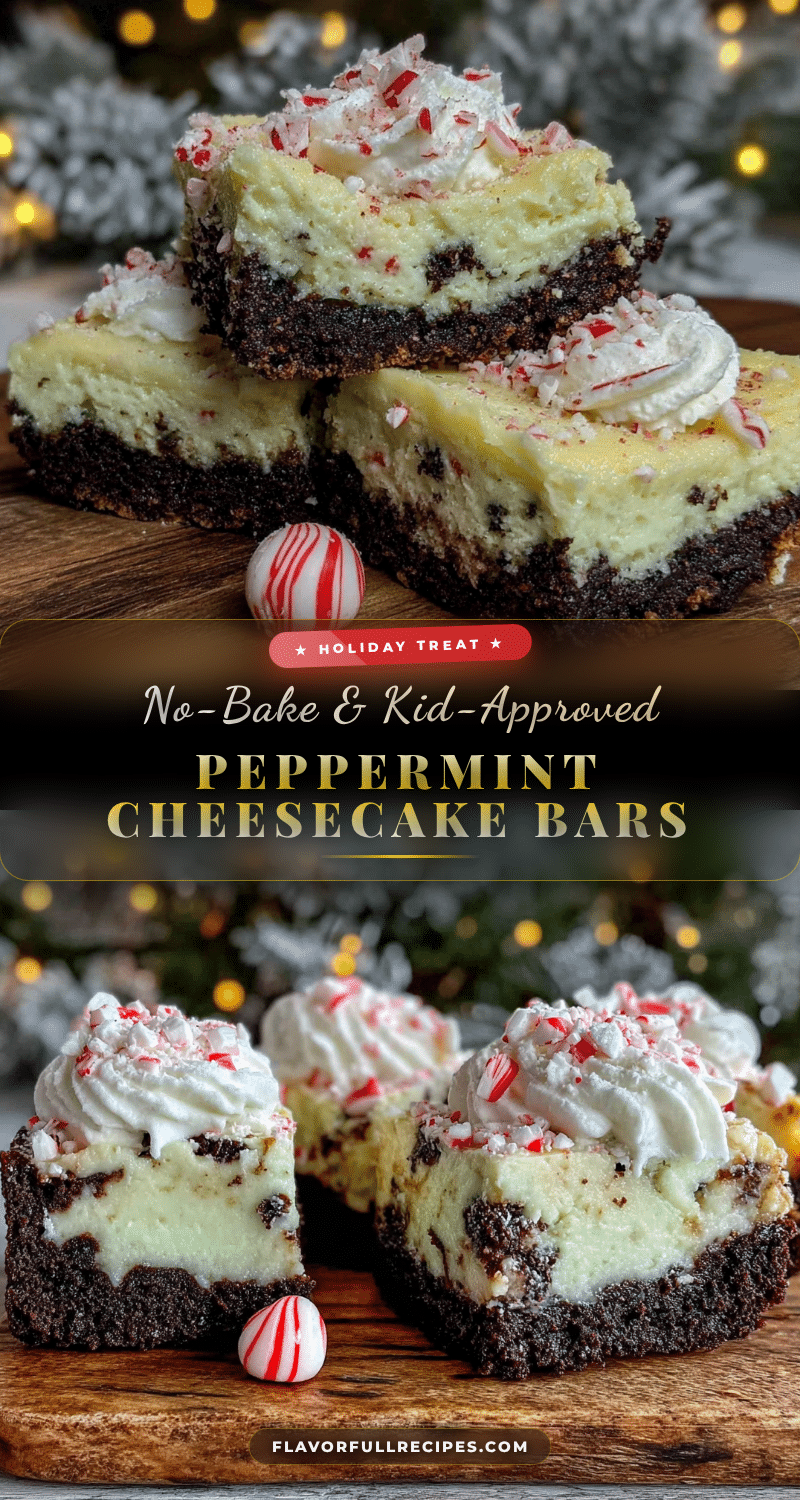

No-Bake Peppermint Cheesecake Bars
- Total Time: 6 hours 20 minutes (includes chilling)
- Yield: 16 servings 1x
Description
Creamy, rich cheesecake with cool peppermint on a buttery chocolate crust. A no-bake holiday dessert that’s quick, easy, and perfect for gatherings.
Ingredients
- 2 cups (200g) crushed chocolate sandwich cookies (about 20 cookies, filling removed)
- 5 tablespoons (70g) unsalted butter, melted
- 1 tablespoon granulated sugar (optional)
- Pinch of salt (if using unsalted butter)
- 16 ounces (450g) full-fat cream cheese, softened to room temperature
- 1/2 cup (100g) granulated sugar
- 1 teaspoon vanilla extract
- 1/2 teaspoon peppermint extract
- 1 1/4 cups (300ml) heavy cream, cold
- 1/2 cup (60g) powdered sugar, sifted
- 1/2 cup (80g) crushed candy canes or peppermint candies (about 8–10 regular candy canes)
- 1/2 cup (120ml) heavy cream, cold (for topping)
- 2 tablespoons powdered sugar (for topping)
- 1/4 teaspoon vanilla extract (for topping)
- Optional: mini chocolate chips or shaved dark chocolate for garnish
Instructions
- Line a 9×9-inch baking pan with parchment paper, leaving overhang on two opposite sides.
- Crush chocolate sandwich cookies into fine crumbs. In a medium bowl, combine crumbs with melted butter, sugar, and salt. Stir until coated. Press firmly into the bottom of the prepared pan. Refrigerate while making filling.
- In a large bowl, whip cold heavy cream on medium-high speed until it thickens. Add powdered sugar and vanilla, continue whipping until stiff peaks form. Set aside in fridge.
- In another large bowl, beat softened cream cheese with granulated sugar until smooth (2-3 minutes). Scrape sides. Add vanilla and peppermint extracts, beat for 1 minute until well combined.
- Fold one-third of whipped cream into cream cheese mixture gently. Repeat with remaining whipped cream until light, airy, and uniform. Do not overmix.
- Pour cheesecake filling over chilled crust. Spread evenly. Tap pan gently to release air bubbles. Cover with plastic wrap and refrigerate for at least 6 hours, preferably overnight.
- When bars are set, make topping: whip remaining heavy cream with powdered sugar and vanilla until soft peaks form. Spread over chilled cheesecake layer.
- Crush candy canes into small pieces. Sprinkle generously over whipped cream topping. Gently press in. Refrigerate for another 30 minutes.
- Use parchment handles to lift bars out of pan. Slice into bars with a sharp knife, wiping clean between cuts. Serve cold.
Notes
Cream cheese must be at room temperature to avoid lumps. Chill for at least 6 hours, preferably overnight. Start with 1/4 teaspoon peppermint extract and adjust to taste. Crush candy canes in a bag to contain mess. Bars can be stored in the refrigerator for up to 5 days or frozen for up to 3 months.
- Prep Time: 20 minutes
- Cook Time: 0 minutes
- Category: Dessert
- Cuisine: American
Nutrition
- Serving Size: 1 bar
- Calories: 285
- Sugar: 18
- Fat: 20
- Saturated Fat: 12
- Carbohydrates: 24
- Protein: 4
Keywords: no-bake peppermint cheesecake bars, holiday dessert, easy cheesecake, peppermint dessert, no-bake dessert