
I was standing in the checkout line at the hardware store—of all places—when the woman behind me started talking about Halloween treats. She was maybe seventy, with silver hair and a sensible jacket, holding a bag of lightbulbs and a single pretzel rod she’d pulled from her purse. “You know what my grandkids go crazy for every year?” she said, tapping the pretzel against her palm. “Witch fingers. But not the cookies. The pretzel kind.” I wasn’t expecting cooking advice from a stranger in the lighting aisle, but there I was, Wednesday afternoon, listening to her describe exactly how to make these creepy little things. She told me she’d been making them for thirty-one years, ever since her daughter was in kindergarten. I grabbed a bag of pretzel rods on the way home, honestly, before I’d even decided to make them. Sometimes the best recipes come from the most unexpected people, and this one came from a woman whose name I never even caught.
Let me tell you, these Kid-Friendly Witch Finger Pretzel Rods are exactly what you need this Halloween. They’re spooky without being scary, easy enough for little hands to help with, and they cost next to nothing to make. I mean, we’re talking about pretzel rods, some melting chocolate, and a handful of almond slivers. That’s it. No fancy equipment, no trips to three different stores, no spending twenty dollars on specialty candy. My own kids went absolutely wild when I set the tray on the counter—my youngest actually screamed “MOM THOSE ARE DISGUSTING” in the best possible way, which is basically the highest compliment you can get from a seven-year-old.
Maybe you’ve been there—scrolling Pinterest at midnight, feeling that familiar panic because Halloween is three days away and you still don’t have anything for the class party. Or maybe you just want something fun to make with your kids that won’t leave you scrubbing chocolate out of the carpet for a week. These witch finger pretzel rods are the answer. They look impressive, they taste amazing (salty-sweet perfection), and they come together in about twenty minutes. The woman from the hardware store was right—thirty-one years of grandkid approval doesn’t lie. I’ve been making these every October since that day, and I don’t plan on stopping anytime soon.
Why You’ll Love This Recipe
I’ve tested this recipe more times than I care to admit—through broken almond slivers, melted chocolate that seized up on me, and one memorable incident where my toddler tried to eat a raw pretzel rod dipped in nothing but sprinkles. After all that trial and error, I can tell you with confidence: this version works every single time. Here’s why these witch finger pretzel rods deserve a spot on your Halloween menu:
- Budget-Friendly: You can make a whole batch for under five dollars. Seriously. Pretzel rods are cheap, melting chocolate goes on sale every October, and almond slivers cost pennies per serving. Your wallet will thank you.
- Kid-Approved: My kids have brought these to school parties, neighbor gatherings, and family Halloween dinners. They disappear every single time. Even the picky eaters who “don’t like chocolate” somehow end up eating three.
- Quick & Easy: From start to finish, you’re looking at about twenty minutes of active work. The hardest part is waiting for the chocolate to set. If you’ve got impatient little helpers, this is the recipe for you.
- No Special Skills Required: If you can dip a pretzel in melted chocolate and stick an almond on the end, you can make these. No piping bags, no complicated techniques, no stress.
- Perfect for Halloween: They look delightfully creepy—like actual witch fingers—but they’re completely kid-friendly. No gore, no scary faces, just fun spooky vibes.
What makes this recipe different from all the other Halloween treats out there? It’s the texture combination, honestly. You get that satisfying crunch from the pretzel, the creamy sweetness from the chocolate, and the little nutty bite from the almond “fingernail.” It’s not just another sugar bomb—it’s salty and sweet and weirdly addictive. Plus, these hold up really well at room temperature, which means you can make them a day ahead and not worry about them melting or getting soggy. That’s a game-changer for busy parents, let me tell you.
This recipe is the kind that makes you feel like a Halloween hero without actually doing much work. Your kids will think you’re some kind of kitchen wizard. Your neighbors will ask for the recipe. And you’ll get to enjoy that warm little glow that comes from pulling off something fun and festive without breaking a sweat. Honestly, that’s the best kind of recipe to have in your back pocket.
What Ingredients You Will Need
This recipe uses simple, everyday ingredients to create something that looks way more complicated than it actually is. You probably already have most of these in your kitchen, which is exactly how I like my Halloween treats to work. Let’s break down what you’ll need and why each ingredient matters.
- Pretzel rods (1 standard bag, about 12-16 rods): These are the “fingers” themselves, so you want the thick, sturdy kind—not the thin twisty pretzels. I usually grab the store brand to save money, and they work perfectly. Just make sure they’re not broken in the bag, because cracked pretzels are harder to dip and don’t look as convincing. If you can only find the extra-long rods, that’s fine too—just break them in half for smaller fingers.
- Green candy melts or melting wafers (1 cup, about 6 ounces): This is what gives the pretzels that creepy witchy color. You can find green candy melts at most craft stores or in the baking aisle during October. If you can’t find green, white chocolate with a few drops of green food coloring works just as well. I’ve used both Wilton and Ghirardelli brands, and honestly, the cheap store brand melts fine too. Just avoid chocolate chips—they don’t melt as smoothly and tend to get lumpy.
- Almond slivers (about 24-32 pieces): These become the witch fingernails, so you want slivers that are relatively flat and uniform in size. If your almond slivers are super tiny, you can use whole almonds cut in half lengthwise instead. I’ve also used sliced almonds in a pinch, but they’re a little too thin and break easily. Look for slivers that are about the size of a pinky fingernail—that’s the sweet spot.
- Edible googly eyes (optional, about 24-32): These are totally optional, but they add so much personality. You can find them in the baking aisle or online. If you don’t have any, you can pipe little dots with black frosting or just skip them entirely—the fingers still look creepy without eyes.
- Red decorating gel or frosting (optional): A tiny dab at the base of the almond “fingernail” gives the illusion of blood without being too gory. My kids love this part, but I skip it for school parties where parents might be sensitive. Use your judgment.
- Coconut oil or shortening (1 teaspoon): This is my secret weapon for smooth, shiny melted chocolate. Adding a tiny bit helps the candy melts flow better and gives a nice glossy finish. You don’t need it if you’re using high-quality melting wafers, but it really helps with the cheaper brands.
That’s it. Seven ingredients, most of which you probably already have or can find easily. No obscure spices, no expensive imports, no hunting through three different stores. I love recipes like this because they prove you don’t need a fully stocked pantry to make something special. One bag of pretzel rods, one bag of candy melts, and a handful of almonds—that’s all it takes to become the coolest parent on the block.
Equipment Needed
You don’t need a fancy kitchen to make these witch finger pretzel rods. I’ve made them in my tiny apartment kitchen, in my mom’s cramped galley kitchen, and even in a cabin with basically no counter space. Here’s what you’ll actually use:
- Microwave-safe bowl (medium size): For melting the candy melts. A glass measuring cup works great too—the spout makes dipping easier.
- Baking sheet or tray: Lined with parchment paper or wax paper. This is where the dipped pretzels will set. Make sure it fits in your fridge or freezer if you’re in a hurry.
- Small spatula or offset spatula: For smoothing the chocolate if needed. A butter knife works in a pinch.
- Tweezers (optional but helpful): For placing the almond slivers and googly eyes without getting chocolate all over your fingers. I use my regular kitchen tweezers, but clean fingers work too.
- Piping bag or small zip-top bag: If you want to add red gel details or extra chocolate accents. You can also just use a toothpick for fine details.
- Cooling rack (optional): If you want the chocolate to set more evenly, you can place the dipped pretzels on a cooling rack over the baking sheet. This prevents pooling at the bottom.
That’s really all you need. No double boiler, no candy thermometer, no special molds. I’ve made these with just a bowl, a spoon, and a baking sheet more times than I can count. The tweezers are nice but not essential—my kids just use their fingers and it works fine (though we do end up with chocolate fingerprints everywhere). If you’re making these with little helpers, embrace the mess. It’s part of the fun.
Preparation Method

Alright, let’s get to the fun part. Here’s how to make these creepy little fingers step by step. I’ve included all the little tricks I’ve learned from years of making these—the things that turn good witch fingers into great witch fingers.
- Prep your workspace (5 minutes): Line a baking sheet with parchment paper or wax paper. Make sure it’s big enough to hold all your pretzel rods without them touching each other. Set out your almond slivers, googly eyes, and any other decorations so they’re easy to grab. Trust me, you don’t want to be hunting for almond slivers with melted chocolate dripping everywhere.
- Melt the candy melts (2-3 minutes): Place the green candy melts in a microwave-safe bowl. Microwave in 30-second intervals, stirring well after each interval, until completely smooth. This usually takes about 90 seconds total, but microwaves vary. Add 1 teaspoon of coconut oil or shortening if the mixture seems thick—it should be the consistency of warm honey. Be careful not to overheat, because burnt chocolate gets grainy and gross. I’ve ruined more than one batch by getting distracted and nuking it too long.
- Dip the pretzels (10-15 minutes): Hold a pretzel rod by one end and dip it into the melted chocolate, leaving about an inch undipped at the top (this will be the “wrist” area). Gently twist and tap the pretzel against the side of the bowl to let excess chocolate drip off. You want a nice even coating, but you don’t want thick globs. Place the dipped pretzel on the prepared baking sheet. Repeat with all the pretzels. Work quickly—the chocolate will start to set as it cools.
- Add the fingernails (right after dipping): While the chocolate is still wet, press an almond sliver onto the tip of each pretzel rod. Position it so it looks like a fingernail—slightly overlapping the end of the pretzel, with the pointed end facing outward. Press gently so it sticks. If the chocolate has already started to set, just dip the almond in the melted chocolate before placing it—that’ll help it adhere.
- Add the knuckle wrinkles (optional but fun): Use a toothpick or the tip of a small knife to draw little wrinkle lines on the chocolate coating. Make two or three lines across the “finger” to mimic knuckles. Don’t press too hard—you just want to create a slight indent in the chocolate. This is the step that really sells the witch finger illusion, so don’t skip it if you have time.
- Add the eyes and details (right after dipping): If you’re using googly eyes, place them on the pretzel while the chocolate is still wet. I usually put two eyes near the “wrist” end, making the finger look like a little creature. For the red “blood” detail, wait until the chocolate has set (about 10 minutes), then use a toothpick or piping bag to add a tiny dab of red gel at the base of the almond fingernail. Less is more here—you want creepy, not gory.
- Let them set (20-30 minutes at room temperature, or 10 minutes in the fridge): Let the pretzels sit undisturbed until the chocolate is completely firm. If you’re in a hurry, pop the baking sheet in the refrigerator for about 10 minutes. Just don’t leave them in too long, because condensation can make the chocolate look dull. I usually make these in the evening and let them set overnight on the counter—they’re always perfect by morning.
- Finishing touches (5 minutes): Once the chocolate is set, you can add extra details if you want. I sometimes pipe a little green “wart” or two on the fingers using leftover melted chocolate. My daughter likes to add tiny sprinkles that look like warts. Get creative—there are no rules here.
And that’s it! You’ve just made a batch of witch finger pretzel rods that look like they came from a professional bakery. The whole process takes about 30 minutes of active time, plus setting time. Easy enough for a weeknight Halloween activity, impressive enough for a class party.
Cooking Tips & Techniques
After making these witch finger pretzel rods about a dozen times, I’ve collected a few tips that make the process smoother and the results better. Some of these I learned the hard way—like the time I used cheap chocolate that refused to set and ended up with a tray of sticky, sad-looking fingers. Learn from my mistakes.
Temperature matters more than you think. Candy melts are finicky about temperature. If your kitchen is really warm (like 75°F or above), the chocolate will take forever to set and might stay tacky. If it’s too cold, the chocolate will thicken up before you can dip all the pretzels. Aim for a cool, dry room—around 68-70°F is ideal. If your kitchen is warm, pop the dipped pretzels in the fridge for a few minutes to speed up setting.
Don’t skip the coconut oil. I know it seems like an unnecessary extra step, but adding a tiny bit of coconut oil or shortening to your melting chocolate makes a huge difference. It thins out the chocolate so it coats the pretzels more evenly, and it gives a nice glossy finish. Without it, the chocolate can look dull and streaky. Just a teaspoon is enough for a cup of melts.
Work in small batches. If you’re making a big batch (like for a class party), don’t try to dip all the pretzels at once. Melt half the chocolate, dip half the pretzels, then melt the rest. This keeps the chocolate at the right consistency and prevents it from thickening up before you’re done. I learned this the hard way when I tried to dip 30 pretzels at once and ended up with lumpy, uneven coating on the last ones.
Keep your hands clean. Chocolate-covered fingers are inevitable, but you can minimize the mess by holding the pretzels by the undipped end. If your hands do get chocolatey, just wipe them on a damp paper towel between pretzels. And if you’re working with kids, accept that there will be chocolate everywhere and embrace it. That’s half the fun.
Troubleshooting common issues: If your chocolate seizes up (gets thick and grainy), you can sometimes save it by adding a teaspoon of coconut oil and stirring vigorously. If that doesn’t work, just start over with fresh melts—it’s not worth trying to salvage seized chocolate. If your almond slivers won’t stick, dip them in the melted chocolate first before pressing them onto the pretzel. And if your googly eyes slide off, it means the chocolate was too thick—thin it with a bit more oil next time.
Variations & Adaptations
One of the best things about this recipe is how easy it is to customize. I’ve tried several variations over the years, and they’ve all been hits. Here are some of my favorites:
Monster Fingers: Skip the almond fingernails and instead press candy eyeballs all over the pretzel. Use different colored melts—purple, orange, or black—for a monster-themed treat. My son loves these because they look like little aliens.
Mummy Pretzels: Dip the pretzels in white chocolate, then use a piping bag to drizzle more white chocolate in a crisscross pattern over the top. Add two tiny eyes peeking through the “bandages.” These are less creepy and more cute, which is perfect for younger kids.
Gluten-Free Version: Use gluten-free pretzel rods instead of regular ones. Most major brands offer gluten-free options now, and they work exactly the same way. Just double-check that your candy melts are also gluten-free—most are, but it’s worth verifying.
Dairy-Free Version: Use dairy-free chocolate chips or candy melts (Enjoy Life makes good ones) and skip the coconut oil if you’re avoiding it. The dairy-free chocolate might be a little thicker, so add a teaspoon of vegetable oil to thin it out.
Spicy Witch Fingers: Add a pinch of cayenne pepper or chili powder to the melted chocolate before dipping. The heat pairs surprisingly well with the salty pretzel and sweet chocolate. I tried this on a whim last year and it was a huge hit with the adults.
Color Variations: You don’t have to stick with green. Purple witch fingers look amazing for a wizard theme. Orange works great for a pumpkin vibe. And white chocolate with silver sprinkles makes them look like icicle fingers for a winter-themed party. Get creative with whatever colors you have on hand.
My personal favorite variation is the “zombie fingers”—I dip them in gray or pale green chocolate, add a red gel “blood” spot, and press on a tiny piece of black licorice for a torn nail effect. It’s a little gross, which is exactly what my teenagers love. But for the little kids, I stick with the classic green with googly eyes. You know your audience best.
Serving & Storage Suggestions
These witch finger pretzel rods are surprisingly versatile when it comes to serving and storing. Here’s what I’ve learned from making them for parties, school events, and just because.
Serving: Arrange the pretzels standing up in a small cup or jar for the creepiest presentation. They look like a hand reaching out of the container! You can also lay them flat on a platter, clustered together like a pile of severed fingers. For a Halloween party, I like to stick them into a pumpkin or a foam block covered in fake moss—it looks like they’re growing out of the ground. Serve them at room temperature for the best texture. The chocolate should be firm but not hard, and the pretzel should still have that satisfying crunch.
Storage: Store the finished pretzels in an airtight container at room temperature. They’ll stay fresh for up to a week, though honestly they never last that long in my house. If you live in a humid climate, add a silica gel packet to the container to keep the pretzels from getting stale. Don’t refrigerate them unless you have to—the moisture can make the chocolate look cloudy. If you do refrigerate, let them come to room temperature before serving to restore the shine.
Freezing: You can freeze these for up to three months! Place the pretzels in a single layer on a baking sheet and freeze until solid (about an hour), then transfer to a freezer-safe bag or container. To thaw, just let them sit at room temperature for about 15 minutes. The texture holds up surprisingly well—I’ve made these a month before Halloween and they were perfect.
Transporting: If you’re bringing these to a party, pack them in a rigid container with parchment paper between layers. Don’t stack them too high, or the bottom ones might break. I use a clean egg carton for transport—each pretzel fits perfectly in its own little compartment. It’s a game-changer for school parties.
Flavor development: These actually taste better the next day. The chocolate sets completely, and the flavors meld together. If you can resist eating them right away, make them a day ahead for the best results. Just don’t tell your kids they have to wait—I learned that lesson the hard way.
Nutritional Information & Benefits
Let’s be real—these are a treat, not a health food. But that doesn’t mean they’re totally without redeeming qualities. Here’s the nutritional breakdown for one witch finger pretzel rod (based on using standard ingredients):
- Calories: Approximately 120-150 per pretzel rod, depending on the amount of chocolate used
- Fat: 6-8 grams (mostly from the chocolate and almonds)
- Carbohydrates: 15-18 grams
- Sugar: 8-10 grams
- Protein: 2-3 grams
- Sodium: 200-250 mg (from the pretzel)
The good stuff: Almonds are a great source of vitamin E, magnesium, and healthy fats. The pretzel provides a little bit of iron and B vitamins. And dark chocolate (if you use it) has antioxidants. But let’s be honest—the main benefit here is the joy it brings. Sometimes that’s enough.
Dietary considerations: This recipe contains gluten (from the pretzels), dairy (from the chocolate), and tree nuts (from the almonds). For a nut-free version, use sunflower seed slivers instead of almonds. For gluten-free, use gluten-free pretzel rods. For dairy-free, use dairy-free chocolate. Always check labels if you’re serving people with allergies.
My take: Halloween is one day a year. I don’t stress about the sugar content of a single treat. These pretzels are portion-controlled—one is satisfying without being over-the-top. And honestly, the joy of making them with my kids and watching their faces light up is worth every calorie. Balance is key, and a little indulgence now and then is part of a happy life.
Conclusion
These Kid-Friendly Witch Finger Pretzel Rods have become a Halloween tradition in my house, and I have a feeling they’ll become one in yours too. They’re everything I want in a holiday treat—fun to make, easy on the budget, and absolutely adored by kids and adults alike. The fact that they came from a random conversation in a hardware store just makes them better. Some of the best things in life come from unexpected places.
I love that this recipe gives you permission to be a little silly. You get to make creepy fingers with your kids, laugh at how ridiculous they look, and then eat them together. That’s the kind of memory that sticks. And the best part? You can customize them however you want. Make them green, make them purple, add googly eyes or leave them plain. This recipe is a starting point, not a rulebook.
So here’s my challenge to you: Make a batch of these this Halloween. Get your kids involved—let them dip and decorate and make a mess. Take a picture of the finished product (because they really do look amazing). And then leave a comment below telling me how they turned out. Did your kids love them? Did you try a fun variation? I genuinely want to hear about it. Happy Halloween, and happy snacking!
Frequently Asked Questions
Can I make these witch finger pretzel rods ahead of time?
Absolutely! These are perfect for making ahead. You can store them in an airtight container at room temperature for up to a week, or freeze them for up to three months. I actually think they taste better the next day after the chocolate has fully set.
What if I can’t find green candy melts?
No problem at all! You can use white chocolate or vanilla candy melts and add a few drops of green food coloring. Just stir it in well until you get the shade you want. You can also use any color you like—purple, orange, or even black for a different look.
How do I keep the almond slivers from falling off?
The key is to press the almond into the chocolate while it’s still wet. If the chocolate has started to set, just dip the almond in the melted chocolate first before placing it. This creates a little glue that holds it in place. Also, make sure you’re using flat almond slivers—the curved ones don’t stick as well.
Are these safe for kids with nut allergies?
As written, this recipe contains almonds, so it’s not safe for nut allergies. However, you can easily make a nut-free version by using sunflower seed slivers instead of almonds. Just check that all your other ingredients are also nut-free. Always communicate with other parents about ingredients before sending treats to school or parties.
Can I use regular chocolate chips instead of candy melts?
You can, but I don’t recommend it. Chocolate chips are formulated to hold their shape when baked, so they don’t melt as smoothly. They tend to get thick and lumpy. If you must use chocolate chips, add a teaspoon of coconut oil or shortening to help them melt more smoothly. Candy melts or melting wafers give much better results and are worth the small extra cost.
Pin This Recipe!
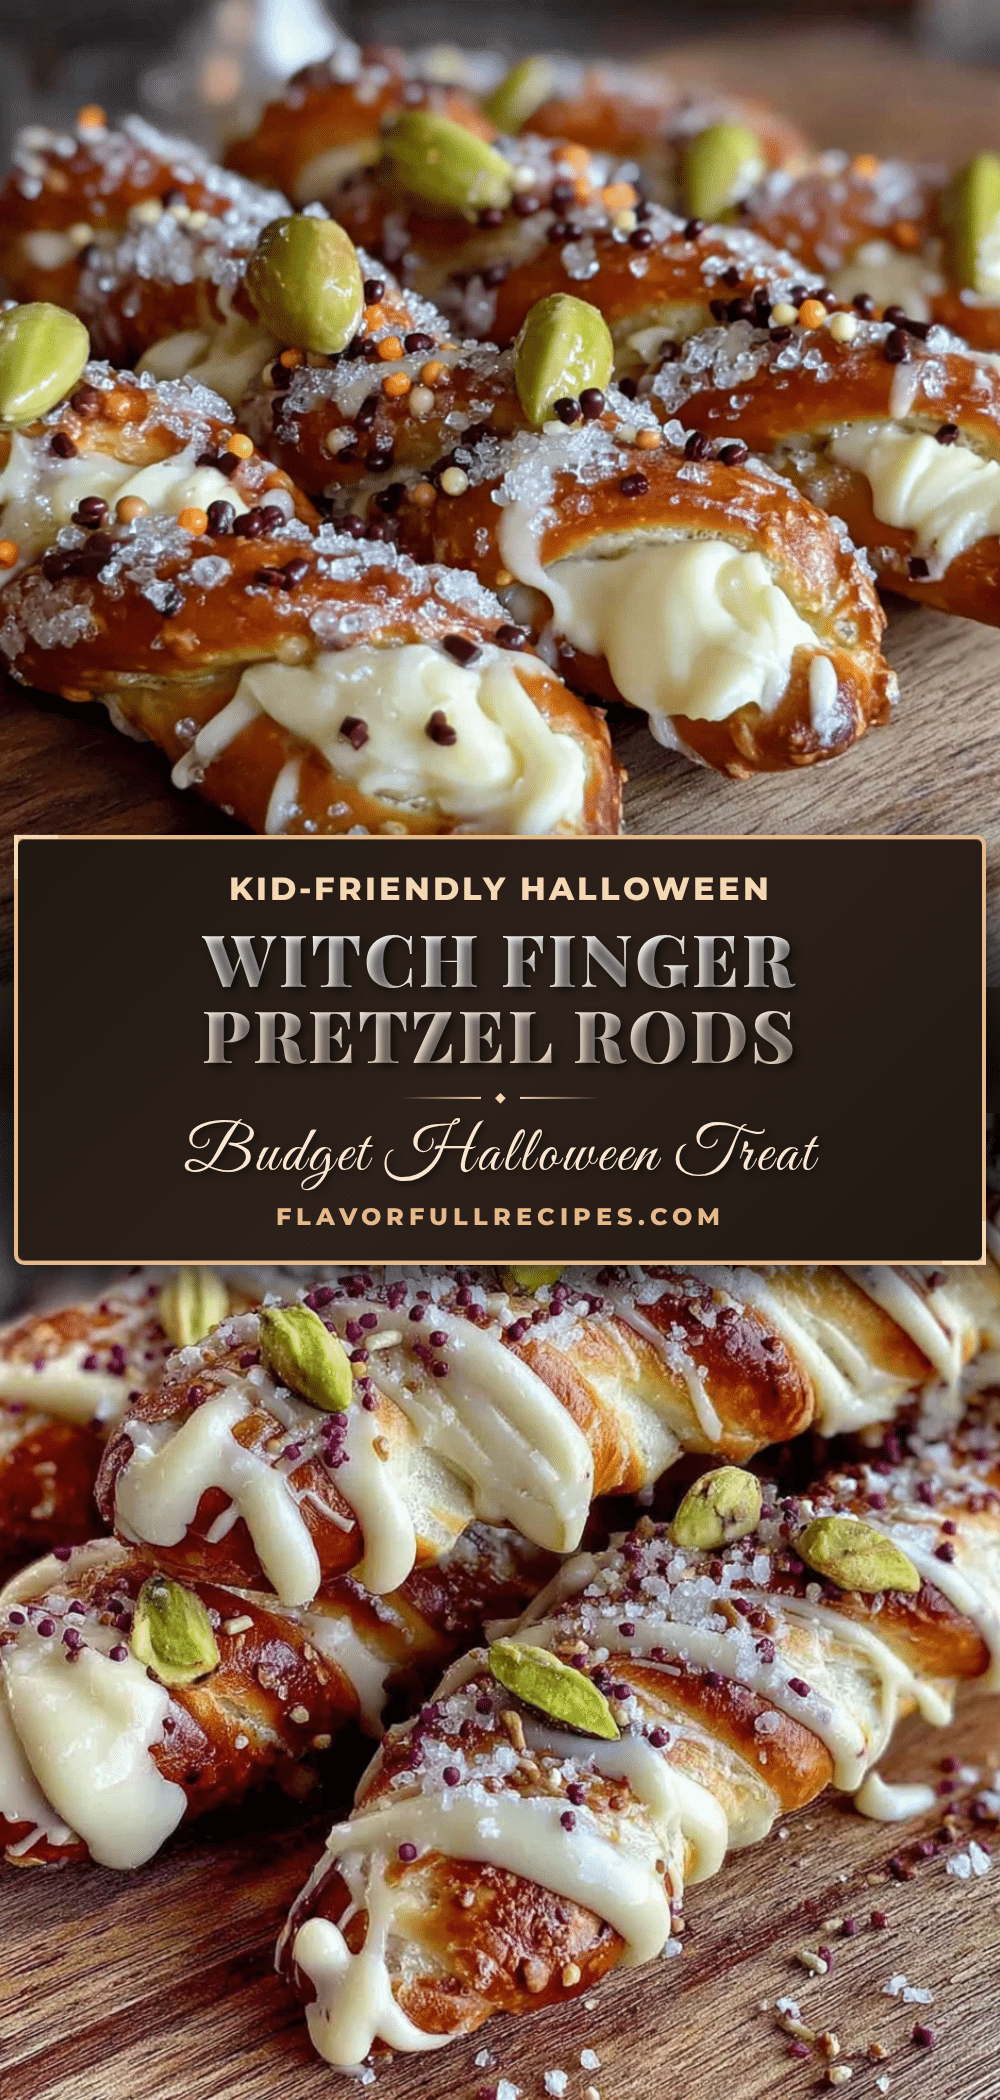

Easy Witch Finger Pretzel Rods: Best Budget Halloween Treat
- Total Time: 30 minutes (plus 20-30 minutes setting time)
- Yield: 12-16 servings 1x
Description
These Kid-Friendly Witch Finger Pretzel Rods are spooky without being scary, easy enough for little hands to help with, and cost next to nothing to make. They look impressive, taste amazing (salty-sweet perfection), and come together in about twenty minutes.
Ingredients
- 1 standard bag pretzel rods (about 12–16 rods)
- 1 cup green candy melts or melting wafers (about 6 ounces)
- 24–32 almond slivers
- 24–32 edible googly eyes (optional)
- Red decorating gel or frosting (optional)
- 1 teaspoon coconut oil or shortening
Instructions
- Prep your workspace: Line a baking sheet with parchment paper or wax paper. Set out almond slivers, googly eyes, and any other decorations.
- Melt the candy melts: Place green candy melts in a microwave-safe bowl. Microwave in 30-second intervals, stirring well after each, until completely smooth (about 90 seconds total). Add 1 teaspoon coconut oil or shortening if mixture seems thick.
- Dip the pretzels: Hold a pretzel rod by one end and dip into melted chocolate, leaving about an inch undipped at the top (the ‘wrist’ area). Gently twist and tap against the bowl to let excess chocolate drip off. Place on prepared baking sheet. Repeat with all pretzels.
- Add the fingernails: While chocolate is still wet, press an almond sliver onto the tip of each pretzel rod, positioned like a fingernail with pointed end facing outward. Press gently to stick.
- Add knuckle wrinkles (optional): Use a toothpick or small knife to draw 2-3 wrinkle lines across the ‘finger’ to mimic knuckles, creating slight indents in the chocolate.
- Add eyes and details (optional): If using googly eyes, place them on the pretzel while chocolate is still wet. For red ‘blood’ detail, wait until chocolate sets (about 10 minutes), then use a toothpick or piping bag to add a tiny dab of red gel at the base of the almond fingernail.
- Let them set: Allow pretzels to sit undisturbed until chocolate is completely firm (20-30 minutes at room temperature, or 10 minutes in the refrigerator).
- Finishing touches: Once set, add extra details if desired, such as piping a little green ‘wart’ or adding tiny sprinkles.
Notes
Temperature matters: Aim for a cool, dry room around 68-70°F. Don’t skip the coconut oil—it helps the chocolate coat evenly and gives a glossy finish. Work in small batches if making a large batch. These actually taste better the next day after the chocolate has fully set. For nut-free version, use sunflower seed slivers instead of almonds. For gluten-free, use gluten-free pretzel rods. For dairy-free, use dairy-free chocolate.
- Prep Time: 20 minutes
- Cook Time: 0 minutes
- Category: Dessert
- Cuisine: American
Nutrition
- Serving Size: 1 pretzel rod
- Calories: 120150
- Sugar: 810
- Sodium: 200250
- Fat: 68
- Saturated Fat: 34
- Carbohydrates: 1518
- Fiber: 1
- Protein: 23
Keywords: Halloween treats, witch fingers, pretzel rods, kid-friendly Halloween, easy Halloween recipe, budget Halloween treats, spooky snacks