My brother-in-law Mark had claimed to hate pumpkin seeds for thirty-seven years. Thirty-seven years. Every Halloween, every pumpkin carving session, every fall gathering—he’d watch the rest of us scoop out those slippery seeds, rinse them, and toss them in the oven, and he’d just shake his head. “Tastes like cardboard,” he’d say. “Like chewing on a dried-out leaf.” We all just nodded and ate our crunchy, salty snacks while he stuck to the candy bowl.
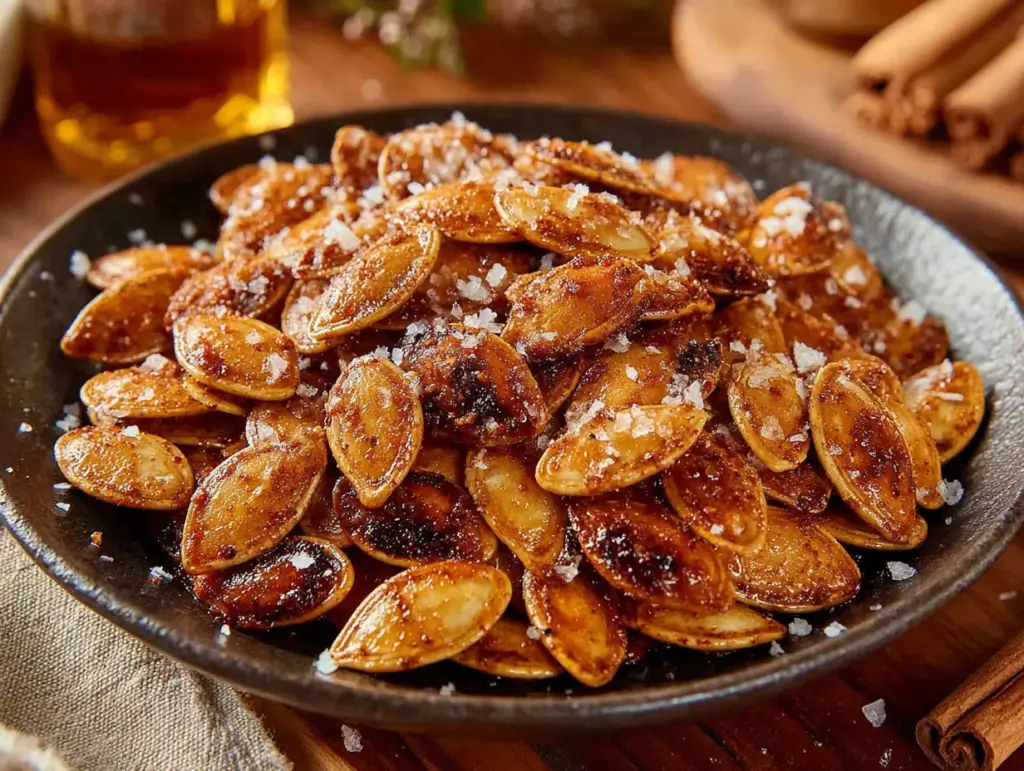
Then last November, I got caught. I mean, literally caught in the act. I was testing a new recipe—smoky, spicy, a little bit sweet—and I had a big batch cooling on a baking sheet. Mark walked into the kitchen to grab a beer, paused, and just stood there staring at them. I didn’t say a word. He picked one up, examined it like it was a suspicious object, and popped it in his mouth. Then another. Then he grabbed a handful and walked back to the living room without a single comment. I waited. Nothing. But the bowl was half empty by the time dinner was ready.
Honestly, I didn’t even bring it up. Some victories are better left unspoken. But that bowl of healthy smoky spiced baked pumpkin seeds did what years of pleading and persuasion couldn’t—it turned a certified pumpkin seed hater into someone who now asks me, every single fall, “You making those seeds again this year?”
Maybe you’ve got a picky eater in your house, or maybe you’re the one who’s never quite understood the appeal. Let me tell you—this version changes everything. It’s not about dry, bland seeds that taste like an afterthought. It’s about smoky depth, a gentle kick of heat, and a crunch that actually satisfies. And the best part? They’re genuinely good for you, which means you can snack without the guilt.
Why You’ll Love This Recipe
Let’s be real for a second—not all pumpkin seeds are created equal. I’ve tested this recipe at least a dozen times, tweaking the spice blend, adjusting the oven temperature, and figuring out the perfect soak time. What I landed on is a version that actually delivers on flavor without turning your kitchen into a science lab. Here’s why this one stands out:
- Quick & Easy: From seed to snack in under 30 minutes. No complicated steps, no fancy equipment—just a bowl, a baking sheet, and an oven.
- Simple Ingredients: You probably already have everything in your pantry. Smoked paprika, cayenne, garlic powder, a touch of maple syrup—all stuff you likely bought for something else.
- Perfect for Snacking: Great for game day, movie night, lunchboxes, or just munching while you’re working from home. They also make a killer topping for soups and salads.
- Crowd-Pleaser: Seriously, I’ve served these at parties and watched people who swore they didn’t like seeds go back for thirds. Mark is living proof.
- Unbelievably Delicious: The smoky-spicy-sweet combo is addictive in the best way. You’ll find yourself reaching for just one more handful—and then another.
What makes this recipe different from the dozens of others out there? It’s the soak. Most recipes skip this step, but soaking the seeds in salted water before roasting does two things: it helps the seasoning stick, and it gives you that perfectly crunchy interior without burning the exterior. Plus, the balance of smoked paprika and cayenne is carefully calibrated—smoky without being overwhelming, spicy without being punishing. It’s comfort snacking, reimagined.
This recipe isn’t just good—it’s the kind that makes you close your eyes after the first bite. That smoky warmth hits your nose before the crunch even registers, and then the subtle heat creeps in at the end. It’s deeply satisfying, and you don’t have to feel bad about finishing the whole batch.
What Ingredients You Will Need
This recipe relies on simple, wholesome ingredients that work together to create layers of flavor without any fuss. Most of these are pantry staples, so you can whip up a batch whenever the mood strikes.
For the Seeds:
- 1 cup raw pumpkin seeds (also called pepitas—look for the green, hulled variety for best texture)
- 2 cups water (for the soaking brine)
- 1 tablespoon fine sea salt (for the brine—this helps the seeds absorb flavor and get crunchy)
For the Seasoning Blend:
- 1 tablespoon olive oil (or avocado oil for a higher smoke point)
- 1 teaspoon smoked paprika (I prefer Sweet Smoked Spanish Paprika for that deep, woodsy flavor)
- 1/2 teaspoon garlic powder (not garlic salt—we’re controlling the sodium ourselves)
- 1/4 teaspoon cayenne pepper (adjust up or down depending on your heat tolerance)
- 1/2 teaspoon ground cumin (adds an earthy warmth that complements the smoke)
- 1 tablespoon maple syrup (pure maple syrup, not pancake syrup—trust me on this)
- Freshly ground black pepper (about 1/4 teaspoon, or to taste)
Ingredient Notes & Substitutions:
- Pumpkin seeds: You can use seeds straight from a fresh pumpkin, but make sure to rinse them thoroughly to remove all the stringy pulp. If you’re using store-bought raw pepitas, they’re already clean and ready to go.
- Oil: Coconut oil works too, but it will add a slight coconut flavor. Not a bad thing, just something to be aware of.
- Maple syrup: Honey or agave nectar are fine substitutes. If you’re watching sugar intake, you can skip the sweetener entirely—the seeds will still be delicious, just less complex.
- Spice adjustments: Want it smokier? Add another 1/2 teaspoon of smoked paprika. Want it milder? Cut the cayenne to 1/8 teaspoon or skip it altogether. This is your snack—make it your own.
A quick note on sourcing: I’ve tried a few different brands of pumpkin seeds, and I keep coming back to Anthony’s Goods for their consistent quality and fresh taste. But honestly, any raw, hulled pepita from a reputable brand will work beautifully.
Equipment Needed
You don’t need a lot of fancy gear for this recipe, which is part of why I love it. Here’s what you’ll need:
- Medium mixing bowl (for soaking the seeds)
- Colander or fine-mesh strainer (for rinsing)
- Kitchen towel or paper towels (for drying the seeds)
- Small bowl (for mixing the seasoning)
- Baking sheet (a half-sheet pan works perfectly)
- Parchment paper (optional, but makes cleanup a breeze)
- Spatula or wooden spoon (for stirring)
If you don’t have parchment paper, you can lightly grease the baking sheet with a little extra oil. I’ve done it both ways, and honestly, the parchment just makes life easier—the seeds don’t stick, and you can lift the whole batch off in one piece.
One pro tip: if you’re using seeds from a fresh pumpkin, you’ll also want a large bowl of cold water to help separate the seeds from the pulp. The seeds float, the pulp sinks—it’s a neat little trick that saves you a ton of time.
Preparation Method
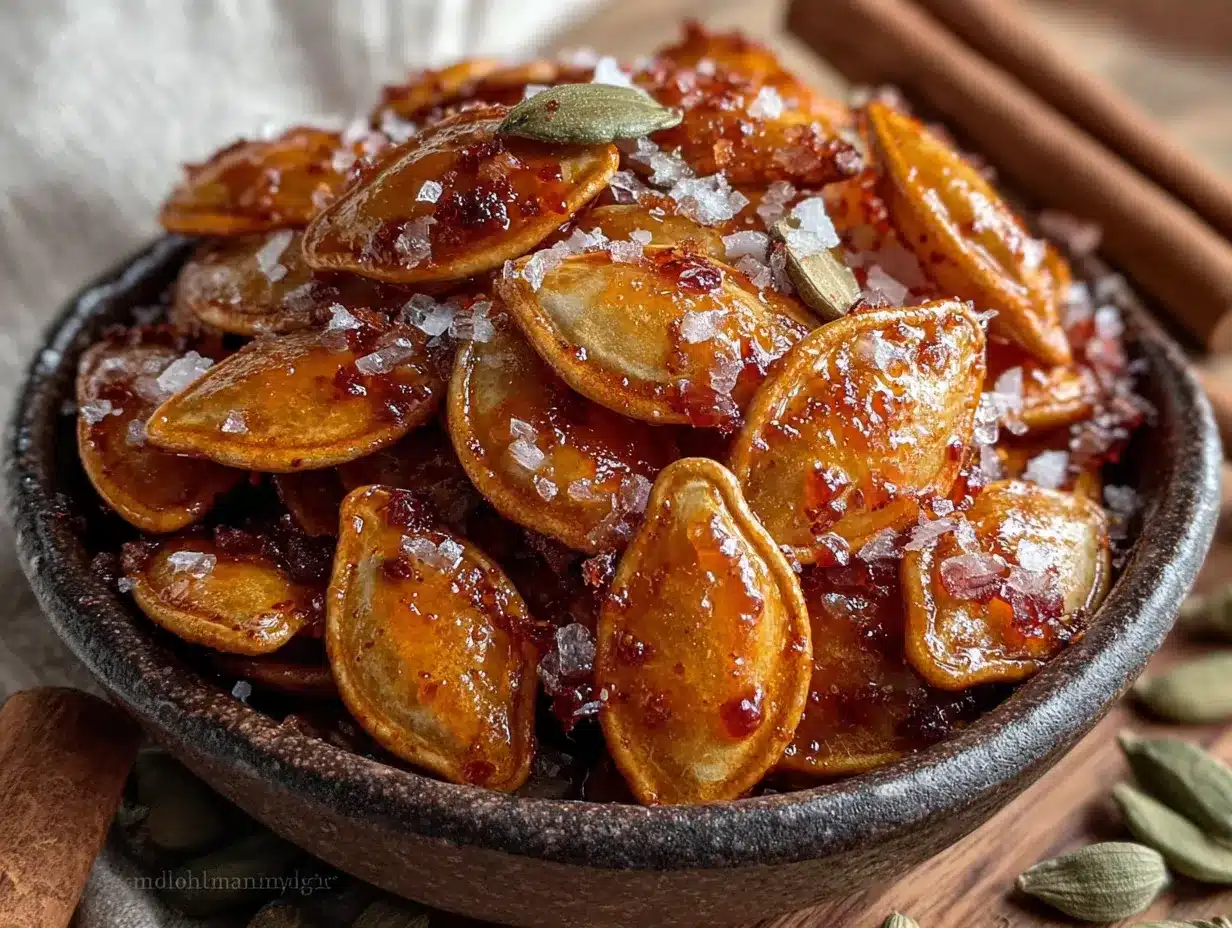
Alright, let’s get cooking. This method is straightforward, but I’ve included some notes along the way that come from trial and error (and a few burnt batches).
- Preheat your oven to 325°F (160°C). Line a baking sheet with parchment paper if you’re using it. Getting the oven to the right temperature before you start mixing is key—you want it ready to go as soon as the seeds are seasoned.
- Prepare the brine. In a medium bowl, combine 2 cups of warm water with 1 tablespoon of fine sea salt. Stir until the salt dissolves completely. The warm water helps the salt dissolve faster, and it also starts the absorption process.
- Soak the seeds. Add 1 cup of raw pumpkin seeds to the brine and stir to make sure they’re all submerged. Let them soak for 10 minutes. I know it’s tempting to skip this step, but don’t. This is what gives the seeds that perfect crunch—the salt penetrates the seeds, and when they roast, the moisture evaporates, leaving behind a light, airy texture. Set a timer. I’ve forgotten before and ended up with overly salty seeds. Ten minutes is the sweet spot.
- Drain and dry. Pour the seeds into a colander or fine-mesh strainer and rinse them briefly with cold water. Then spread them out on a clean kitchen towel or a layer of paper towels. Pat them very dry—this is important. If the seeds are too wet, the seasoning won’t stick, and they’ll steam instead of roast. I usually let them sit on the towel for about 5 minutes while I mix the seasoning.
- Mix the seasoning. In a small bowl, combine 1 tablespoon olive oil, 1 teaspoon smoked paprika, 1/2 teaspoon garlic powder, 1/4 teaspoon cayenne pepper, 1/2 teaspoon ground cumin, 1 tablespoon maple syrup, and a few grinds of black pepper. Stir until it forms a thick, fragrant paste. Take a second to smell it—that smoky aroma is what you’re after.
- Coat the seeds. Transfer the dried seeds to a clean bowl and pour the seasoning mixture over them. Use a spatula or your hands (I use my hands—it’s easier and more satisfying) to toss the seeds until they’re evenly coated. Every seed should have a thin, even layer of the spice blend.
- Spread on the baking sheet. Pour the seasoned seeds onto the prepared baking sheet and spread them into a single, even layer. Try not to overlap them too much—crowding leads to uneven roasting. If they’re piled up, some will burn while others stay soft.
- Roast. Place the baking sheet in the preheated oven and bake for 12-15 minutes, stirring halfway through. At the 7-minute mark, pull the sheet out, give the seeds a good stir with a spatula, and spread them back out. This ensures even browning. Watch them carefully in the last few minutes—they go from golden to burnt very quickly. You’re looking for a deep, toasty brown color and a fragrant, nutty smell.
- Cool completely. Remove the baking sheet from the oven and let the seeds cool on the pan for at least 10 minutes. They’ll continue to crisp up as they cool. Don’t rush this step—if you try to eat them while they’re still warm, they’ll be slightly soft. Patience pays off here.
- Enjoy. Once completely cool, transfer the seeds to a bowl and dig in. Or store them in an airtight container for later—if they last that long.
Cooking Tips & Techniques
I’ve made this recipe enough times to learn a few things the hard way. Here are the tips I wish someone had given me from the start:
Don’t skip the soak. I know I’ve said this already, but it bears repeating. The brine is the secret to crunchy seeds that aren’t rock-hard. Without it, the seeds tend to be dense and chewy on the inside. The salt also seasons them from the inside out, so every bite is flavorful, not just the surface.
Watch your oven like a hawk. Ovens vary wildly in temperature. My old oven would burn these seeds at 325°F, but my current one takes the full 15 minutes. Check them at the 10-minute mark and use your senses—they should smell toasty and look golden brown. If they smell burnt, you’ve gone too far.
Stirring is non-negotiable. That halfway stir isn’t just for show. The seeds around the edges of the pan cook faster than the ones in the middle. Stirring redistributes them and ensures even roasting. I’ve forgotten to do this and ended up with half a batch of burnt seeds and half that were still pale. Not my finest moment.
Let them cool completely. This is probably the hardest tip to follow, because the kitchen smells amazing and you just want to grab a handful. But warm seeds are soft seeds. Give them a full 10-15 minutes to cool, and they’ll transform into that satisfyingly crunchy snack you’re after.
Double the batch. Seriously. These disappear fast. I’ve learned to make at least double what I think I need, because once they’re gone, everyone looks at me with those sad eyes. Plus, they store beautifully, so having extra on hand is never a bad thing.
Variations & Adaptations
One of the best things about this recipe is how flexible it is. Here are some variations I’ve tried and loved:
Sweet & Spicy: Increase the maple syrup to 2 tablespoons and add an extra 1/4 teaspoon of cayenne. The sweetness balances the heat, and you get this addictive sweet-heat combo that’s perfect for snacking.
Herb & Garlic: Skip the smoked paprika and cayenne. Instead, use 1 teaspoon dried rosemary, 1 teaspoon dried thyme, and an extra 1/2 teaspoon garlic powder. This version is amazing sprinkled over roasted vegetables or salads.
Everything Bagel: After coating the seeds with the oil and maple syrup, sprinkle them with 1 tablespoon of everything bagel seasoning (poppy seeds, sesame seeds, dried garlic, dried onion, and salt). Roast as directed. This is my go-to for topping avocado toast.
Cheesy Nutritional Yeast: For a dairy-free “cheese” flavor, add 2 tablespoons of nutritional yeast to the seasoning mix. It gives the seeds a savory, umami kick that’s surprisingly convincing. My vegan friends go crazy for this version.
Air Fryer Method: If you have an air fryer, you can make these in half the time. Preheat the air fryer to 300°F (150°C). Cook the seasoned seeds for 8-10 minutes, shaking the basket halfway through. Keep an eye on them—air fryers are even more efficient than ovens, and they can burn quickly.
Serving & Storage Suggestions
These seeds are incredibly versatile. Here’s how I like to serve and store them:
Serving: I usually serve them at room temperature in a simple bowl. They’re perfect as a standalone snack, but they also shine as a topping. Sprinkle them over creamy soups (butternut squash soup is a match made in heaven), add them to salads for crunch, or use them as a garnish for roasted vegetables. They also make a fantastic gift—just pack them in a mason jar with a ribbon, and you’ve got a thoughtful, homemade present.
Storage: Store the cooled seeds in an airtight container at room temperature. They’ll stay fresh and crunchy for up to 2 weeks—if they last that long. I’ve kept them for 3 weeks with no noticeable loss of quality, but they rarely make it past day 3 in my house.
Re-crisping: If your seeds lose their crunch over time (which can happen in humid weather), just spread them on a baking sheet and pop them in a 300°F (150°C) oven for 3-5 minutes. Let them cool completely, and they’ll be good as new.
Flavor development: Honestly, these seeds taste even better the next day. The flavors meld and deepen overnight, so don’t be afraid to make them a day ahead. Just keep them in an airtight container, and you’ll have a perfectly seasoned snack ready to go.
Nutritional Information & Benefits
Let’s talk about why these seeds are more than just a tasty snack. Pumpkin seeds are nutritional powerhouses, and this recipe keeps them in their healthiest form.
Estimated Nutritional Values (per 1/4 cup serving):
- Calories: 180
- Protein: 9g
- Fat: 15g (mostly healthy unsaturated fats)
- Carbohydrates: 6g
- Fiber: 2g
- Sugar: 3g (from the maple syrup)
- Sodium: 180mg (from the brine)
Health Benefits: Pumpkin seeds are rich in magnesium, zinc, and antioxidants. Magnesium supports muscle function and sleep quality, while zinc is essential for immune health. The healthy fats and protein make this a satisfying snack that won’t spike your blood sugar. Plus, the fiber content helps keep you full between meals.
Dietary Considerations: This recipe is naturally gluten-free, dairy-free, and vegetarian. To make it vegan, simply use maple syrup (which is already vegan) or swap it for agave. If you’re watching your sodium, you can reduce the salt in the brine or skip the soak entirely—though the texture won’t be quite as crunchy.
Potential Allergens: Pumpkin seeds are tree nut-free, making them a safe snack for many people with nut allergies. However, if you have a seed allergy, obviously skip this one. Always check your spice blends for cross-contamination if allergies are a concern.
Conclusion
Look, I get it—pumpkin seeds have a reputation. They’re often an afterthought, something you pick at while carving a pumpkin and then forget about. But this recipe changes the narrative. These healthy smoky spiced baked pumpkin seeds are the kind of snack that makes you rethink everything you thought you knew about a humble ingredient.
They’re smoky, they’re spicy, they’ve got just a hint of sweetness, and they’re genuinely good for you. What more could you want? Whether you’re serving them at a party, packing them in a lunchbox, or just keeping a jar on your counter for those afternoon cravings, this recipe delivers every single time.
I’d love to hear how yours turn out. Did you tweak the spice blend? Try a variation? Burn the first batch and try again? (I’ve been there.) Drop a comment below and let me know—your feedback helps other readers, and honestly, I just love hearing about your kitchen adventures. Happy snacking!
Frequently Asked Questions
Can I use seeds from a fresh pumpkin?
Absolutely! Just make sure to rinse them thoroughly to remove all the stringy pulp. The soak and roast method works exactly the same way. You might need to adjust the roasting time slightly, as fresh seeds can vary in size and moisture content.
How do I prevent the seeds from burning?
Watch them closely in the last 5 minutes of roasting. Every oven is different, so start checking at the 10-minute mark. If they smell nutty and look golden brown, they’re done. If they smell acrid or look dark brown, you’ve gone too far. Stirring halfway through also helps prevent burning.
Can I make these without maple syrup?
Yes, you can skip the sweetener entirely. The seeds will still be delicious—just less complex. If you want to keep a touch of sweetness without the sugar, try a sugar-free maple syrup alternative or a pinch of stevia.
How long do these stay fresh?
Stored in an airtight container at room temperature, they’ll stay fresh and crunchy for up to 2 weeks. If they lose their crunch, just re-crisp them in a 300°F oven for 3-5 minutes.
Can I double the recipe?
Definitely! Just make sure to use a larger baking sheet or split the seeds between two sheets. Overcrowding leads to uneven roasting, so give them plenty of space. You may need to add a few minutes to the roasting time for a double batch.
Pin This Recipe!
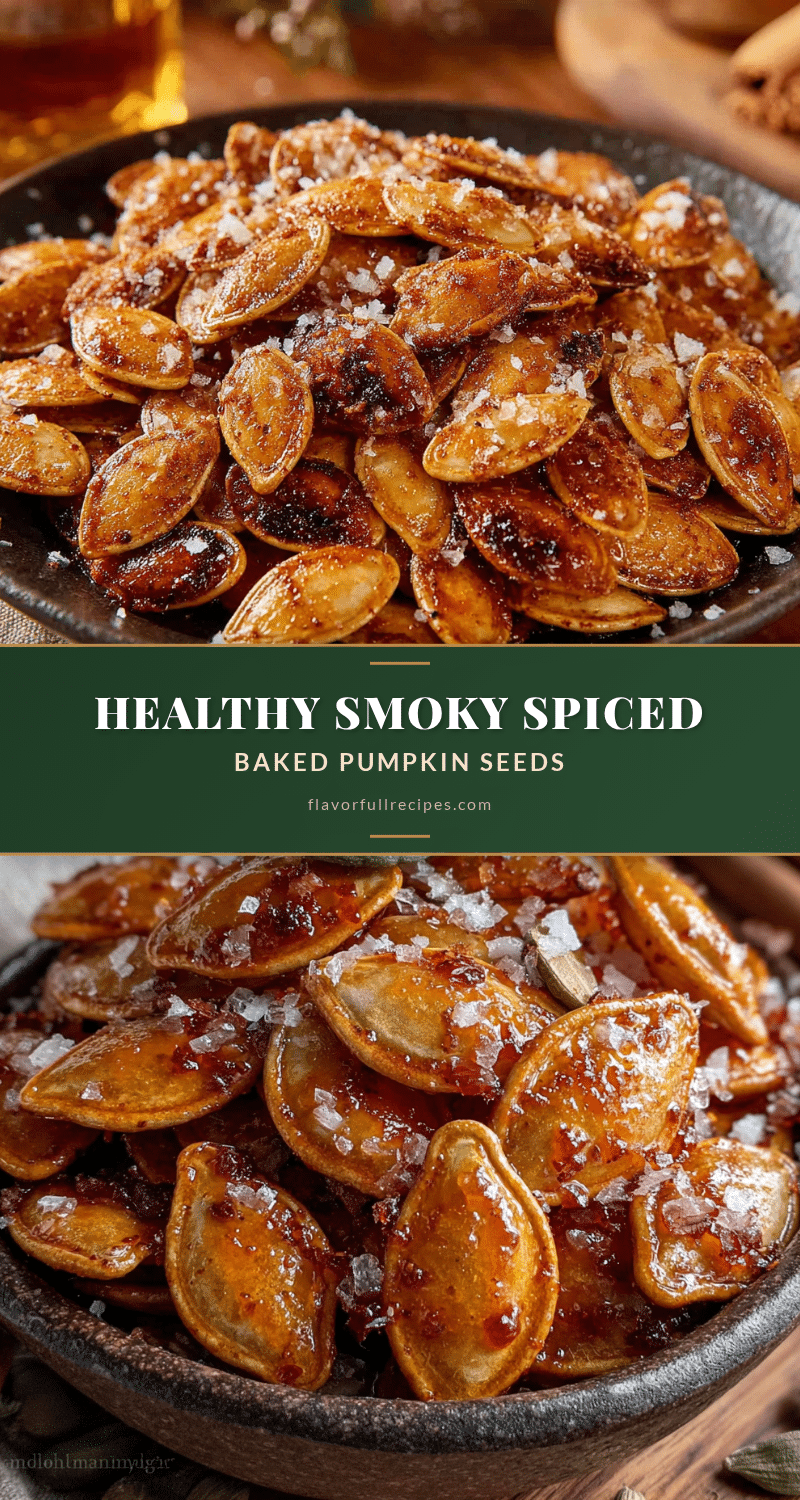
Healthy Smoky Baked Pumpkin Seeds
- Total Time: 30 minutes
- Yield: 4 servings 1x
Description
These smoky, spicy, and slightly sweet baked pumpkin seeds are a game-changer. Perfectly crunchy and packed with flavor, they turn even the biggest pumpkin seed skeptic into a fan.
Ingredients
- 1 cup raw pumpkin seeds (pepitas)
- 2 cups water
- 1 tablespoon fine sea salt
- 1 tablespoon olive oil
- 1 teaspoon smoked paprika
- 1/2 teaspoon garlic powder
- 1/4 teaspoon cayenne pepper
- 1/2 teaspoon ground cumin
- 1 tablespoon maple syrup
- 1/4 teaspoon freshly ground black pepper
Instructions
- Preheat your oven to 325°F (160°C). Line a baking sheet with parchment paper.
- In a medium bowl, combine 2 cups of warm water with 1 tablespoon of fine sea salt. Stir until the salt dissolves completely.
- Add 1 cup of raw pumpkin seeds to the brine and stir to make sure they’re all submerged. Let them soak for 10 minutes.
- Pour the seeds into a colander or fine-mesh strainer and rinse them briefly with cold water. Spread them out on a clean kitchen towel or paper towels and pat them very dry.
- In a small bowl, combine 1 tablespoon olive oil, 1 teaspoon smoked paprika, 1/2 teaspoon garlic powder, 1/4 teaspoon cayenne pepper, 1/2 teaspoon ground cumin, 1 tablespoon maple syrup, and a few grinds of black pepper. Stir until it forms a thick paste.
- Transfer the dried seeds to a clean bowl and pour the seasoning mixture over them. Toss until evenly coated.
- Pour the seasoned seeds onto the prepared baking sheet and spread them into a single, even layer.
- Bake for 12-15 minutes, stirring halfway through at the 7-minute mark. Watch carefully in the last few minutes to prevent burning.
- Remove from the oven and let the seeds cool on the pan for at least 10 minutes. They will continue to crisp up as they cool.
- Once completely cool, transfer to a bowl and enjoy, or store in an airtight container.
Notes
Don’t skip the soak—it’s the secret to crunchy seeds. Watch the seeds closely in the last 5 minutes of roasting to prevent burning. Let them cool completely for maximum crunch. The seeds taste even better the next day as flavors meld.
- Prep Time: 15 minutes
- Cook Time: 15 minutes
- Category: Snack
- Cuisine: American
Nutrition
- Serving Size: 1/4 cup
- Calories: 180
- Sugar: 3
- Sodium: 180
- Fat: 15
- Saturated Fat: 2
- Carbohydrates: 6
- Fiber: 2
- Protein: 9
Keywords: pumpkin seeds, baked pumpkin seeds, smoky pumpkin seeds, healthy snack, fall recipe, Halloween snack, pepitas