
My husband had claimed to hate red velvet cake for over a decade. Ten years. He wrinkled his nose at birthday slices, pushed aside bakery samples, and gave me that look whenever I mentioned cream cheese frosting. Then, last Tuesday, I caught him sneaking one of these crinkle cookies from the cooling rack at 9 p.m., crumbs dusting his shirt, trying to look innocent. “These are different,” he mumbled, reaching for another. “These are cookies.”
Honestly, I wasn’t even trying to convert him. I had a bag of cocoa powder that needed using up, a restless three-year-old who wanted to “bake something red,” and exactly zero ambition for a layered cake disaster. The cookies were supposed to be a quick, low-stakes project — something to keep little hands busy while dinner simmered. I didn’t expect them to become the thing my kids ask for every single week.
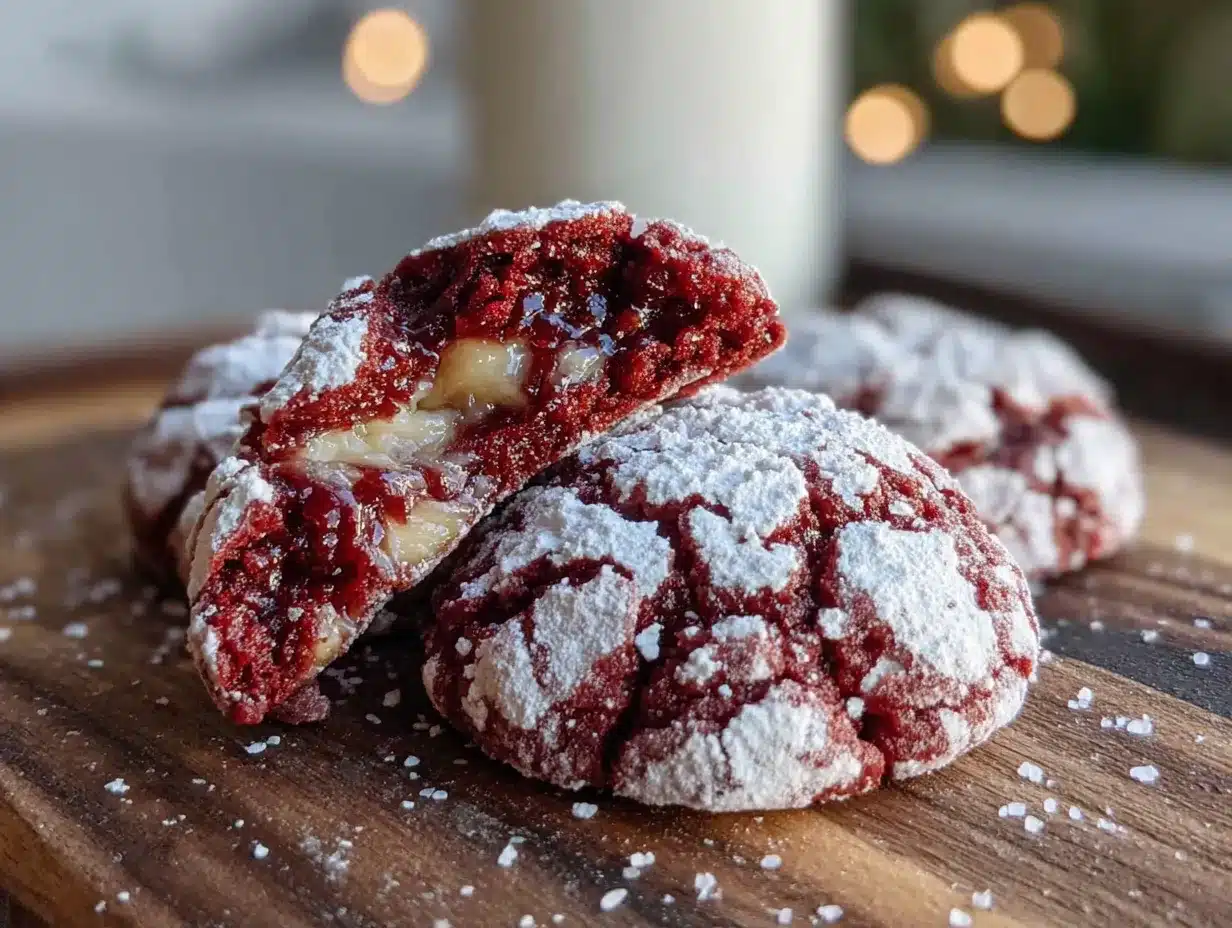
But here’s the thing about these crinkle cookies: they have all the deep, chocolatey, faintly tangy flavor of red velvet cake without the fuss of frosting layers or the pressure of a perfect crumb. They come together in one bowl, they look stunning with that crackled snowy-sugar top, and they disappear faster than anything I’ve ever baked. Maybe you’ve been there — looking for a dessert that feels special enough for a holiday party but simple enough for a random Wednesday. These cookies are that recipe.
Why You’ll Love This Recipe
These red velvet crinkle cookies have earned a permanent spot in my recipe binder, and I think they’ll earn one in yours too. Here’s why this version works so well for real families on real budgets:
- Budget-Friendly Ingredients: You probably already have flour, sugar, cocoa powder, and butter in your kitchen. No expensive extracts or specialty flours required. The red food coloring is the only “extra,” and a bottle lasts for months.
- Quick & Easy: From start to finish, these cookies take about 30 minutes of active work. The dough needs a quick chill, but the hands-on time is minimal — perfect for evenings when you’re juggling homework and bath time.
- Crowd-Pleaser for All Ages: My toddler loves the bright red color. My husband loves that they taste like a bakery treat. I love that they use simple ingredients I always have on hand. Picky eaters? I’ve watched three different kids who “don’t like red velvet” polish off three cookies each.
- Leftovers That Reheat Beautifully: These cookies stay soft for days, and a quick 10-second zap in the microwave makes them taste fresh-baked. That’s a game-changer for lunchbox treats or after-school snacks.
- Unbelievably Delicious: The edges are slightly crisp, the centers are tender and fudgy, and that crackled sugar coating adds the perfect little crunch. It’s comfort food at its finest — no complicated techniques, just pure satisfaction.
What makes these different from every other red velvet cookie recipe out there? It’s the balance. I tested this recipe seven times to get the ratio of cocoa to butter just right — enough chocolate flavor to feel indulgent, but not so much that it overpowers that classic red velvet tang. The cream cheese and vinegar work together to create a subtle but unmistakable depth, the kind that makes people take a second bite and say, “Wait, what’s in these?” It’s my best version, and I’m pretty proud of it.
What Ingredients You Will Need
This recipe uses simple, everyday ingredients to create cookies that taste anything but ordinary. Most of these are pantry staples, so you might not even need a trip to the store.
- All-Purpose Flour: 2 cups (250g) — spoon and level it for the best texture. Too much flour makes dense cookies, so be gentle.
- Unsweetened Cocoa Powder: 1/4 cup (20g) — I prefer Dutch-process for a smoother, richer flavor, but natural cocoa works fine too. Hershey’s Special Dark is my go-to for these.
- Granulated Sugar: 1 cup (200g) — regular white sugar gives the cookies their structure and sweetness.
- Unsalted Butter: 1/2 cup (113g), softened to room temperature — salted butter works if that’s what you have, just reduce the added salt to 1/4 teaspoon.
- Large Egg: 1, room temperature — cold eggs can make the dough stiff and harder to mix.
- Vanilla Extract: 1 teaspoon — pure vanilla makes a difference here, but imitation works in a pinch.
- White Vinegar: 1 teaspoon — this is the secret ingredient that gives red velvet its signature tang. Don’t skip it! You won’t taste vinegar, I promise.
- Buttermilk: 2 tablespoons — adds tenderness and helps activate the baking soda. If you don’t have buttermilk, stir 2 tablespoons of milk with 1/2 teaspoon of lemon juice and let it sit for 5 minutes.
- Red Food Coloring: 1 to 2 tablespoons — gel food coloring gives the most vibrant red without thinning the dough. Liquid works too, but you might need a bit more. I like the Wilton brand for consistency.
- Baking Powder: 1/2 teaspoon — for lift and that soft, puffy texture.
- Baking Soda: 1/4 teaspoon — works with the vinegar and buttermilk for a tender crumb.
- Salt: 1/2 teaspoon — balances the sweetness and deepens the chocolate flavor.
- Powdered Sugar: 1/2 cup (60g), for rolling — this creates that beautiful crackled look. Sift it first to avoid clumps.
Ingredient Tips: For the best red color, use gel food coloring instead of liquid. I’ve learned this the hard way — liquid coloring can make the dough too wet, and you end up adding extra flour, which changes the texture. Also, make sure your butter is truly softened, not melted. Melted butter will make the cookies spread too thin and lose that lovely crinkle effect.
Equipment Needed
You don’t need fancy equipment for these cookies, which is part of why I love them. Here’s what you’ll need:
- Large Mixing Bowl: Any bowl works, but a wide one makes mixing easier.
- Electric Hand Mixer or Stand Mixer: You can mix by hand with a wooden spoon, but a mixer makes creaming the butter and sugar much faster. I’ve done both — hand mixing takes about 5 extra minutes and gives your arm a good workout.
- Measuring Cups and Spoons: For accuracy. I cannot stress this enough — eyeballing flour is the number one reason cookies fail.
- Baking Sheets: Two standard half-sheet pans work perfectly. Line them with parchment paper or a silicone baking mat for easy cleanup.
- Cooling Rack: Essential for getting those cookies cooled evenly. If you don’t have one, a clean wire oven rack works in a pinch.
- Small Bowl: For the powdered sugar coating.
- Plastic Wrap: For chilling the dough — you’ll thank me later.
- Cookie Scoop: A 1.5-tablespoon scoop makes uniform cookies that bake evenly. If you don’t have one, use two spoons and try to keep the portions similar.
Budget-Friendly Tip: Don’t own a stand mixer? No problem. I made these cookies for years with just a hand mixer and a spatula. The dough is forgiving, and the results are identical.
Preparation Method
- Cream the butter and sugar: In a large mixing bowl, beat the softened butter and granulated sugar together until light and fluffy, about 2-3 minutes. Scrape down the sides of the bowl halfway through. You want the mixture to look pale and airy — this is what gives the cookies their tender texture.
- Add the wet ingredients: Beat in the egg, vanilla extract, white vinegar, and buttermilk until well combined. The mixture might look slightly curdled at this point — that’s totally normal, especially with the vinegar. Don’t panic. Add the red food coloring and mix until the color is evenly distributed. Start with 1 tablespoon of gel coloring; if you want a deeper red, add more gradually. I usually use about 1.5 tablespoons for that classic bakery red.
- Combine the dry ingredients: In a separate small bowl, whisk together the all-purpose flour, cocoa powder, baking powder, baking soda, and salt. This ensures the leavening agents are evenly distributed so you don’t get one cookie that’s flat and another that’s puffy.
- Mix the dough: Gradually add the dry ingredients to the wet mixture, mixing on low speed or folding with a spatula. Stop as soon as the flour disappears — overmixing develops gluten and makes tough cookies. The dough will be soft and slightly sticky, which is exactly what you want.
- Chill the dough: Cover the bowl with plastic wrap and refrigerate for at least 30 minutes, or up to 2 hours. This step is non-negotiable. Chilled dough is much easier to handle, and it prevents the cookies from spreading too much in the oven. I’ve skipped this step before, and the cookies turned into flat, sad discs. Learn from my mistake.
- Preheat and prepare: About 10 minutes before you’re ready to bake, preheat your oven to 350°F (175°C). Line two baking sheets with parchment paper or silicone mats.
- Shape the cookies: Place the powdered sugar in a small bowl. Using a cookie scoop or your hands, portion the dough into 1.5-tablespoon balls (about 25g each). Roll each ball between your palms until smooth, then drop it into the powdered sugar. Roll it around until completely coated — don’t be shy here. The sugar coating is what creates that beautiful crackled look. Place the coated balls on the prepared baking sheets, spacing them about 2 inches apart.
- Bake: Bake for 10-12 minutes, rotating the pans halfway through. The cookies should look puffed and crackled, with the edges just set. The centers will look slightly underdone — that’s good! They continue to set as they cool. For softer, fudgier cookies, pull them at 10 minutes. For slightly crispier edges, go to 12 minutes.
- Cool: Let the cookies rest on the baking sheet for 3-4 minutes. This allows them to firm up enough to transfer without breaking. Then move them to a wire cooling rack to cool completely. The crackled pattern becomes more pronounced as they cool.
Pro tip: If your dough is too sticky to roll after chilling, lightly dampen your hands with water. The moisture helps prevent sticking without adding extra flour that would dry out the cookies.
Cooking Tips & Techniques
I’ve made these cookies more times than I can count, and I’ve made just about every mistake possible along the way. Here’s what I’ve learned:
Don’t skip the chill time. I know it’s tempting to rush, especially when kids are asking “are they ready yet?” every two minutes. But warm dough spreads into flat, ugly cookies with no crinkle. Thirty minutes in the fridge makes all the difference. I once tried to speed things up with a 15-minute freezer chill — the outsides froze while the center stayed soft, and the cookies baked unevenly. Stick with the fridge.
Use a cookie scoop for uniformity. Even-sized cookies bake evenly. If you’re rolling by hand, try to keep each ball roughly the same size. I use a 1.5-tablespoon scoop, and I get exactly 24 cookies every time. If you want bigger cookies, use a 2-tablespoon scoop and add 1-2 minutes to the bake time.
Watch for the crinkle. The first time I made these, I opened the oven too early to check on them, and the cookies deflated. The crinkle pattern happens when the dough bakes and the sugar-coated surface cracks as the cookie expands. If you open the oven door during the first 8 minutes, you risk disrupting that process. Be patient.
Powdered sugar is your friend. Don’t skimp on the coating. Each dough ball should be completely covered in a thick layer of powdered sugar. As the cookie bakes, the sugar cracks and creates that beautiful contrast between the white surface and the red interior. If you only give them a light dusting, you’ll end up with pale, boring cookies.
Room temperature ingredients matter. Cold butter doesn’t cream properly, and cold egg can seize the mixture. Take your butter and egg out of the fridge about 30 minutes before you start baking. If you forgot to plan ahead, cut the butter into small cubes — they’ll soften in about 15 minutes. For the egg, place it in a bowl of warm water for 5 minutes.
Variations & Adaptations
One of the best things about this recipe is how adaptable it is. Here are some variations I’ve tried and loved:
Gluten-Free Version: Substitute the all-purpose flour with a 1:1 gluten-free baking flour blend that contains xanthan gum. I’ve had great results with Bob’s Red Mill. The texture is slightly more tender, but the crinkle effect works perfectly. No other adjustments needed.
Dairy-Free Version: Use vegan butter (I like Miyoko’s) and replace the buttermilk with 2 tablespoons of unsweetened almond milk mixed with 1/2 teaspoon of lemon juice. The cookies are slightly less rich but still delicious. My dairy-sensitive friend couldn’t tell the difference.
Extra Chocolatey: Fold in 1/2 cup of semi-sweet chocolate chips or white chocolate chips after mixing the dough. The chips add little pockets of melted chocolate that make these feel even more indulgent. I did this for a holiday cookie swap, and they were the first plate to empty.
Peppermint Red Velvet: Add 1/2 teaspoon of peppermint extract along with the vanilla, and crush a few candy canes to sprinkle on top before baking. This is my go-to Christmas variation. The peppermint pairs beautifully with the chocolate and tangy notes.
Natural Red Alternative: If you want to skip artificial food coloring, try using beet powder or freeze-dried raspberry powder. You’ll need about 2 tablespoons, and the color will be more of a deep pinkish-red than a bright crimson. The flavor is subtly different — earthier — but still lovely. My kids didn’t notice the difference, which I count as a win.
Serving & Storage Suggestions
These cookies are best served at room temperature, but honestly, they’re pretty amazing straight from the cooling rack when the edges are still slightly warm and the center is soft. I like to arrange them on a simple white platter — the red and white contrast looks stunning without any extra effort.
What to serve with them: A cold glass of milk is the classic pairing, and for good reason. The creamy milk balances the rich chocolate and tangy notes. For a more grown-up option, these cookies are fantastic with a cup of hot coffee or a mug of spiced chai. I’ve also crumbled them over vanilla ice cream for a quick dessert sundae — highly recommended.
Storage: Store the cookies in an airtight container at room temperature for up to 5 days. Place a slice of bread in the container to keep them soft — the bread absorbs excess air and releases moisture. Replace the bread slice every other day. I learned this trick from my grandmother, and it works like magic.
Freezing: These cookies freeze beautifully. You have two options: freeze the baked cookies or freeze the dough balls. For baked cookies, let them cool completely, then layer them between sheets of parchment paper in a freezer-safe container. They’ll keep for up to 3 months. Thaw at room temperature for about 30 minutes. For dough balls, roll and coat them in powdered sugar, then freeze on a baking sheet until solid. Transfer to a freezer bag. Bake from frozen, adding 2-3 minutes to the bake time. This is my favorite method — I always keep a batch in the freezer for unexpected guests or cookie emergencies.
Reheating: A quick 10-second zap in the microwave makes these taste fresh-baked. If you’re reheating a whole batch, pop them in a 300°F oven for 5 minutes.
Nutritional Information & Benefits
Let’s be real — these are cookies, not health food. But they’re made with real ingredients, and that counts for something. Here’s the estimated nutritional breakdown per cookie (based on 24 cookies):
| Nutrient | Amount Per Cookie |
|---|---|
| Calories | 145 |
| Total Fat | 6g |
| Saturated Fat | 3.5g |
| Cholesterol | 22mg |
| Sodium | 85mg |
| Total Carbohydrates | 21g |
| Sugars | 13g |
| Protein | 2g |
Health highlights: The cocoa powder contains antioxidants called flavonoids, which can support heart health. The butter provides vitamin A, and the egg adds a small amount of protein. Is it a superfood? No. But it’s a treat made with wholesome ingredients, and there’s value in that.
Dietary considerations: This recipe contains gluten, dairy, and eggs. For gluten-free or dairy-free options, see the variations section above. These cookies are not suitable for vegans as written, but a flax egg (1 tablespoon ground flaxseed mixed with 3 tablespoons water) can replace the egg in a pinch — the texture will be slightly more cake-like.
Potential allergens: Wheat, milk, eggs.
My personal take? I’d rather my kids eat a cookie made with real butter and flour than something from a box with a dozen unpronounceable ingredients. These cookies are a treat, and treats are part of a balanced life. No guilt required.
Conclusion
These red velvet crinkle cookies have become a staple in my kitchen for good reason. They’re simple enough for a Tuesday afternoon bake with a toddler, but impressive enough for holiday cookie platters and bake sales. The ingredients are affordable, the technique is forgiving, and the results are consistently beautiful and delicious. That crackled sugar top? It never gets old.
I hope you give these a try, and I hope they become a favorite in your home too. Maybe you’ll even convert a red velvet skeptic of your own — my husband now asks for these by name, and he’s already planning to bring a batch to his office potluck. If that’s not a win, I don’t know what is.
I’d love to hear how these turn out for you! Did you try any of the variations? Did your kids help with the rolling and coating? Drop a comment below and let me know. And if you share a photo on Pinterest, tag me — I love seeing these cookies in other people’s kitchens. Happy baking, friends!
Frequently Asked Questions
Can I make these cookies without red food coloring?
Absolutely! The red color is traditional for red velvet, but it doesn’t affect the flavor. You can skip it entirely for a chocolate crinkle cookie, or use natural alternatives like beet powder. The cookies will taste the same either way.
Why did my cookies turn out flat?
Flat cookies usually mean the dough was too warm when it went into the oven, or the butter was too soft. Make sure you chill the dough for at least 30 minutes, and don’t skip it even if you’re in a hurry. Also, check that your baking powder and baking soda are fresh — old leavening agents lose their power.
Can I use margarine instead of butter?
You can, but the texture will be different. Butter gives these cookies their rich flavor and tender crumb. Margarine has a higher water content, which can make the cookies spread more and turn out less flavorful. If you must use margarine, choose a stick variety (not tub) and chill the dough for a full hour.
How do I get a deeper red color?
Use gel food coloring instead of liquid — it’s more concentrated and won’t thin out your dough. Start with 1 tablespoon and add more gradually until you reach your desired shade. Also, using Dutch-process cocoa powder instead of natural cocoa will give you a darker, richer red because it’s less acidic.
Can I double this recipe?
Yes, this recipe doubles beautifully. Just make sure your mixing bowl is large enough to accommodate the extra volume, and chill the dough in two separate bowls if needed. The bake time stays the same, but you’ll need to bake in batches to avoid overcrowding the oven.
Pin This Recipe!


Best Red Velvet Crinkle Cookies: Easy Homemade Recipe
- Total Time: 57 minutes
- Yield: 24 servings 1x
Description
These red velvet crinkle cookies are rich, chocolatey, and have a faintly tangy flavor, all without the fuss of frosting layers. They come together in one bowl, look stunning with a crackled snowy-sugar top, and are perfect for any occasion.
Ingredients
- 2 cups (250g) all-purpose flour
- 1/4 cup (20g) unsweetened cocoa powder (Dutch-process preferred)
- 1 cup (200g) granulated sugar
- 1/2 cup (113g) unsalted butter, softened
- 1 large egg, room temperature
- 1 teaspoon vanilla extract
- 1 teaspoon white vinegar
- 2 tablespoons buttermilk
- 1 to 2 tablespoons red food coloring (gel preferred)
- 1/2 teaspoon baking powder
- 1/4 teaspoon baking soda
- 1/2 teaspoon salt
- 1/2 cup (60g) powdered sugar, for rolling
Instructions
- Cream the butter and sugar: In a large mixing bowl, beat the softened butter and granulated sugar together until light and fluffy, about 2-3 minutes. Scrape down the sides of the bowl halfway through.
- Add the wet ingredients: Beat in the egg, vanilla extract, white vinegar, and buttermilk until well combined. Add the red food coloring and mix until evenly distributed.
- Combine the dry ingredients: In a separate small bowl, whisk together the all-purpose flour, cocoa powder, baking powder, baking soda, and salt.
- Mix the dough: Gradually add the dry ingredients to the wet mixture, mixing on low speed or folding with a spatula. Stop as soon as the flour disappears.
- Chill the dough: Cover the bowl with plastic wrap and refrigerate for at least 30 minutes, or up to 2 hours.
- Preheat and prepare: About 10 minutes before baking, preheat oven to 350°F (175°C). Line two baking sheets with parchment paper or silicone mats.
- Shape the cookies: Place powdered sugar in a small bowl. Portion dough into 1.5-tablespoon balls (about 25g each). Roll each ball in powdered sugar until completely coated. Place on prepared baking sheets, spacing 2 inches apart.
- Bake: Bake for 10-12 minutes, rotating pans halfway through. Cookies should look puffed and crackled with edges just set.
- Cool: Let cookies rest on baking sheet for 3-4 minutes, then transfer to a wire rack to cool completely.
Notes
Don’t skip the chill time—it prevents spreading and ensures the crinkle effect. Use gel food coloring for the best red color. For softer cookies, bake for 10 minutes; for crispier edges, bake for 12 minutes. Store in an airtight container at room temperature for up to 5 days. Freeze baked cookies or dough balls for up to 3 months.
- Prep Time: 15 minutes
- Cook Time: 12 minutes
- Category: Dessert
- Cuisine: American
Nutrition
- Serving Size: 1 cookie
- Calories: 145
- Sugar: 13
- Sodium: 85
- Fat: 6
- Saturated Fat: 3.5
- Carbohydrates: 21
- Fiber: 1
- Protein: 2
Keywords: red velvet, crinkle cookies, chocolate cookies, easy cookies, homemade cookies, holiday cookies